Bed, Bath and Kitchen 2

2608
2609
2610
2611
Not long after I got my TM I decided to replace all the lights with LED’s and that included the bathroom fixture as well. But, in order to do that I had to take the fixture down and pull out the old fluorescent ballast and direct wire the contacts to the tubes to make the LED’s work. Then later on when I decided to put some lights in the shower (I used a strip of waterproof LED lights) I had to take it down and wire those in as well. Somewhere along the line of doing that, the fixture rebelled and went intermittent on me. RATZ!
 
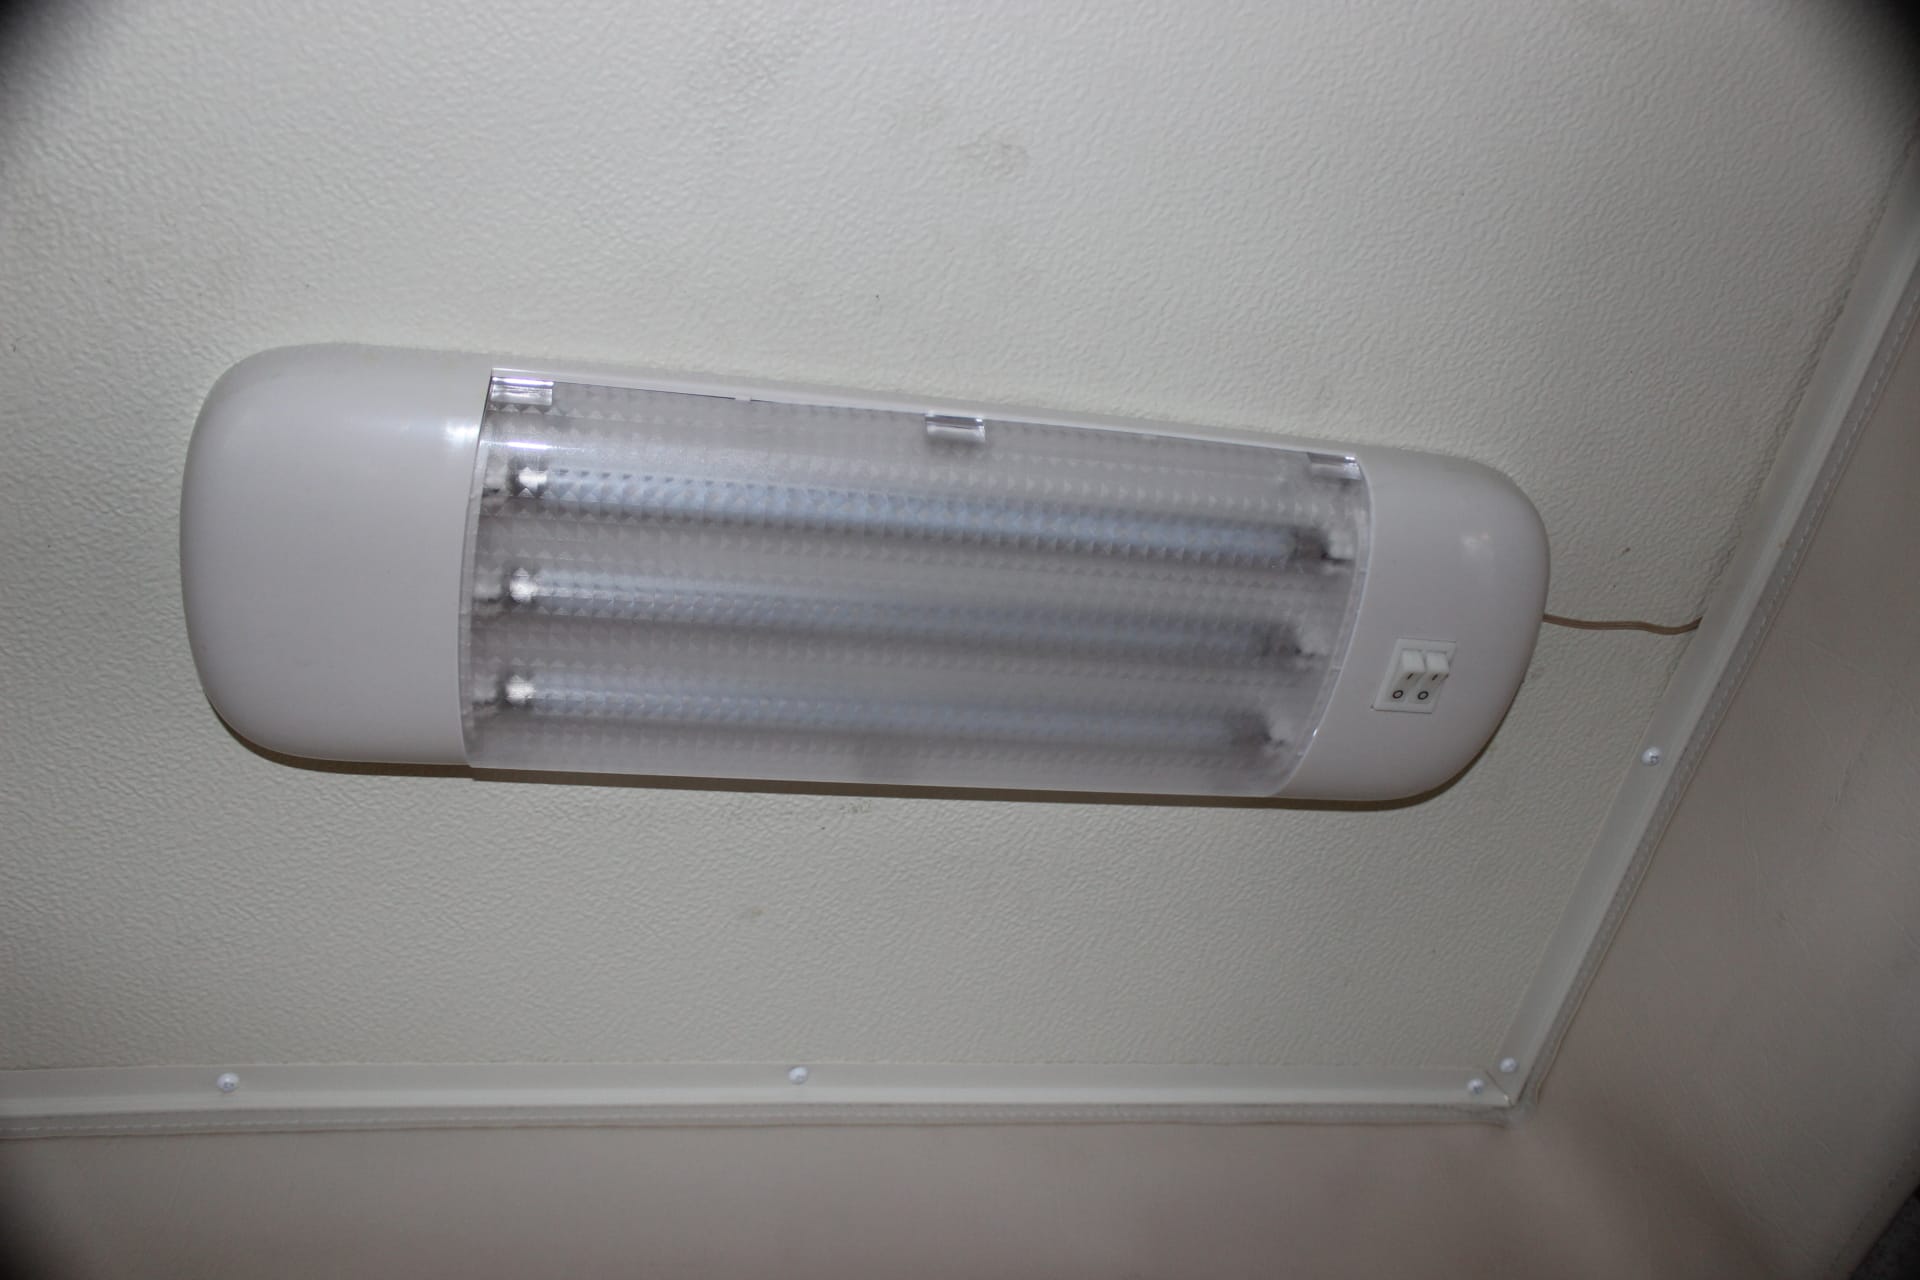
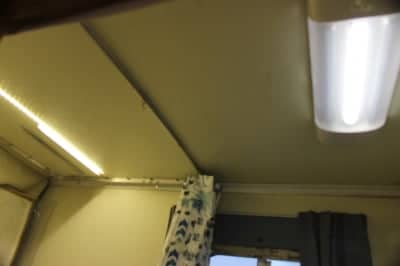
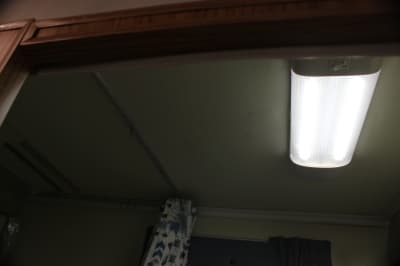
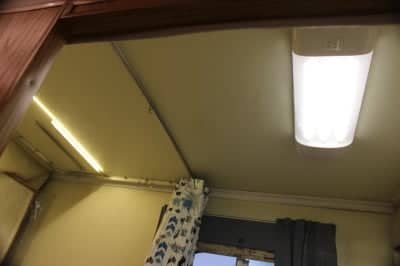
  This is when I decided to just replace the whole shootin match with the same LED fixture I had use over the stove when it needed more light there (image 2608). So I go one. I liked the fact that one could turn on one, two (image 2610, or all three tubes (image 2611) at a time. I wired in the LED strip I had installed over the shower/tub to the switch that is used to turn on the single tube (image 2609) and thereby was able to control the strip light and the single tube with that switch. It works great and now there is even more light in there which is conducive to happy management…YEAH!!! An easy fix and happy outcome. 
2601
2602
2603
2604
2605
2607
We don’t usually ever use a micro-wave over, but there are those few and far between times when one is needed. So we have always had this small one in our home just for those select occasions. One day while shopping at Home Despots I noticed these Amana combo range hood and micro-wave ovens on display for a very good price and decided to purchase one. Now what to do with the old little micro? AH HA! I’ll put it in the trailer. So I went out and measured the dimensions and it appeared (key word appeared) that it would fit just right. Well that is with a bit of finagle-in and holding your tongue properly.
 
  Ok….the first thing is to decide where to put it. We did have some things stored in the cabinet under the drawer by the stove (image 2605), but those were moved to other locations and cabinets as we have plenty of room for them. Now the next thing was to get power inside that cabinet and that wasn’t going to be a big deal as the electrical plug on the counter is also located inside that cabinet next to the drawer (image 2607). So after unplugging the 110vac power from the trailer (this is VERY IMPORTANT!!!), I proceeded to take the side plug out and then splice in and new box and GFI plug receptacle inside the cabinet to feed the micro-wave (image 2602) and then reconnected the side plug back up and replaced it where it belonged so now it also became a GFI (ground fault interrupter) as well.
 
  Next all I had to do was stick it in and….and….an….it wouldn’t fit???!! **^$%^&*&**er …. It was just about an inch or so too wide…..ok….there more than one way to skin an oven….so I had to take the drawer out, and then the support that the drawer slides on (image 2604) and tilt the oven on its end and then I was just able to get it to lay down as it should….but now it was too low for the door of the micro to open properly….what next??!!! So to remedy that was simple…..I cut some spacers out of ¼” plywood and shimmed them under the bottom of the micro and that made it just the right height for the door to swing open. You can see these in image 2603 under the bottom of the unit. I made 3 to lay flat side by side to each other so they wouldn’t slide around. I also cut a block and placed it on the left end of the micro to keep it from sliding to the left as well. The last thing to be done was to move the cabinet latch up to the top of the cabinet door. Look up in the top left corner of the cabinet opening in image 2601 and you might be able to see it there. That way the catch works and doesn’t get in the way of the micro-wave oven door so it can swing wide open if need be. Plugged it in and….it didn’t work?! Oh I forgot…you have to reset the breaker on the GFI plug to make it work the first time. So I pressed it in and that did the trick. We now can nuke our food….YIP-EEEEE!