One thing I really like about the Trailmanor Owners Forum is that when a potential problem comes up, that there are so many variations on that theme.
And so here is mine (image 1813).
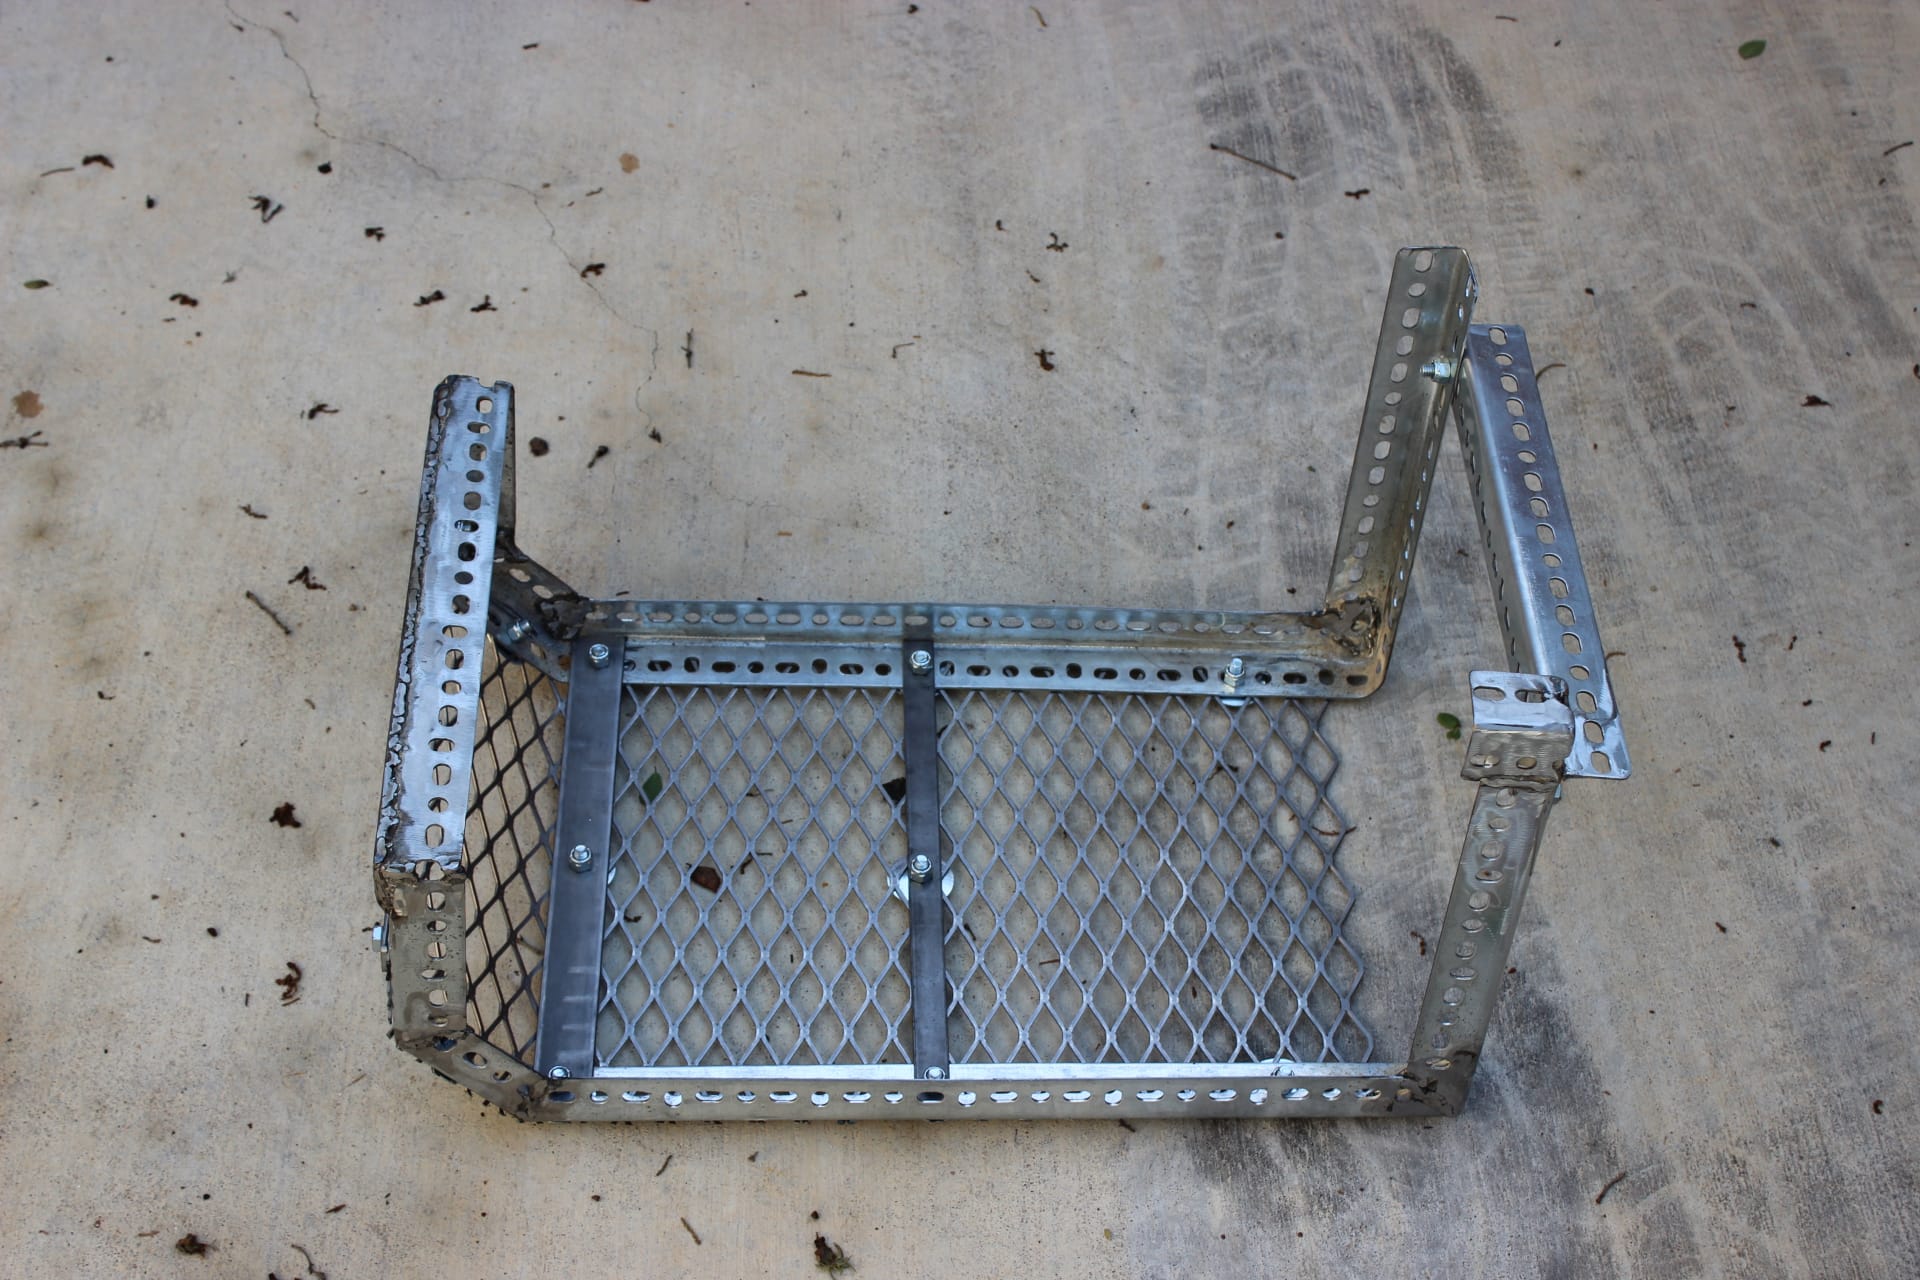
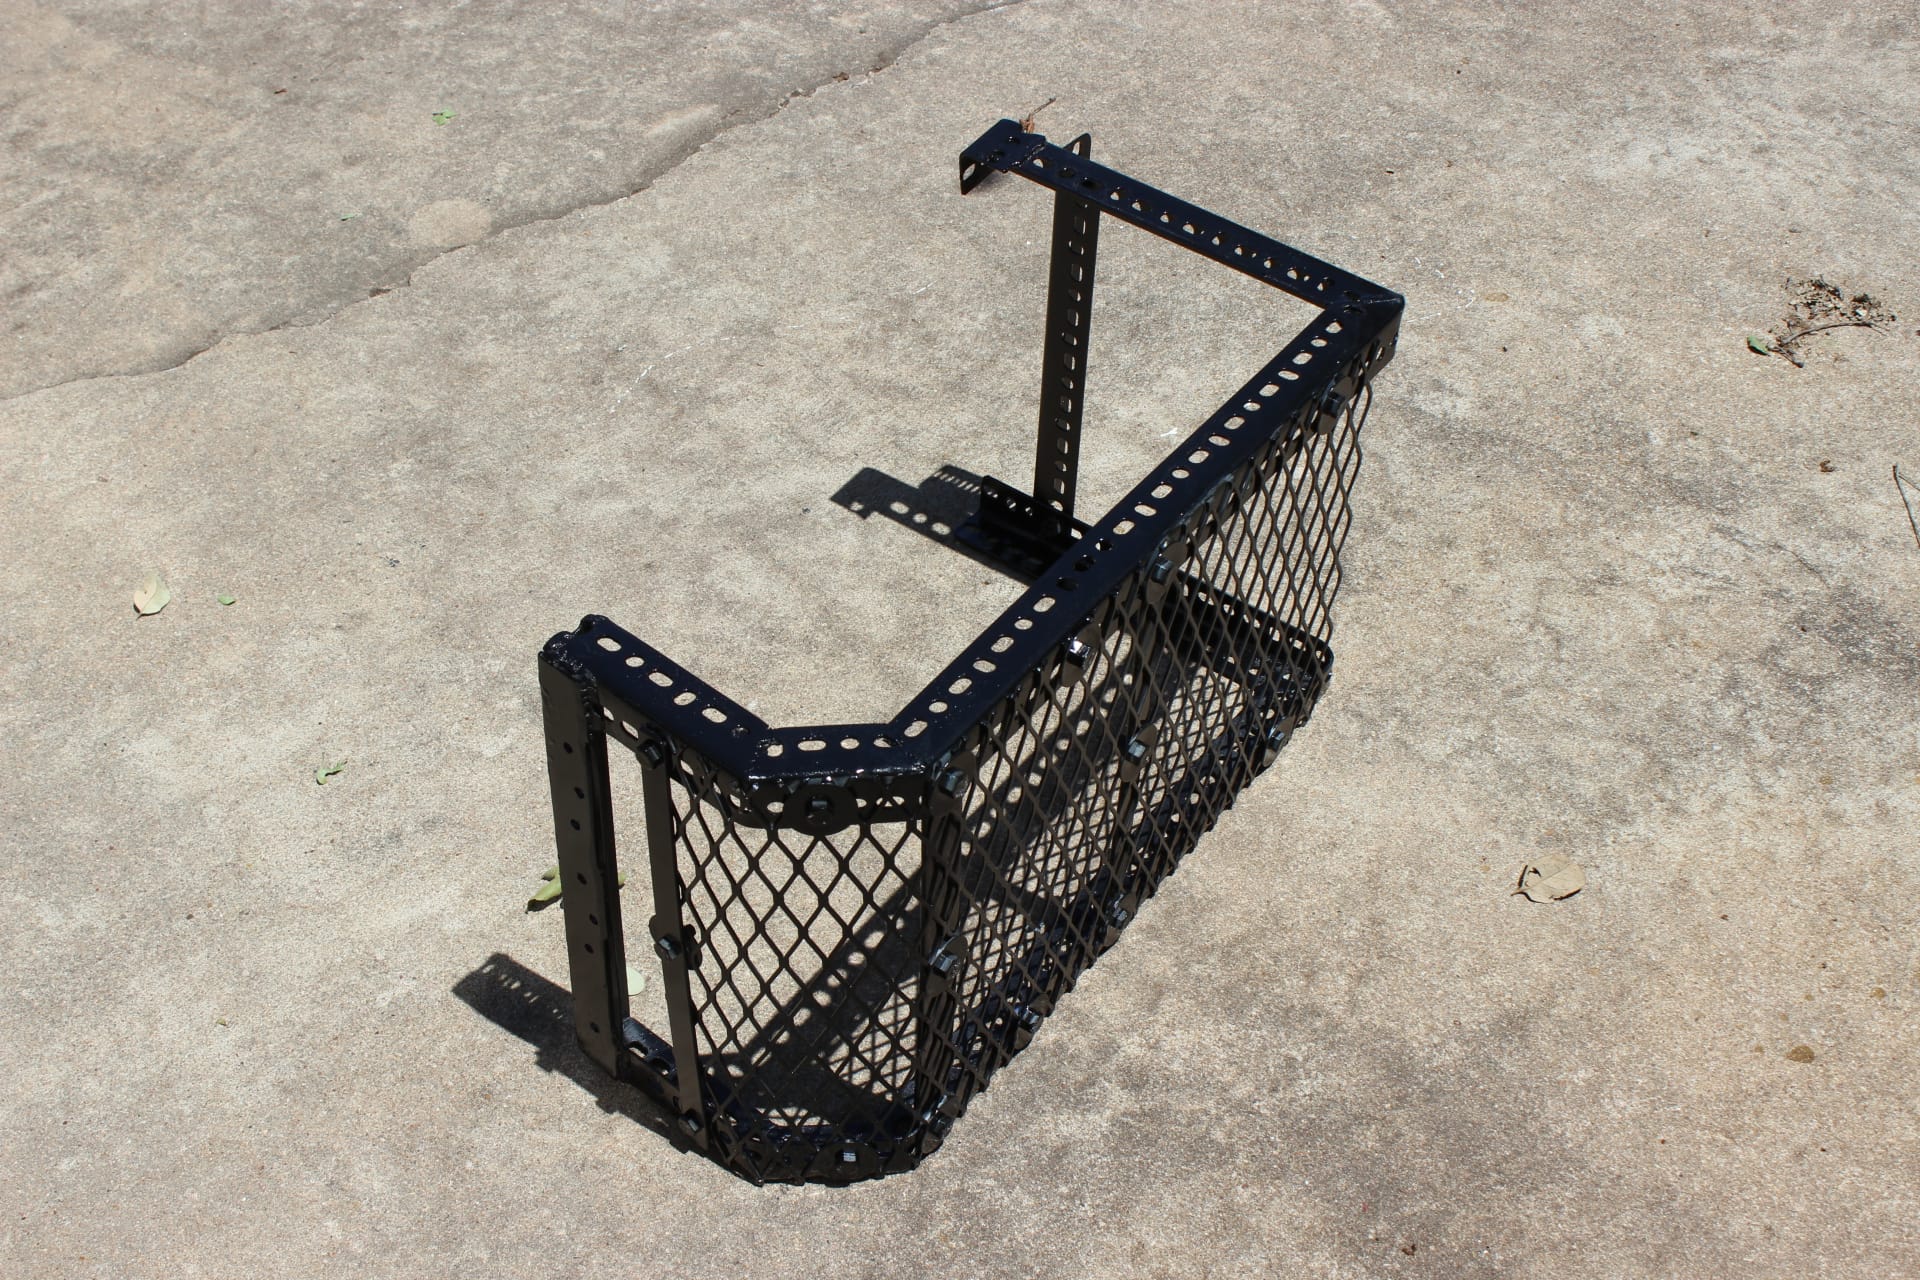
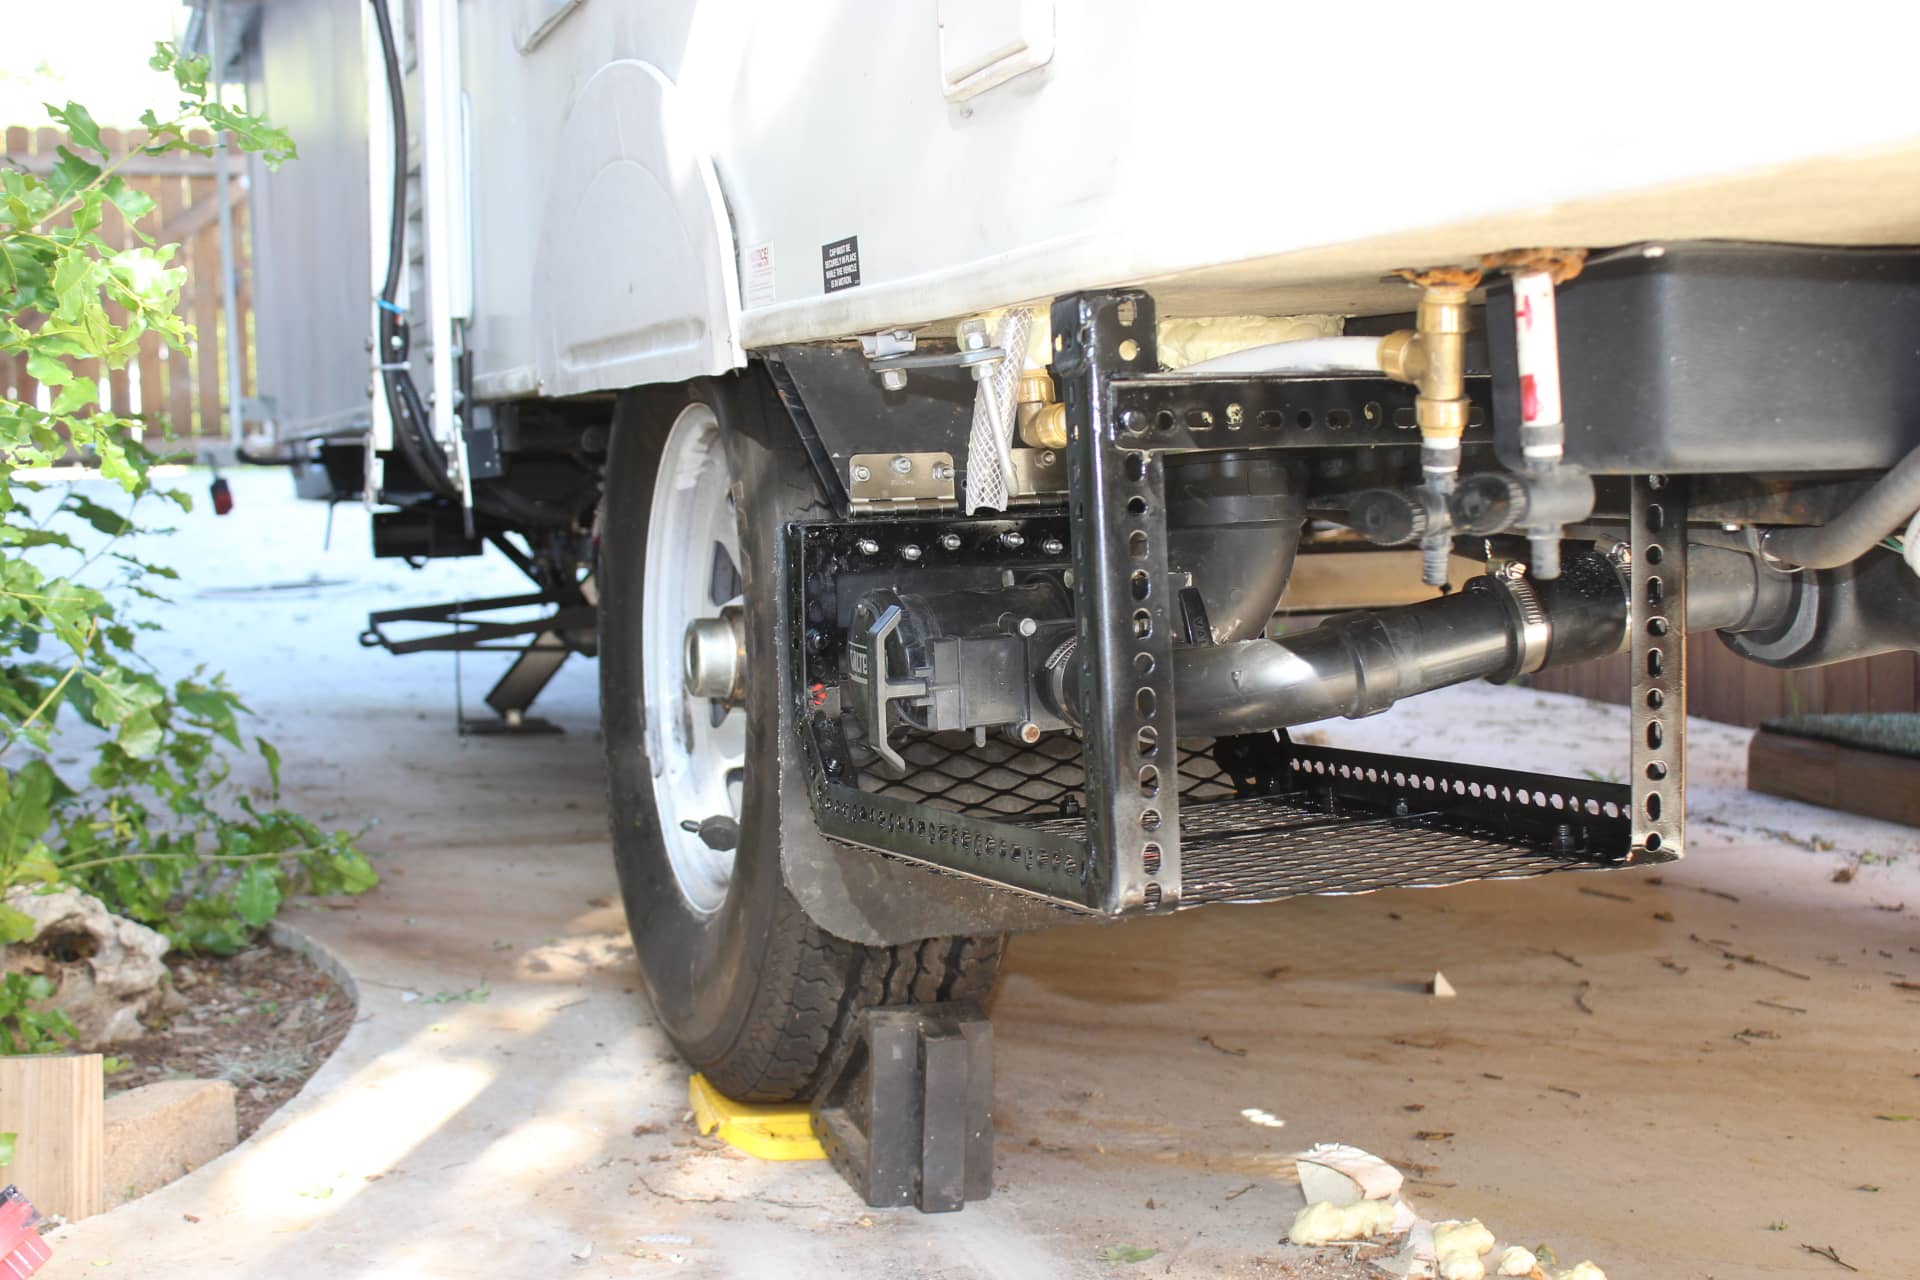
The theme is the blowout cage that covers the outside discharge plumbing and keeps it from becoming history. It was on the forum where I read about this just happening to someone and how it wiped out his whole valve assembly and all of the trouble that causes. Me, I am a firm believer in “an ounce of prevention is worth a pound of cure”. I had a blow out in early September of 2015 and saw what kind of damage and havoc a steel belted tread can do while whirling around at 70+ MPH. But we were lucky because it was on the passenger side and the only real damage it did was bust out the seam of the wheel well liner and mark up the bottom somewhat. I did have my surge guard located under there just back of the wheel well, but It was in a pretty tough enclosure and besides the mud flap did help ease the striking force a good deal.
So having just installed a new Dometic Sealand toilet, I didn’t want to take any chances with the plumbing on that being destroyed by a tire issue. Although I have just installed brand new 16” Maxxis tires, I’m not one for taking any chances, especially after reading about all the other folks that have this same mind set.
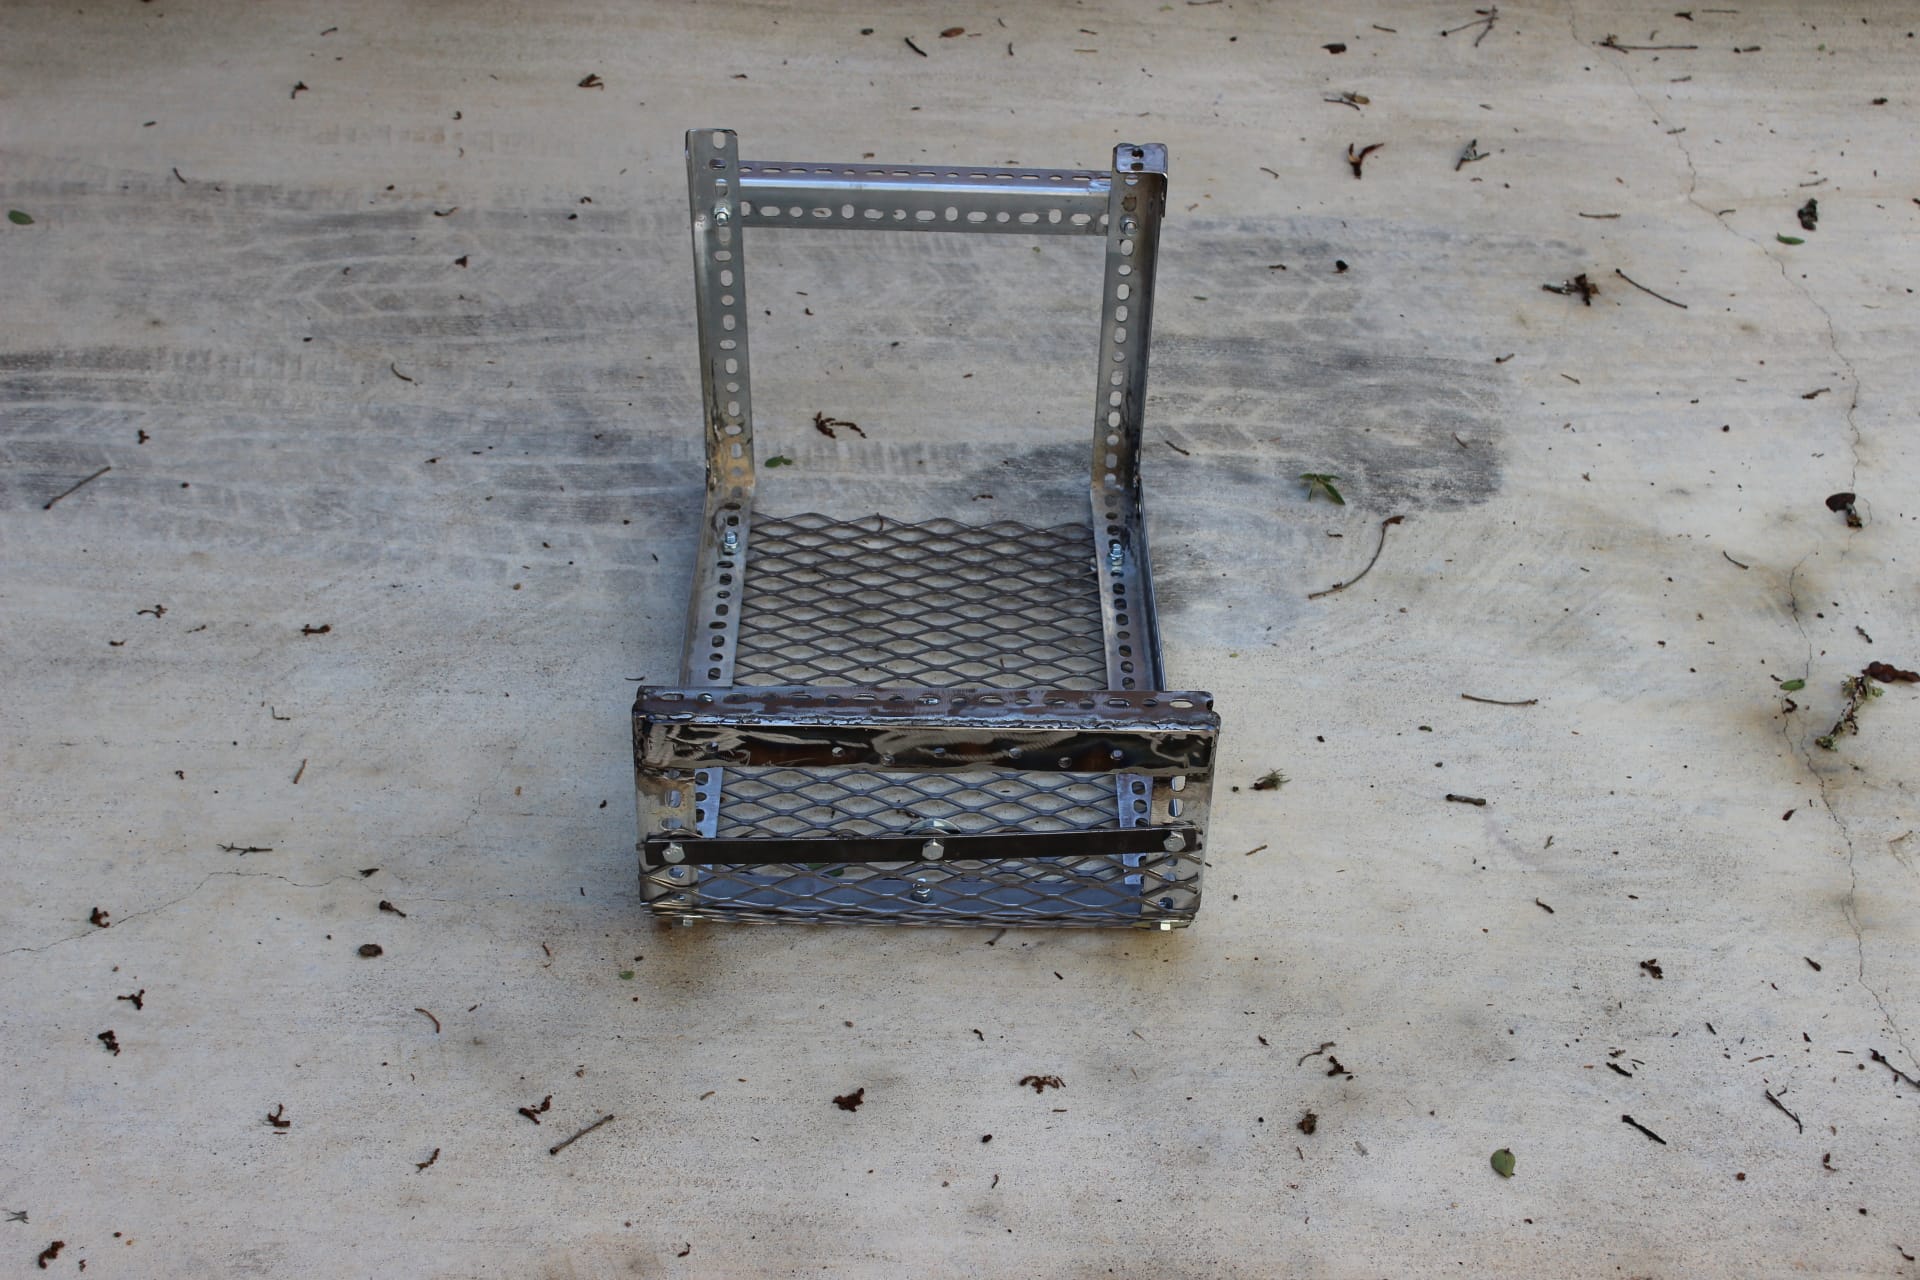
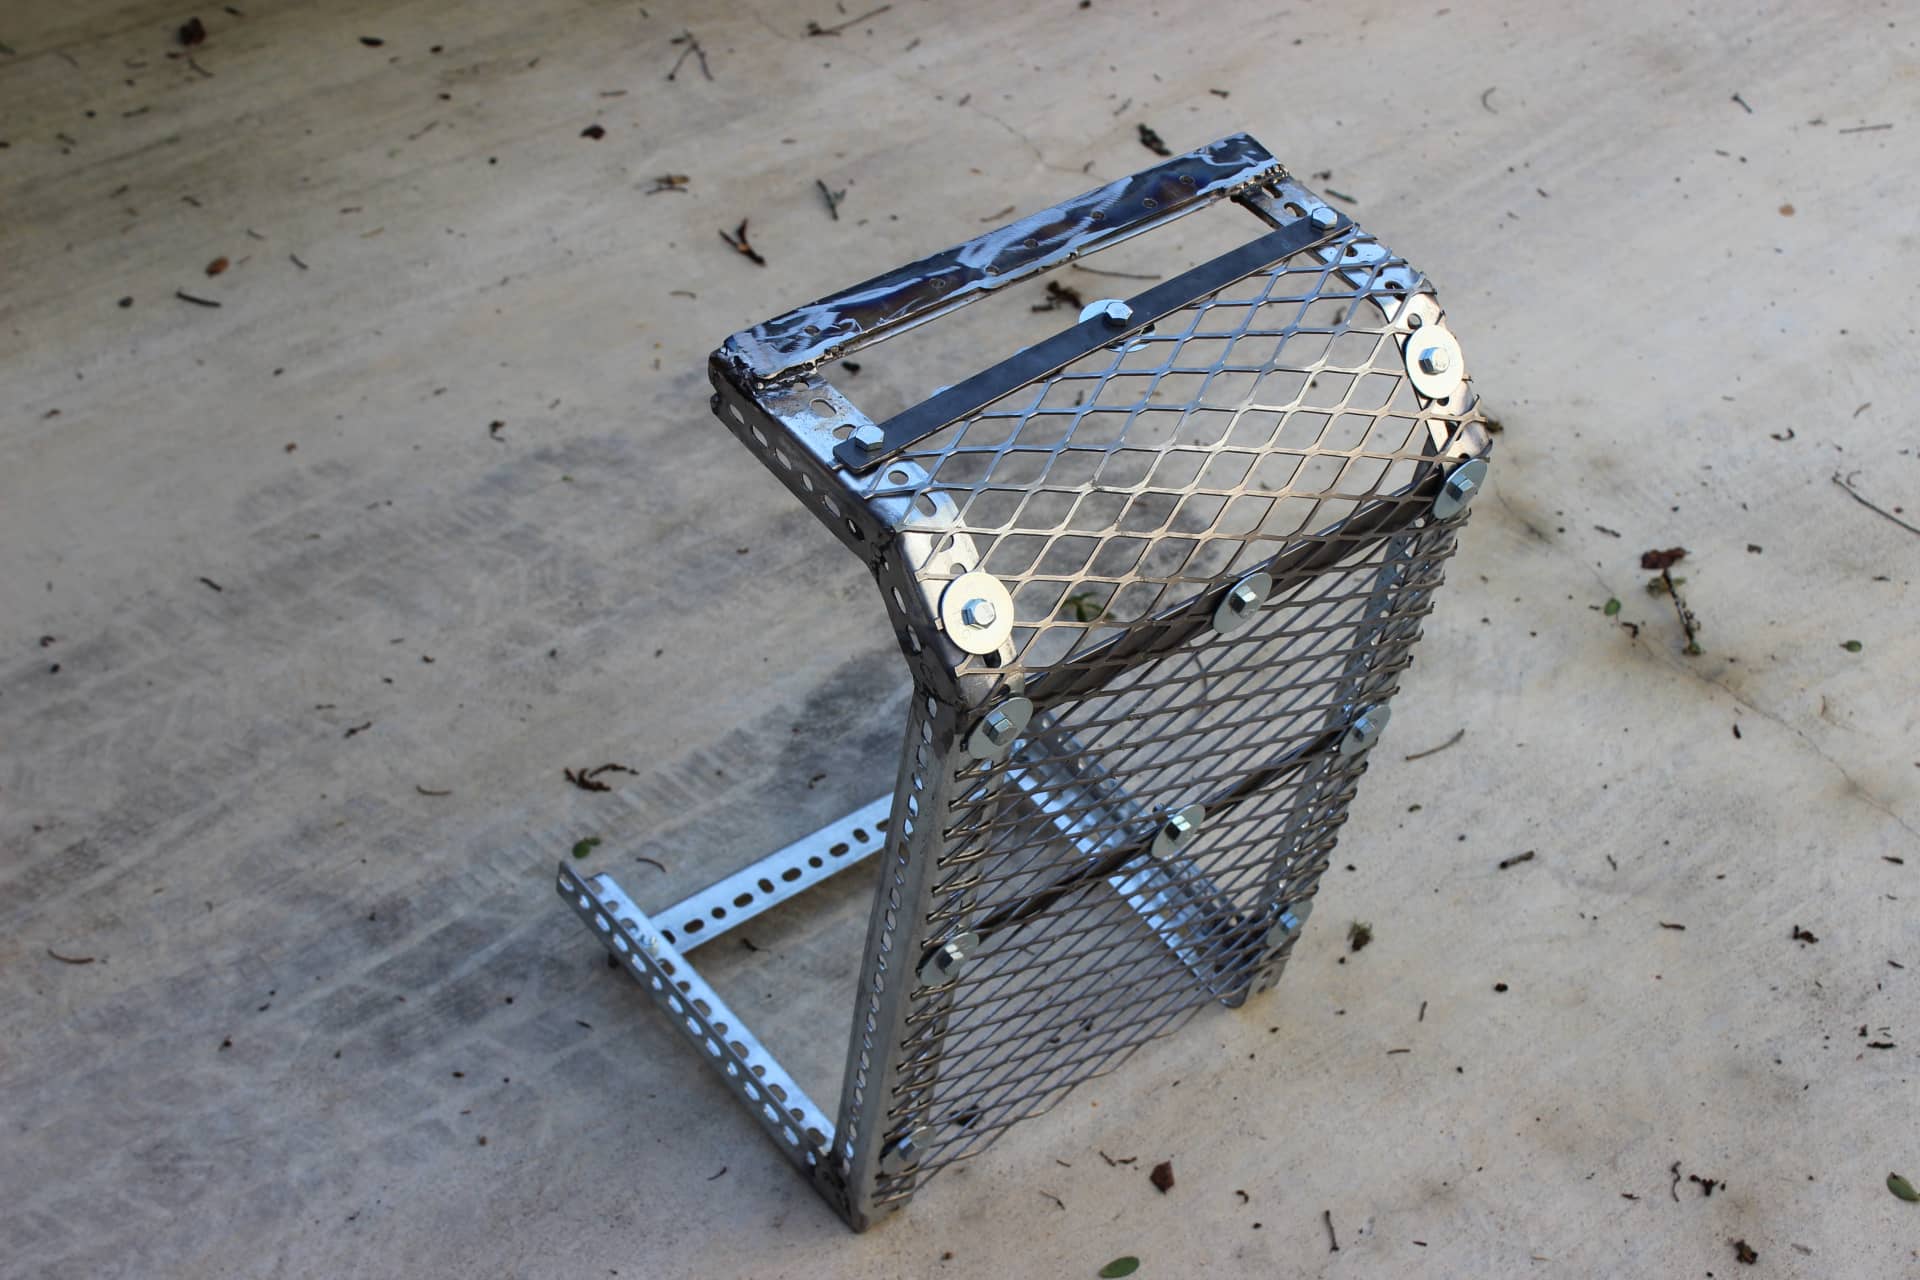
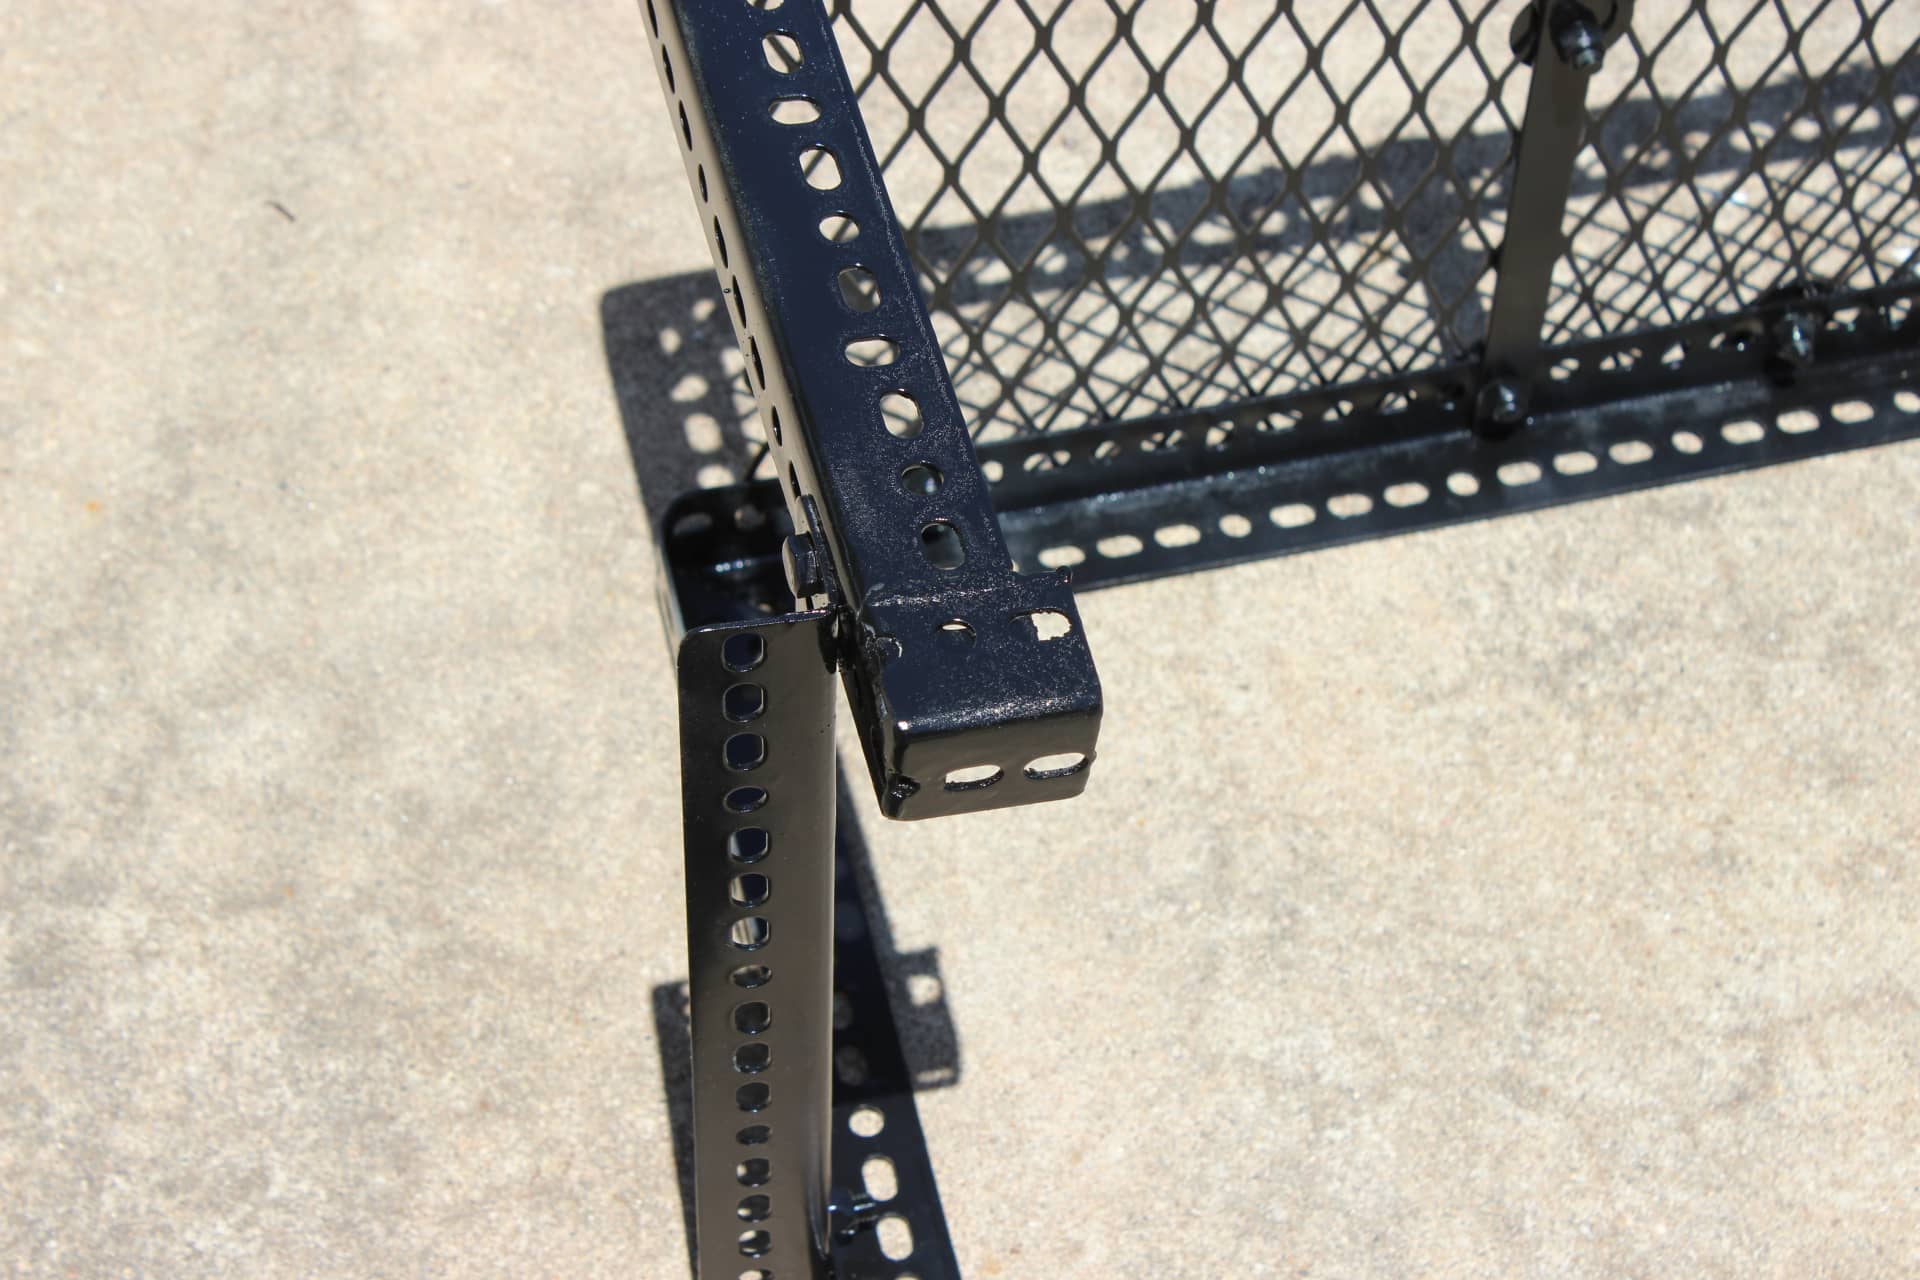
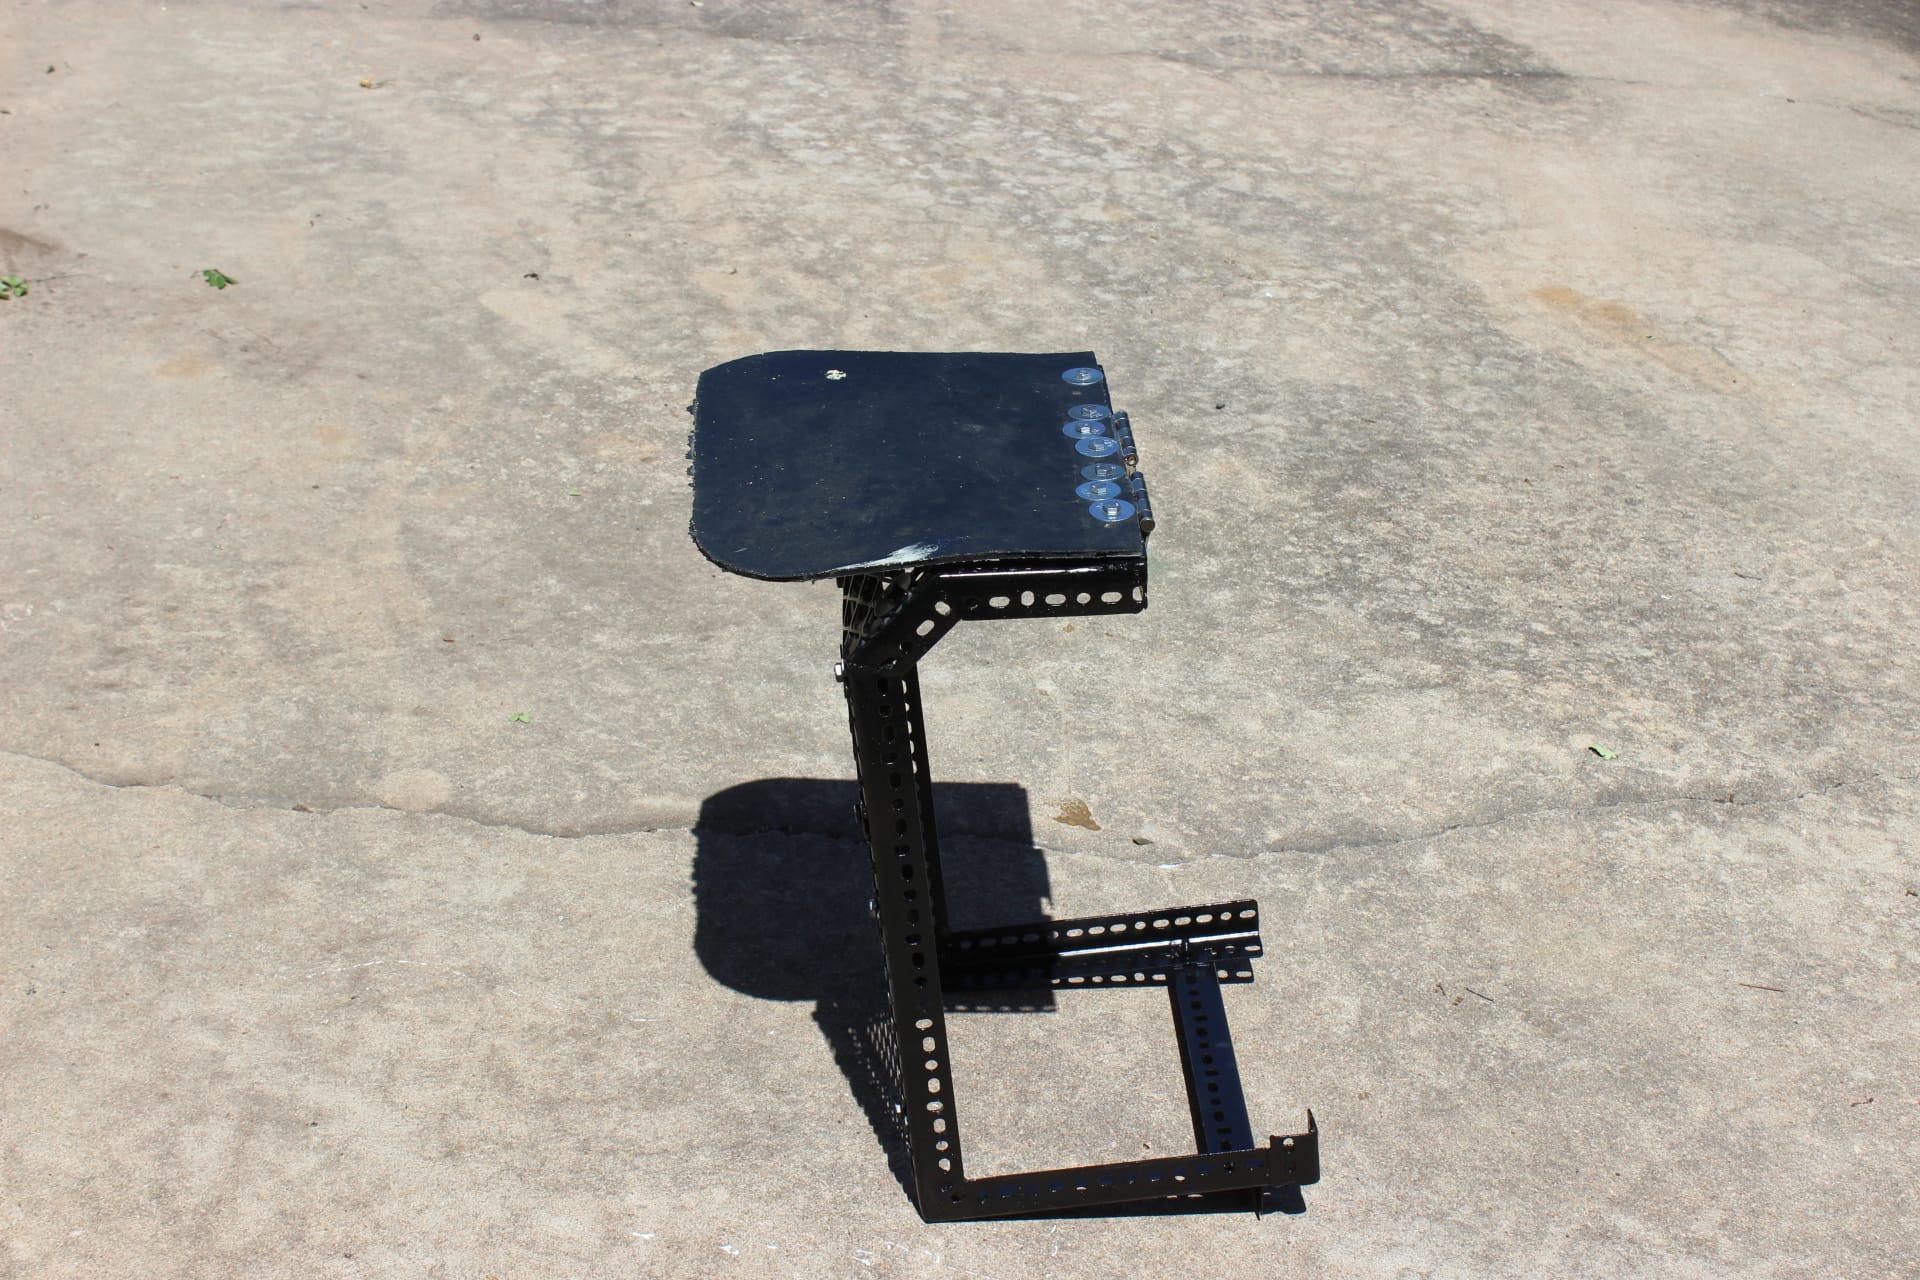
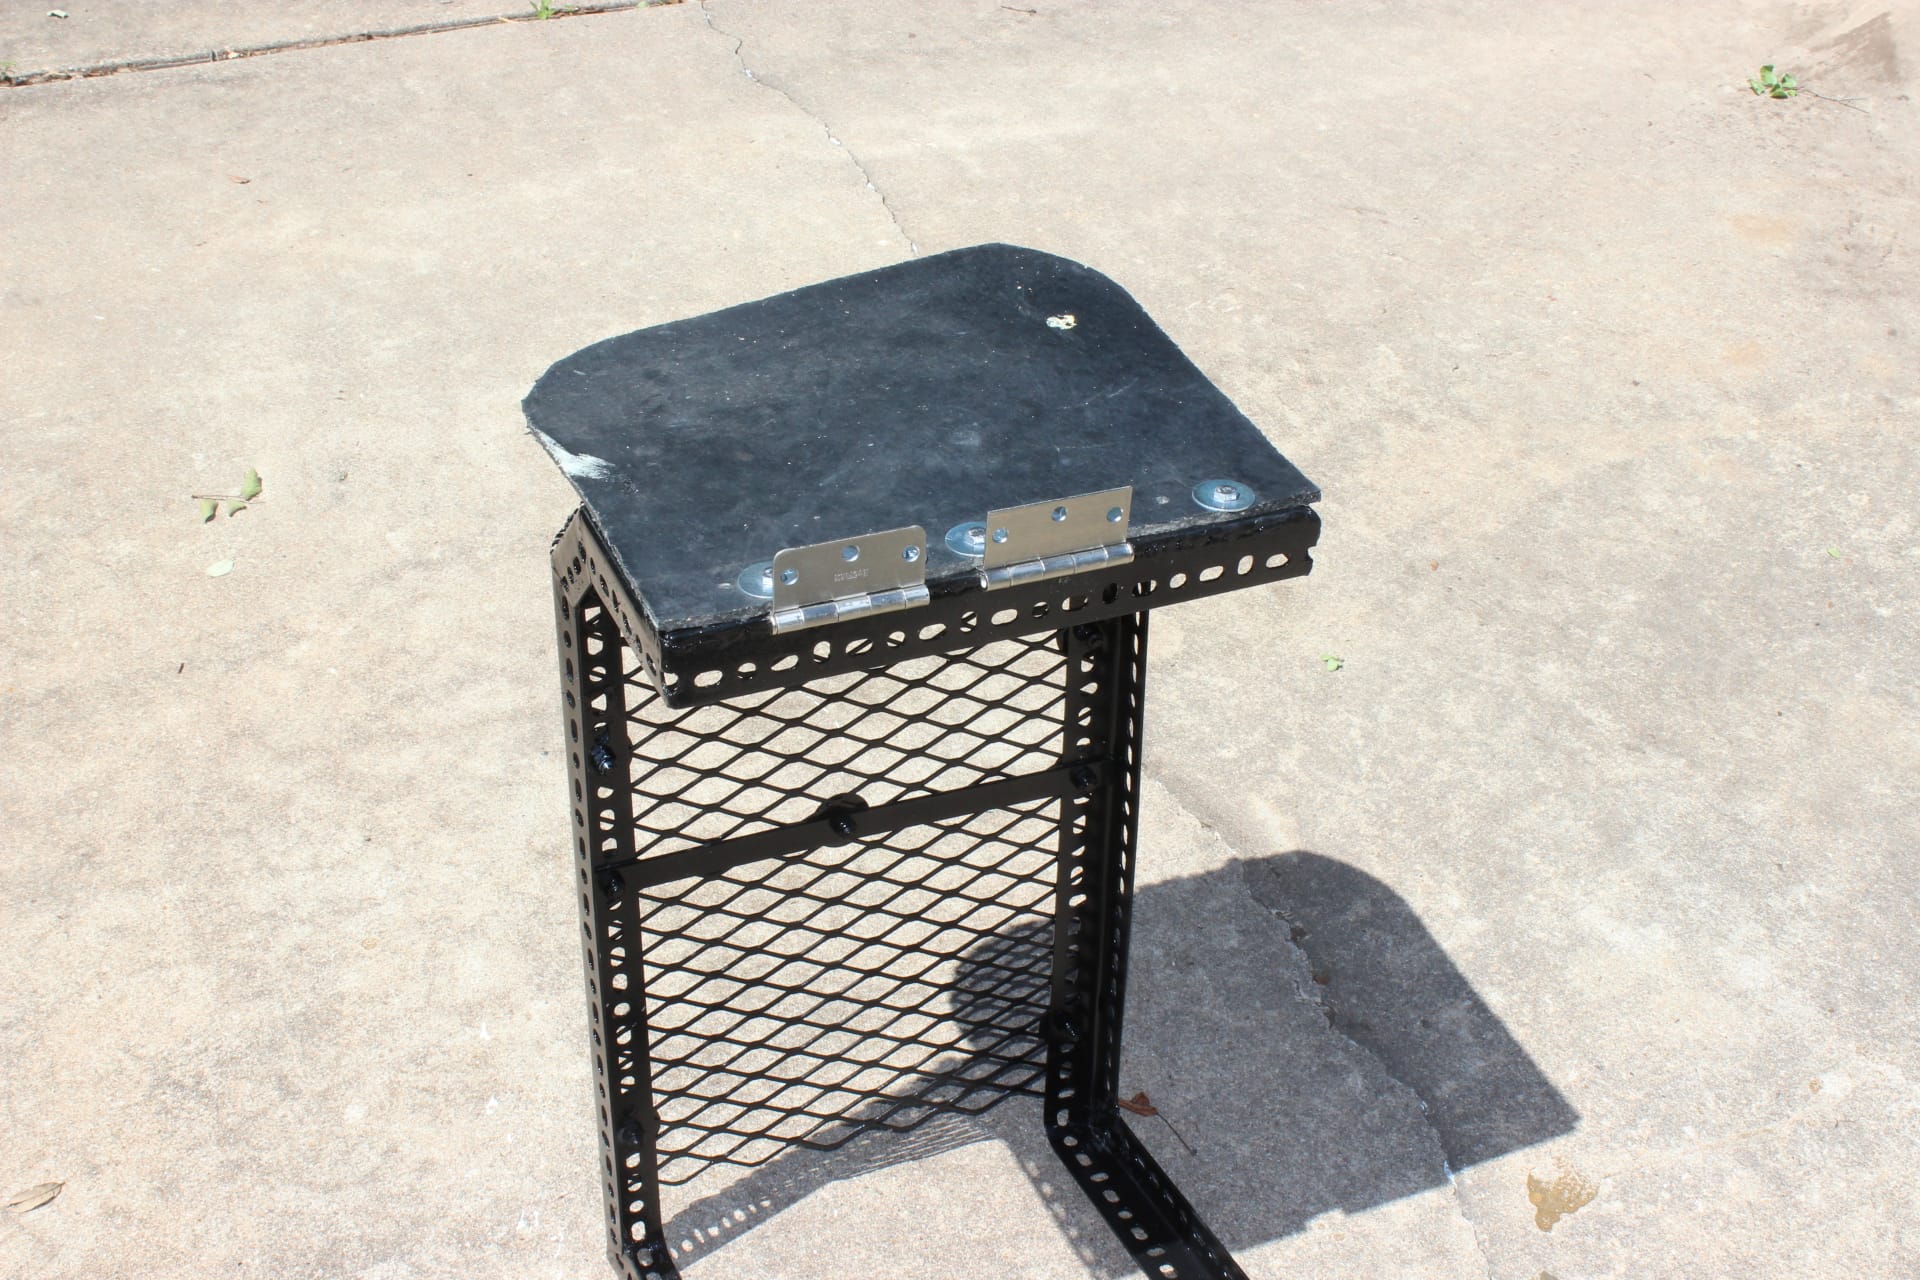
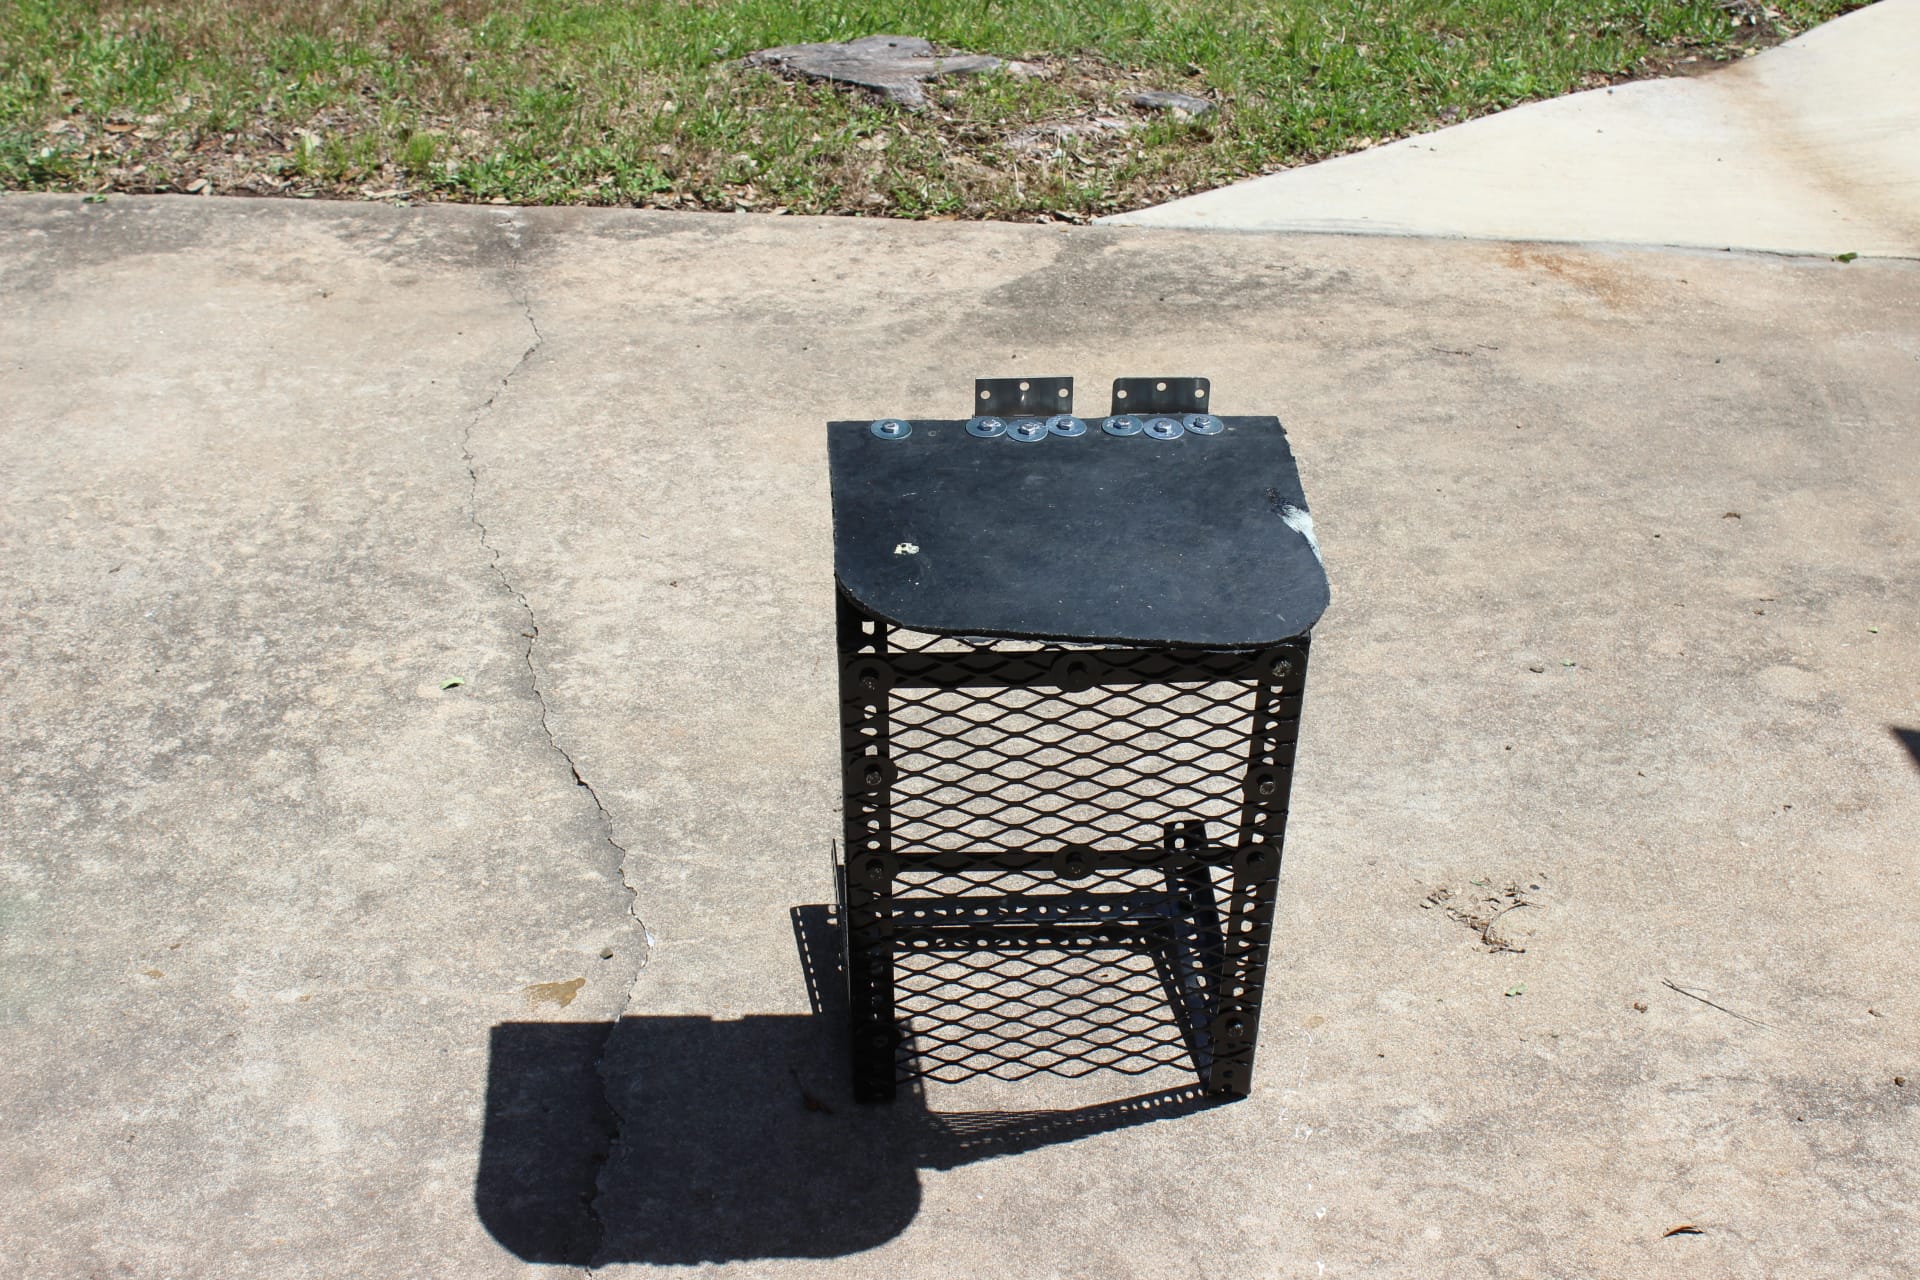
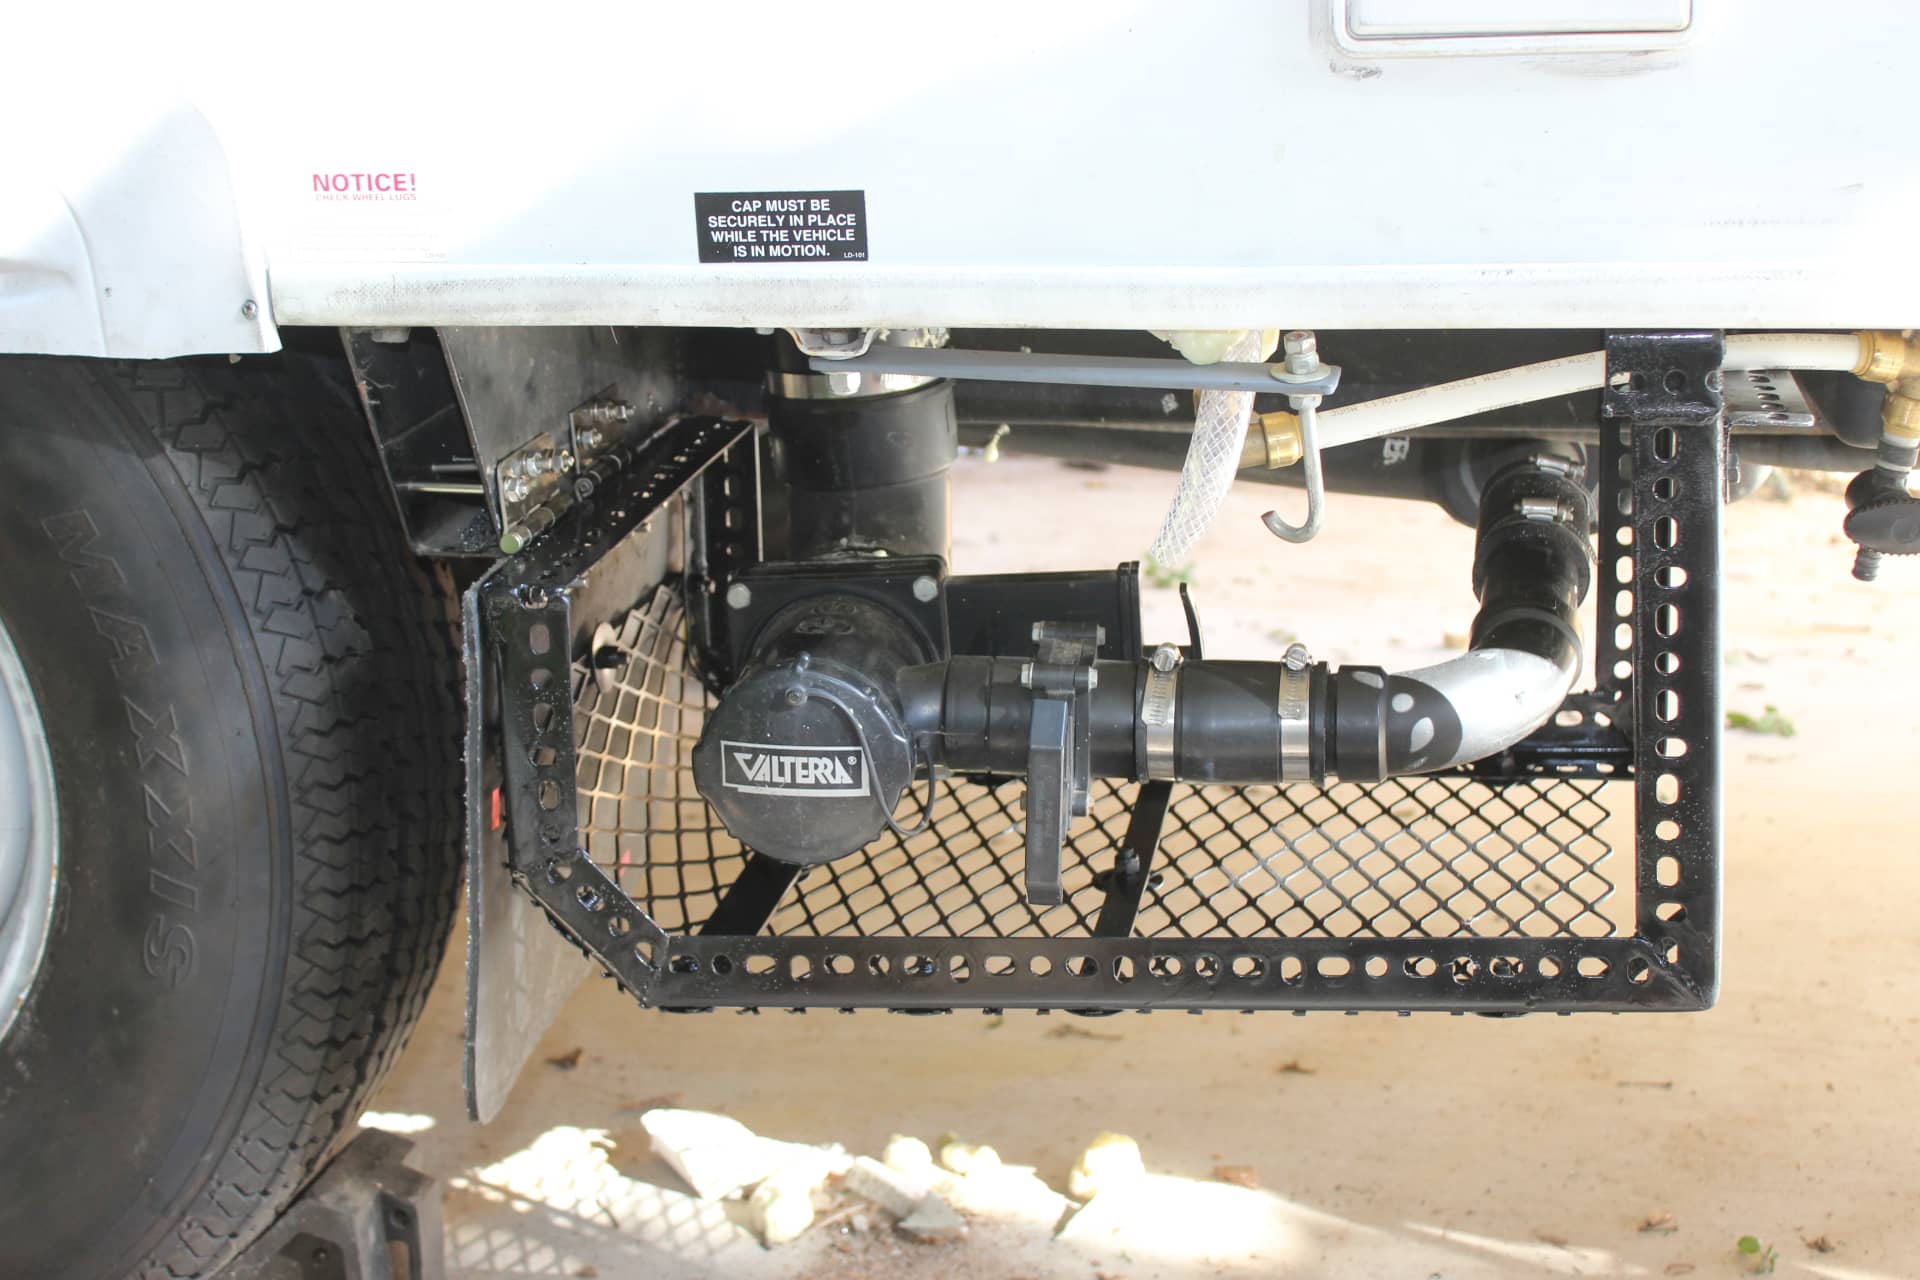
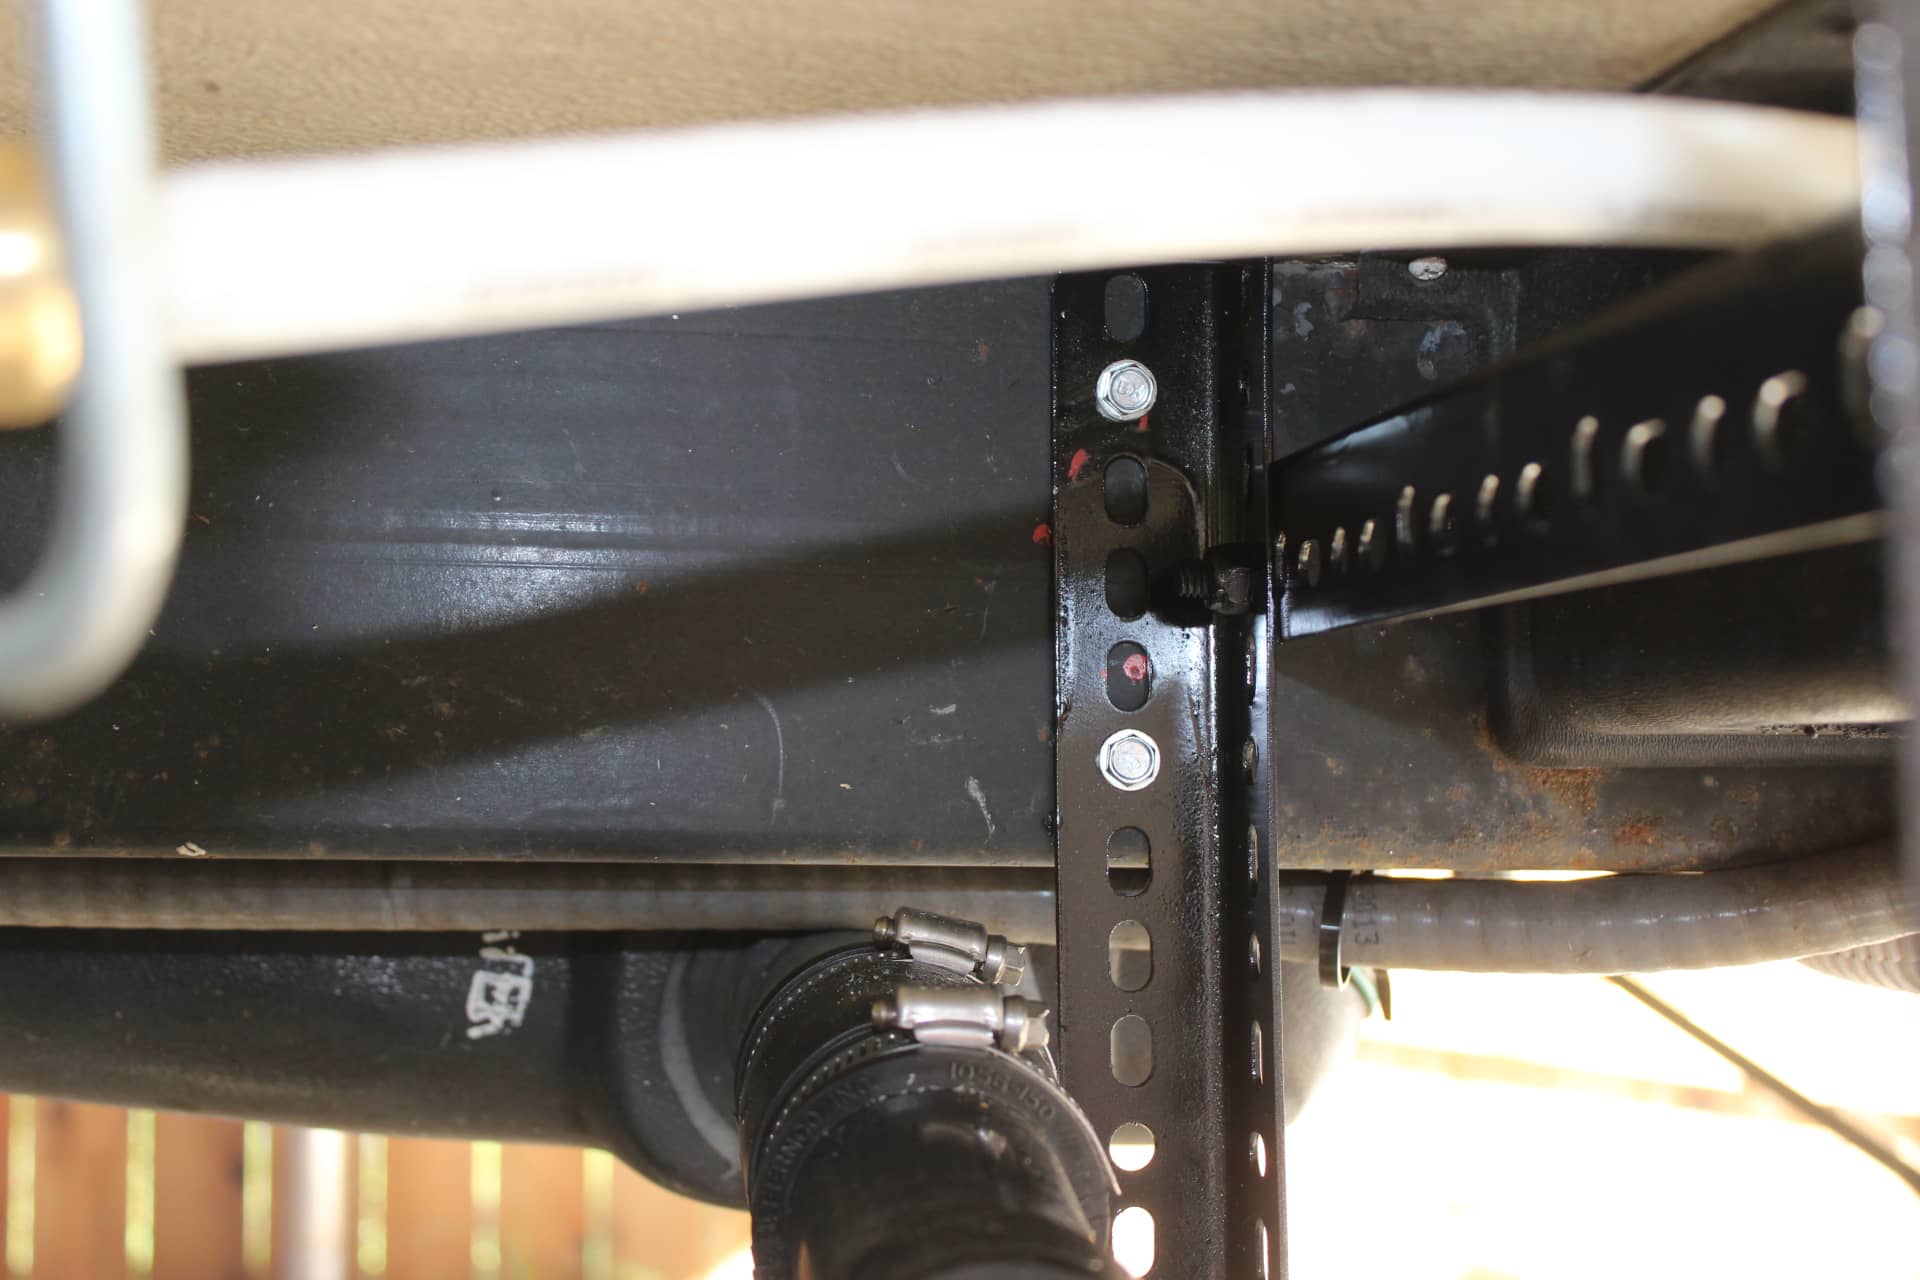
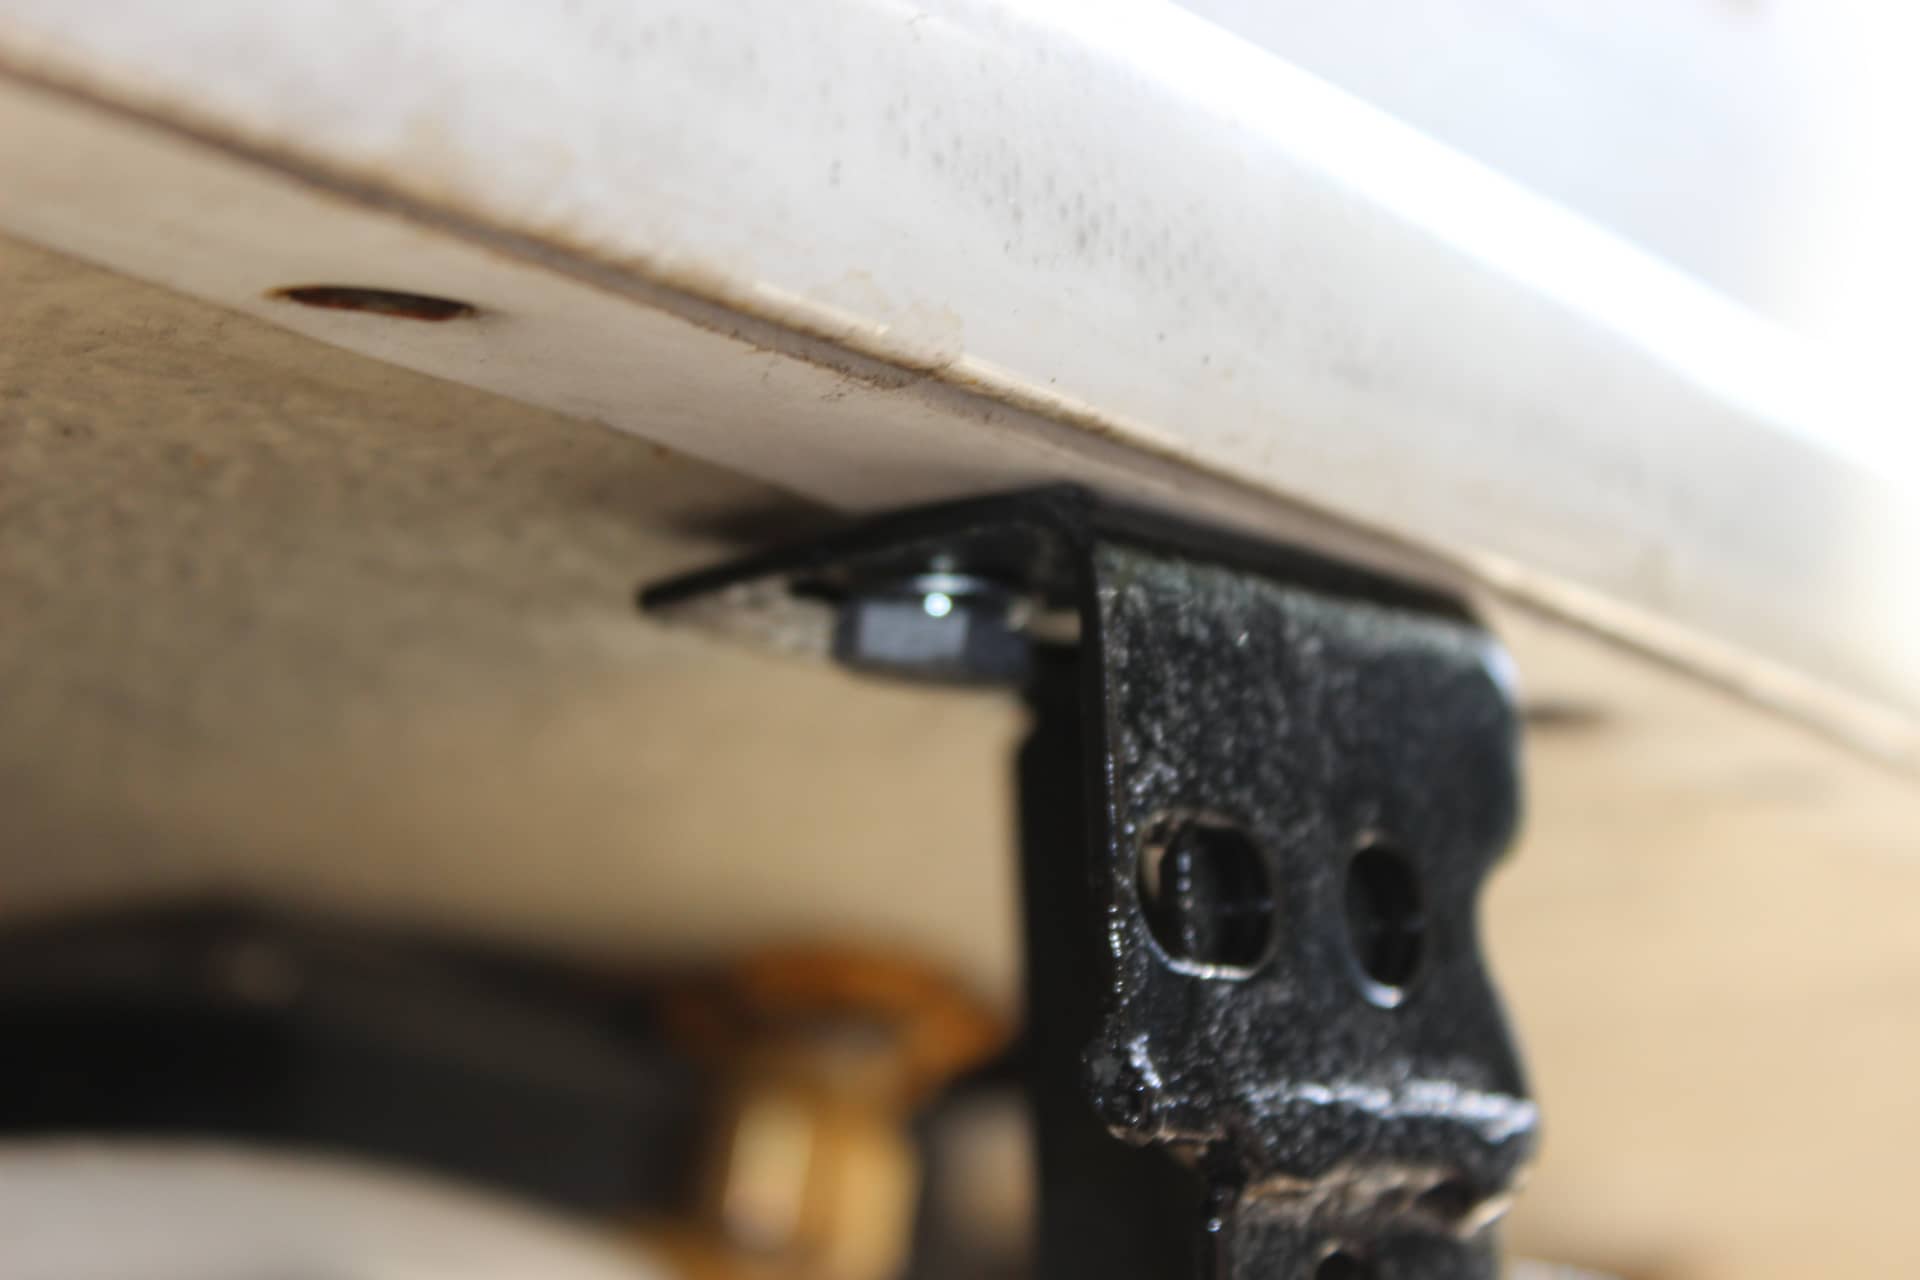
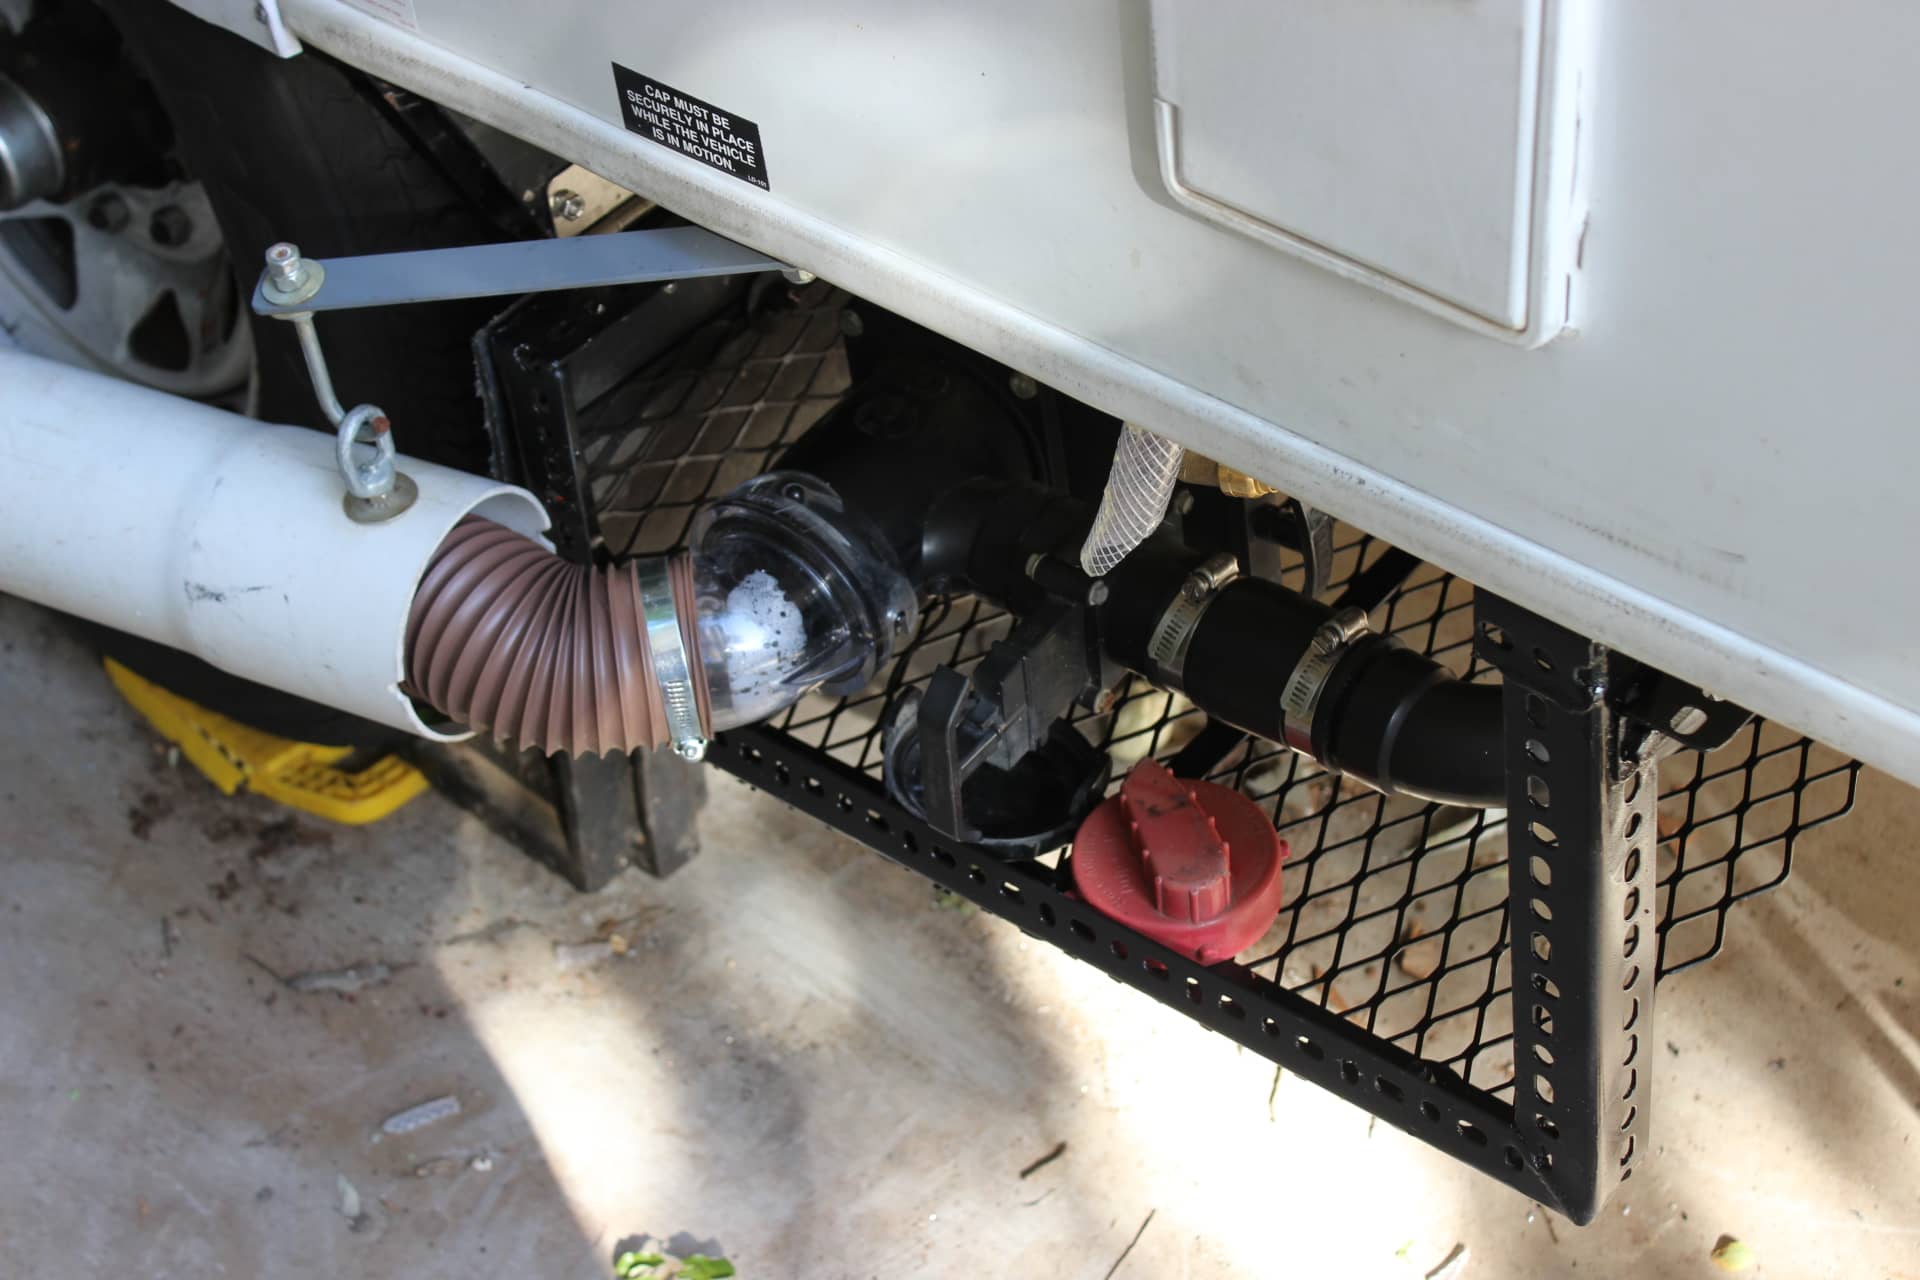
I looked at a bunch of different designs and read a slew of posts on the subject and decided on a course of action….with a twist on the theme. I wanted it strong but light weight. Easy to build, but with built in access to the plumbing without having to take the whole thing down if there ever was a plumbing issue. So for this project I decided on using that perforated angle steel (the kind with holes and slots already drilled into it on both sides of the angle) and an expanded steel mesh (like they use on inexpensive BBQ grills … image 1804) that would be bolted on to the cage frame with bolts, lock nuts and fender washers. I made it like the ones I saw in earlier posts with a slight 45° angle at the front of the cage and with several steel flat stock cross braces to help keep the mesh from bending out of place by the tread whopping against it (images 1802, 1805). Now I had planned on attaching my cage to the trailer frame outrigger behind the tire where the mud flap was and I was going to use hinges between the two so I would be able to drop one end of the cage (the rear end) if I ever had to service the plumbing and not have to remove the whole cage. So I welded a piece of steel flat stock to the front top cross piece so I would have a very strong place for my hinges (image 1803). Similarly I welded a small piece of the perforated angled steel perpendicular to the outside rear post (on the top) where I could screw a lag screw into the underside edge on the trailer (images 1809, 1815). In the rear next to the frame, I used two tech screws to secure the rear inside post to the frame (image 1814). I bolted a cross brace on the rear between the two vertical posts that also serves to support the flush water line for the toilet (image 1817).
Since I used the outrigger behind the wheel well to attach the hinges (image 1816), I put the mud flap on the cage with the mud flap on the outside of the hinge (images 1810, 1811, 1812). That way the mud flap would add even more protection to the cage.
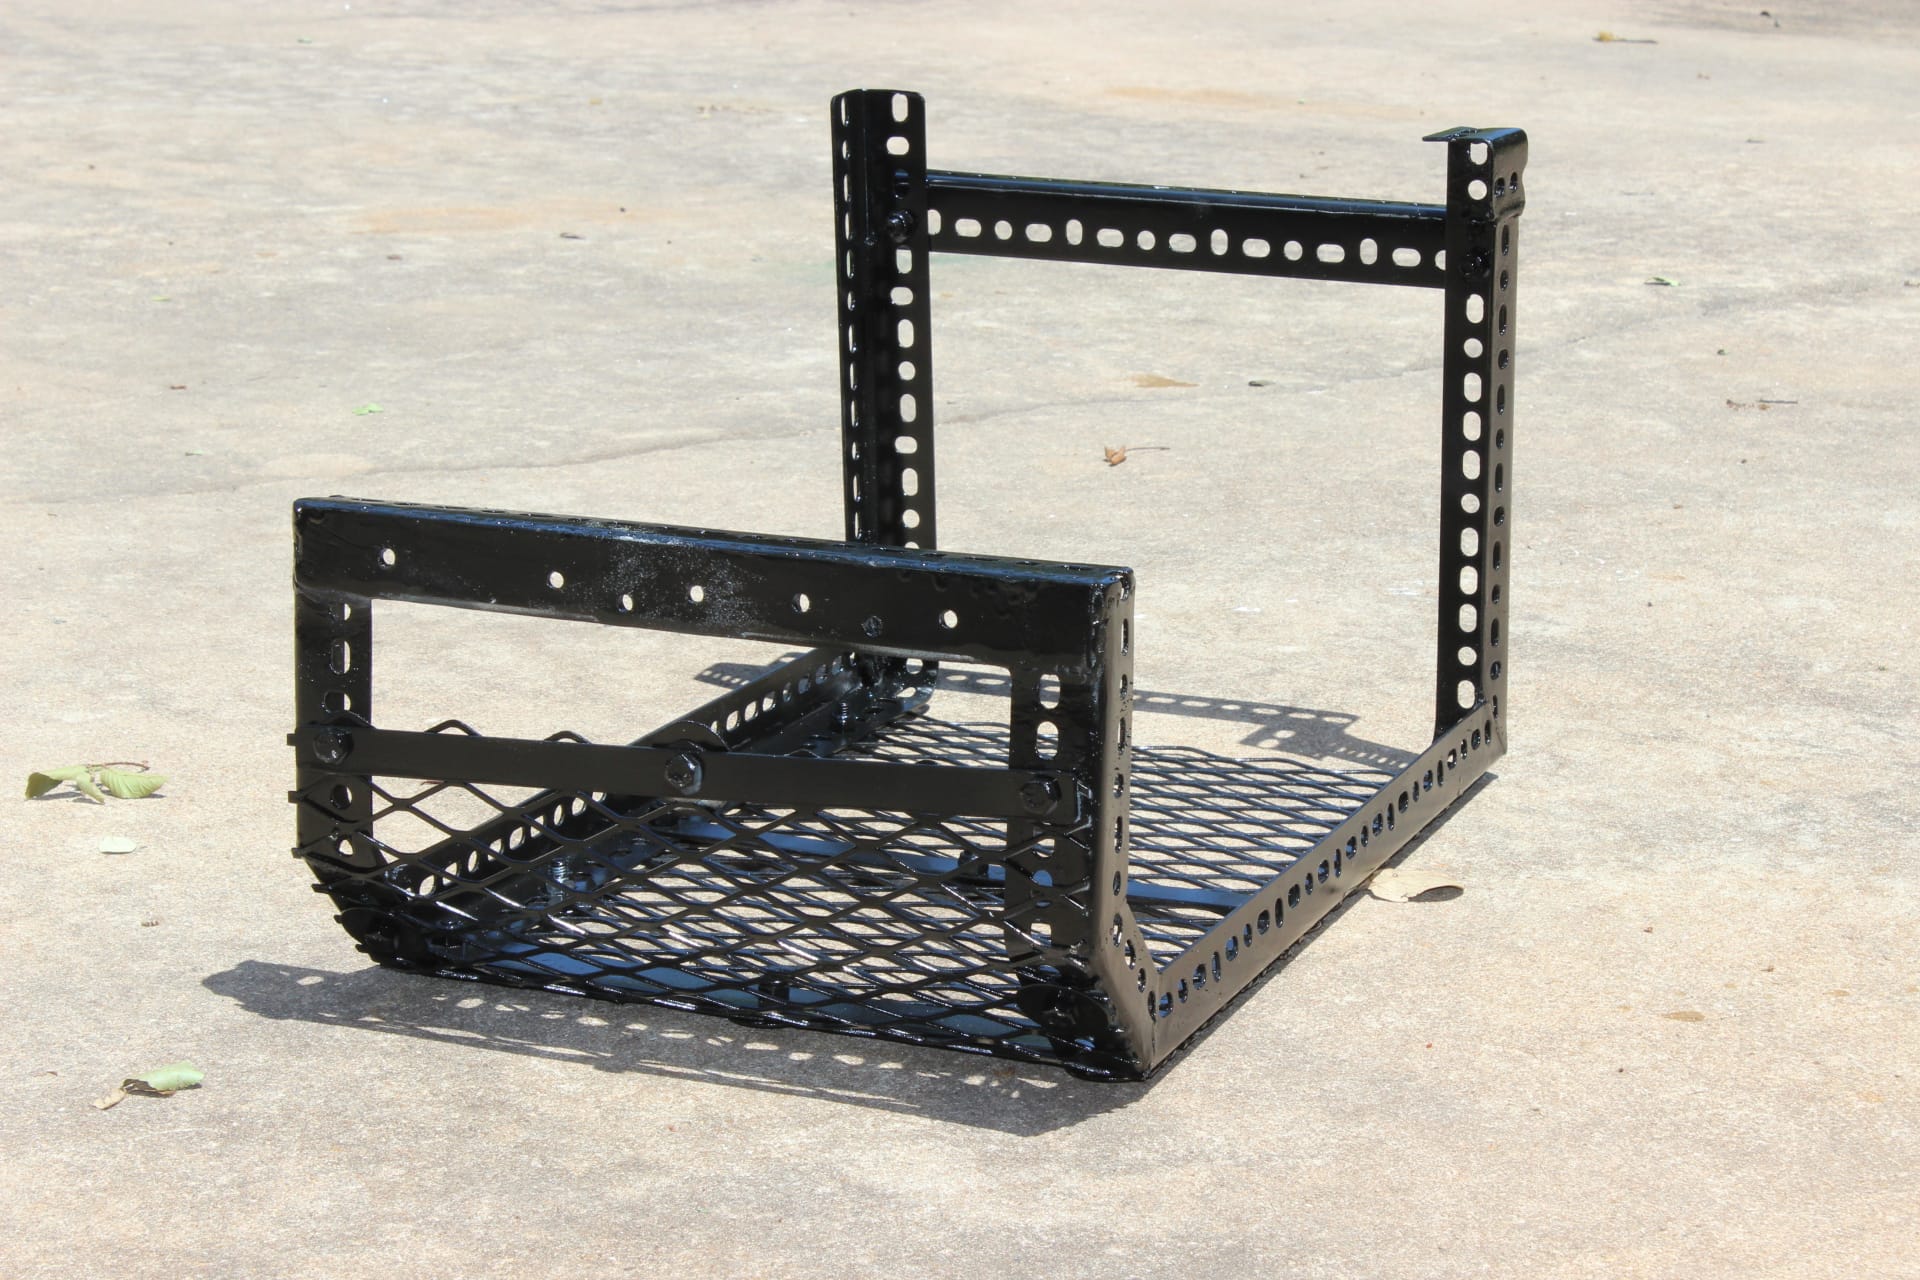
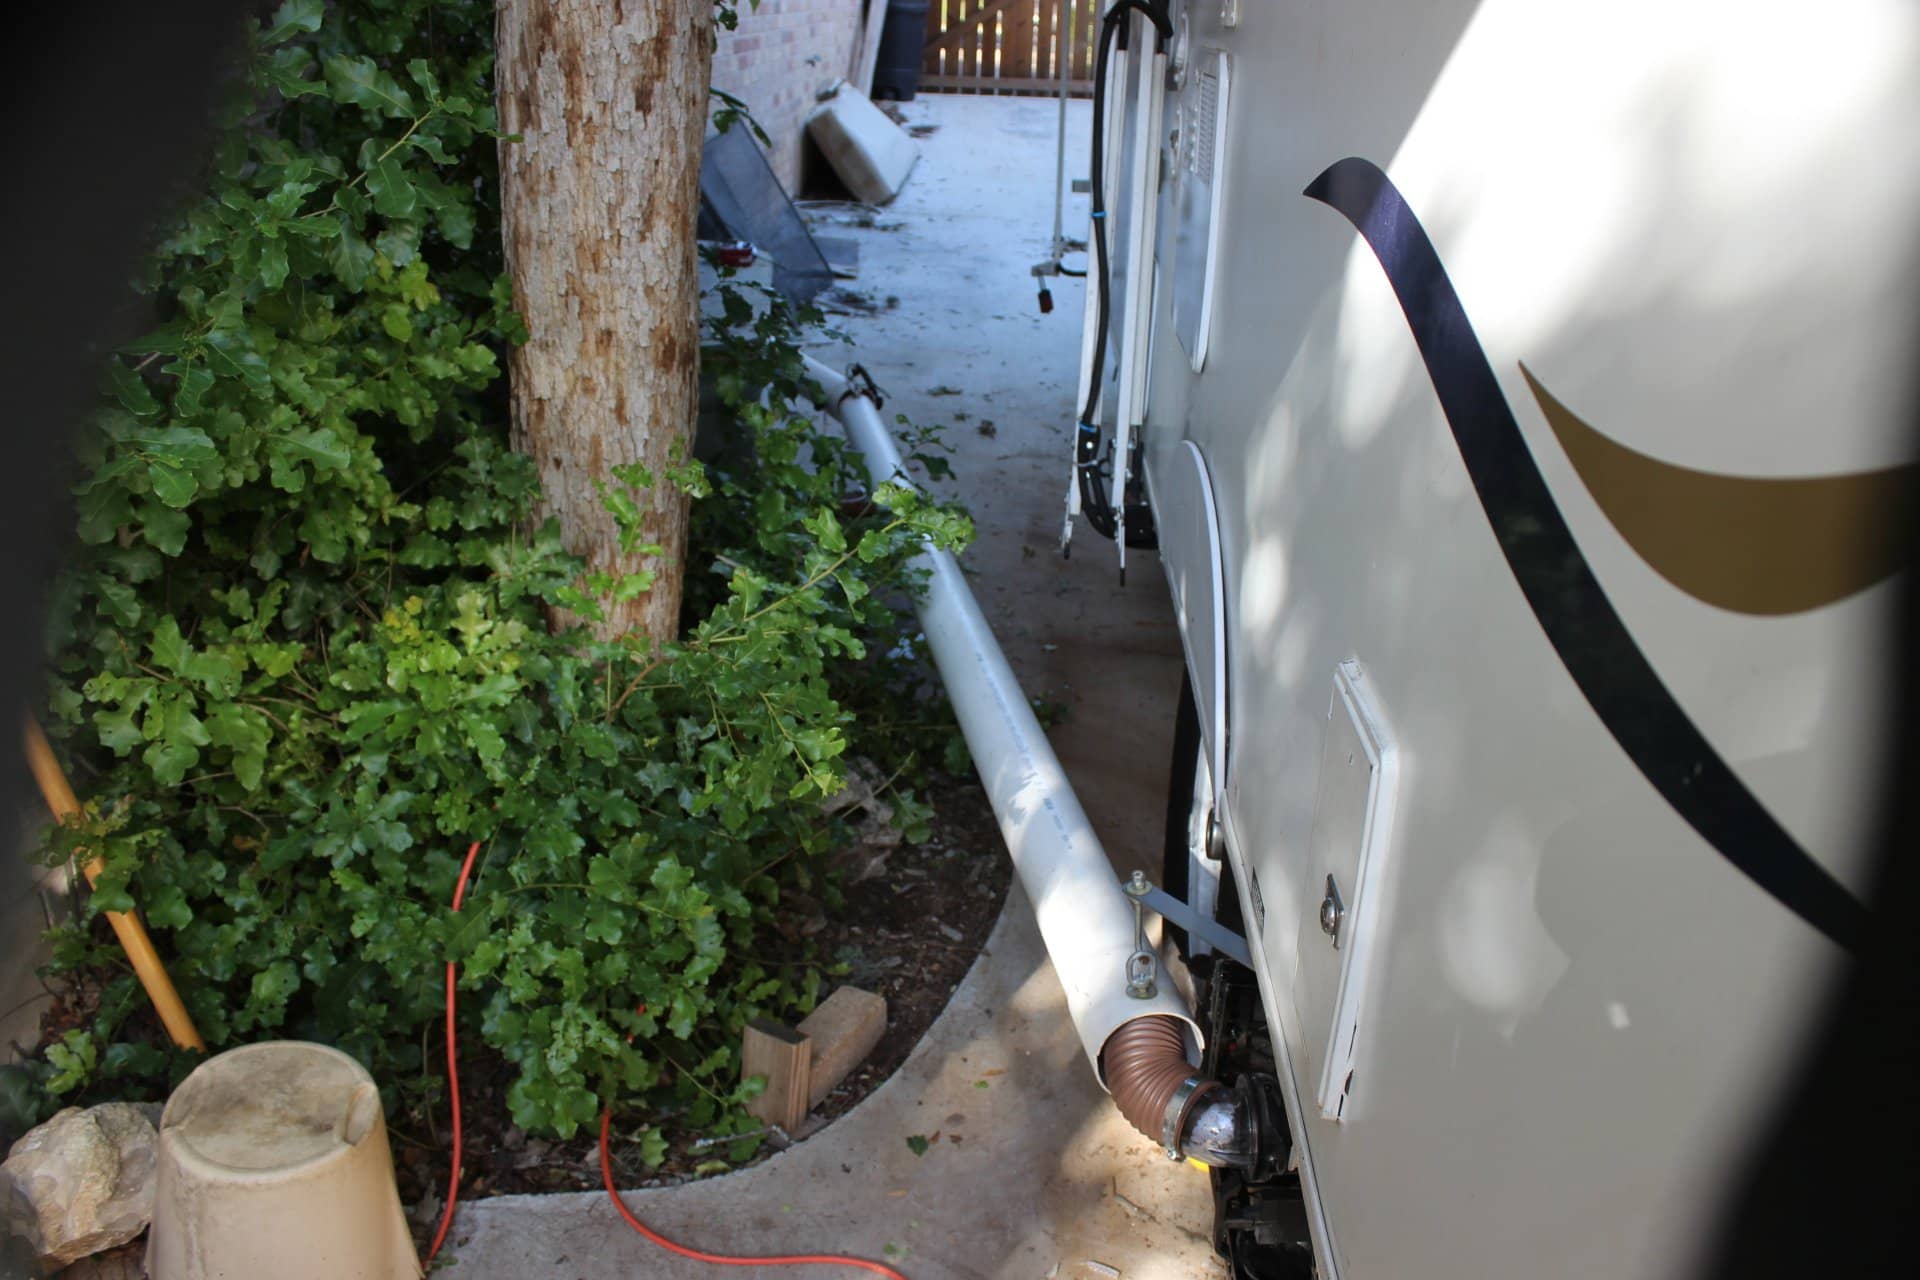
Having the steel mesh bottom gives me a place to put the sewer hose end caps to dry out when they are not being used for the sewer hose and it’s a handy place for them to not get lost. As you can see I painted the whole thing black. So here’s what it looks like with the sewer hose hook in place (image 1818).
Now losing my drain plumbing to a blowout or partial tread separation is just one more little thing NOT to worry about. I’ve got enough on my mind anyways!