New Converter Charger Upgrade

Nothing like the domino effect to bring out those short comings. This new converter/charger is one of those brought to light (no pun intended) by another mishap when I was trying to install my Wave XL Wi-Fi booster antenna and router. I got it all hooked up but the little inverter (it exchanges 12 volts DC into 110 volts AC) that was to run the power converter (like one that would charge up a cell phone or other device….exchanging 110 volts AC into 12 volts DC but at 1 amp) which powers the router and the antenna, would not come on. Curious. It worked in my truck when I plugged it into the cigarette lighter…but when I plug it into this new cigarette lighter receptacle that I had just installed in this cabinet above my couch in the front of my trailer….NOTHING! …I am bummed! …and confused to say the least! So I got out the multi meter to see if there was any current and BOY HOWDY was there…like 19 volts! YIKES! I couldn’t imagine how a 12 volt system running off my 12 volt batteries could product 19 volts….did I discover a new type of quantum mechanics or something of the likes??? Was this somehow now a free energy machine???…..Well…as it turned out NO. So I went and checked out the fuse panel to see what I could see and low and behold there it was…the old manual for the distribution panel…you know..the one no one ever reads accept in an emergency. So I did to see what I could find and, I found the answer.
You see I always thought that the trailer’s 12 volts came from the batteries all the time and when plugged into the shore power the converter/charger would charge the batteries as they powered everything that was 12 volt in the trailer. Boy was I wrong! As it turns out, when you plug into the shore power (that’s any power coming from a 110-120 volt AC power pole or box at a campground or where ever) it automatically disconnects the batteries and switches over to the converter..a really BIG converter that now will run everything in your trailer that requires 12 volts. At the same time, the charger side of it will start charging up your battery. That’s why the battery gets disconnected so it can charge faster without a load. AH HA! So I went and disconnected the shore power and my little inverter came on…and so did the little converter plugged into it…and then the router came on and everything worked as it should…but only with the shore power un–plugged (which means that it works great on the 12 battery but not on the converter…which was pumping out too much juice (19 volts YIKES). It seems that that little inverter has an overload circuit in it to keep it from frying when too much power is put to it. That’s why it would not come on when plugged into my trailer while on shore power. So just to check things I went and plugged the shore power back in and did some measurements at a few light sockets and sure nuff 17, 18, 19 volts etc…Too much… and the little inverter stopped working as well…then I went to remove one of my LED lights from its socket and it was HOT…I grabbed a cloth to twist it and remove it and the whole light bulb discentigrated in my hand…a zillion pieces hit the floor…it be fried to death. Now I knew for sure that the 2003 converter had gone south and a new one was to be had.
So had I not tried to put in the Wi-Fi booster, I would have never known that the converter for the whole trailer had given up the ghost until maybe something big like the fridge conked out. Although this was sad it had left me, it was a blessing disguised as a curse. So with a new converter comes newer technology and that I’m all for.
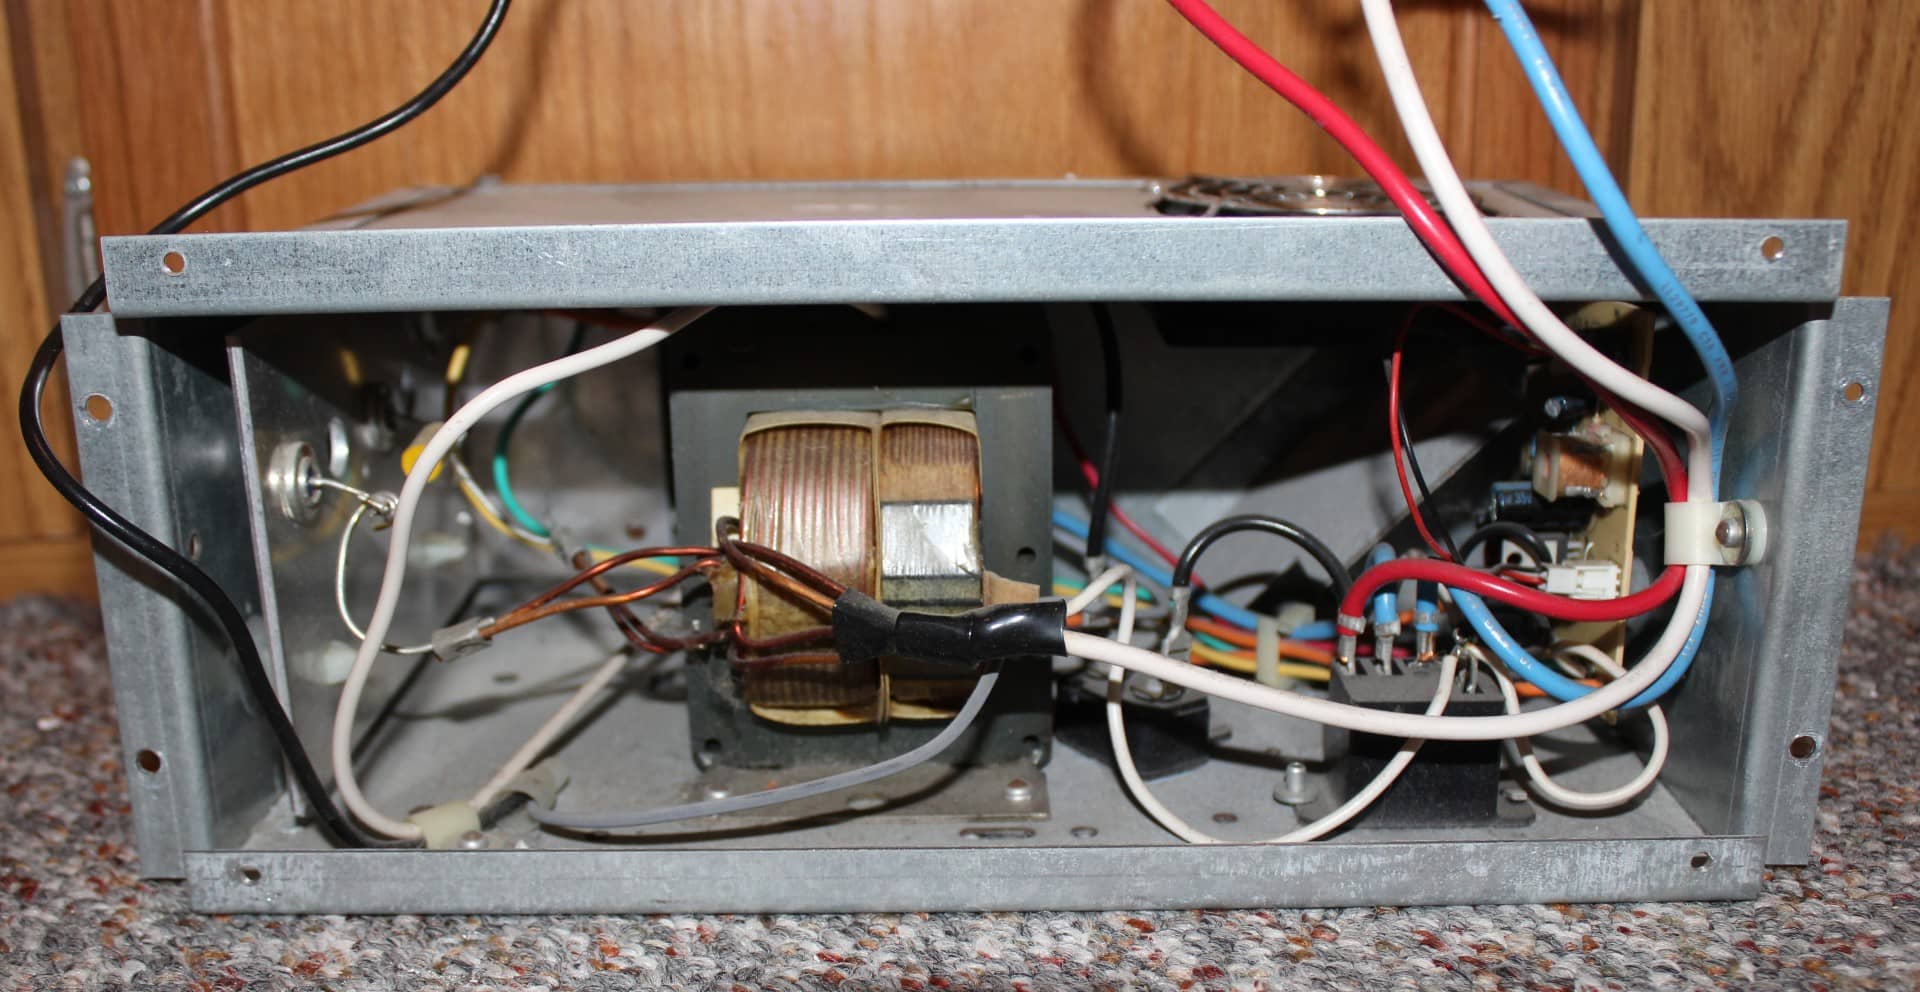
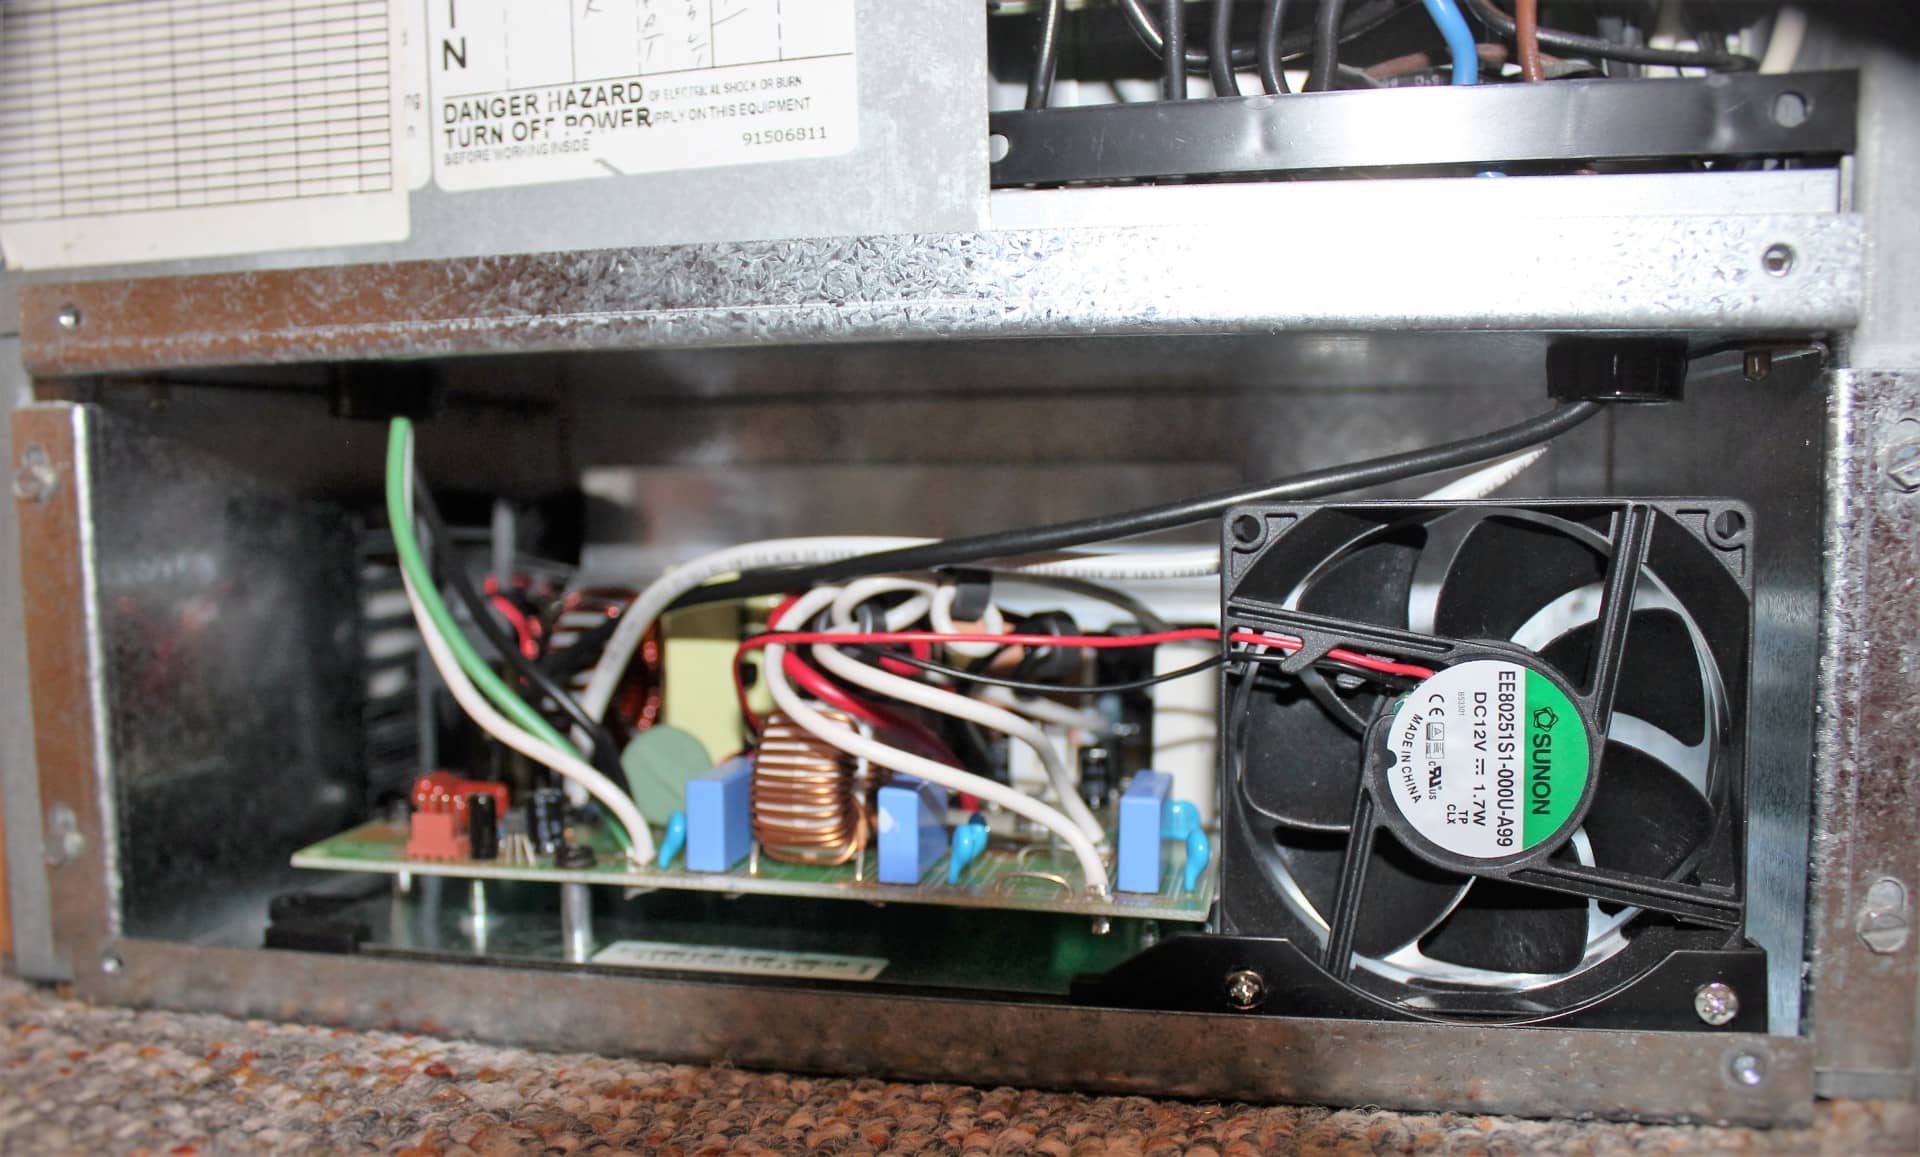
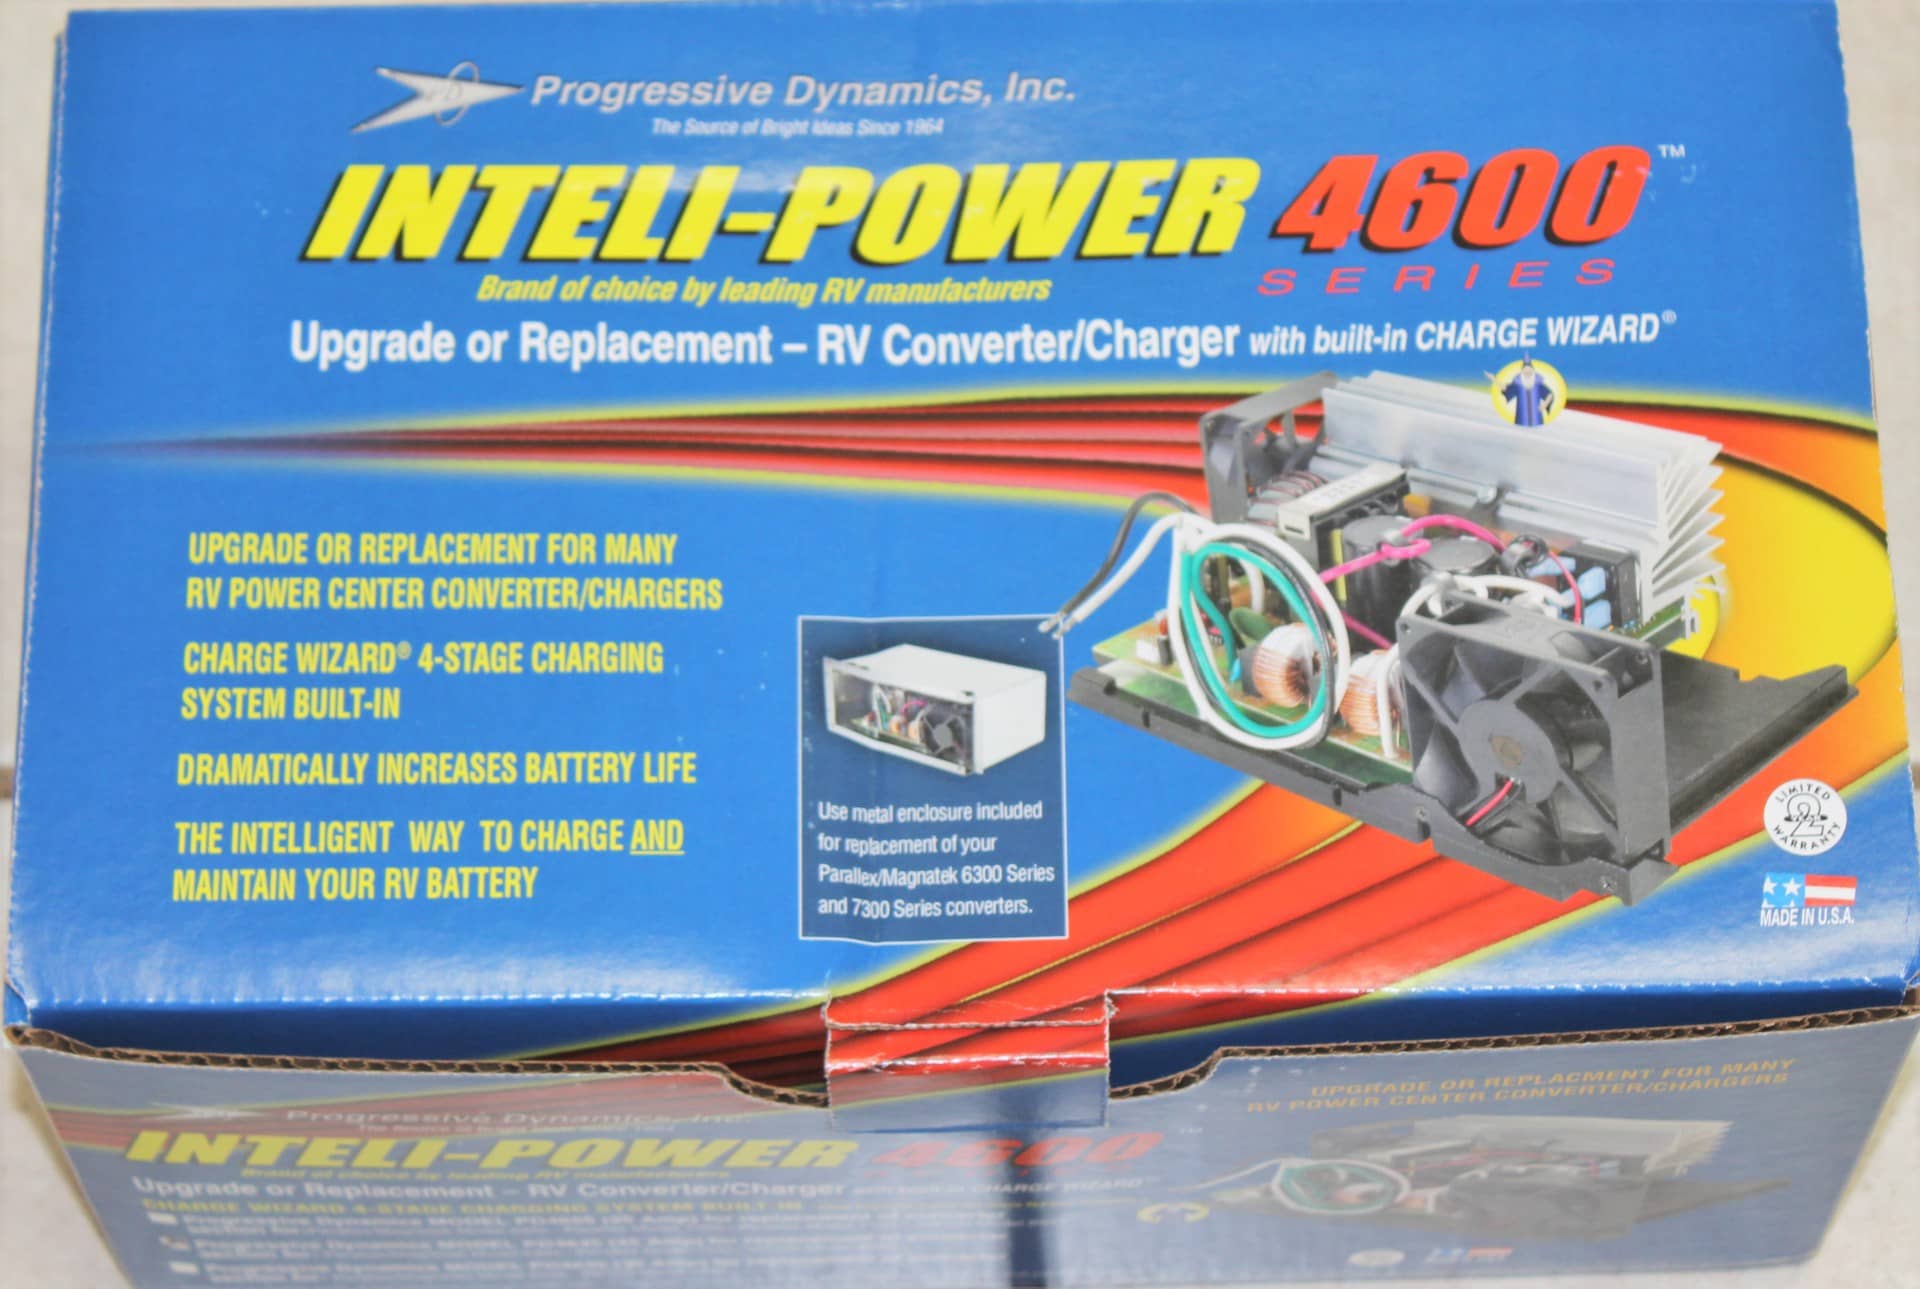
The hunt begins. Which one to get? Whichever one is the easiest and offers a good unit. So I looked and what I decided on was a unit by Progressive Dynamics. The Intelli-Power 4600 Series (Images 1985, 1986, 1987, 1988). I got the one in the middle of the power range (45 amps, model PD 4645) but they did have one rated at 55 amps, however I thought that might be a bit much for my 2003 model so I got the 45 amp model (Image 1974) . If you look at them side by side the new one looks a lot better and has a fan in front as well as one on the side. The old one is about 10 lbs. heavier with that big transformer in there (image 1973) and only has one fan on the top in the back. The new one can run at different fan speeds and so it is a lot quieter than the old one. That I like.
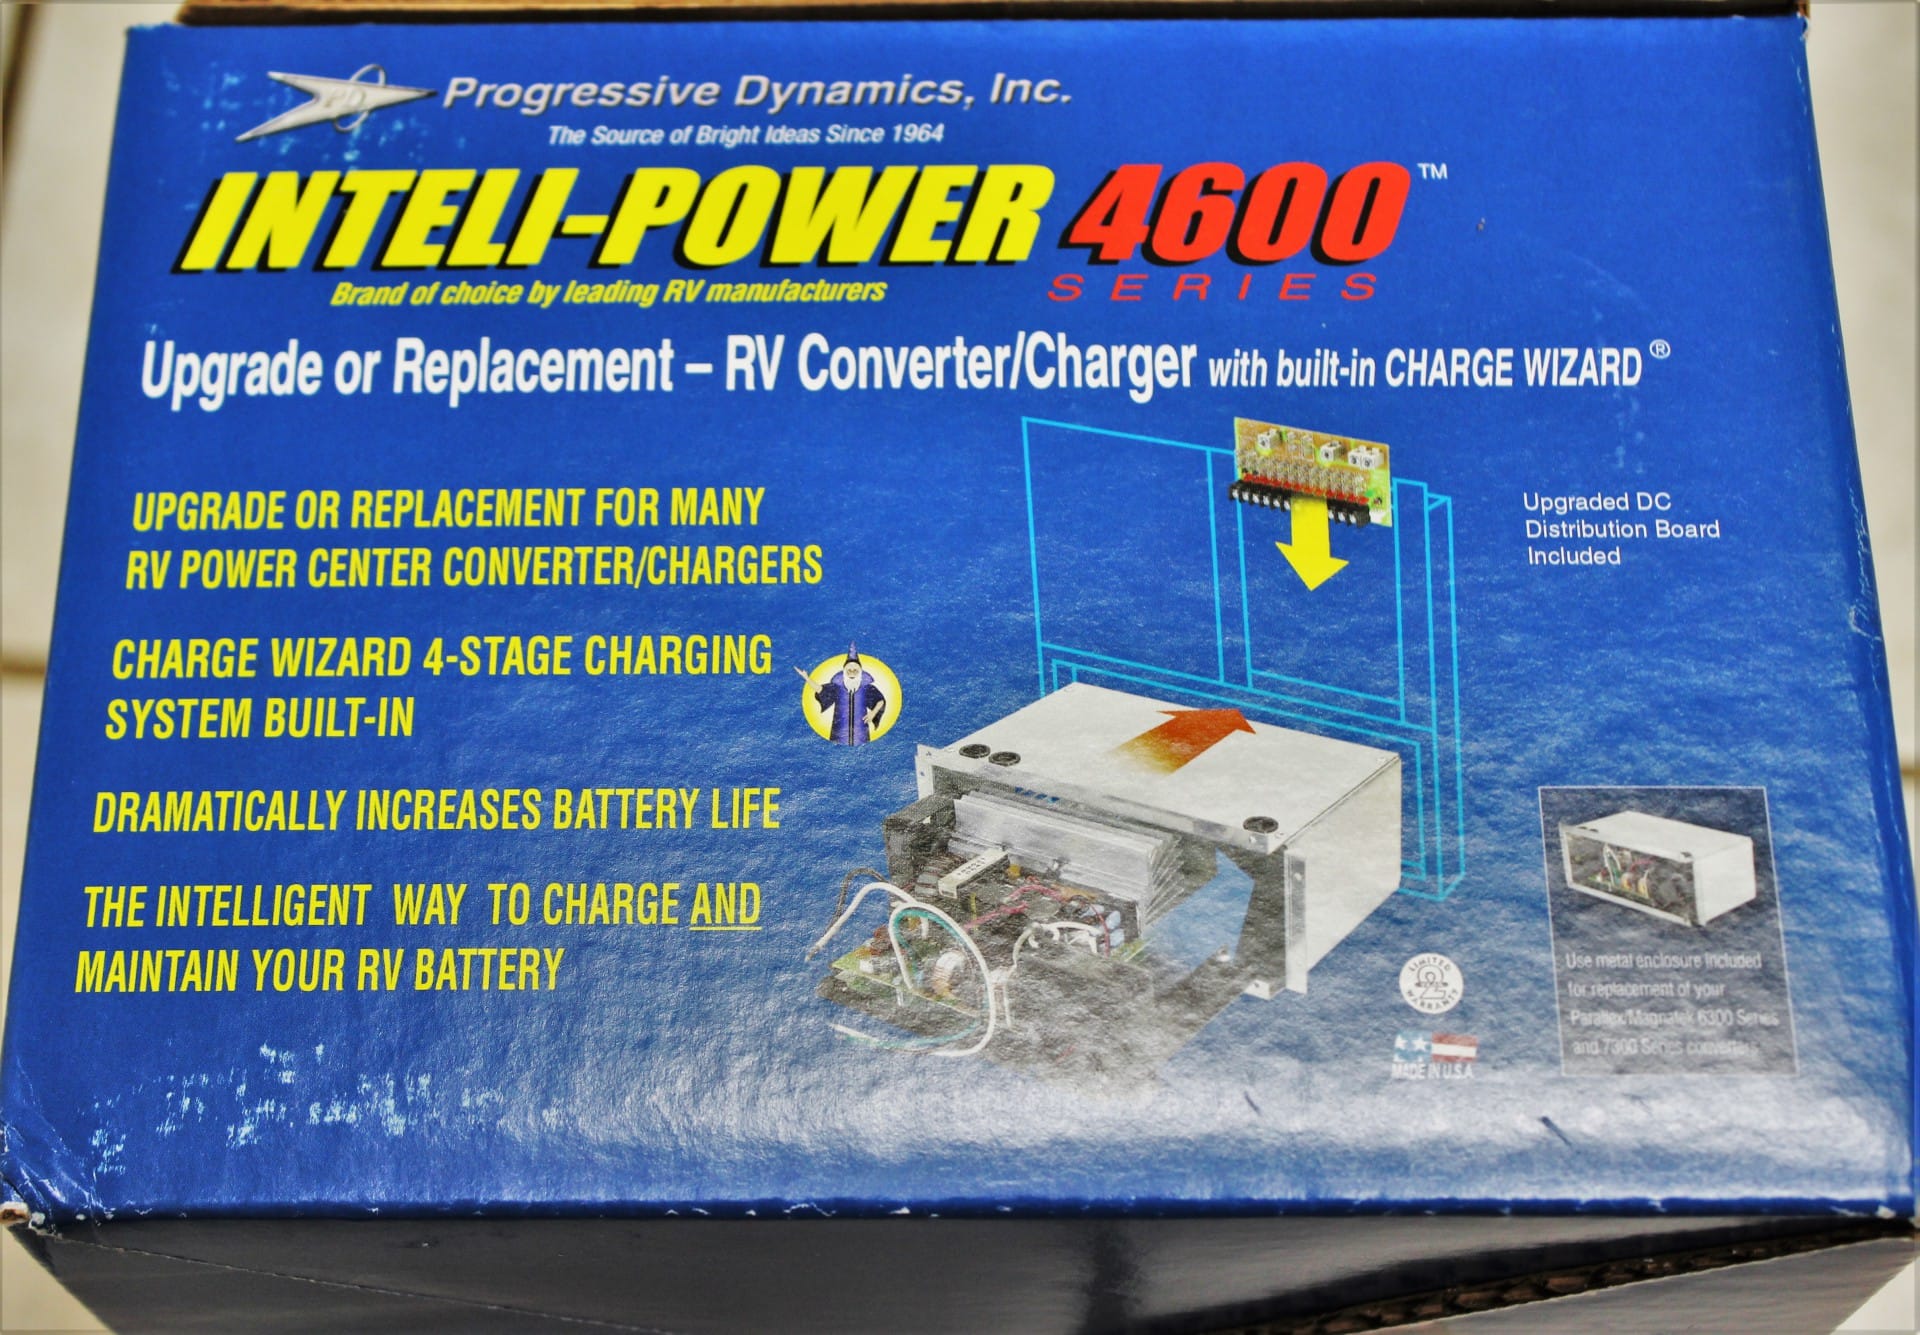
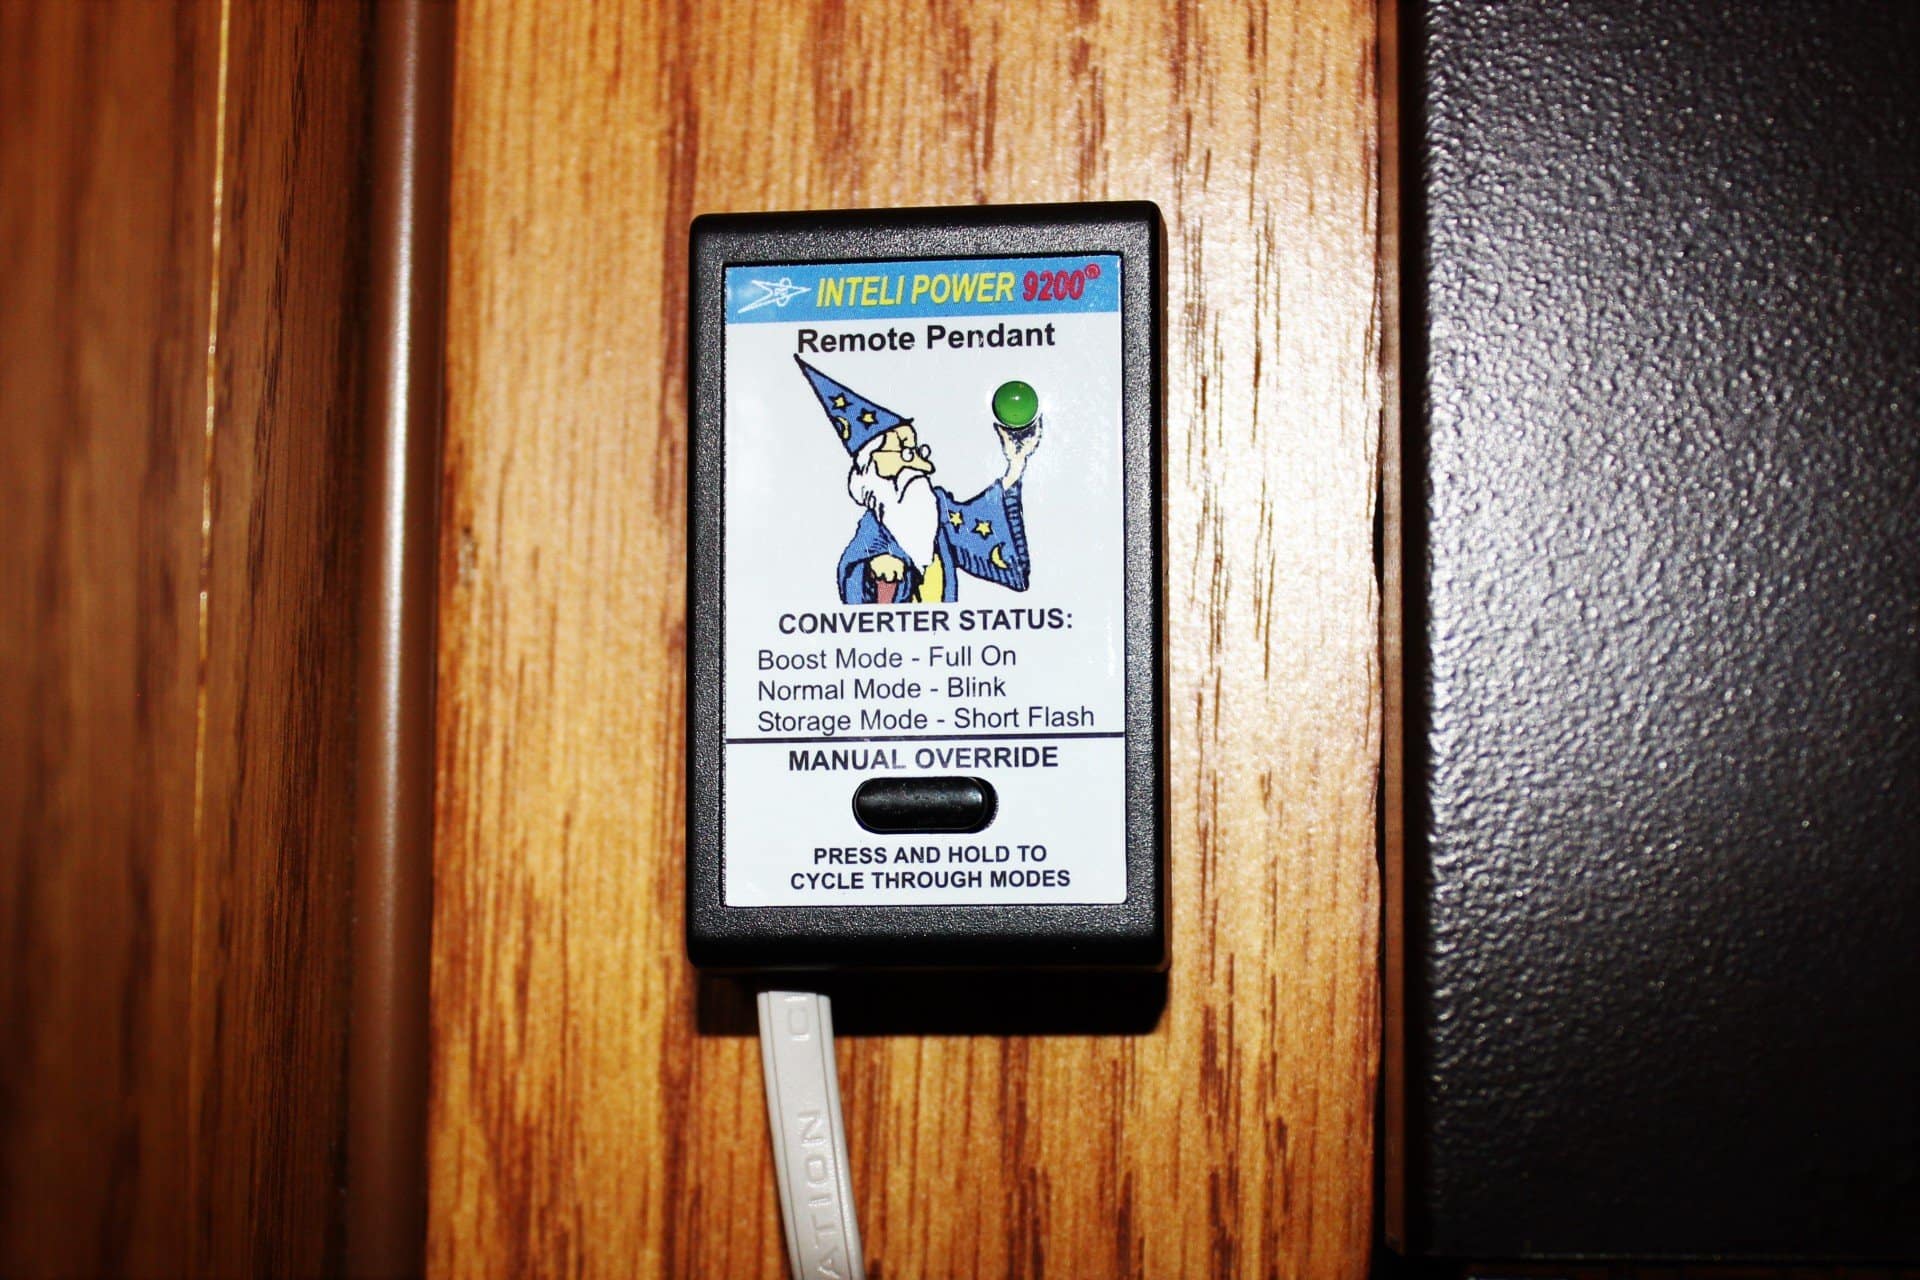
Another really nice feature is that the new model has the “Charge Wizard”, or a three stage charging system that allows it to help keep your battery maintained better by producing a bigger charge rate at a short duration for burning off the sulfides that can collect inside on the plates of your battery. Then it has a normal re-charge setting and finally a float or trickle charge to keep things topped off. Along with the unit I got the remote hard wired “Pendant” button (images 1989, 1995) which lets you select and monitor which mode of charging you want to run or monitor what it’s doing at any time.
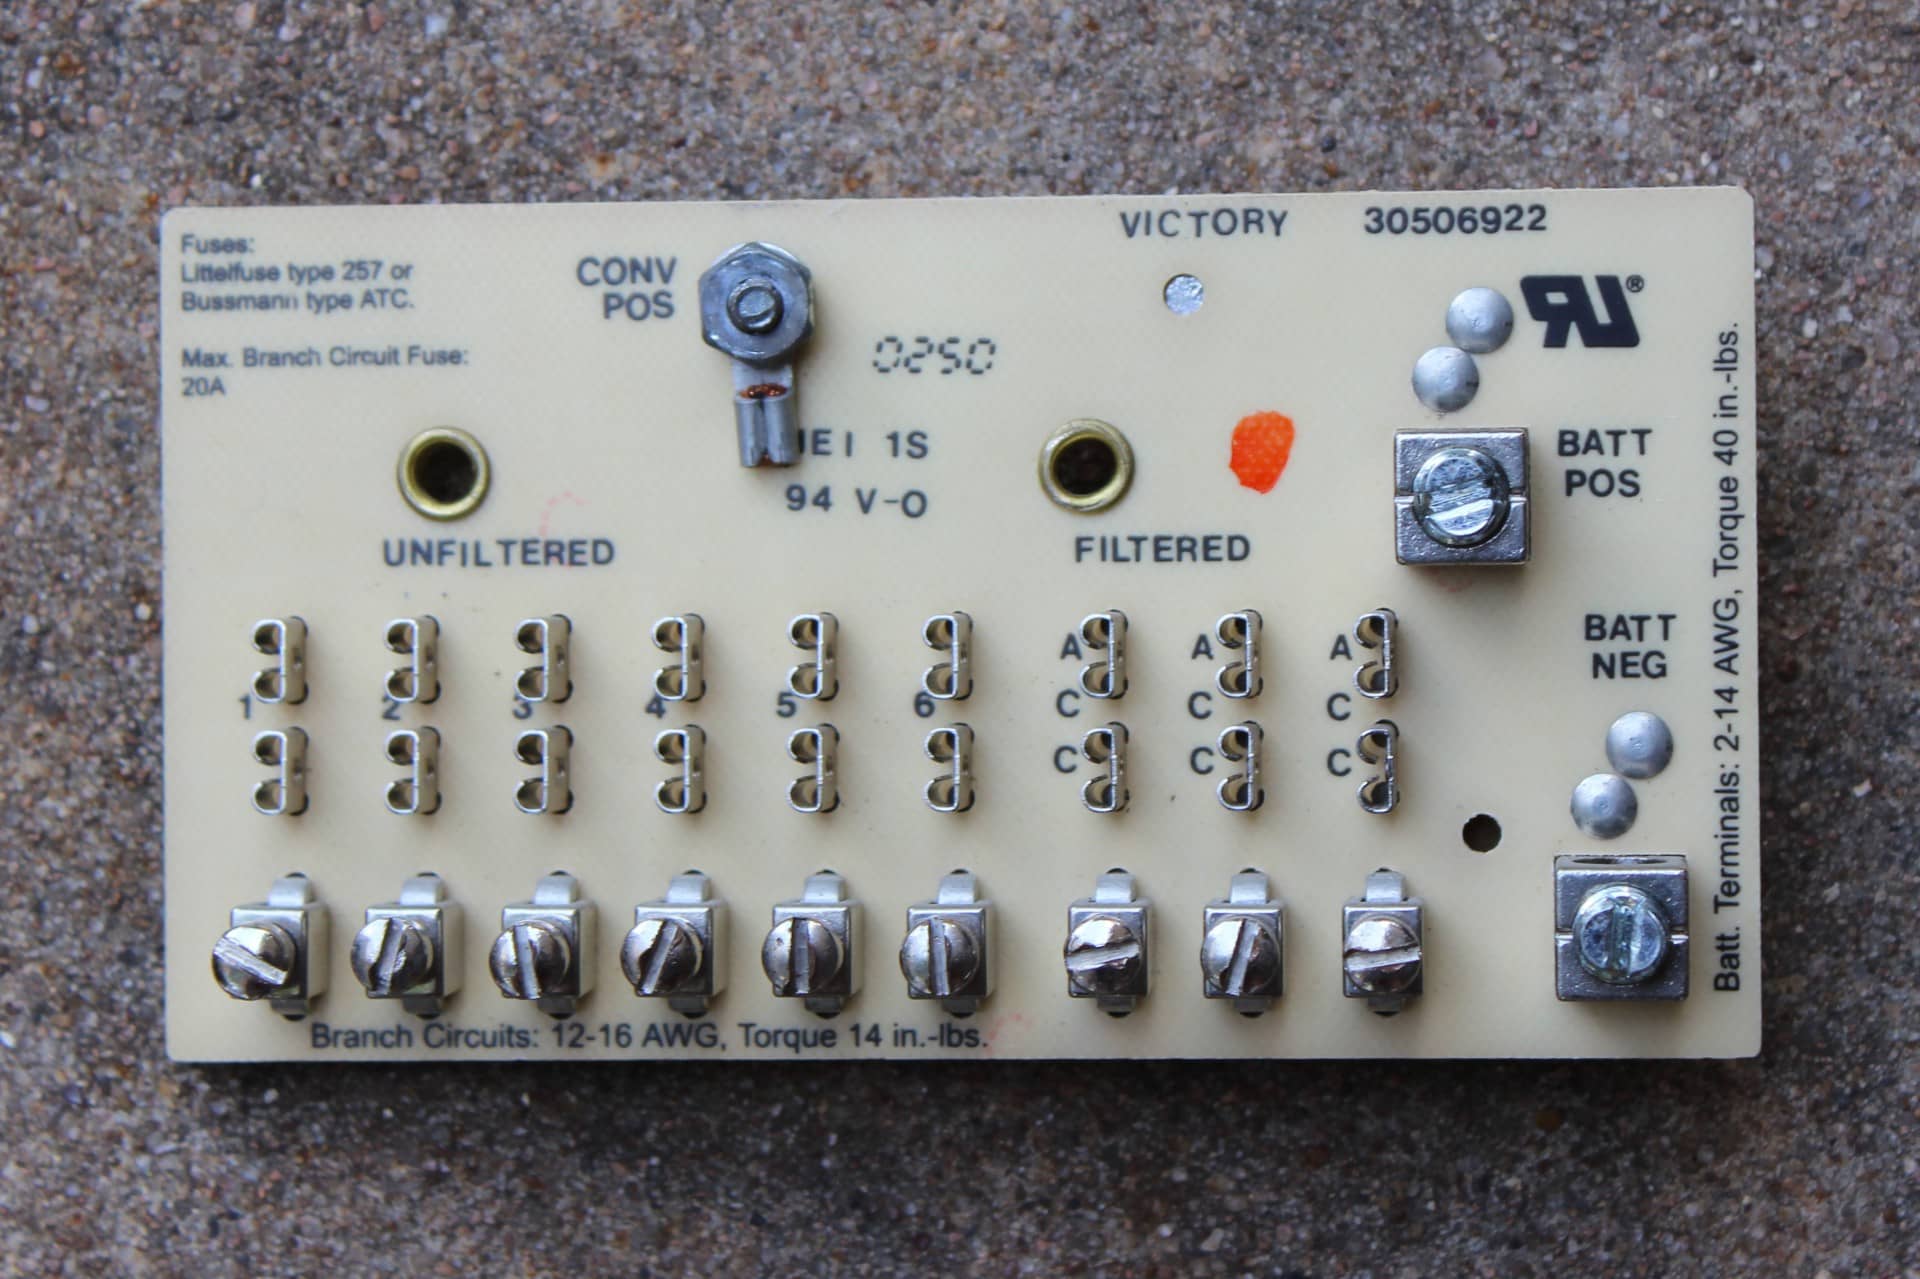
When you purchase this unit, it comes with another upgrade….a newer 12 volt fuse panel (image 1974). Although it’s the same size as the old one (image 1977), it has more capacity with 3 more fuse slot than the old board in case you want to add some new circuits…. and each fuse slot now has an LED located below each fuse that will light up if that fuse blows. Handy! But not only that, the whole board is master fused itself…on the battery side and the converter side too. These are the two 30 amp green fuses at the top of the new board in image 1974.
As for the installation…it was a snap….I just unscrewed the old one from the bottom of the distribution panel, unhooked the wires after I labeled them and slid out the old unit. The new 4600 series is made to replace this old one and several other brands and has the same dimensions so you can just slide out the old and slide in the new. The only time consuming thing was re-hooking up the wires and even that was easy because there is plenty of slack in the wires behind the wall to make things a snap. I’d say all in all it took about 45 minutes to do the job. I just wish everything when as well as this did. The worst part….it was a cramped working space.
So I should be in good shape for quite some time and I don’t have to worry about burning up in the middle of the night either. The first clue…now that I remember it, was that the LEDs in my TM were starting to flicker and I did not know why…..but I do now. They don’t flicker anymore and my Wi-Fi booster has no problem powering up too. The down side to this is that I will have to replace all of the LEDs that got a lot of “air time”. I’m in the process of doing just that and like everything else I’ve done…it’ll be mo-bettah!