Nothing like relaxing after a hard day’s drive….unless you’re sitting in that OEM chair that comes with the trailer (I hope that Trailmanor has fixed that by now). I’d rather sit on a rock or maybe a chair like the one that Fred Flintstone sits on at home (which would overextend my GVW axle limit).
You know when I was researching Trailmanor trailers, and I saw that chair in their add and even on youtube, I naturally assumed that it was a recliner….I mean, it looks like a recliner, and why they would put that torture rack in there is the $709,000,000.00 question. They could have just as easily stocked it with a nice small recliner! (hey Trailmanor….if you need the manufacturers name, contact me…maybe they are still in business….they probably have moved the manufacturing to communist China so that way the communist who want to see us all dead here in the USA, can keep most all of the money from the sales and convert it into H-bombs!….sorry for that political statement but sometimes I just can’t help myself……at least Trailmanors are made here in the good ole USA!!!)
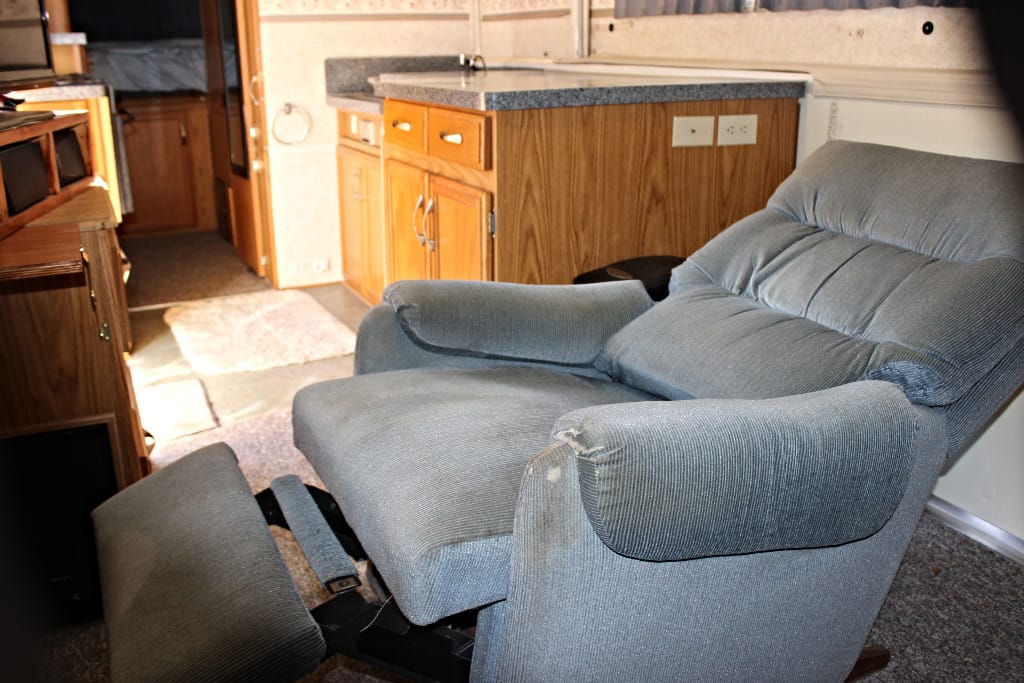
I did luck out though. When Linda’s blind father died (2 years ago), we ended up with this chair (image 1543). It’s a real recliner that rocks and I mean that in the physical since (it’s a rocking chair too). At first I didn’t know what I was going to do with it and had it slated for the Salvation Army or Good Will. But then I saw it’s potential and after a few measurements it turned out to be almost the exact same dimensions as the granite slab in the trailer. So I swapped them out and it’s been so nice ever since. I had to load it in thru the front over the propane tanks while the front lower pull out section was pushed in. I am assuming that’s how they got that original chair in there because it won’t fit thru the door no matter how you hold your tongue! Who cares if it shows a bit of wear, it opens up all the way if you pull it out from the wall a slight bit. It’s nice to relax and when only one person can lay on the couch, having the “RECLINER” is a real boon!
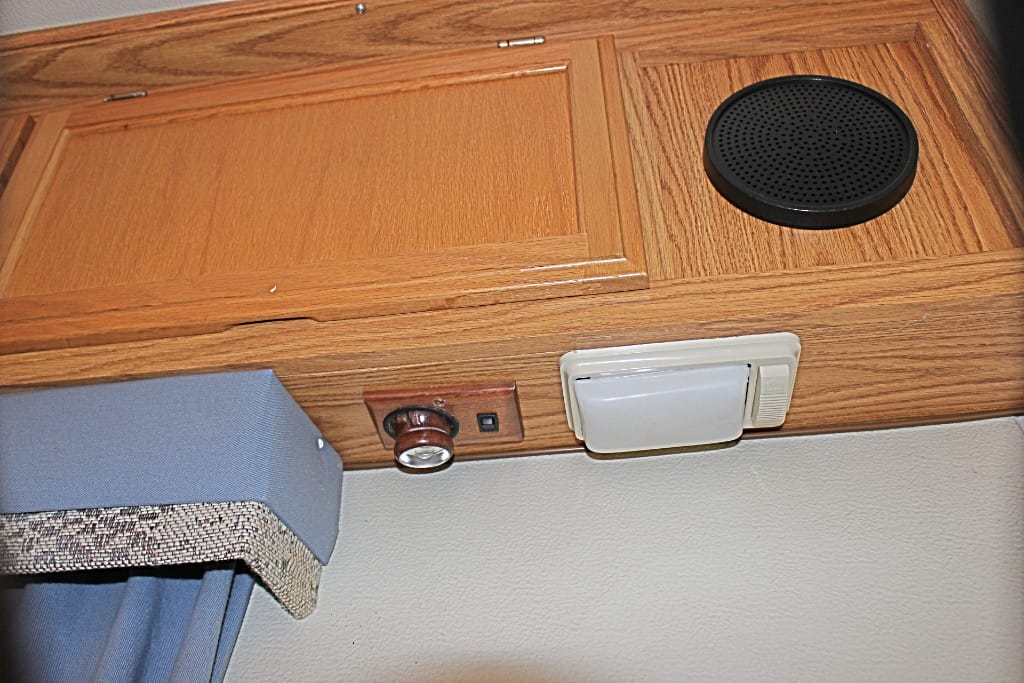
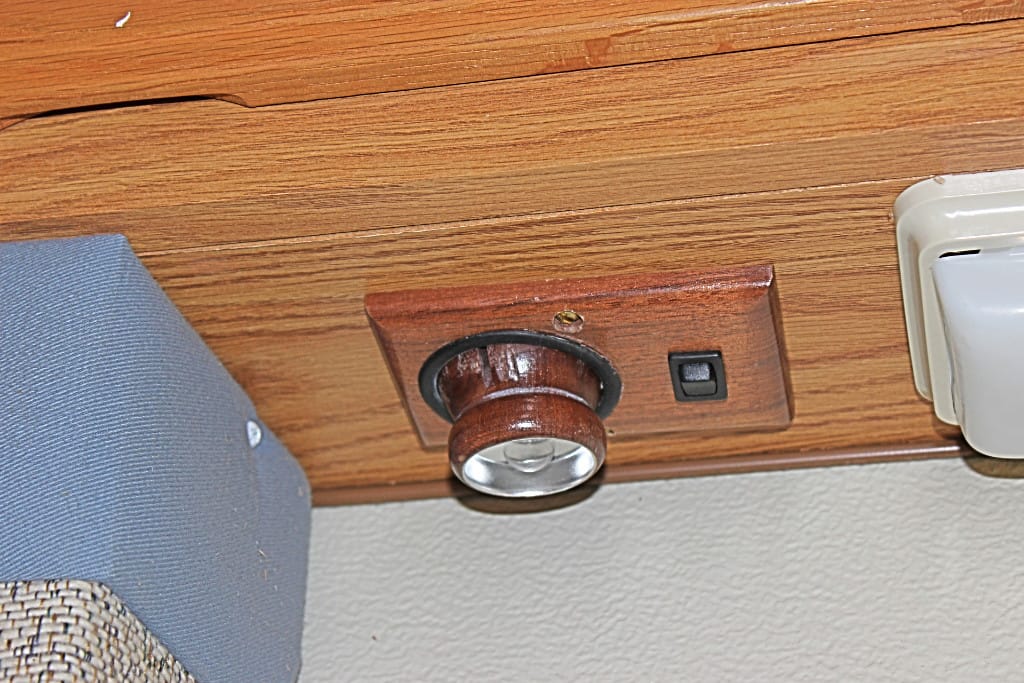
Another thing I did was put up a couple of eyeballing reading lamps (images 1544, 1545) underneath the front cabinet. I got these off of eBay from an RV salvage parts place for dirt cheap. They looked old but were brand new and they really don’t put out that much light, however I left the old incandescent bulbs in them to produce a warmer kind of ambiance lighting. For that, they work great.
Now speaking of lights, one of the best things you can do is to switch out the incandescent bulbs in your trailers’ light fixtures with LED bulbs (no images here…you can go on the internet and find a zillion different types of LED bulbs to fit your fancy…and they are way cheaper than say Campingworld, that’s a BIG 10-4). An LED will use 1/10th the power as an incandescent. So I can run 10 LEDs to 1 old incandescent and save on the batteries power. The only incandescent I left in was the one over the stove. Incandescent bulbs do put out a little brighter, warmer light, and so since I do the cooking most of the time I need better light to work with.
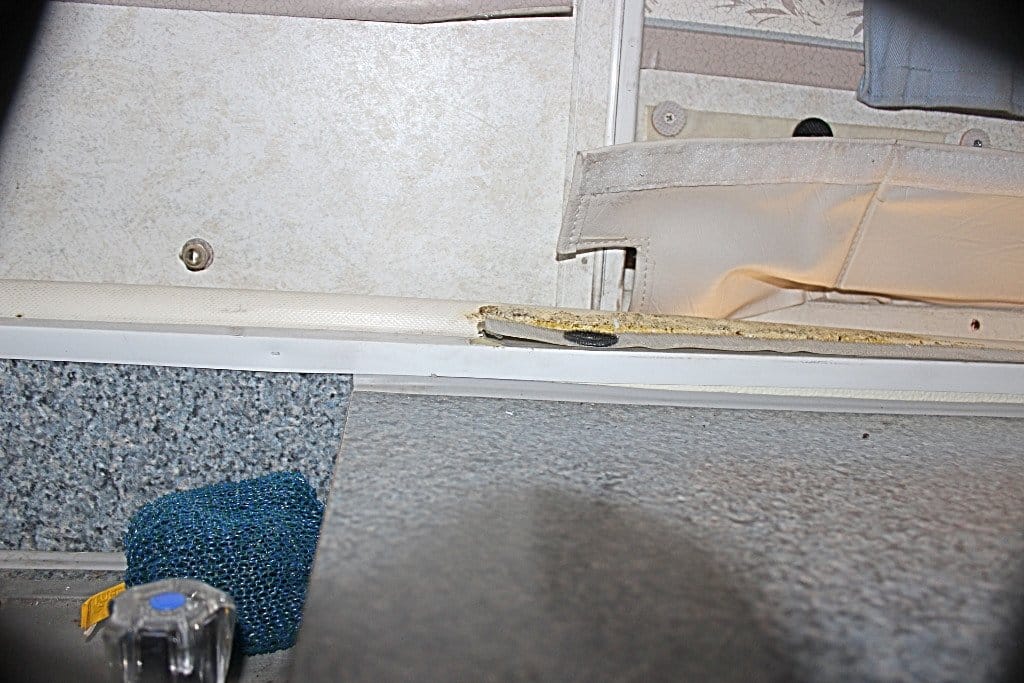
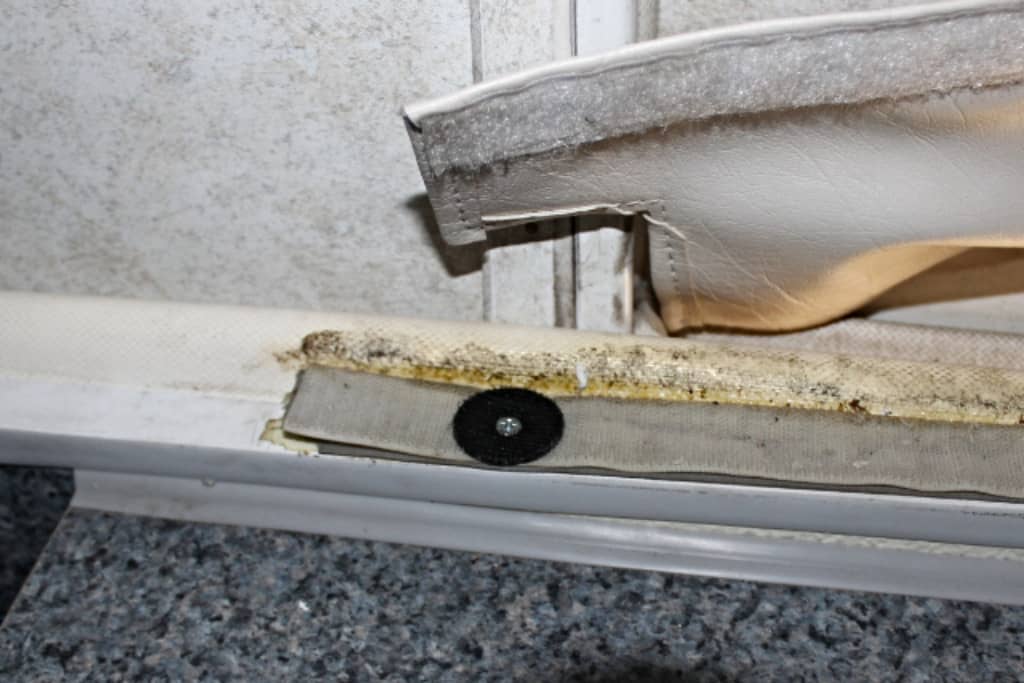
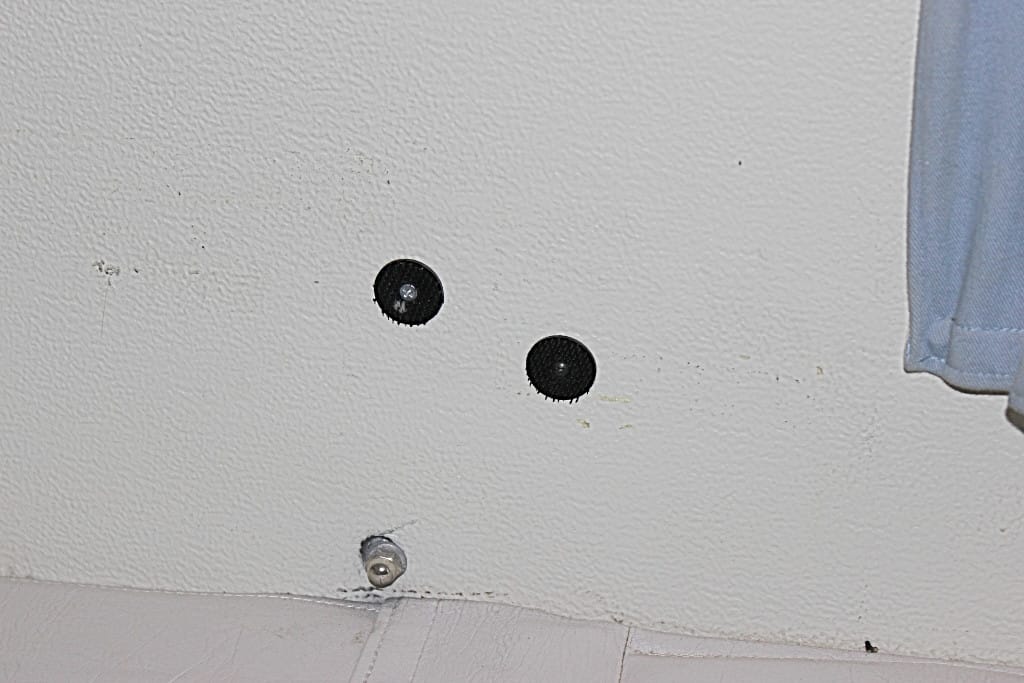
When you inter my trailer, one thing you will notice is these round black (and some white) dots on the wall. These are Velcro fasteners, namely the “hook” side (not the side that feels like carpet). Another problem I have had with my Trailmanor is the Velcro strips along and near the top edge of the lower shell walls, which after time begins to pull up and off, especially near the ends of the Velcro strips (image 1579). These Velcro strips are there to secure the weather flaps on the top shell to the bottom shell and are essential to sealing up the trailer when opened (image 1580). The ones you see screwed onto the wall are for securing these same weather flaps when folded up onto the top shell for storage and to keep them out of the way when one wishes to close down the trailer for travel (image 1581). If the Velcro pulls up (and eventually it will over time and usage), you can’t seal up your Trailmanor or store the flaps properly (which has the potential of ruining the flaps so they no longer work efficiently….we know thru experience).
I don’t know if Trailmanor has corrected this oversite (if not they should) on their newer models. These Velcro dots can be found on the internet. They screw down so they are much more secure than that adhesive on the back of the Velcro strips. Before I found these dots, I tried everything from super glue to that 3–M VHB tape and nothing worked. Then when I got these dots, I simply screwed them to the wall and over the Velcro strips (especially on the ends of these strips where it tends to peel away from the trailer) to hold them down better. Not one has come loose yet. Thank you Will Unruh of Colorado Springs (The Car Show) for hipping me to these!
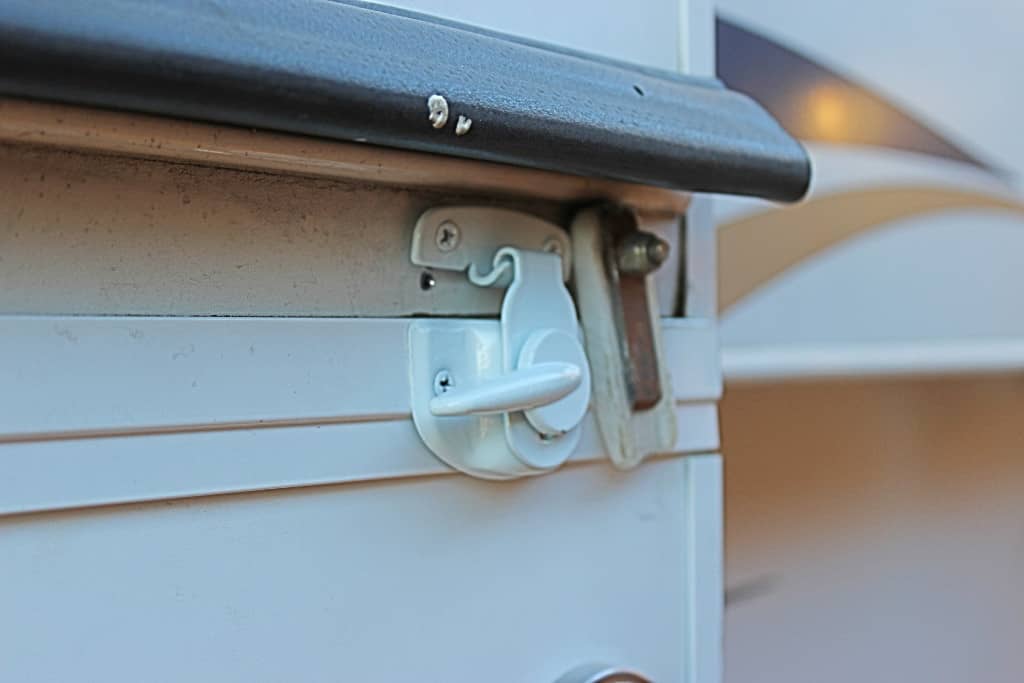
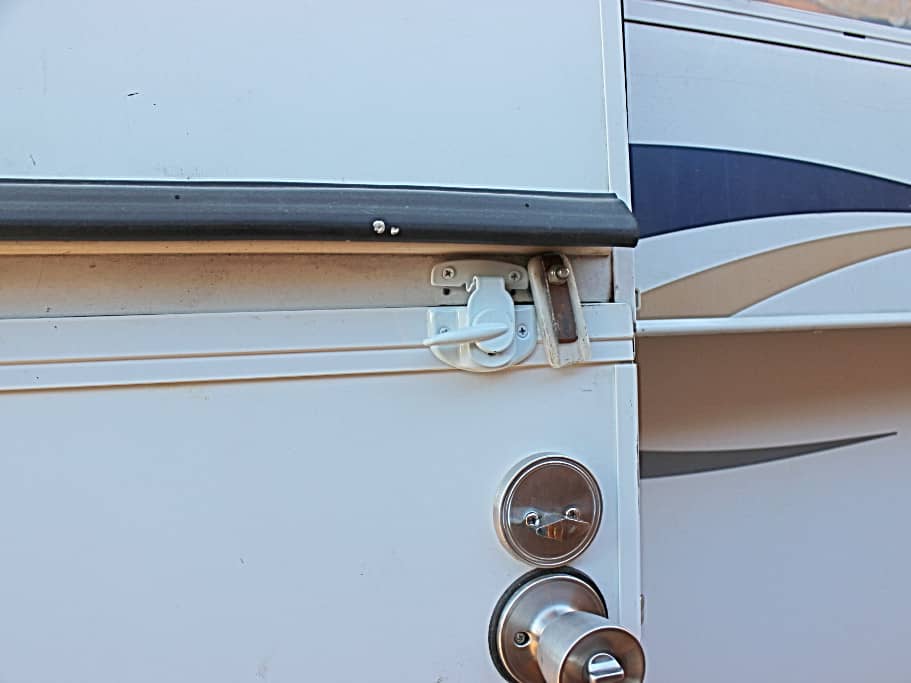
I was checking out the Trailmanor videos on youtube the other day and notice an improvement that I hadn’t considered. It had to do with the entry door. On my Trailmanor, when you connect the two halves together there is only a little plastic nylon tab that you swing down to hold the upper and lower parts of the door together. Although this worked securing the two halves together….it didn’t work well. I even tried to improve this tab by placing a steel piece to it to make it more secure….not much luck. My door never would lock properly with either the door knob or the dead bolt because of mean ole MR. Gravity. The door’s lower section always seemed to sag and I was always having to lift the bottom portion up to get the locks to mate with the door jamb. Then I saw the answer. It was a cam locking device like they use on windows with an upper and a lower part to lock the two together (images 1582, 1583). It took a little doing with several wrong holes drilled in the door, and some washers placed behind the top latch catch on the top portion of the entry door. I finally got it aligned and it works like a champ. Now the door knob locks into the jamb just by swinging it shut and the dead bolt goes in to the strike plate with complete ease….just like it should….Thank you Trailmanor!
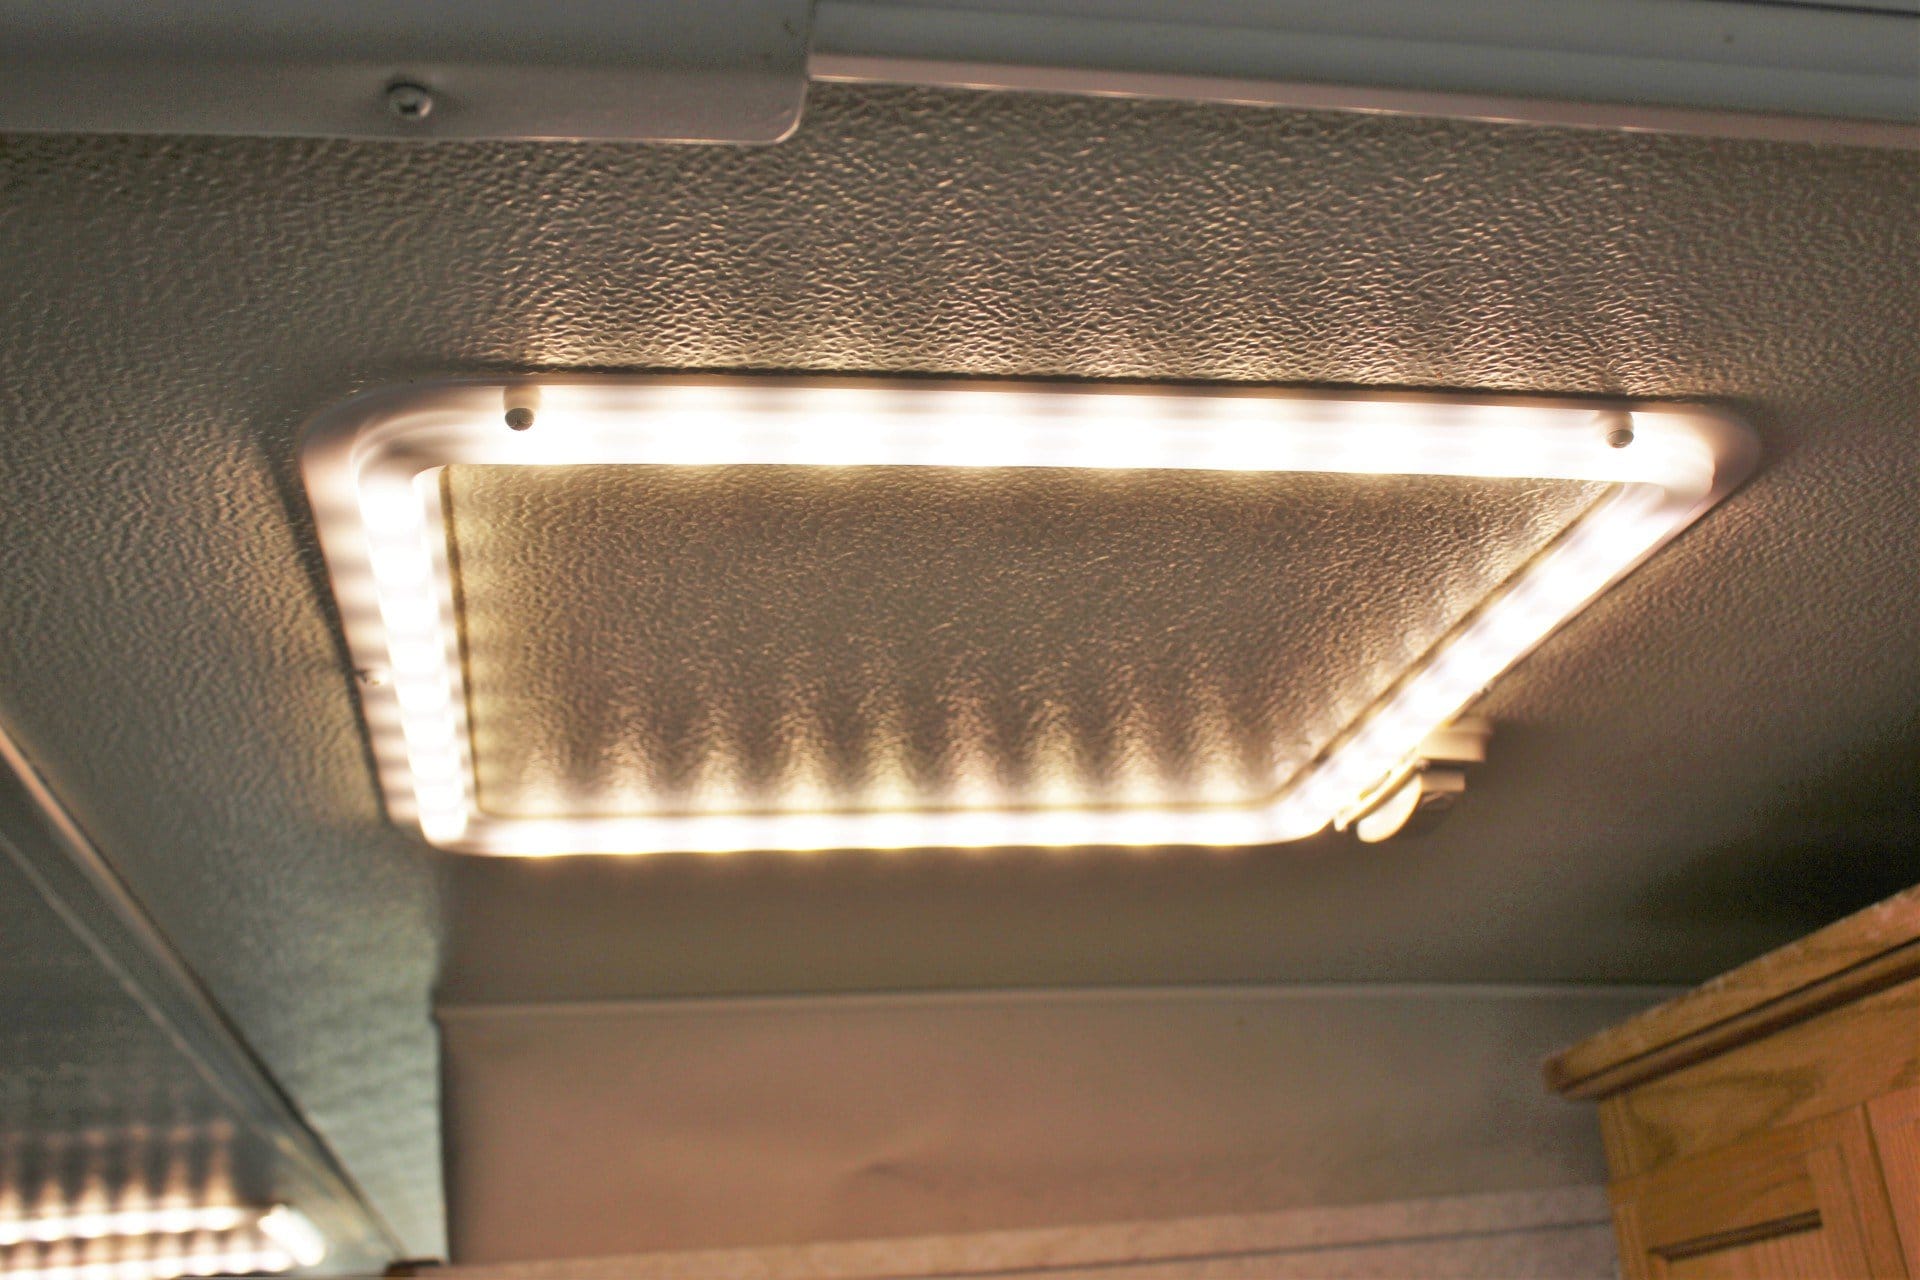
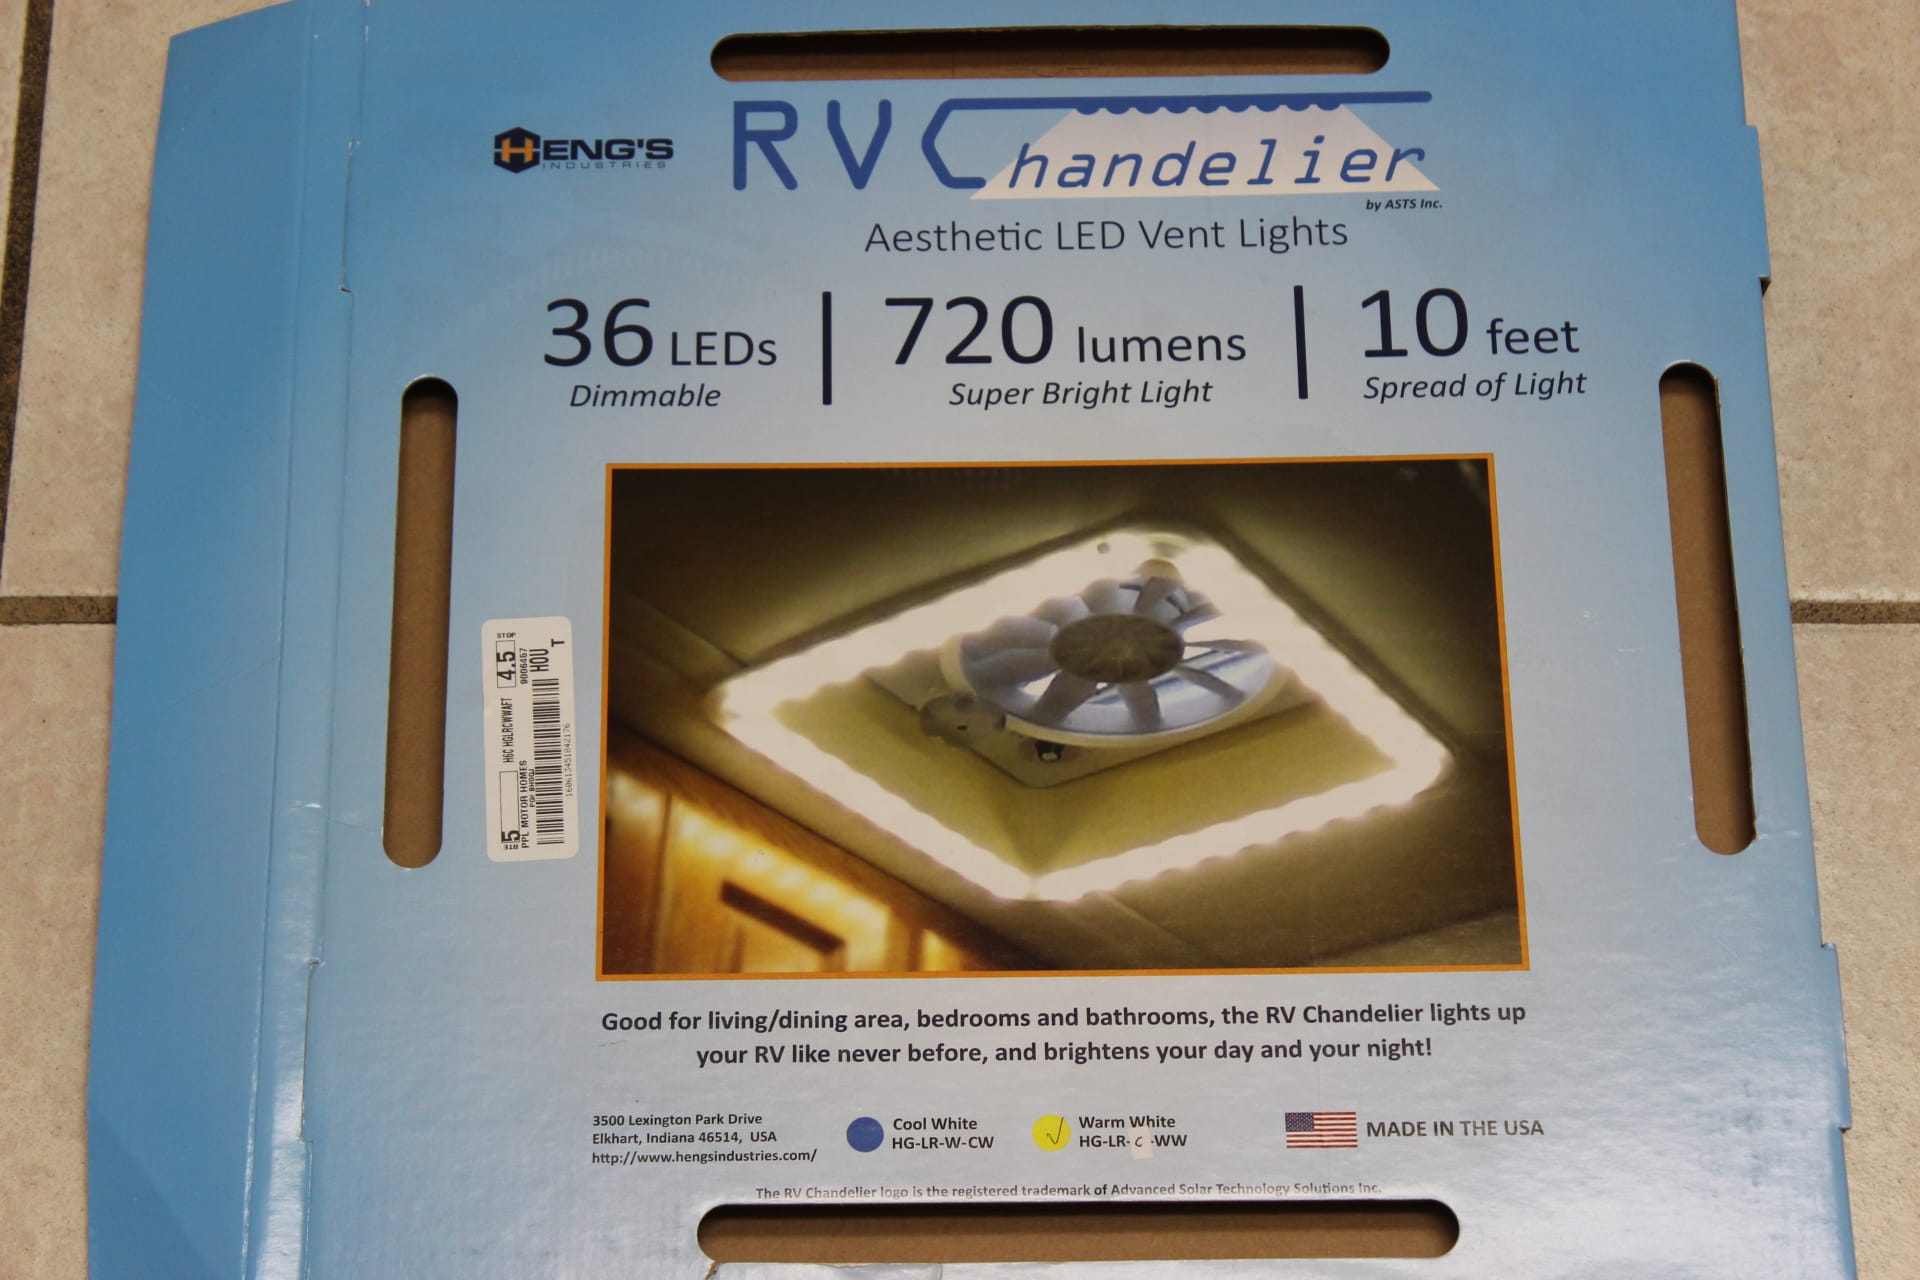
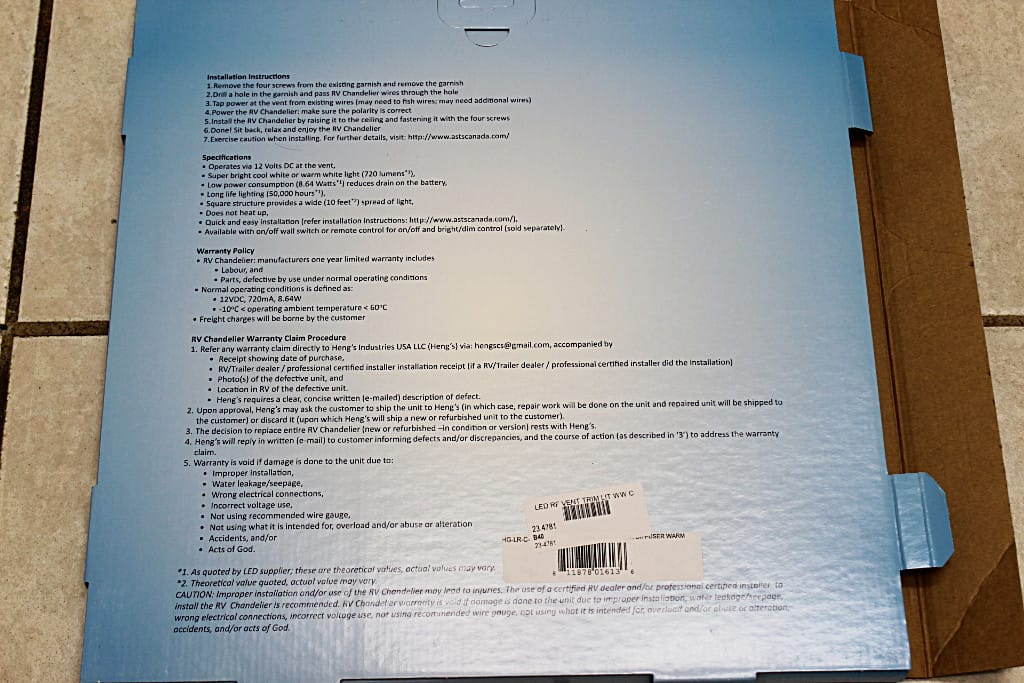
I have replaced the most of the old style single bulb light fixtures with a product made by Hengs Industries called the “RV Chandelier” ( images 1984, 1983….
http://www.pplmotorhomes.com/parts/rv-lights/chandelier-warm-led-white-diffuser.htm ) which is nothing more than a flat square ring filled with 9 LEDs on each side that is made to go around the popup vents. However they can be mounted on any flat surface. They come in 4 different models, two different diffusers (clear and white) and two different LED light spectrums (warm white my choice and cool white). I ordered two of these warm white models from Camping World, and when they came they had NO switches. Then I found out, at PPL Motorhomes they had these in clear (which is what I would have wanted had I have known). So I called up Camping World and told them about this product that had no switch. What was I suppose to do…twist the wires together every time I wanted to tI have replaced the most of the old style single bulb light fixtures with a product made by Hengs Industries called the “RV Chandelier” ( images 1984, 1983….
http://www.pplmotorhomes.com/parts/rv-lights/chandelier-warm-led-white-diffuser.htm ) which is nothing more than a flat square ring filled with 9 LEDs on each side that is made to go around the popup vents. However they can be mounted on any flat surface. They come in 4 different models, two different diffusers (clear and white) and two different LED light spectrums (warm white my choice and cool white). I ordered two of these warm white models from Camping World, and when they came they had NO switches. Then I found out, at PPL Motorhomes they had these in clear (which is what I would have wanted had I have known). So I called up Camping World and told them about this product that had no switch. What was I suppose to do…twist the wires together every time I wanted to urn them on and untwist the wires when I wanted it off? Hey I like to dance, but I never liked the twist! So I was referred to the Customer Service department at Camping World and told them I wanted to return these and why and they told me that they would give me a full refund and that I should just keep them! YOWZA! Two free RV Chandeliers to play with! I guess the return shipping cost was more than they were worth to them. So then I ordered from PPL Motorhomes, two of the warm white clear diffuser models and they made sure I got switches with these (and I did get switches).
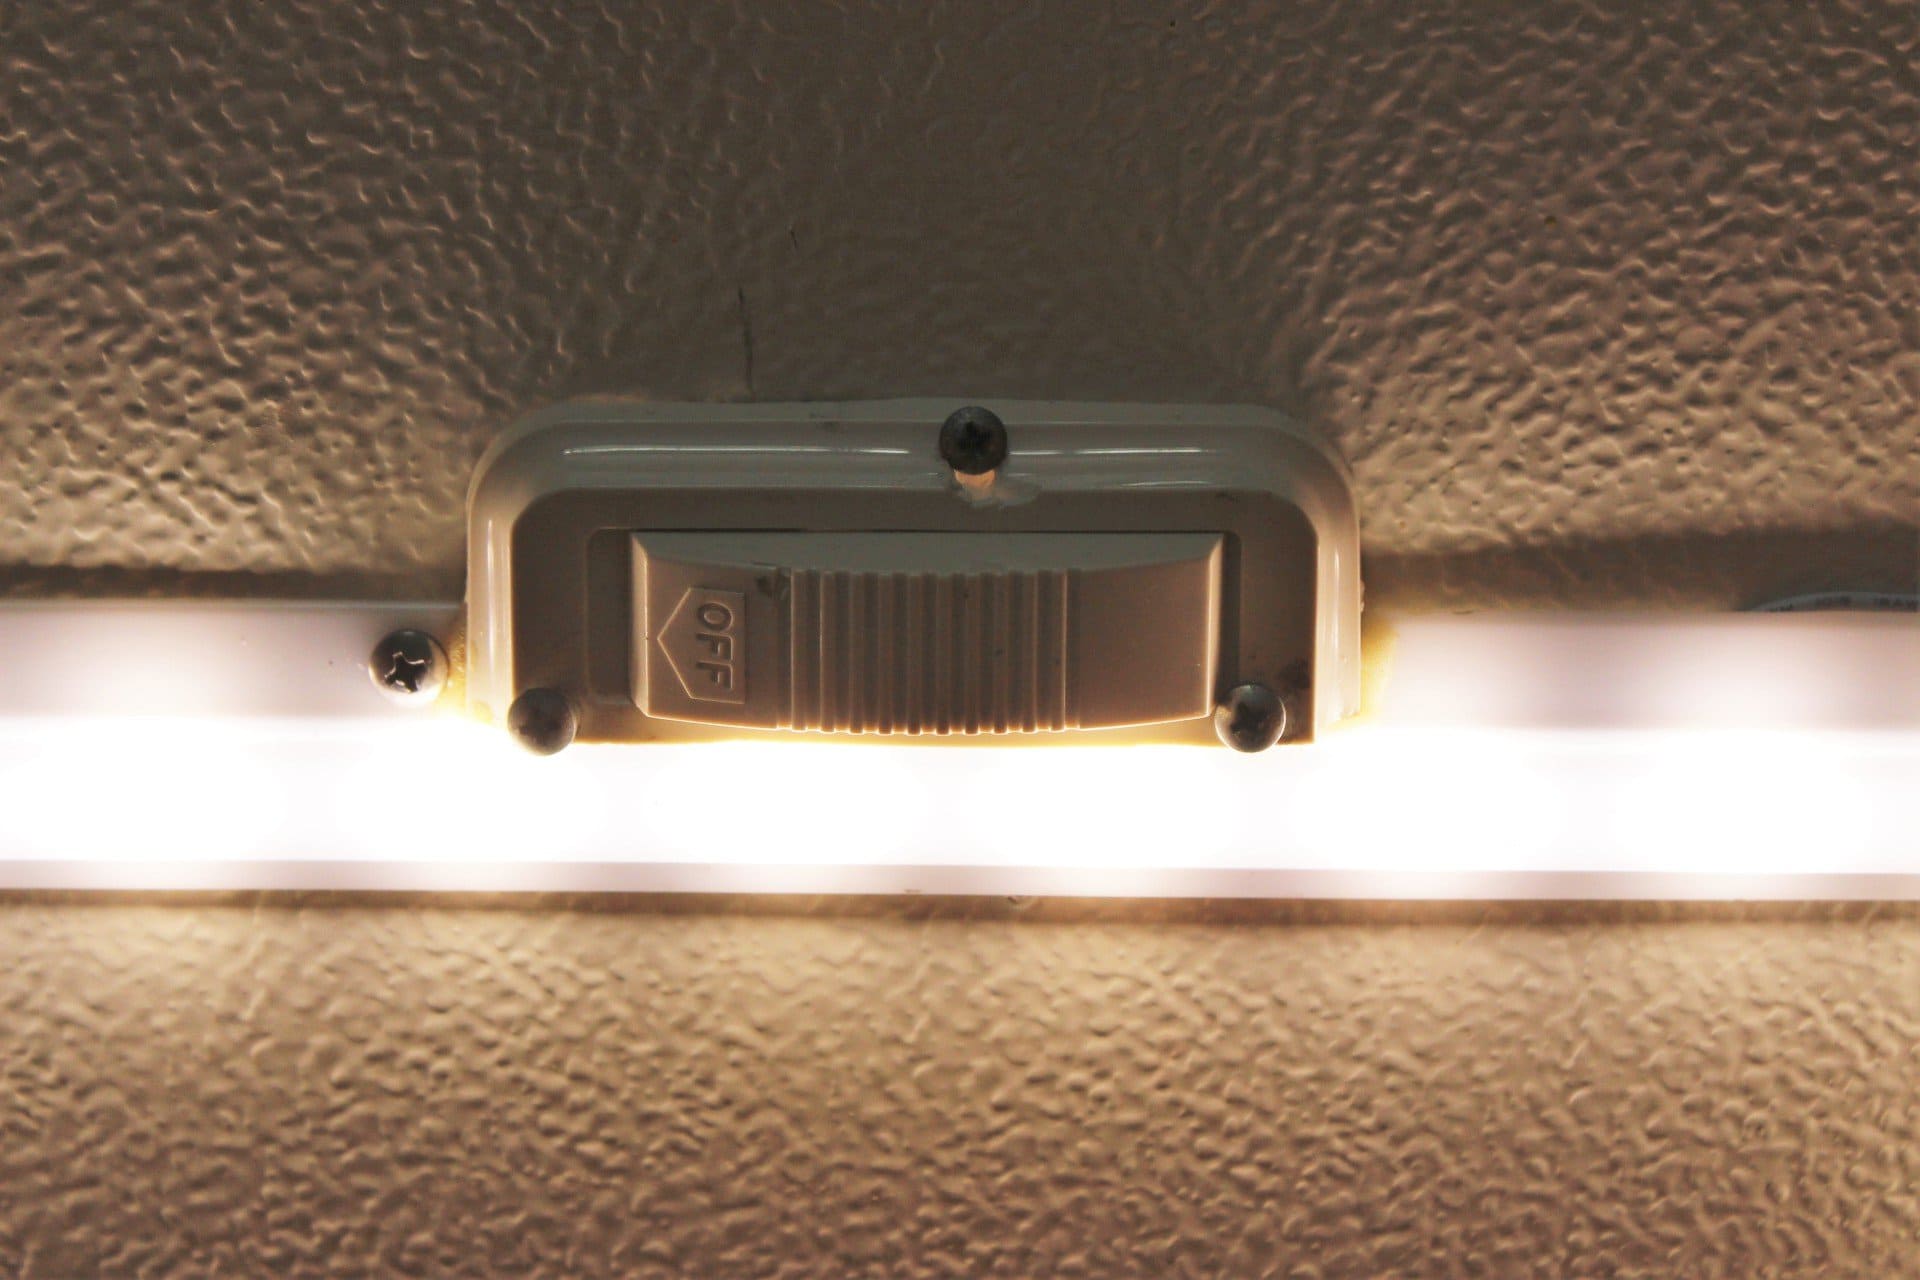
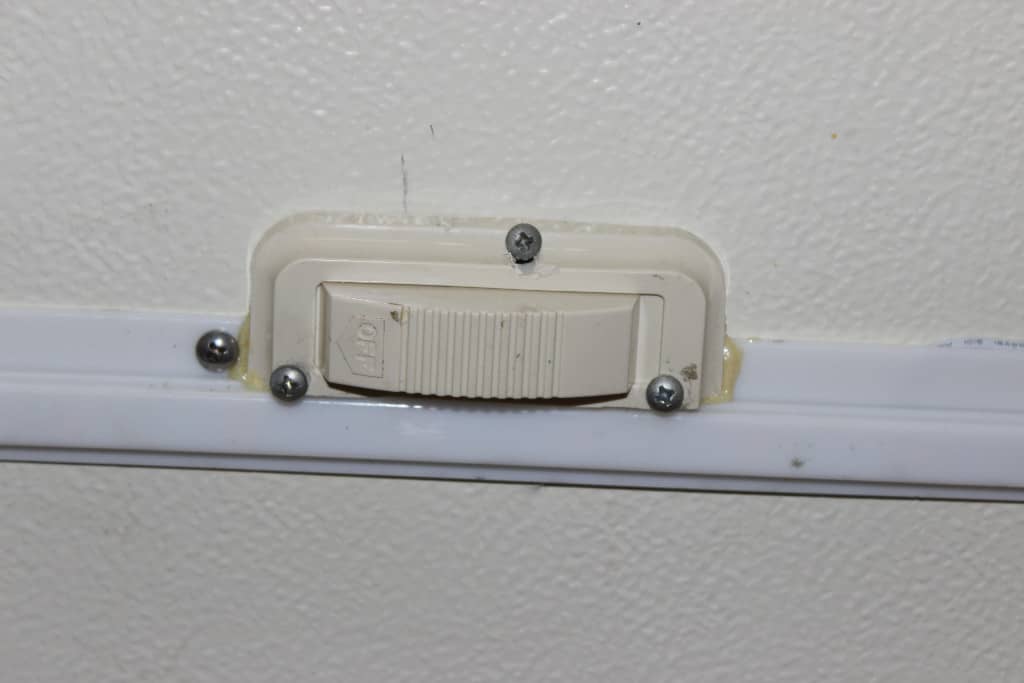
Now what to do about the ones with no switches….So what I did was take down the old light fixtures and put them on my band saw and sawed off the switch from the fixtures. Then I glued and screwed them onto the RV Chandeliers (images 1966, 1967, 1972) and soldered new wires to the switches. These two with the white diffusers I put up over the kitchen sink (images 1965, 1970) and the other in the “hallway” between the bathroom wall and the wardrobe. Boy, what a big difference they made!
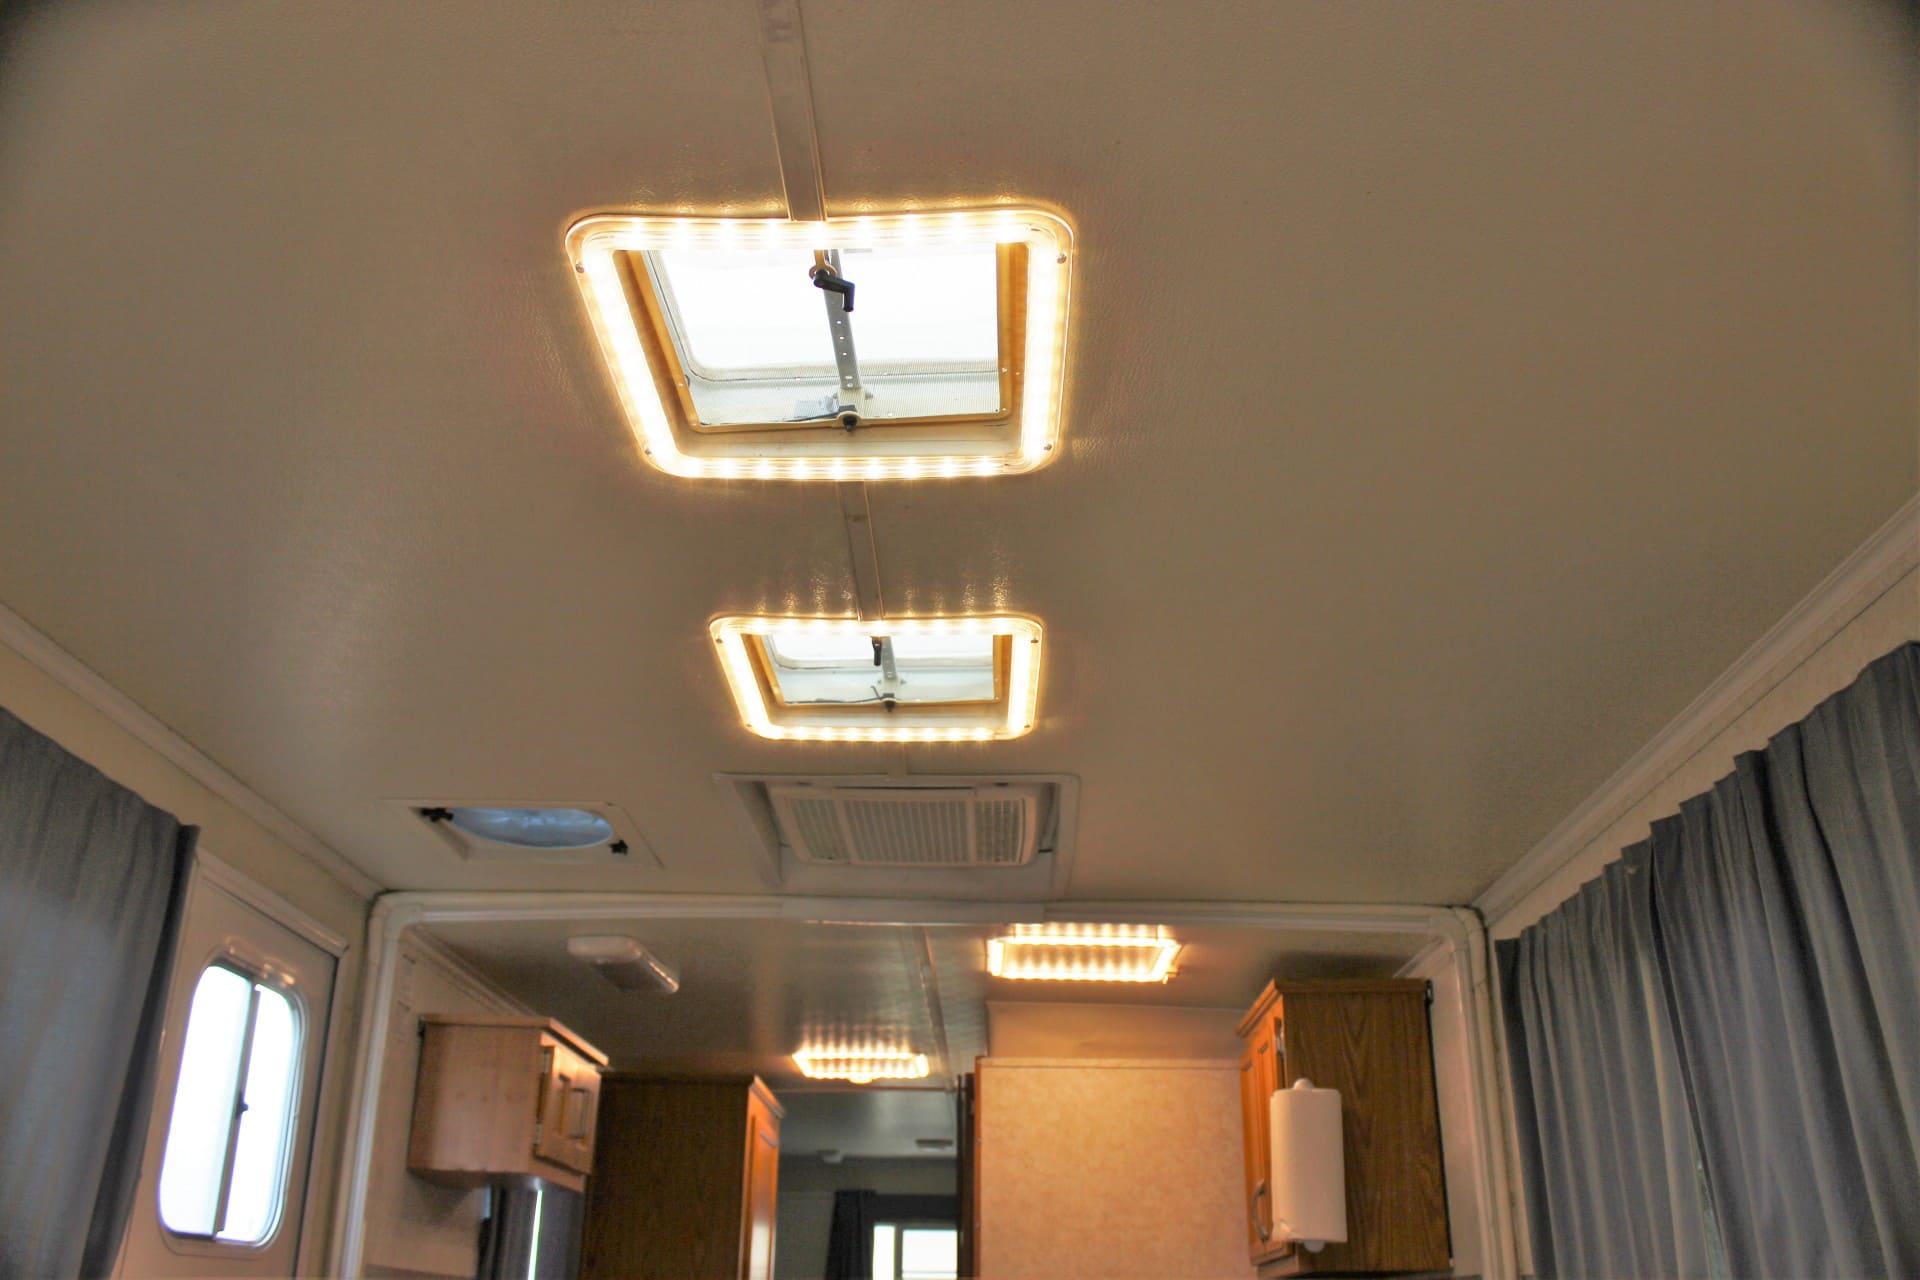
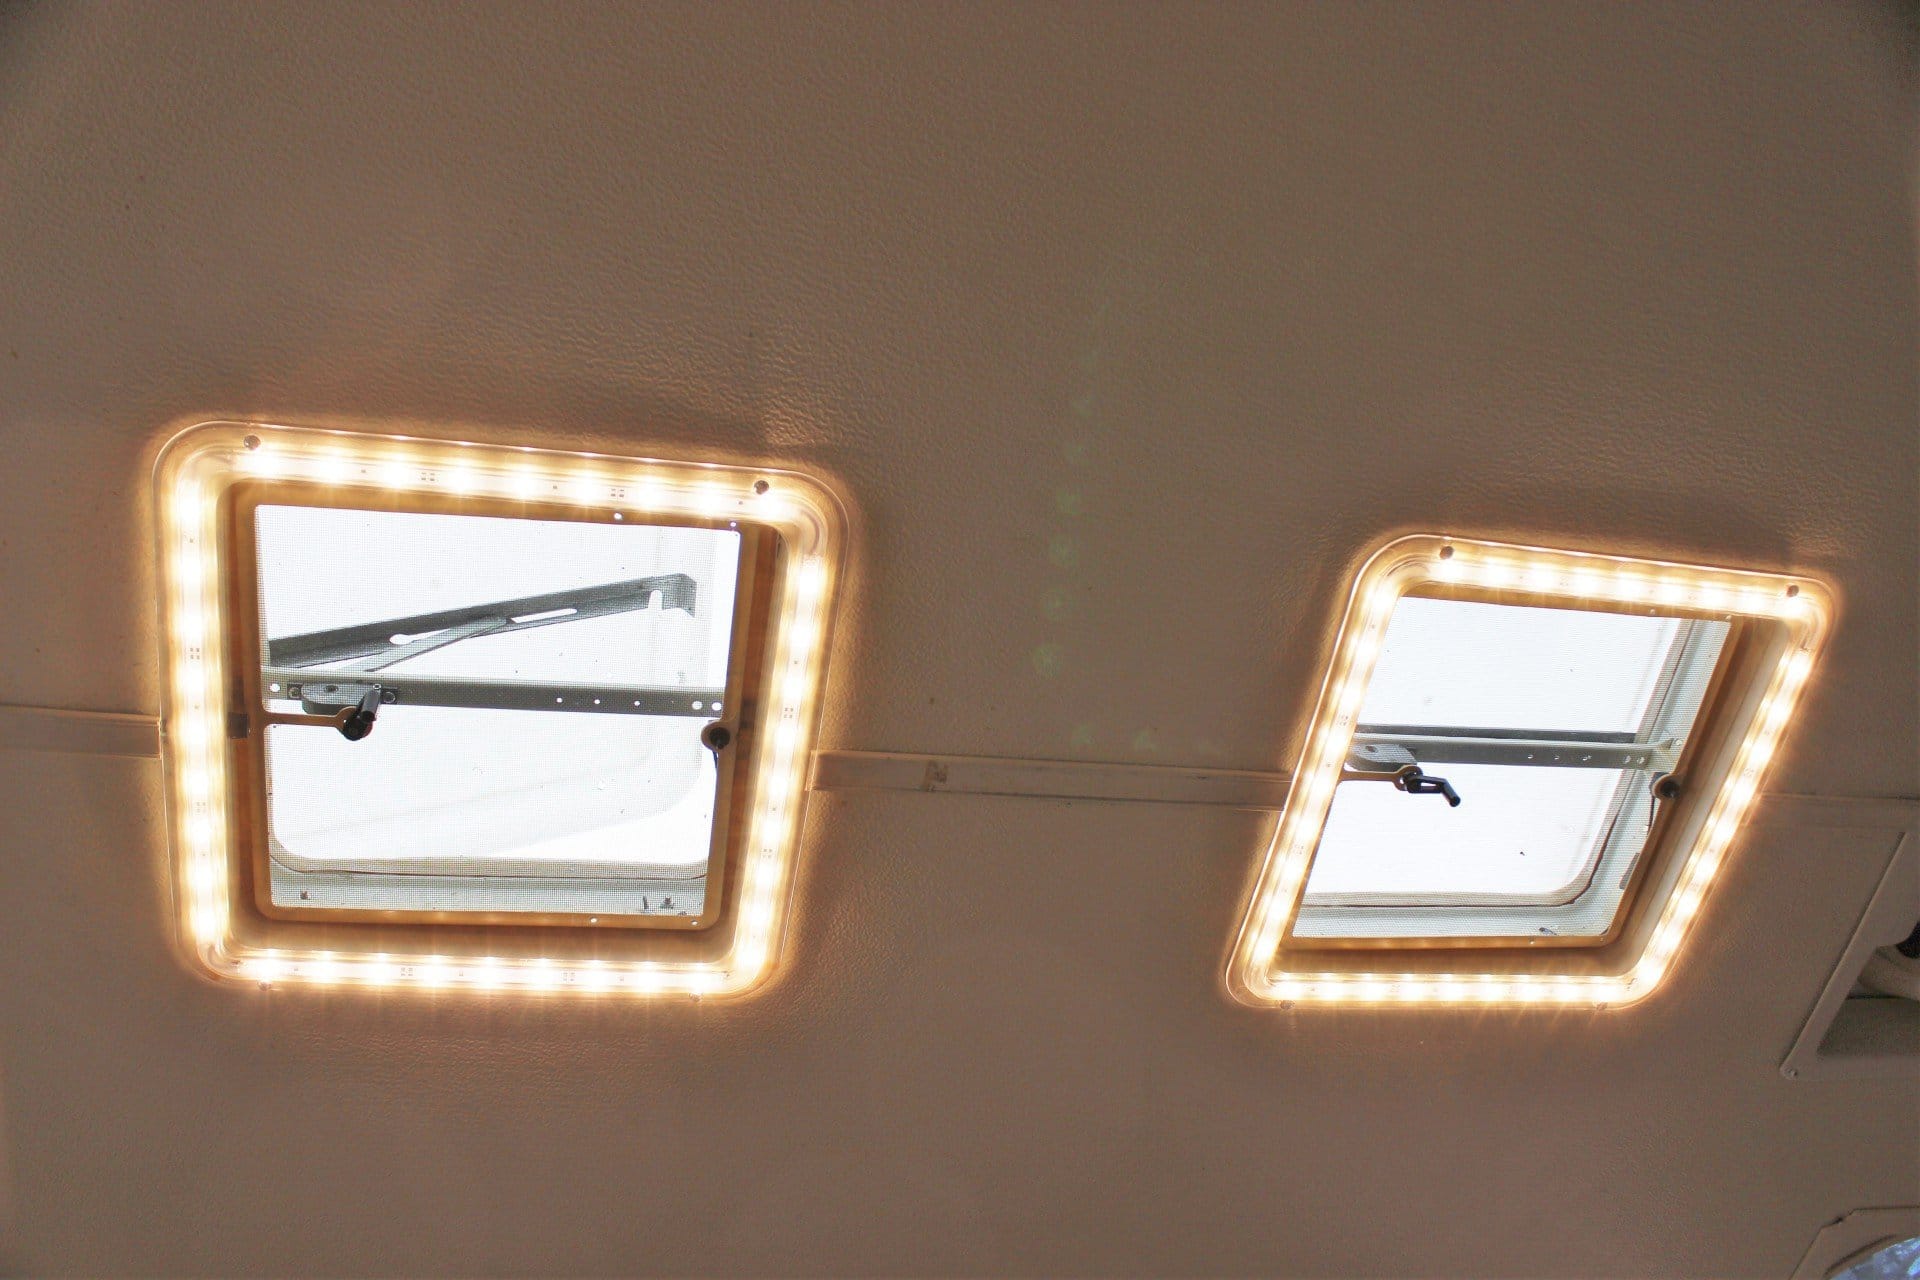
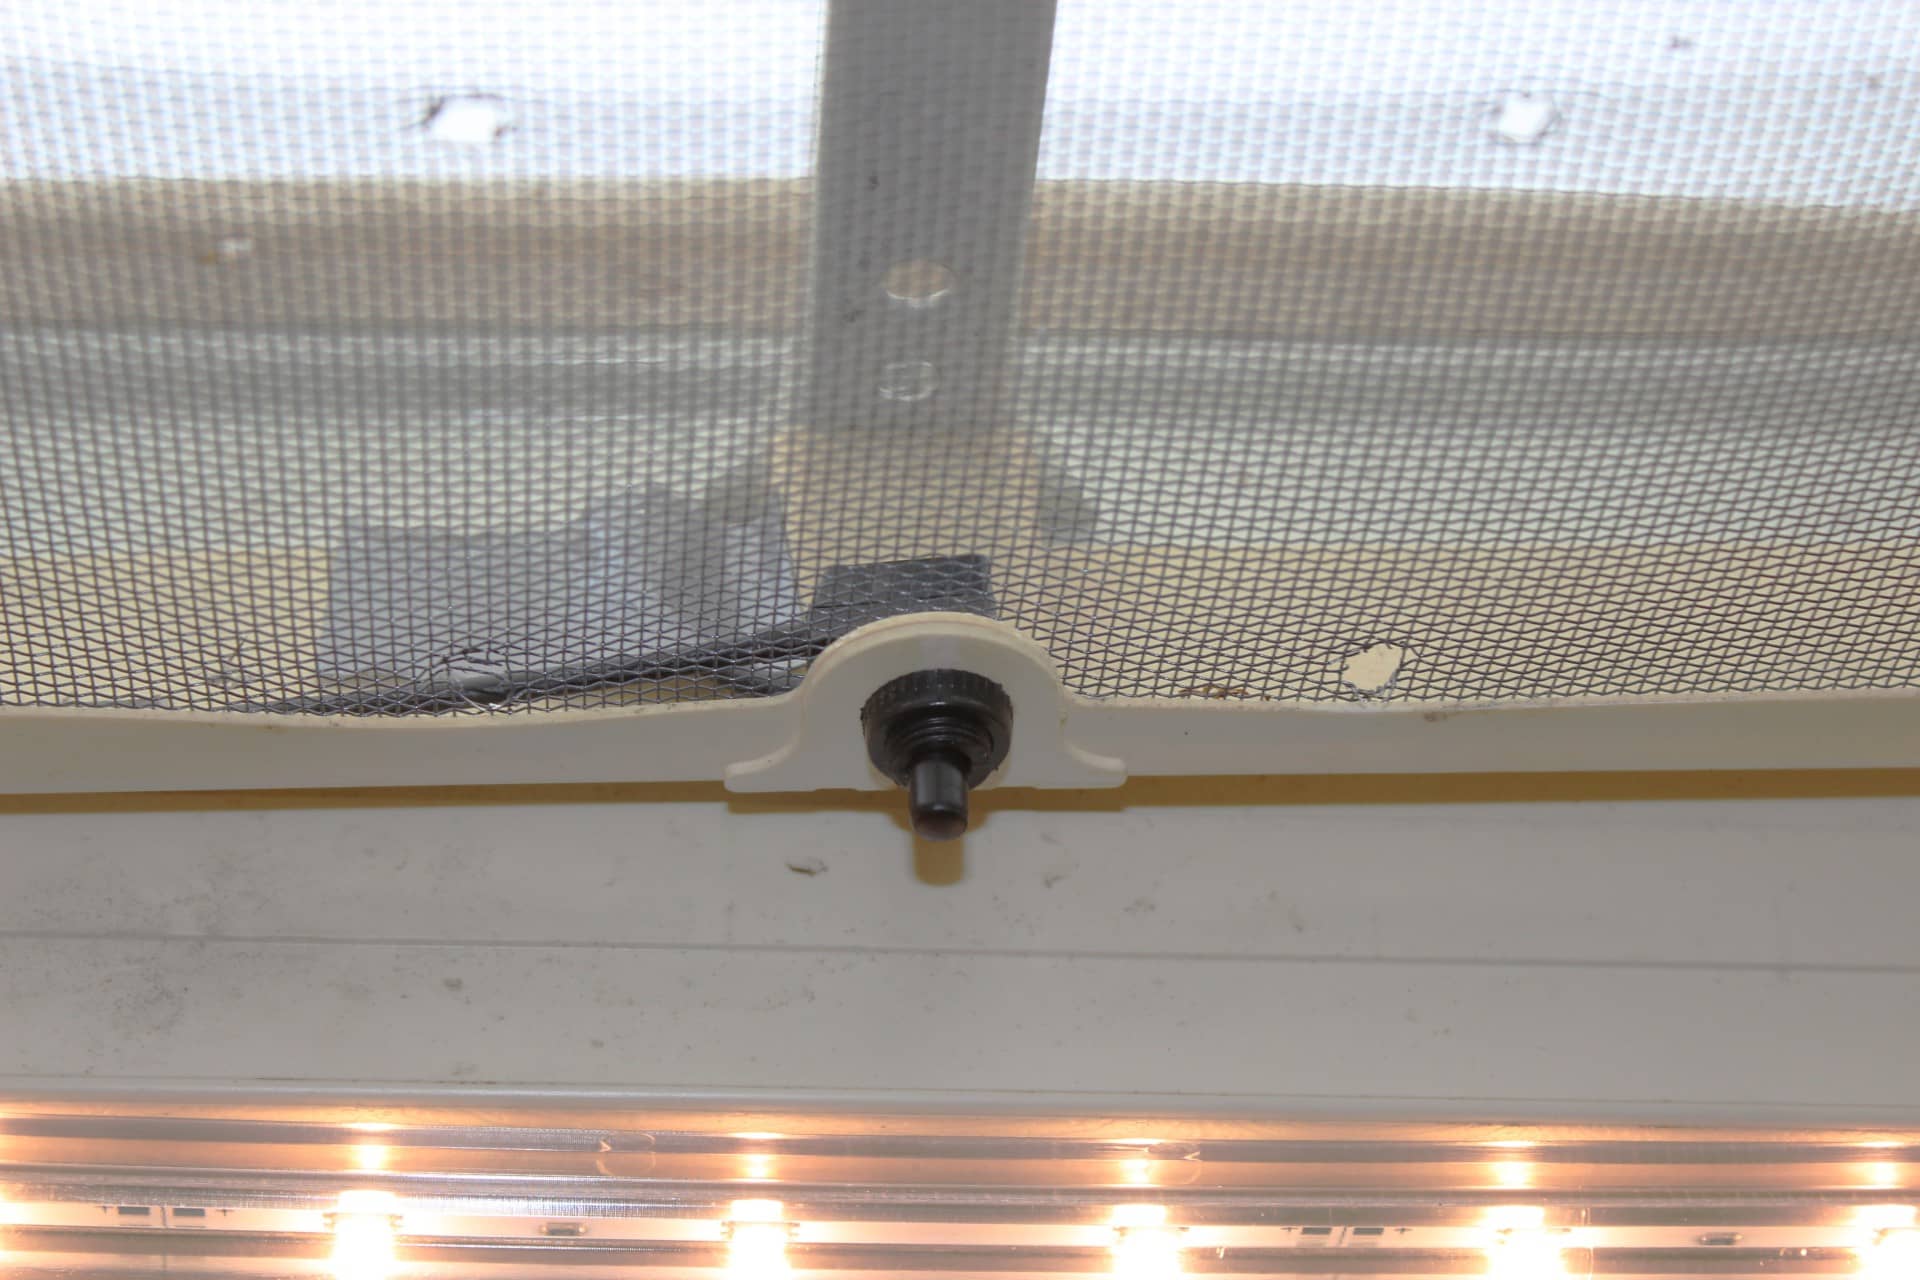
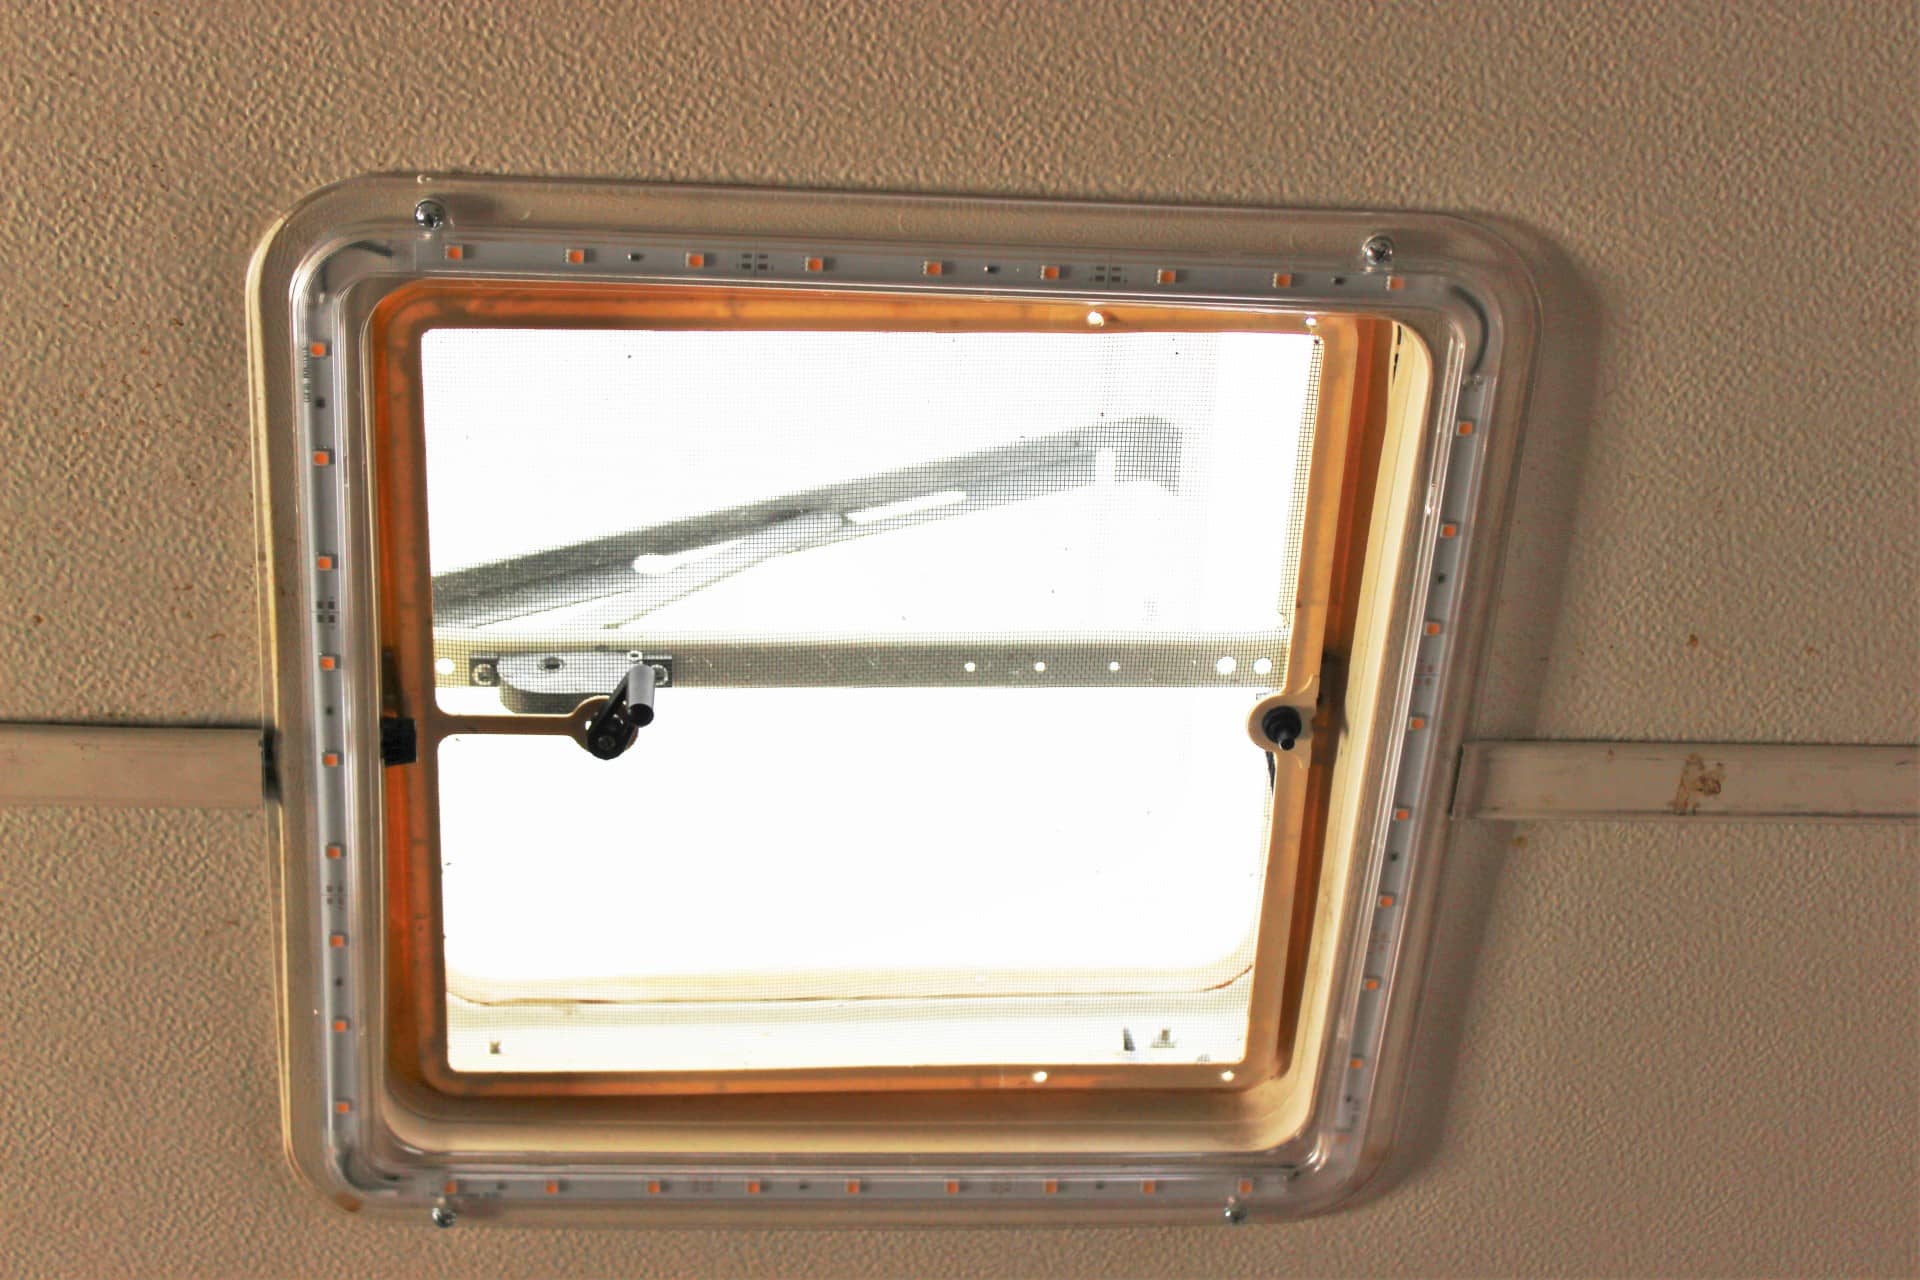
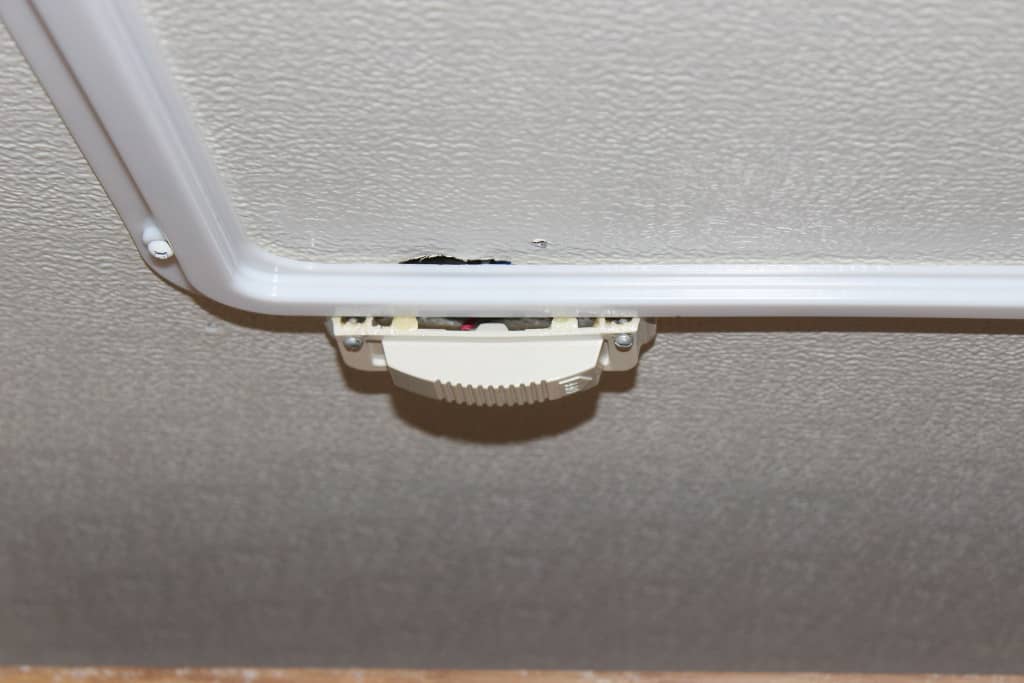
The other two with the clear diffusers (and switches) I went ahead and put them on the flashing around the popup vents (image 1961). They were easy because when I took down the old fixtures there was a molded hole in the screen where the old wires ran thru and this hole was the exact fit for the switch (image 1963). Not only that, but the screw holes lined up perfectly with the screw holes in the flashings (images 1962, 1964). So instead of using the old sheet metal screws (which, by the way, were beginning to strip out the screw holes) I installed #10 riv-nuts. That way I could just use machine screws with inside spline lock washers instead to hold everything up to the ceiling.
These really do make quite a difference and when all four are on! They light up my TM like never before (image 1960 …thanks Shane)!
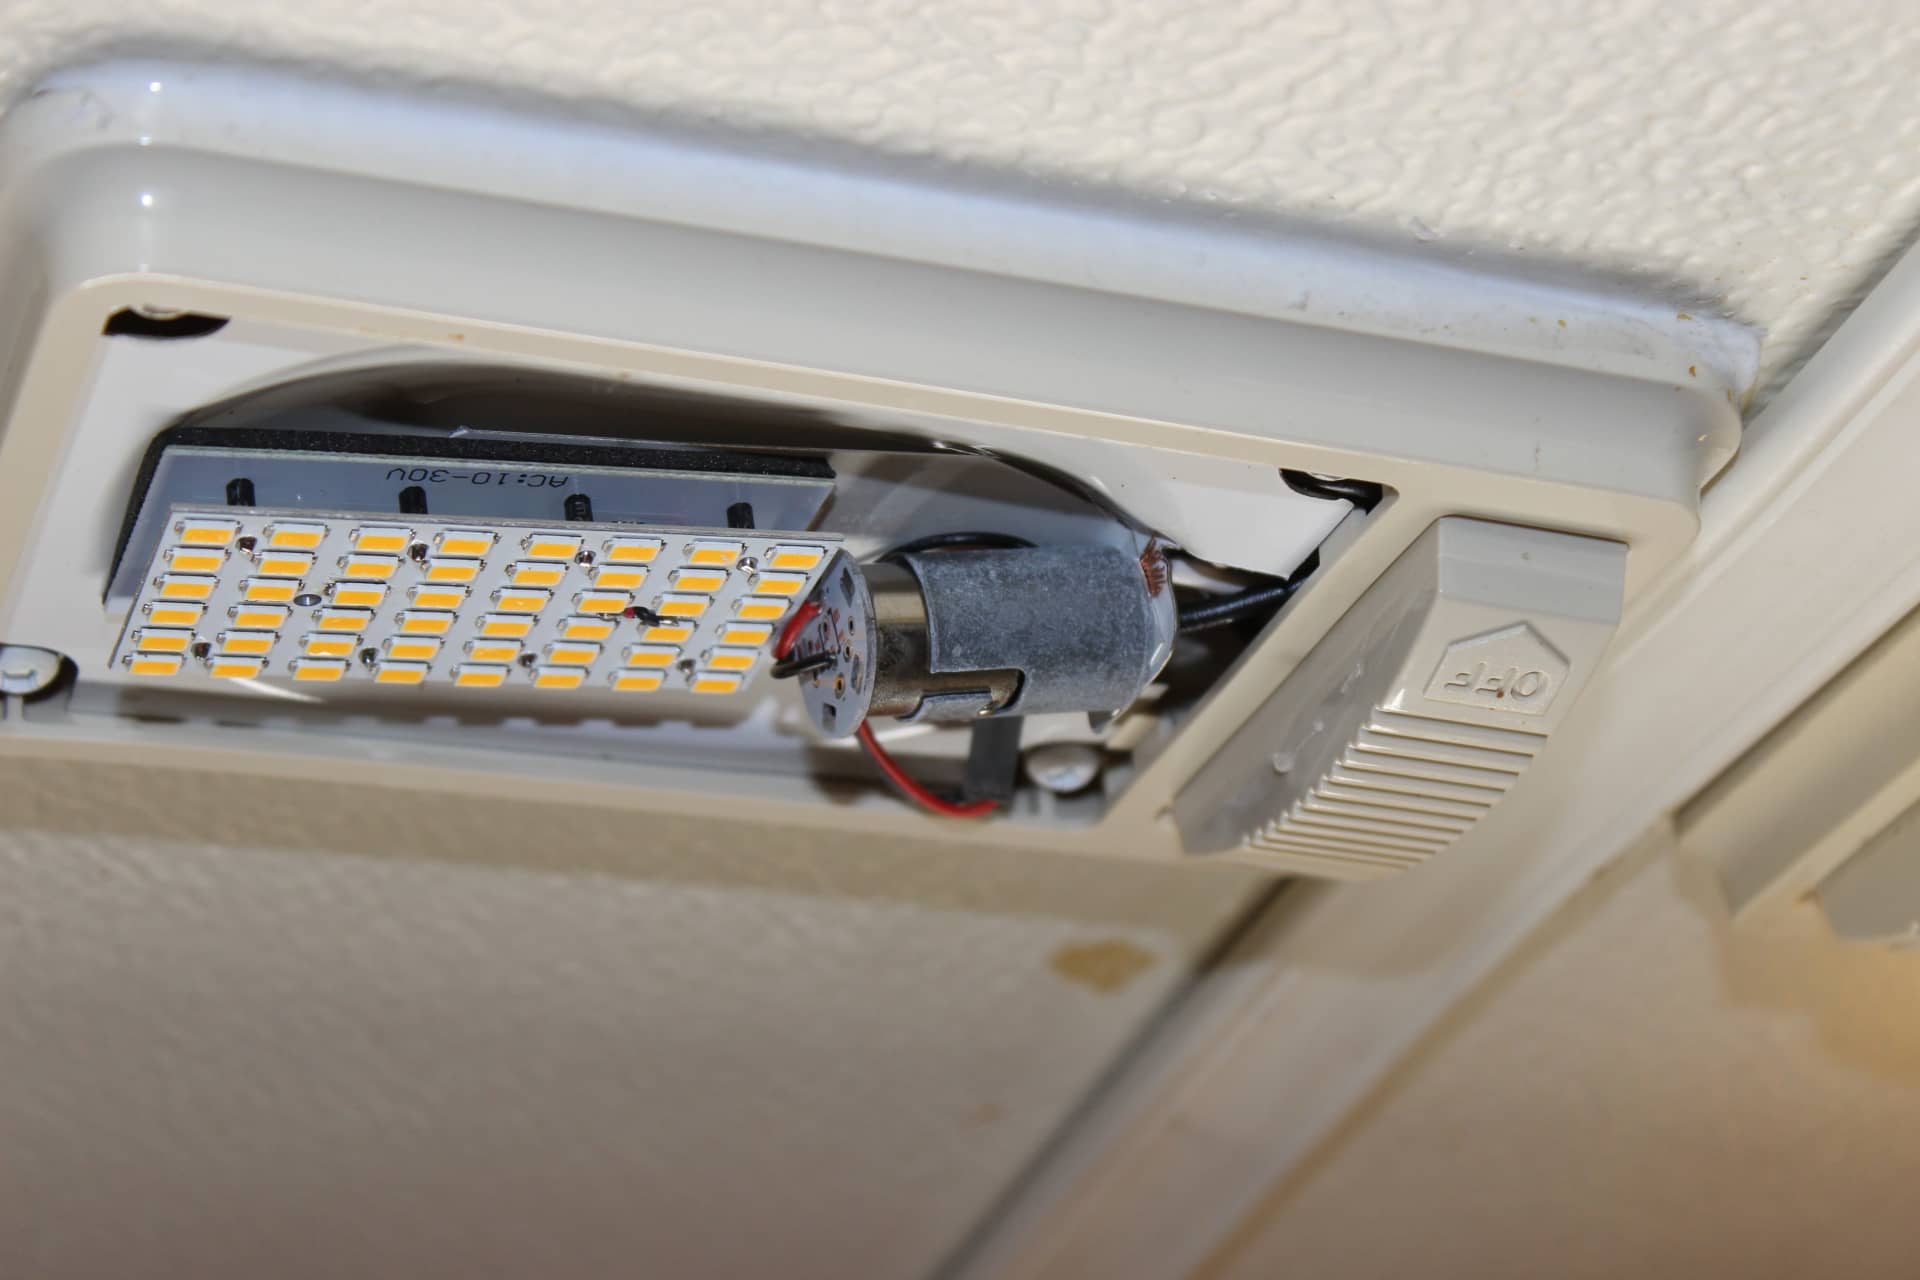
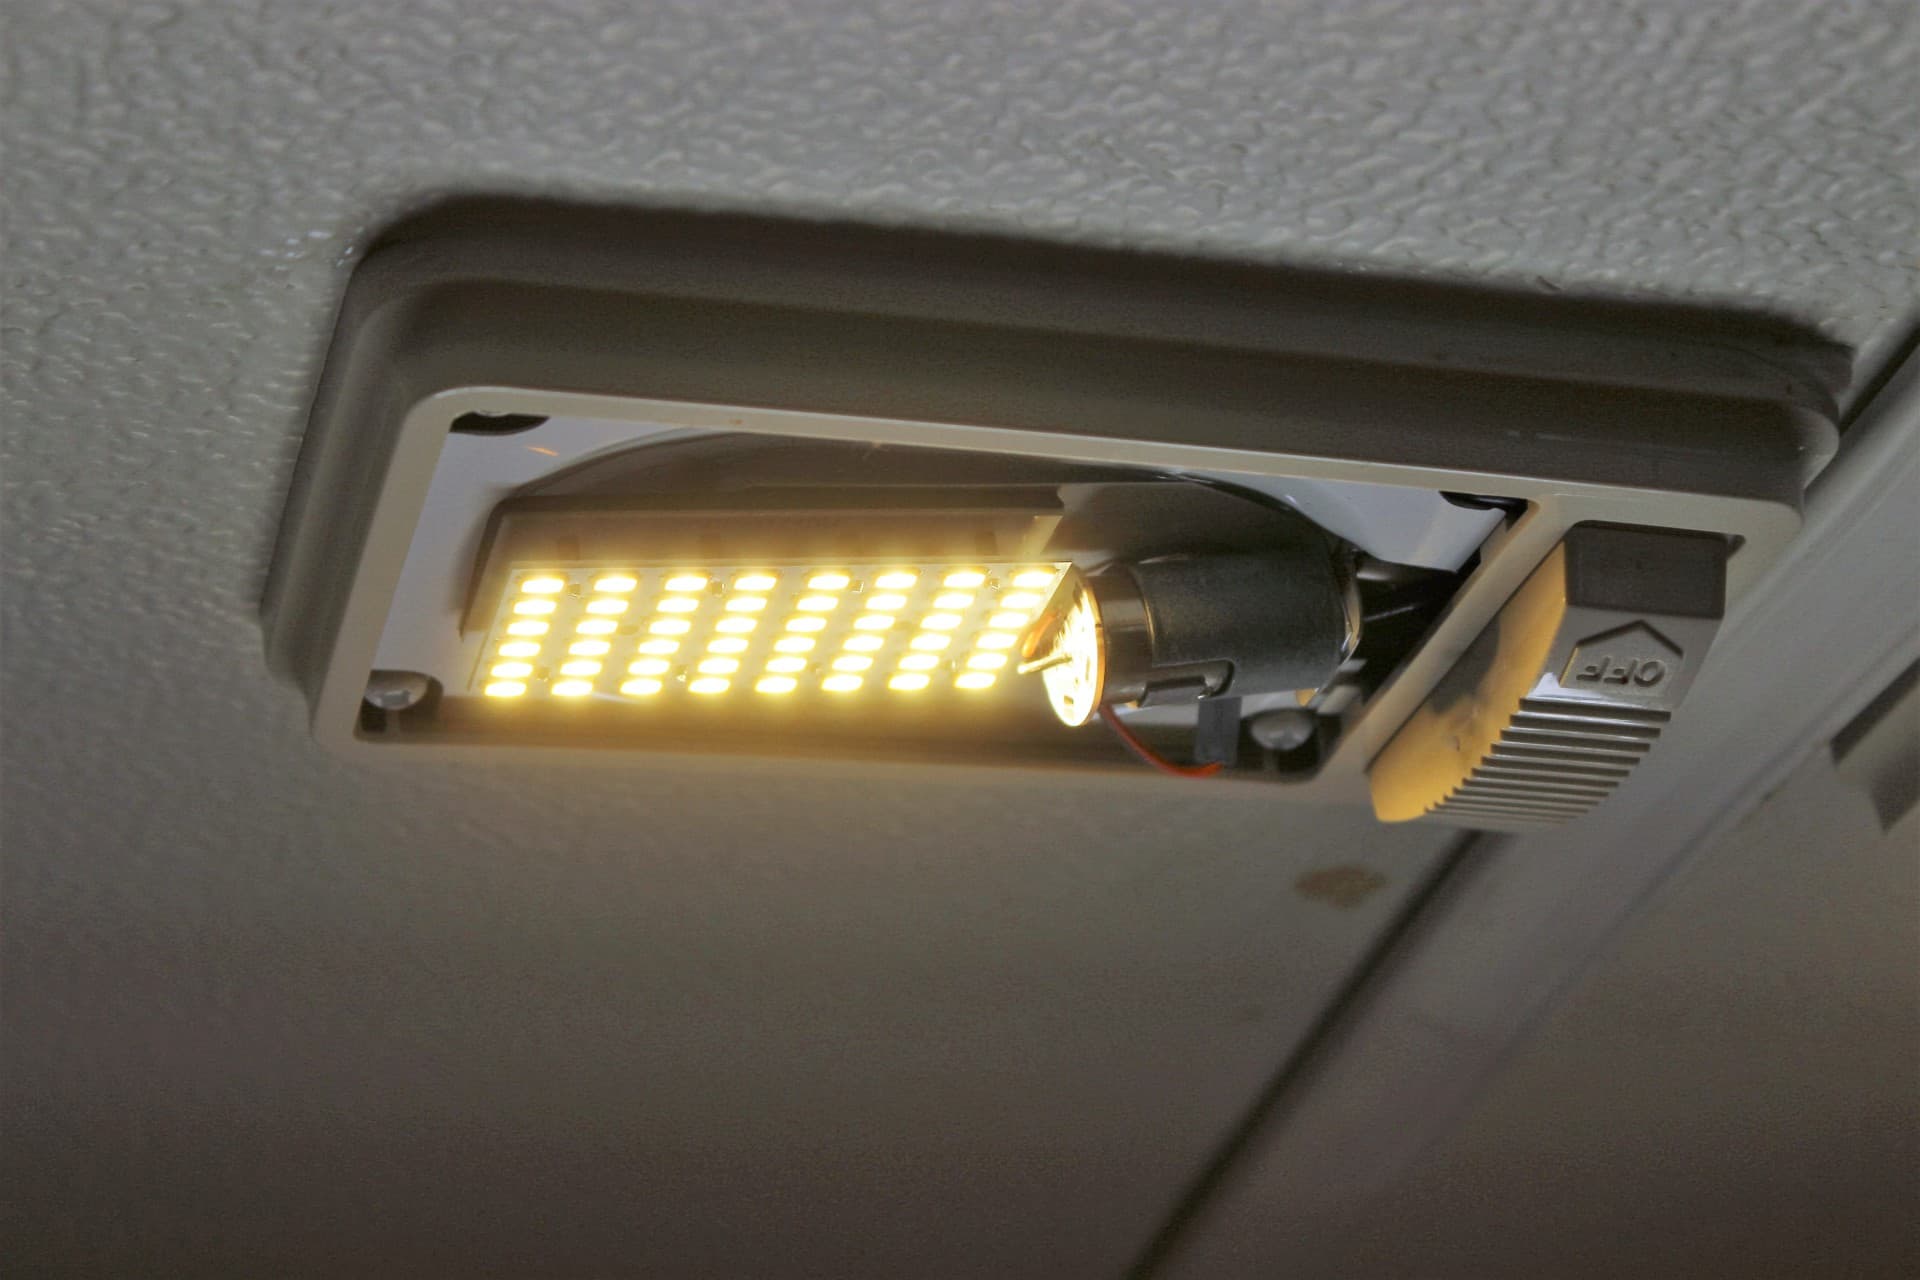
Another thing that I tried (thanks to Bruce Perens and his wonderful website) was to replace two of the led bulbs with some LED pads containing a bunch of LEDs that shine directly down where you need the light (image 1969). These just plug into the socket where the bulb went (image 1958) and the pad has some sticky tape on the back so it just attaches to the inside of the fixture ( image 1968 ) I got these from M4 Products http://www.m4products.com/alplate-48-5630-ww-warm-white-double-aluminum-plate/
I ordered the warm white and it was a little too yellow so maybe I’ll get the natural or cool white next time. But these do a great job too and I would recommend them to anyone wanting to brighten up their TM.
You know….it’s the little things in life that makes it so enjoyable.e