I like to get away from it all….it’s just that I like to take it with me too. The best time to do that is in the fall when all the kids have gone back to school and all their parents have gone back to work and the crowds have become much diminished. The only problem is….football….college football to be precise. Not that it matters so much for me but for my wife who is a total football freak! Living in Austin Texas means only one thing to her….Texas Longhorns! Heaven forbid if we were to miss seeing a game on TV, so the ready solution….Dish Satellite TV!
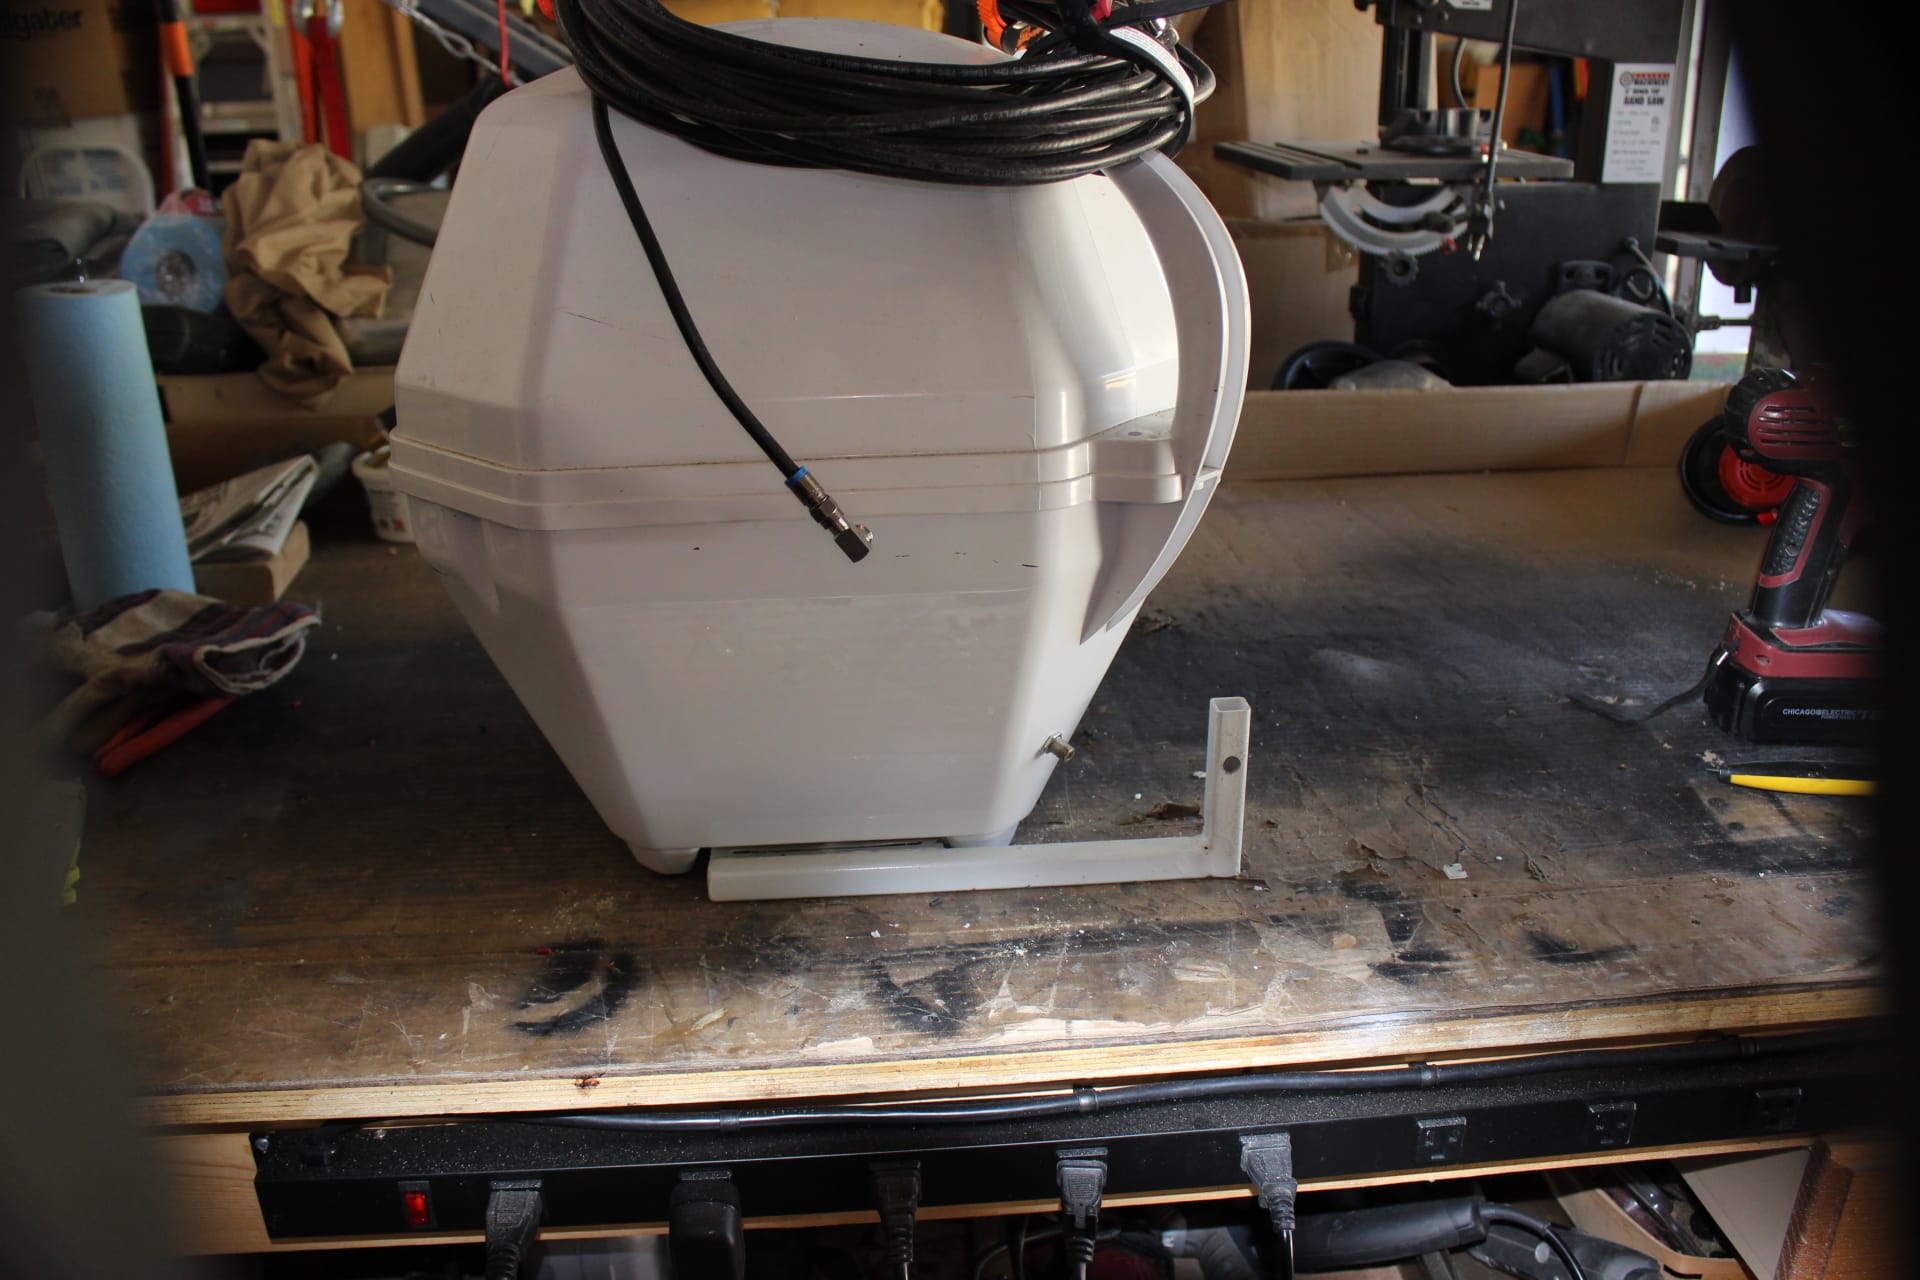
We got the Tailgater (image 1559) because it was very reasonably priced and it’s portable so you can move it around to get the right spot for good reception. It’s pretty easy to set up, even when you change location by hundreds of miles.
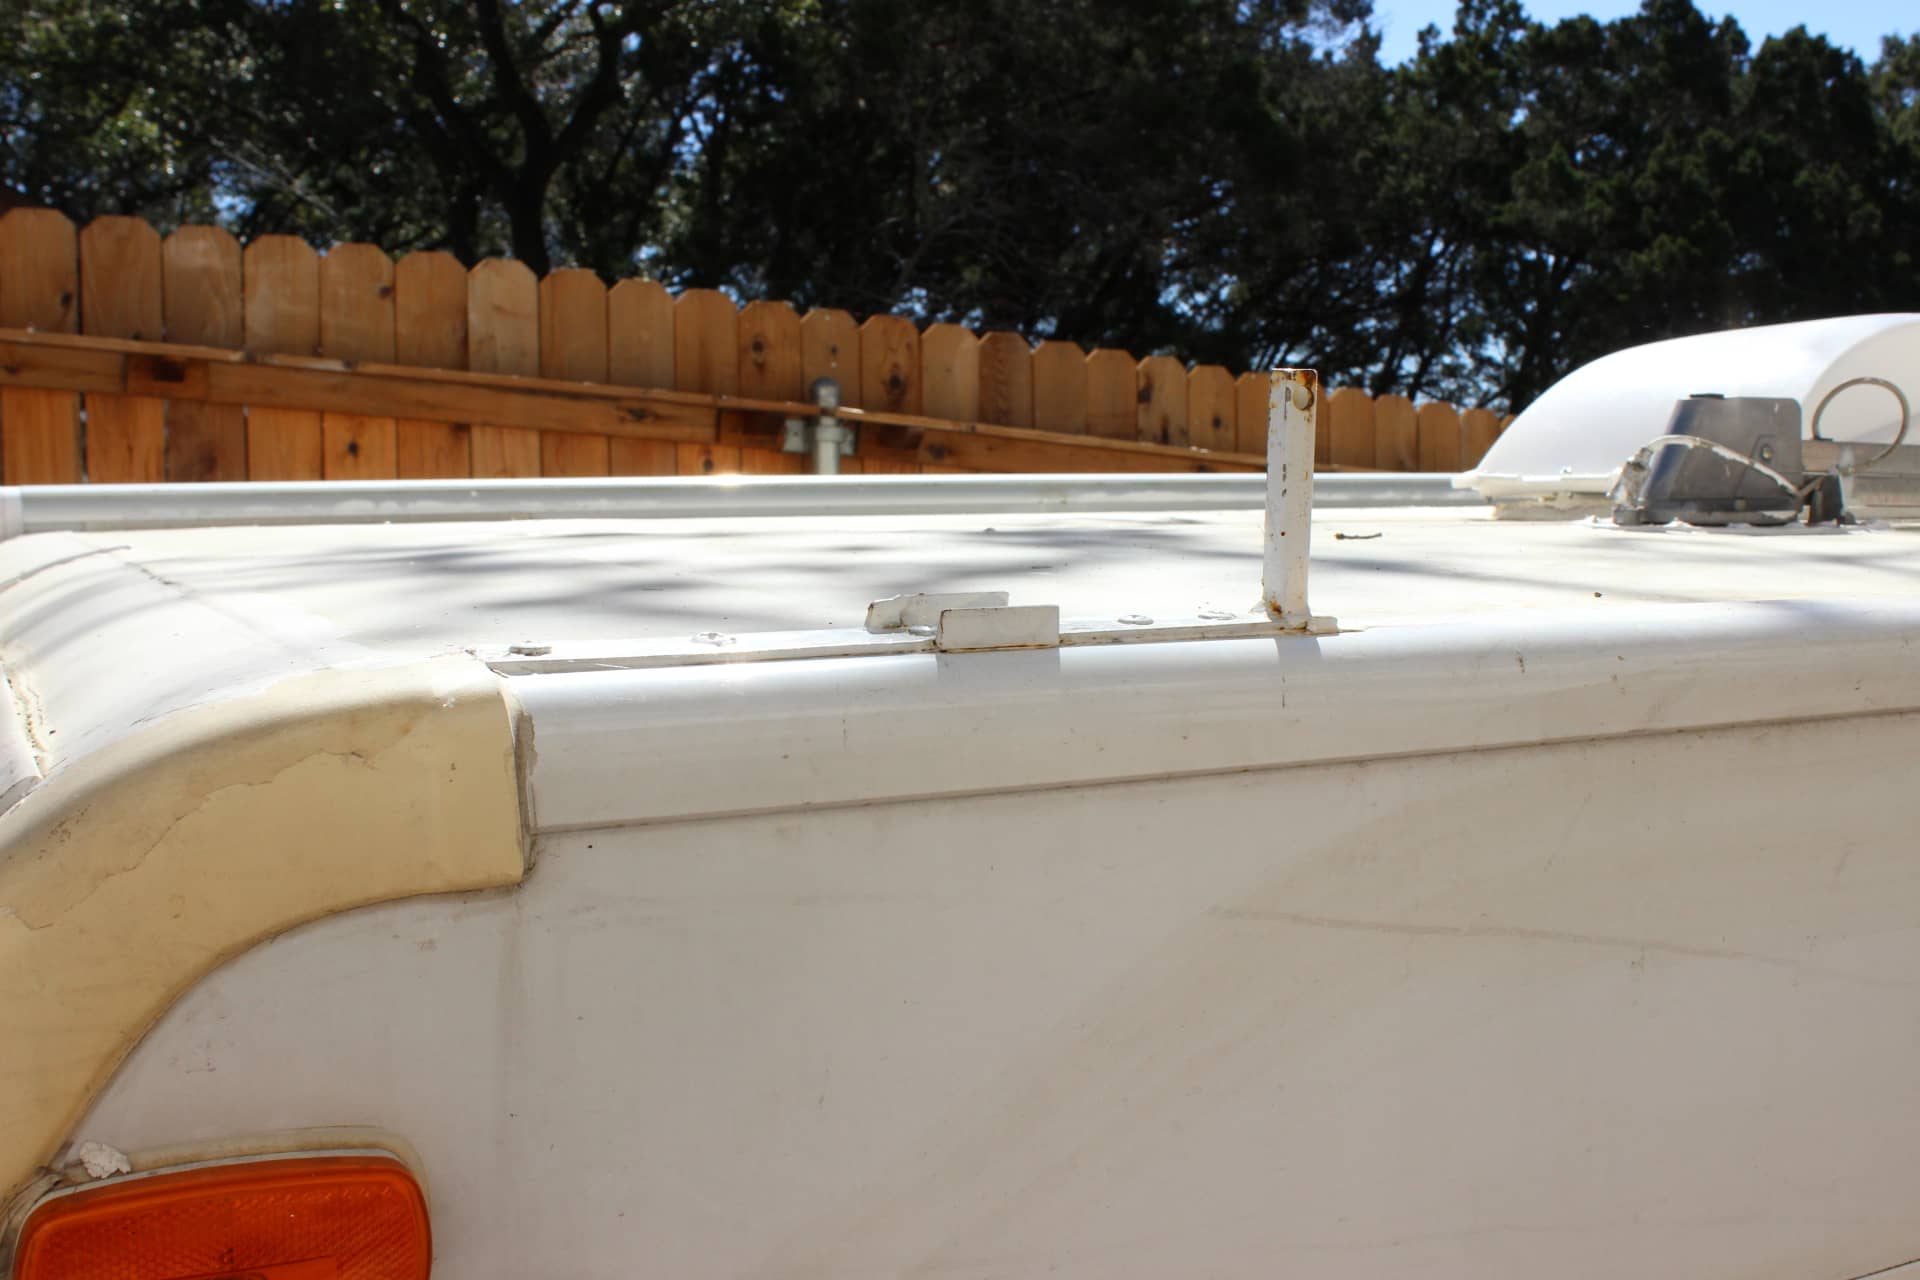
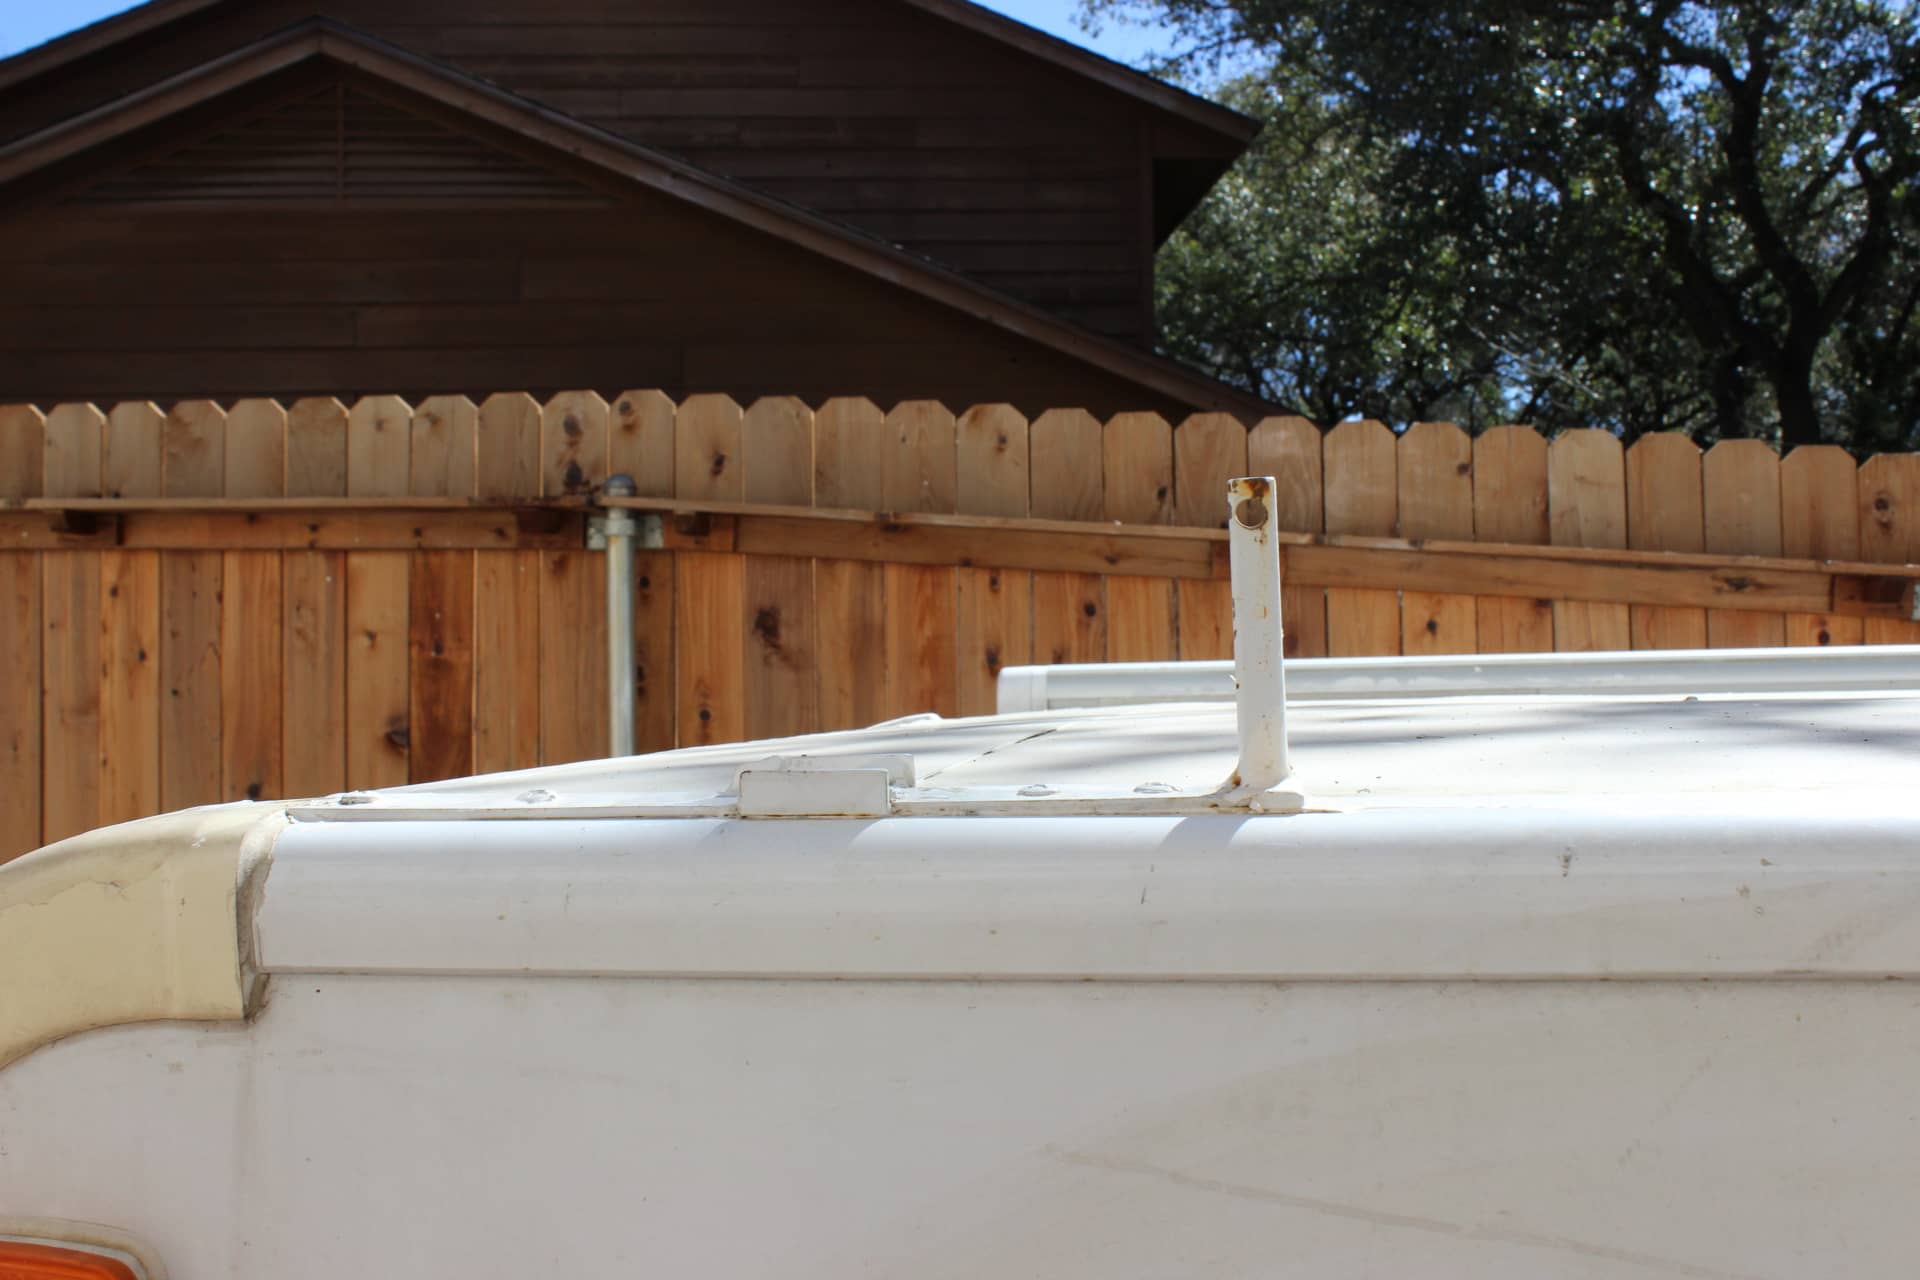
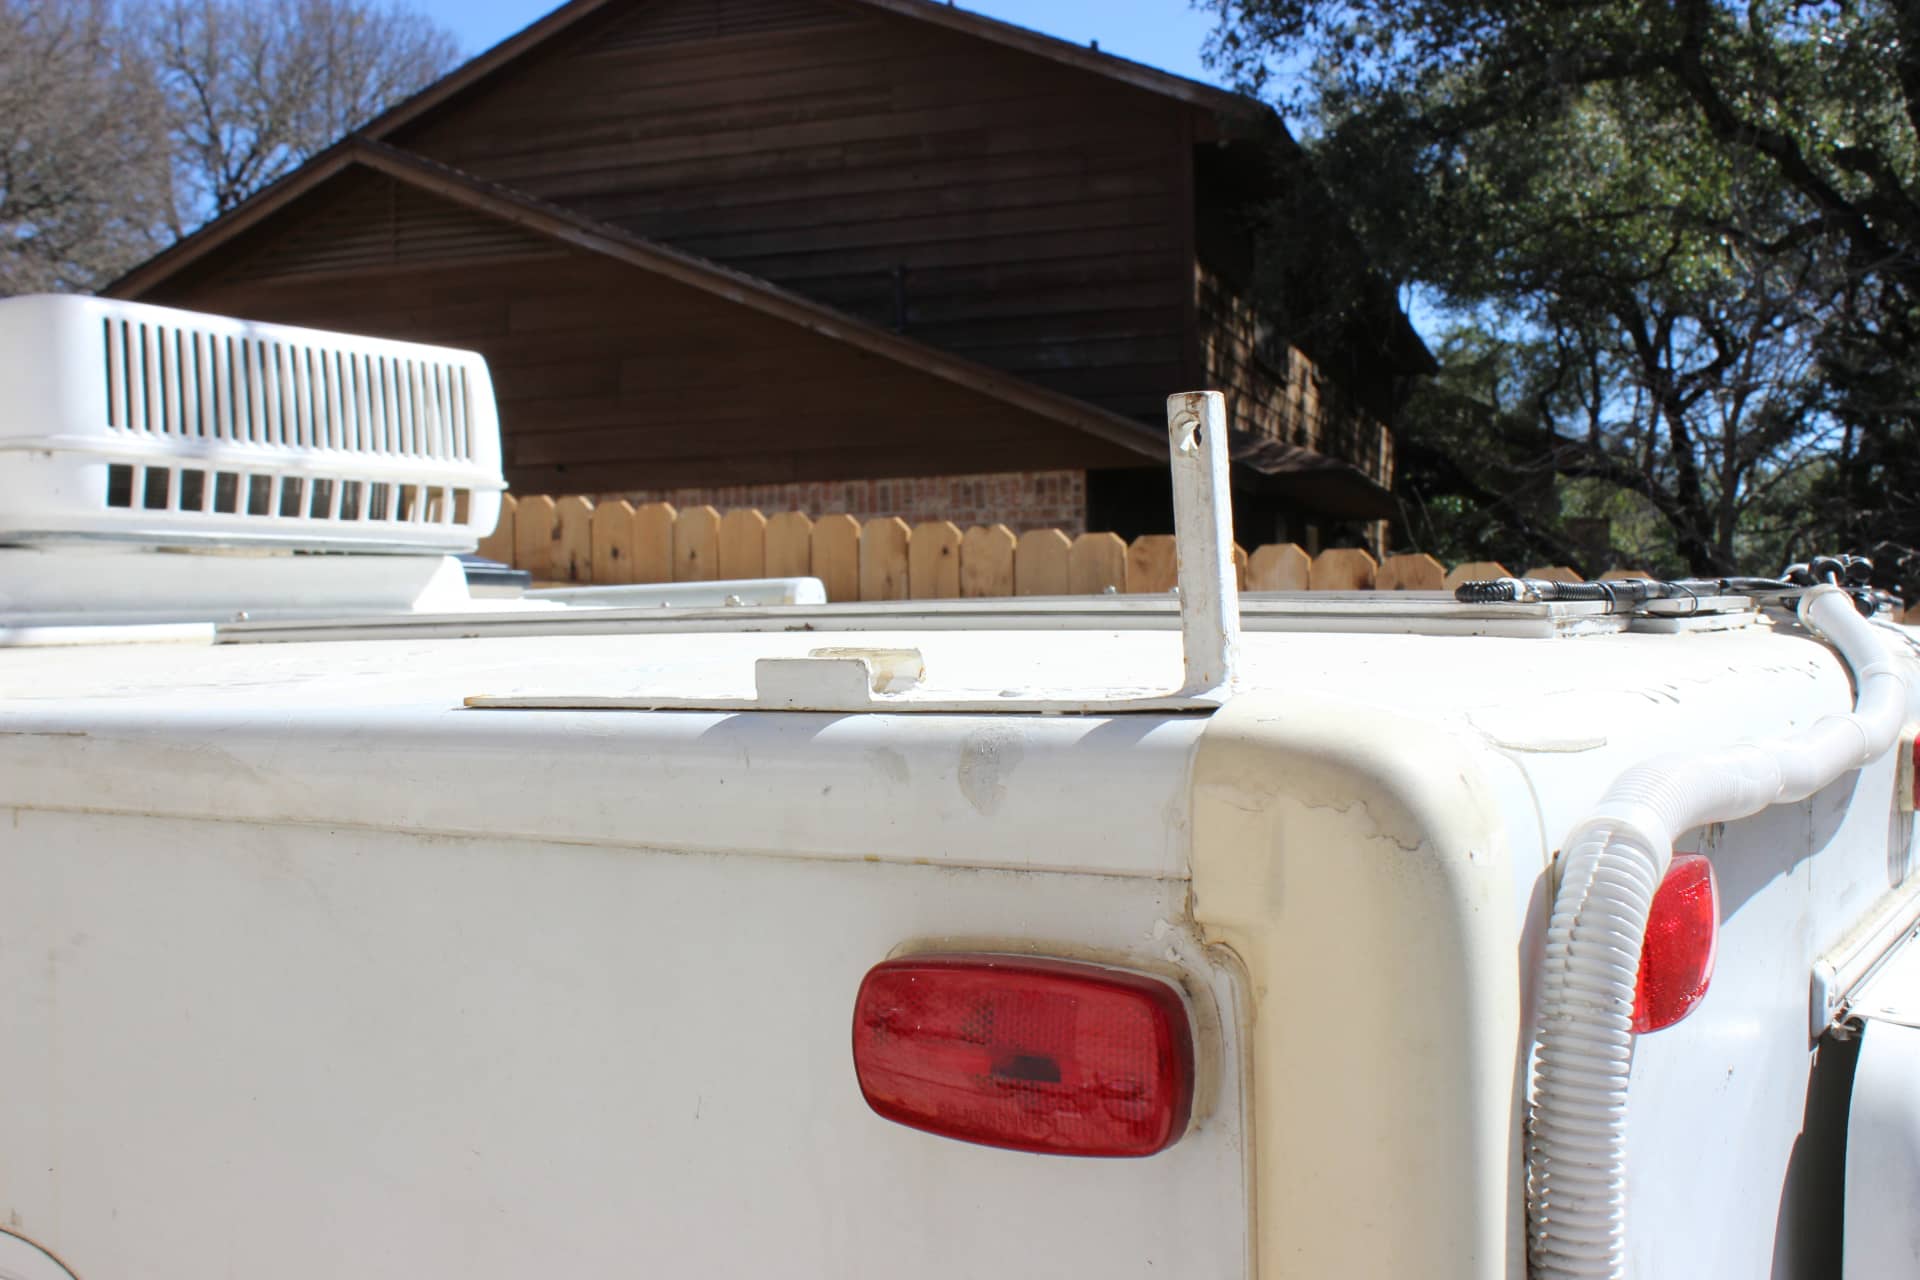
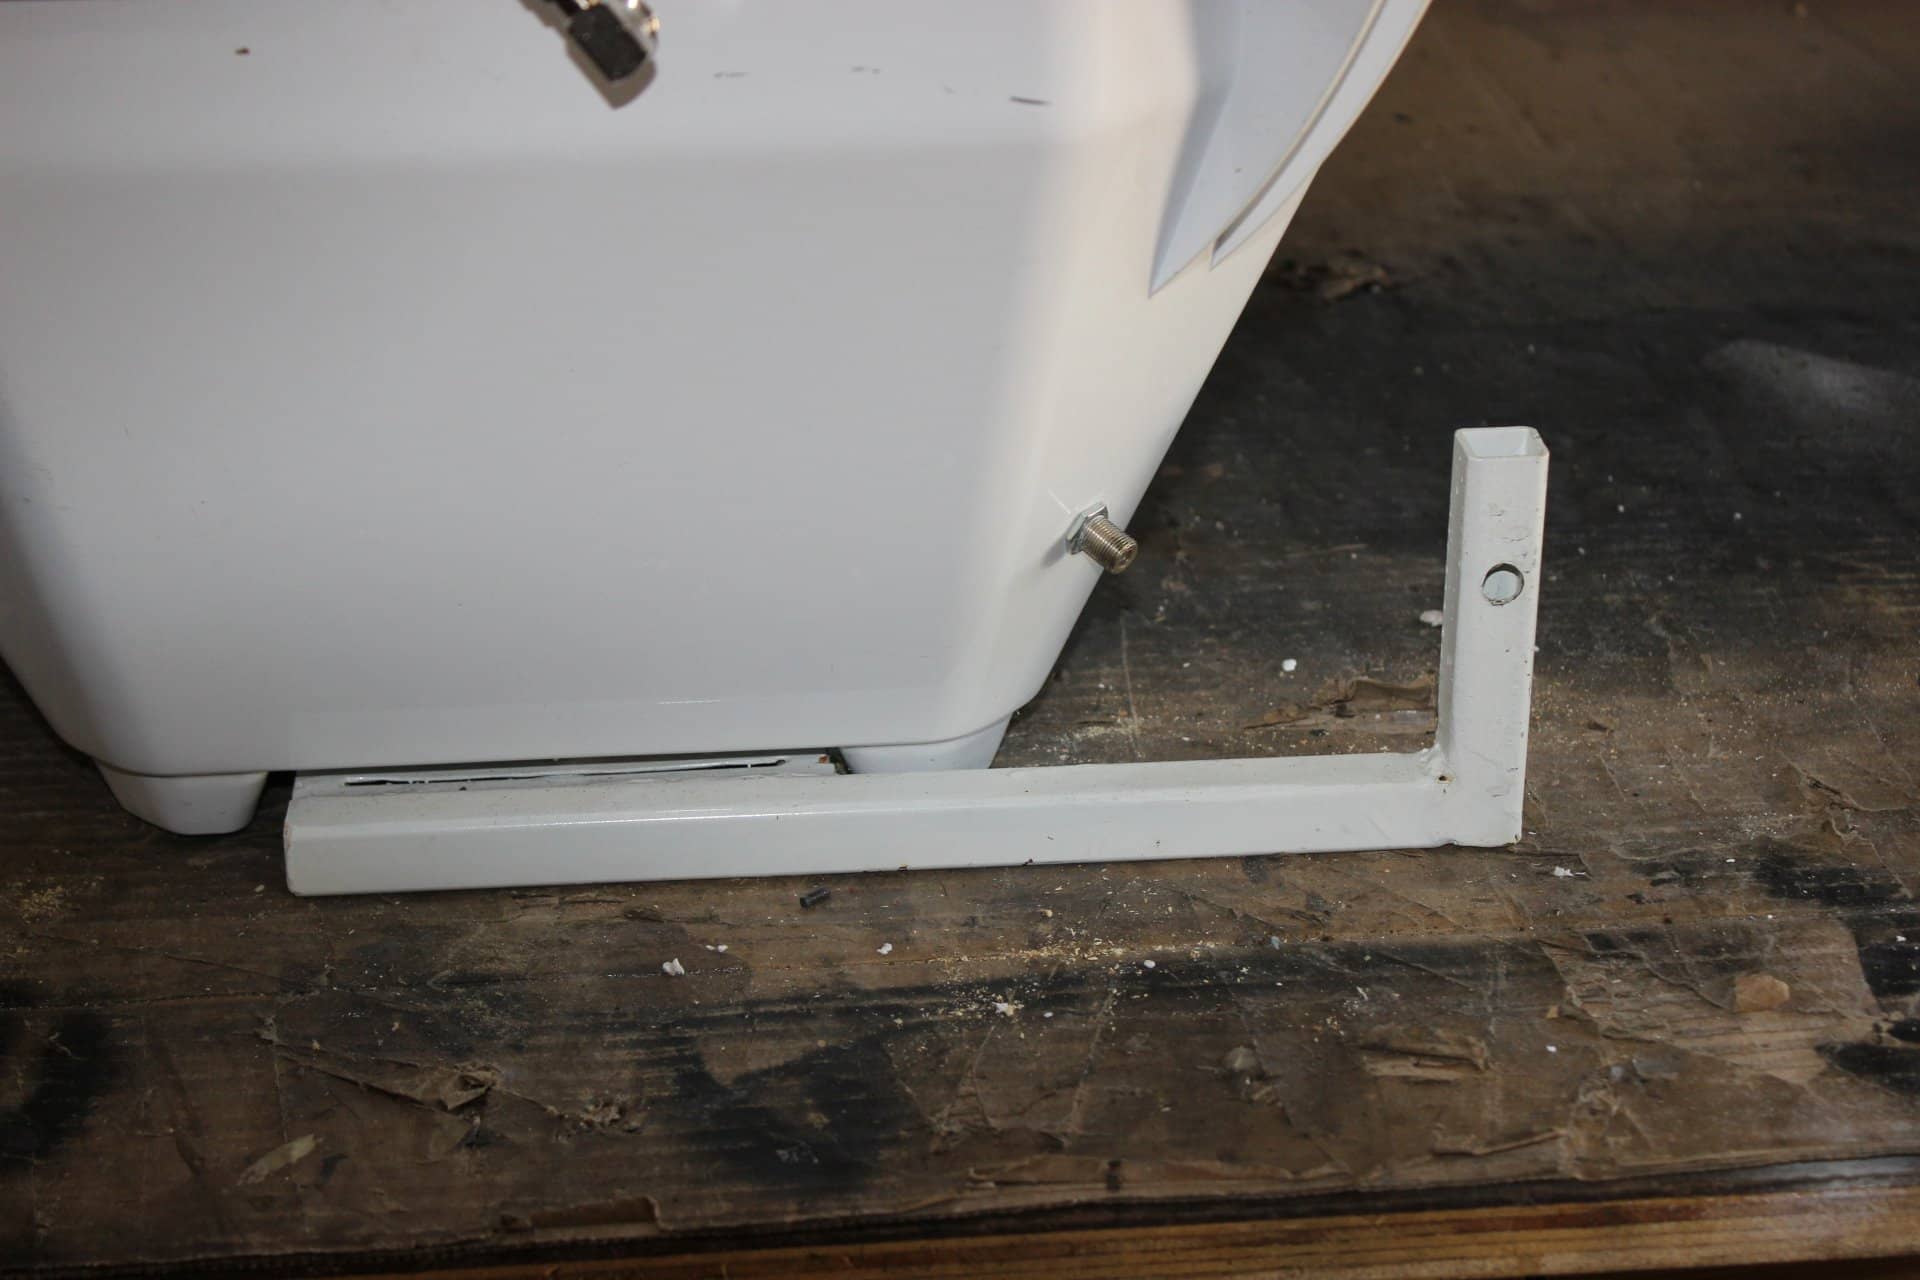
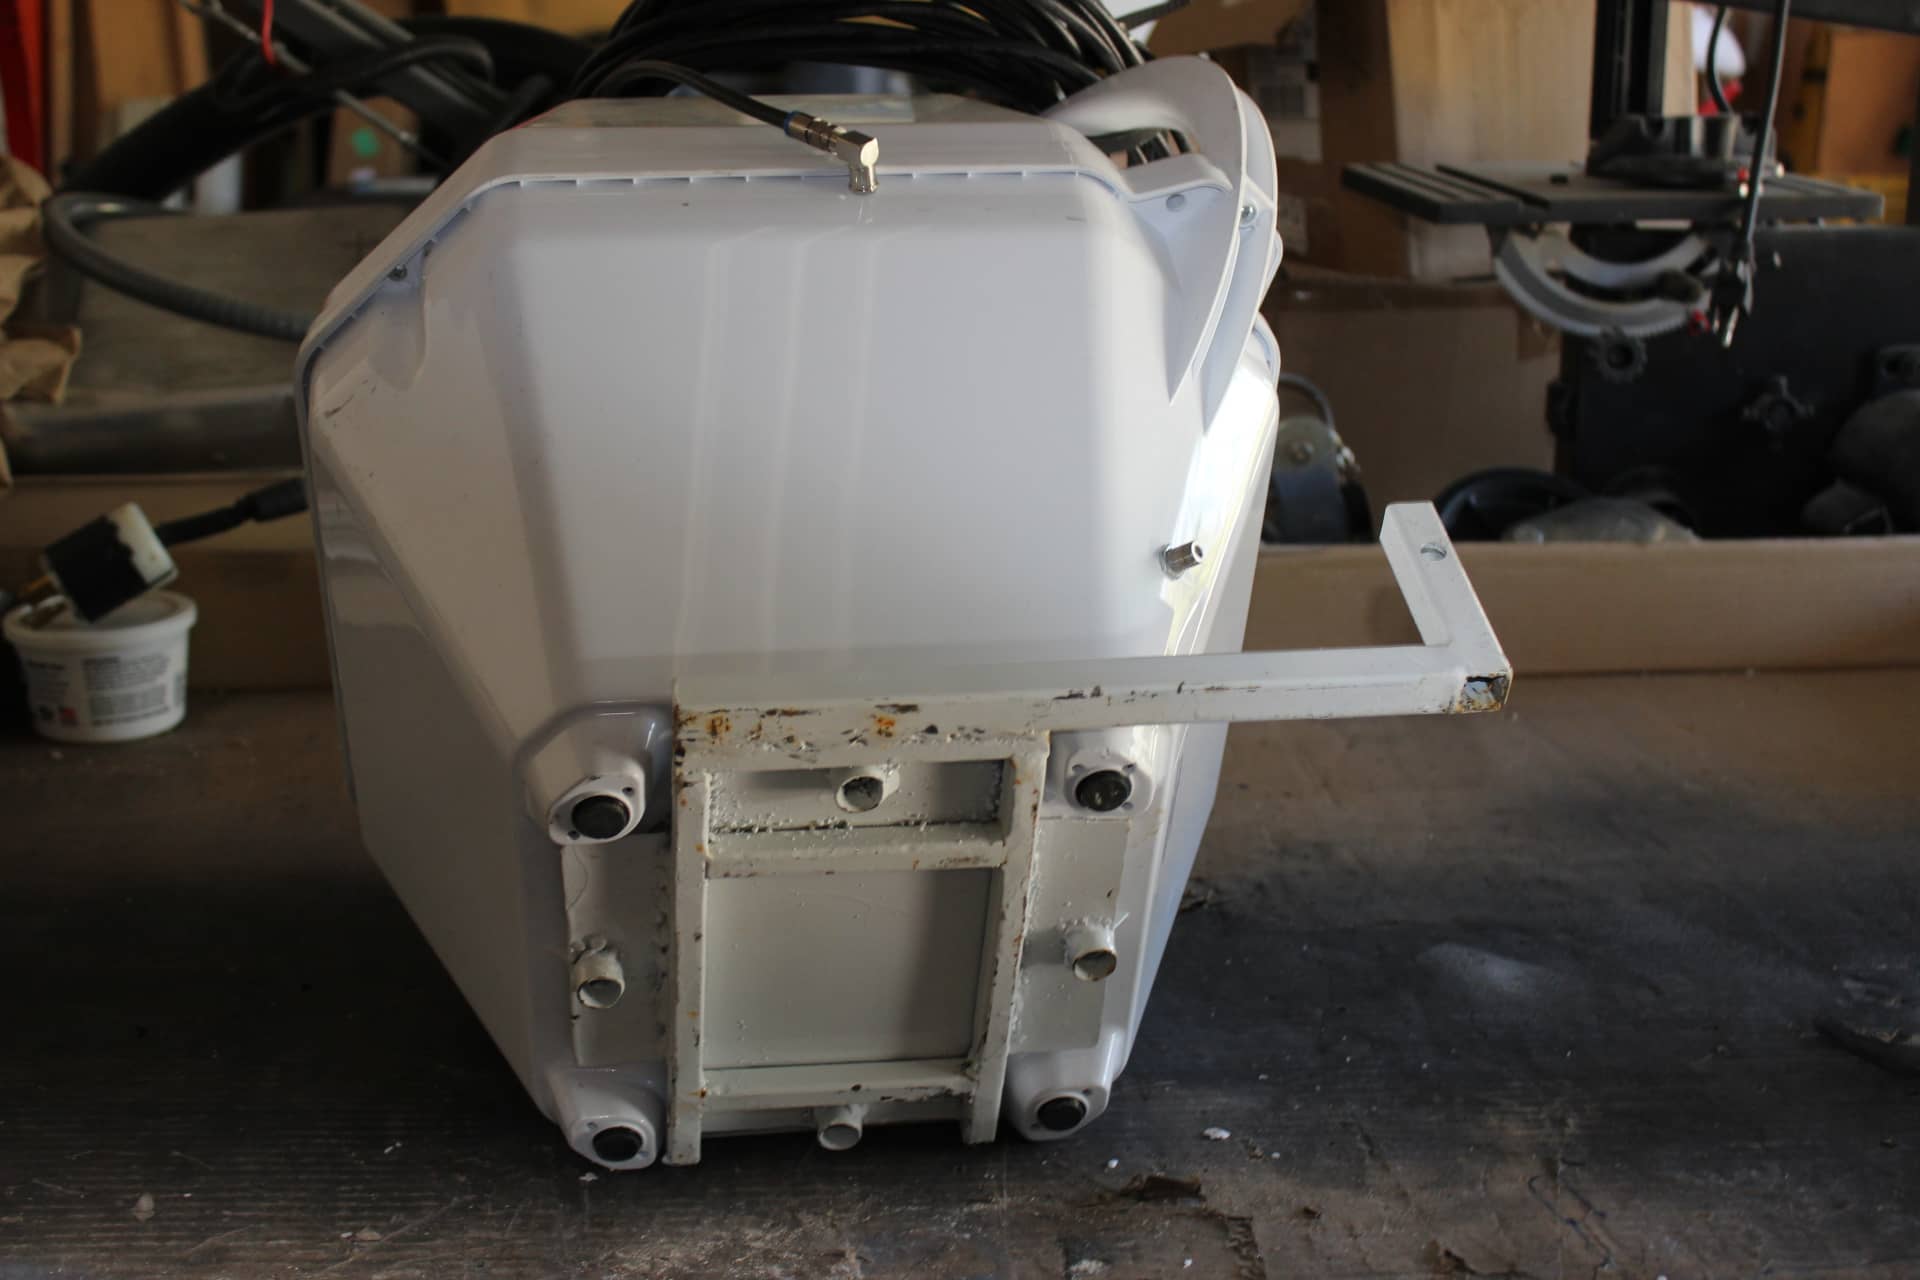
What I did was weld up a frame that has a post with a hole (image 1560) at its top on the side of the frame for the bottom of the Tailgater to be bolted onto it so I would have a bass to lock it down and secure it from walking away (image 1561, 1562). Then I built two rails (one for the front and one for the back) that were bolted onto the top edges of the trailer (front, images 1417, 1418 and the rear image 1419) also having a post, with a hole at the top to slide a padlock thru. That way the post on the frame would slide over the post on the rail that is attached to the trailer, and when fully down, the holes line up for the padlock to go thru. Having one on each end of the trailer gives you more flexibility when placing you dish. To get the best reception your dish has to have a clear view of the southern sky, so having one on each end of the trailer gives you a choice. One places the dish on the rail that has the clearest view (making sure no trees are in the way), slide the lock thru the holes, plug in the coax cable, raise the shells, and finally plug the other end of the coax into the cable TV receptacle on the trailer. This also gets the unit off the ground too.
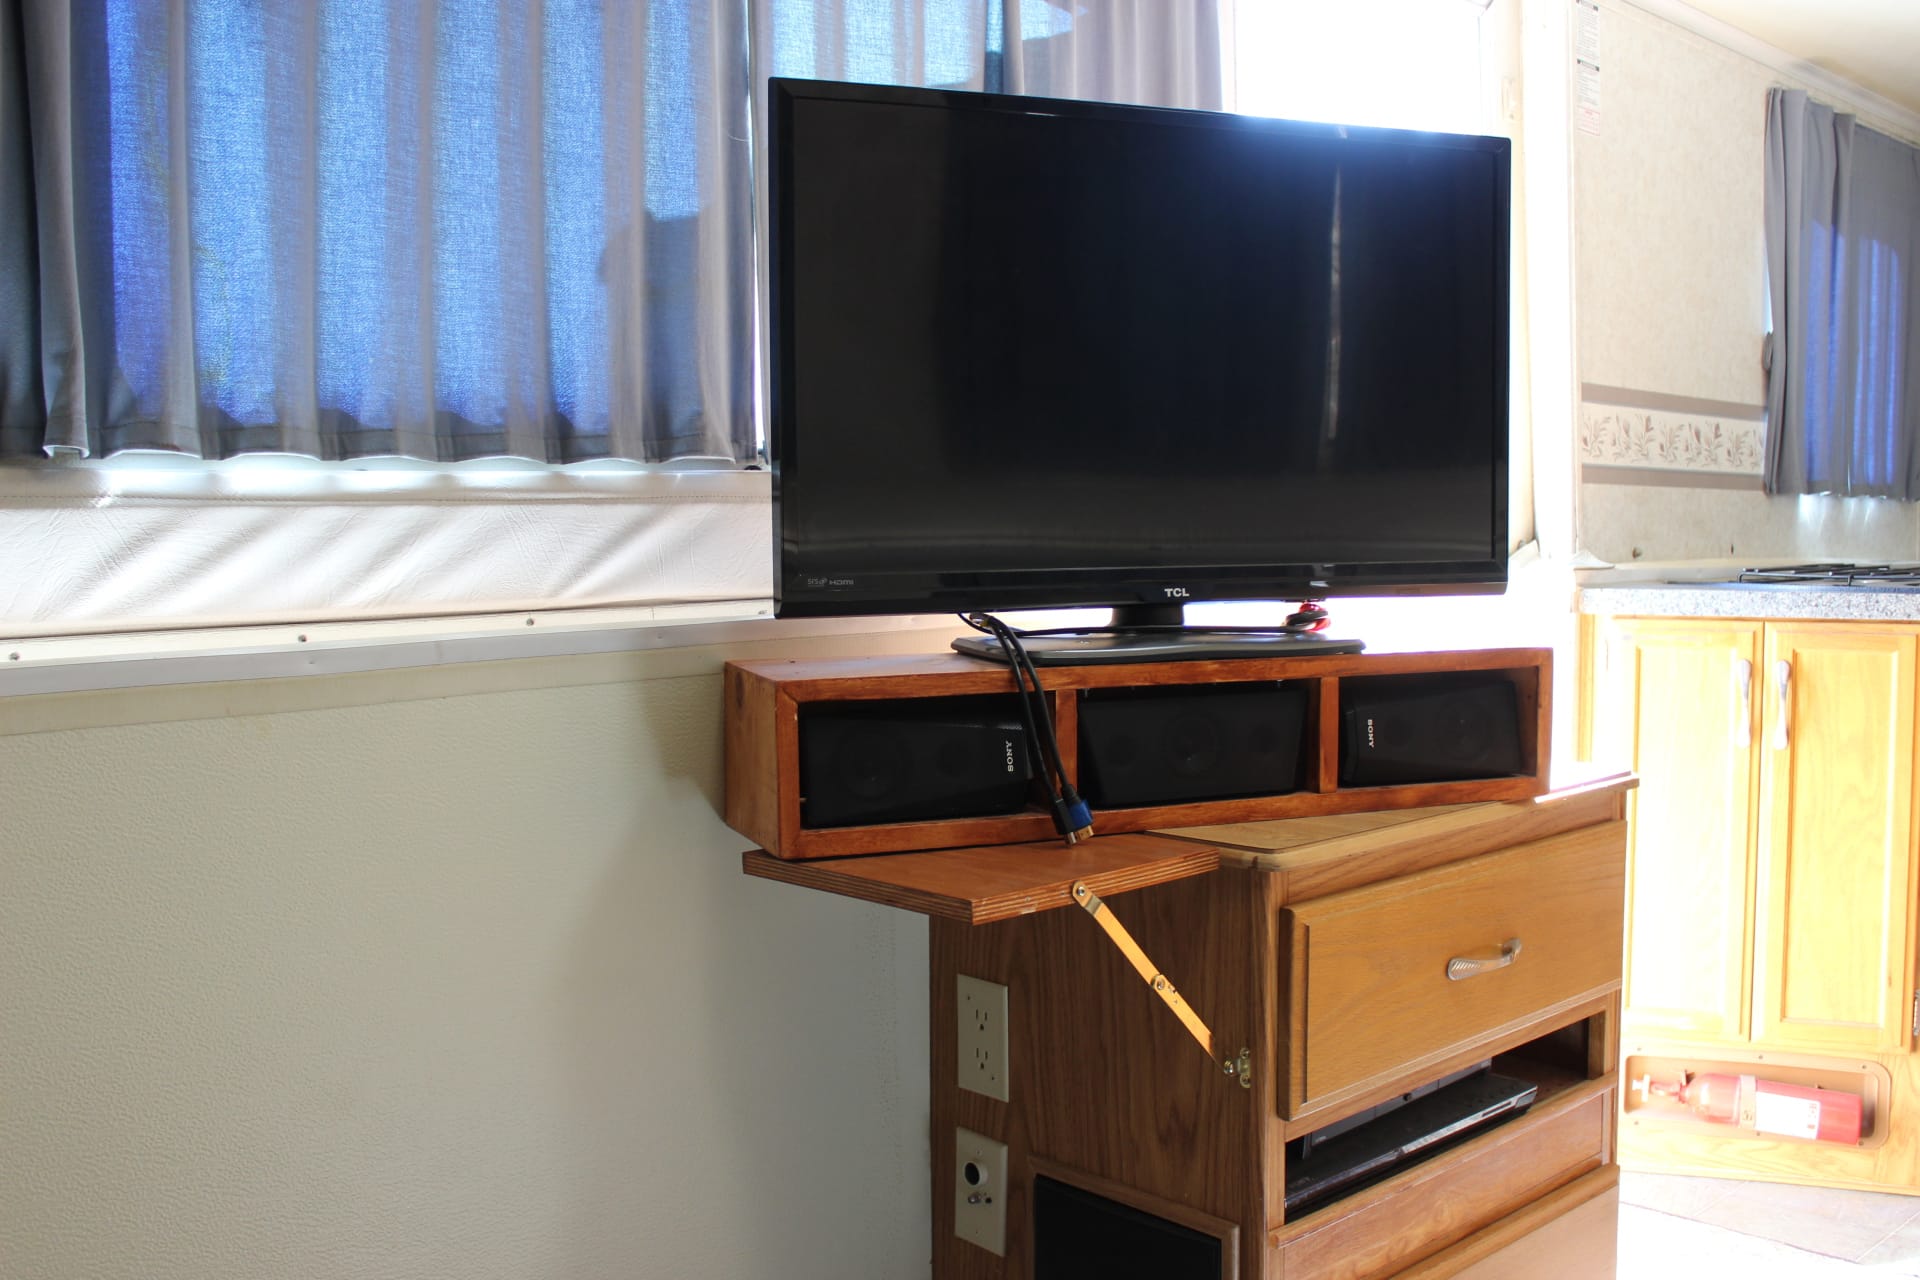
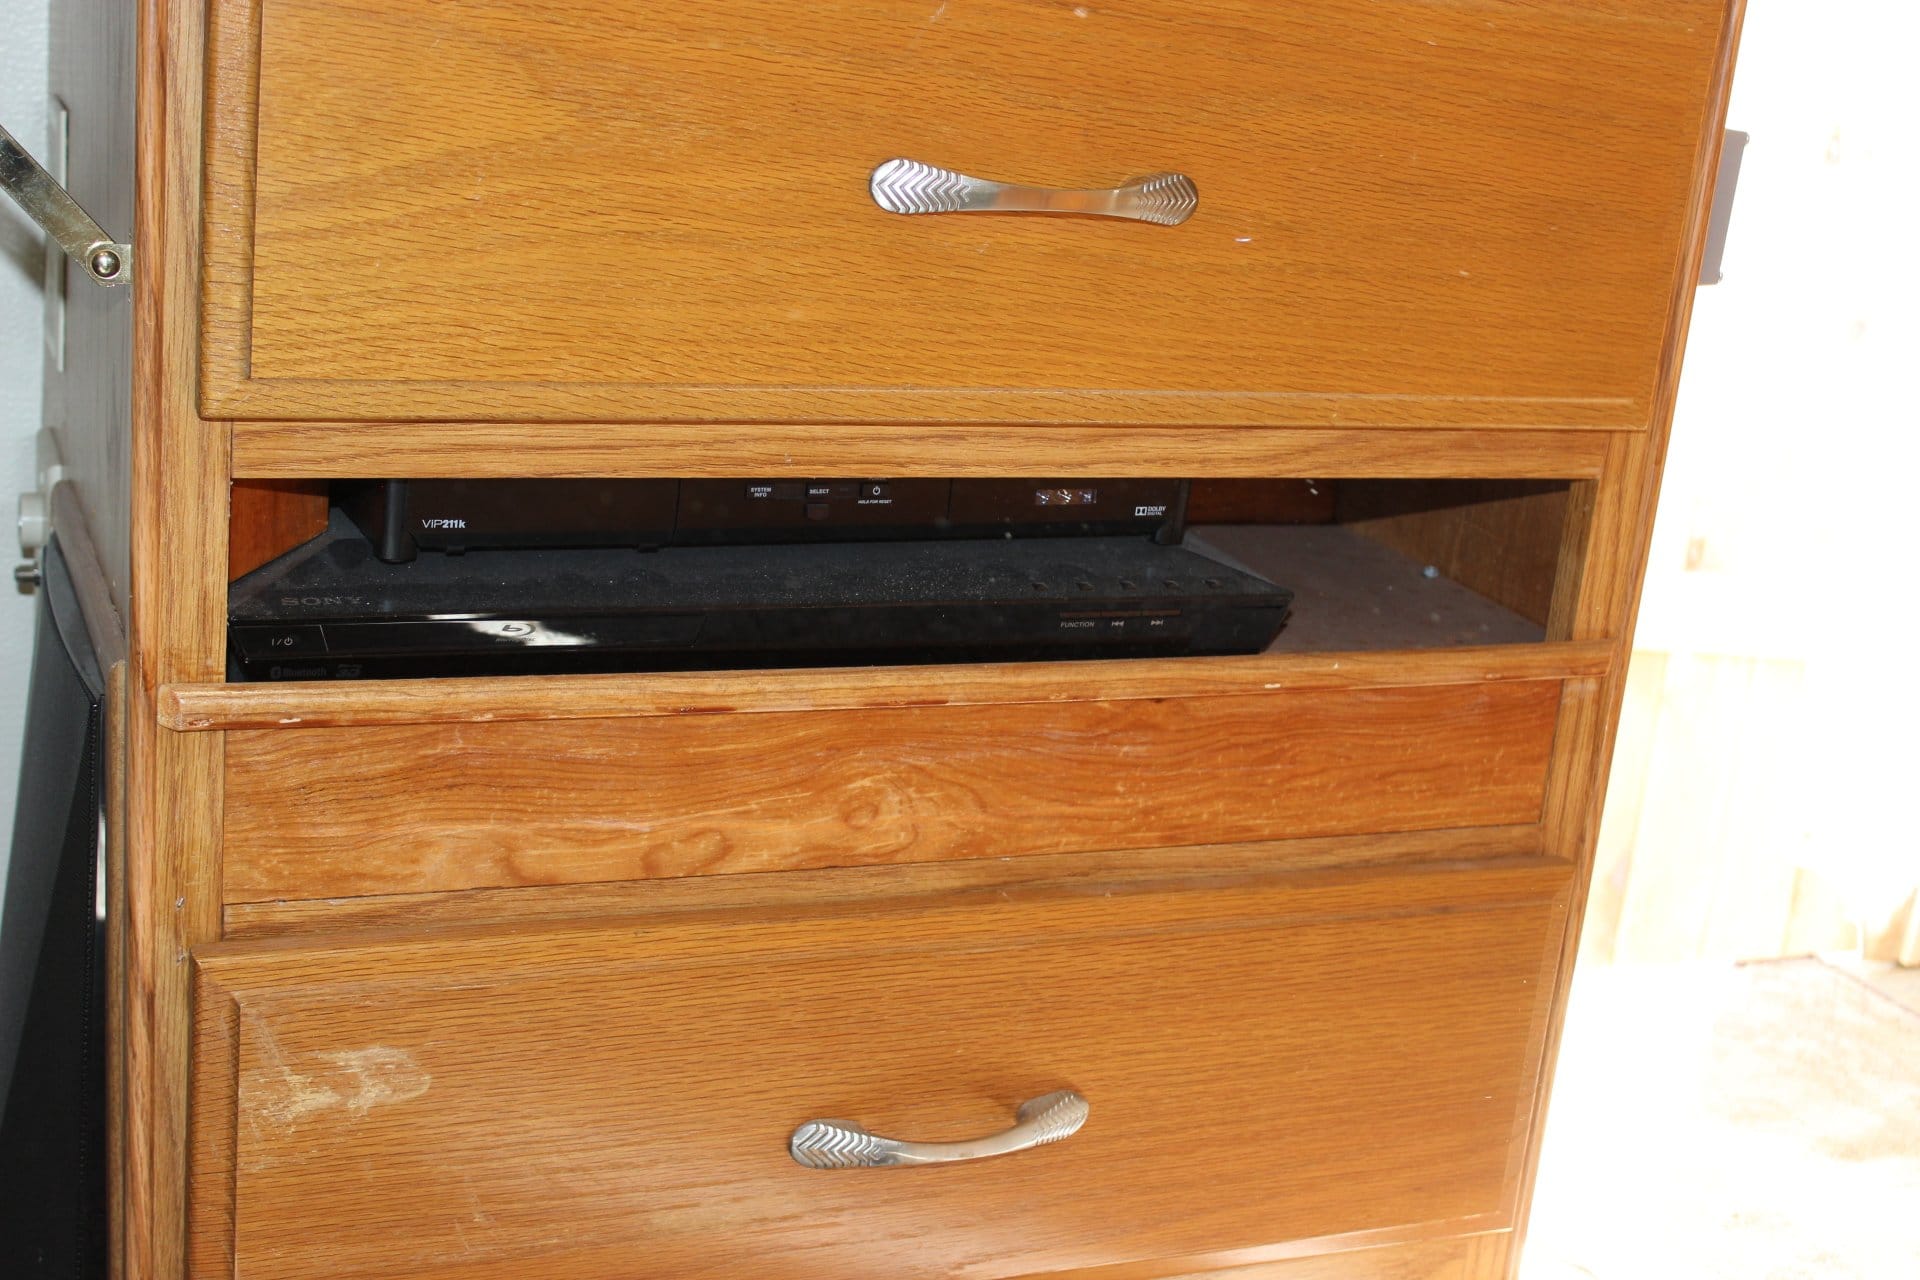
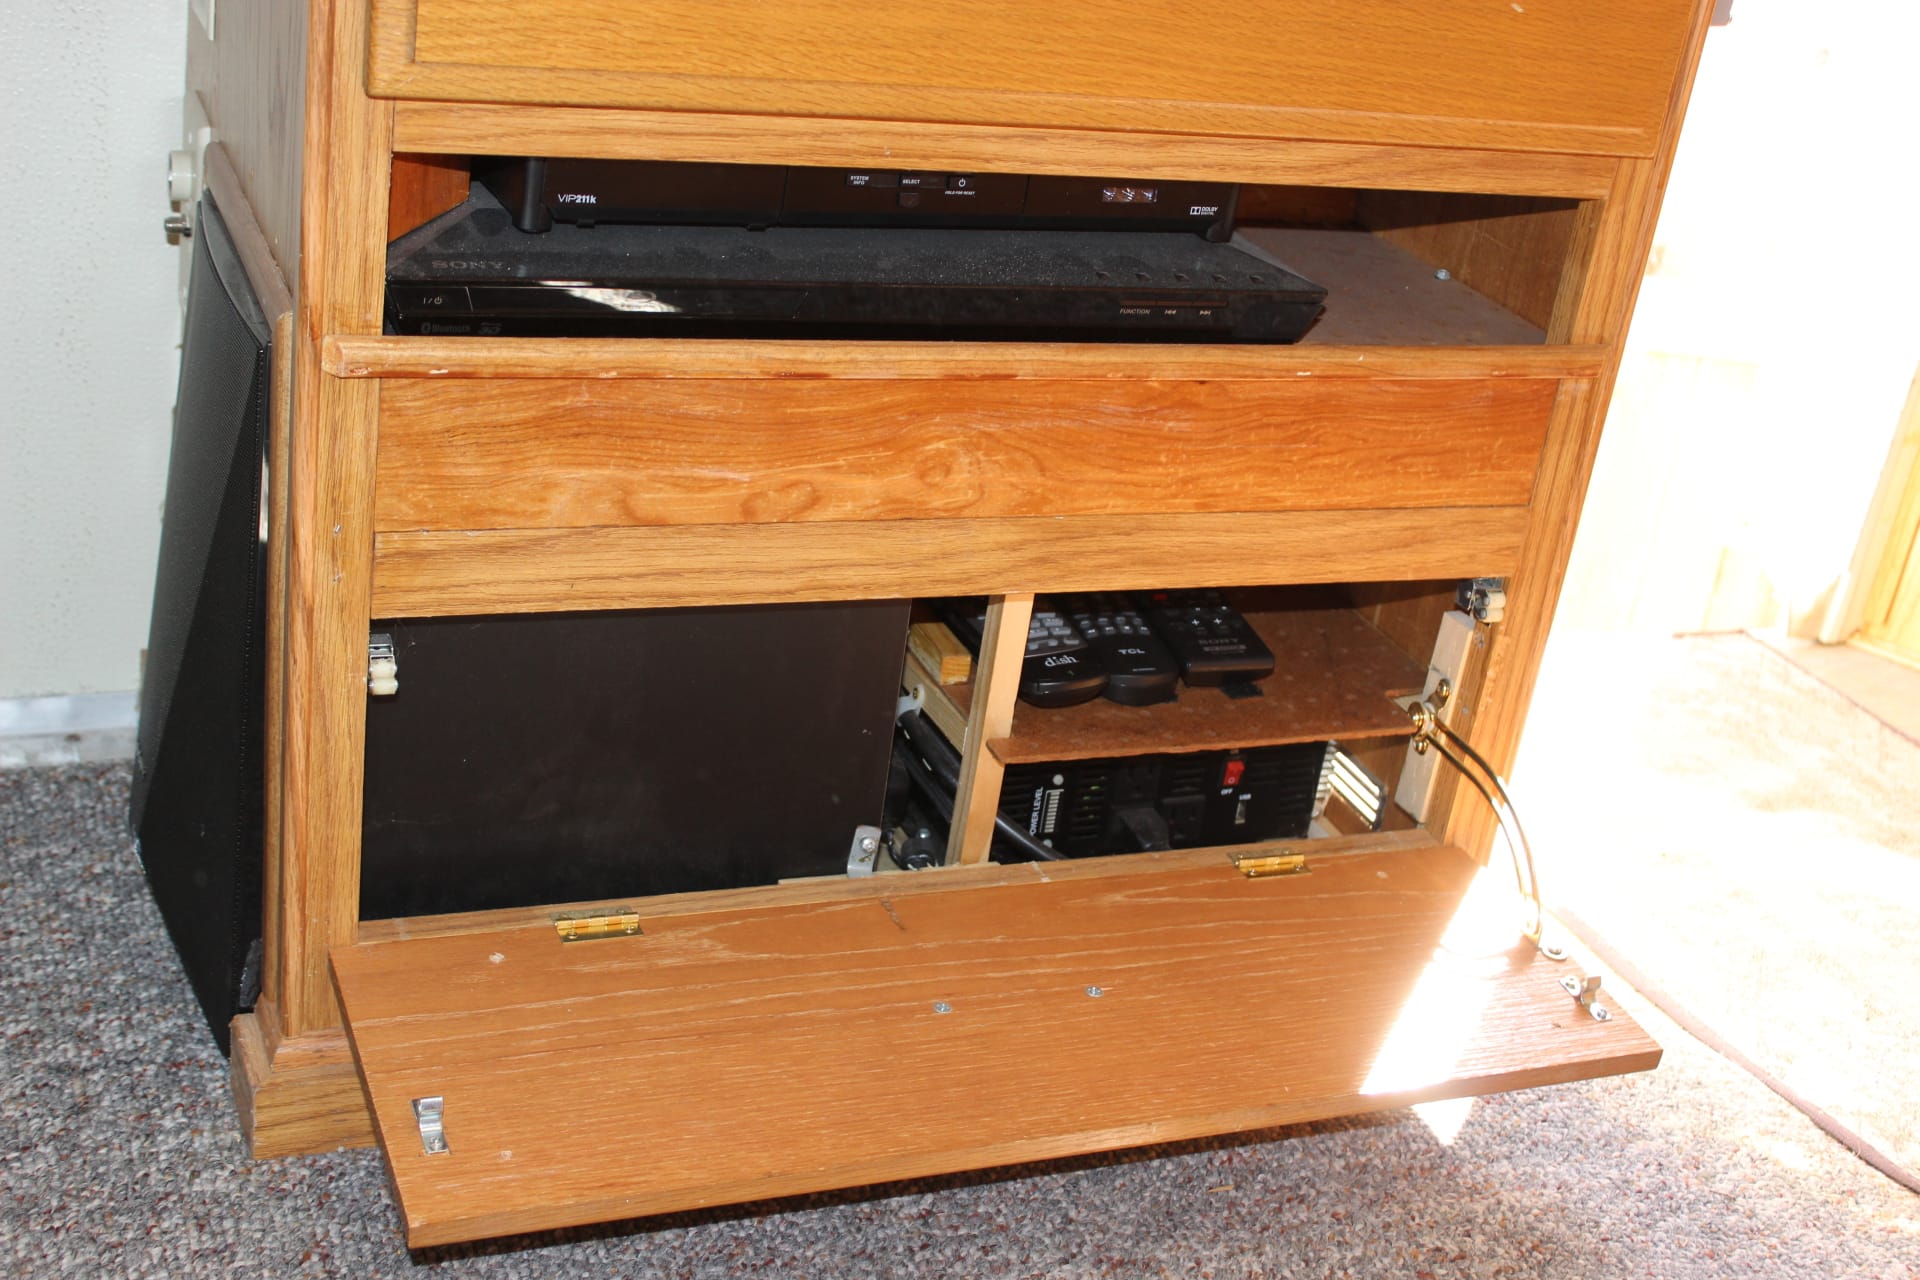
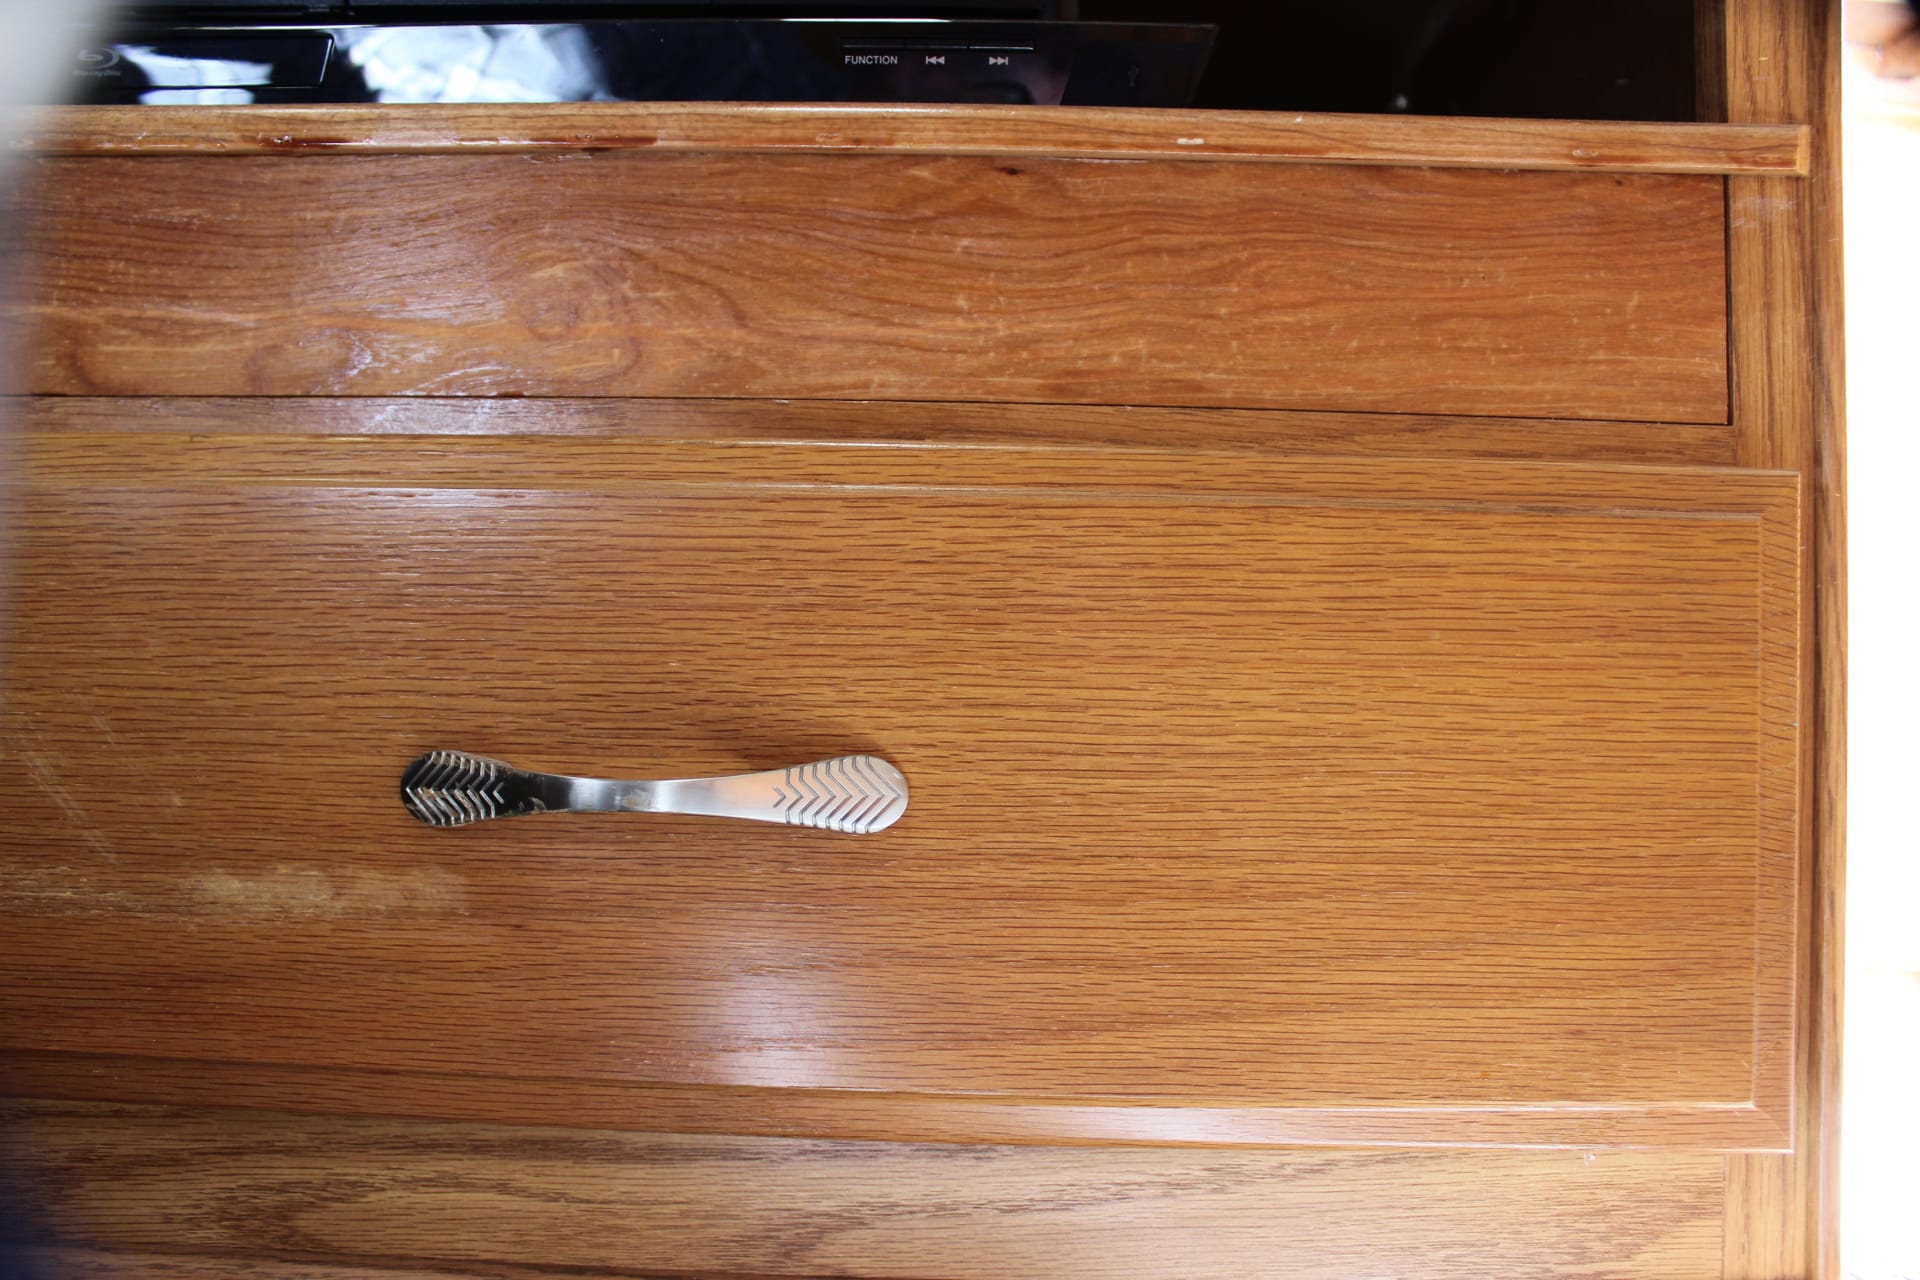
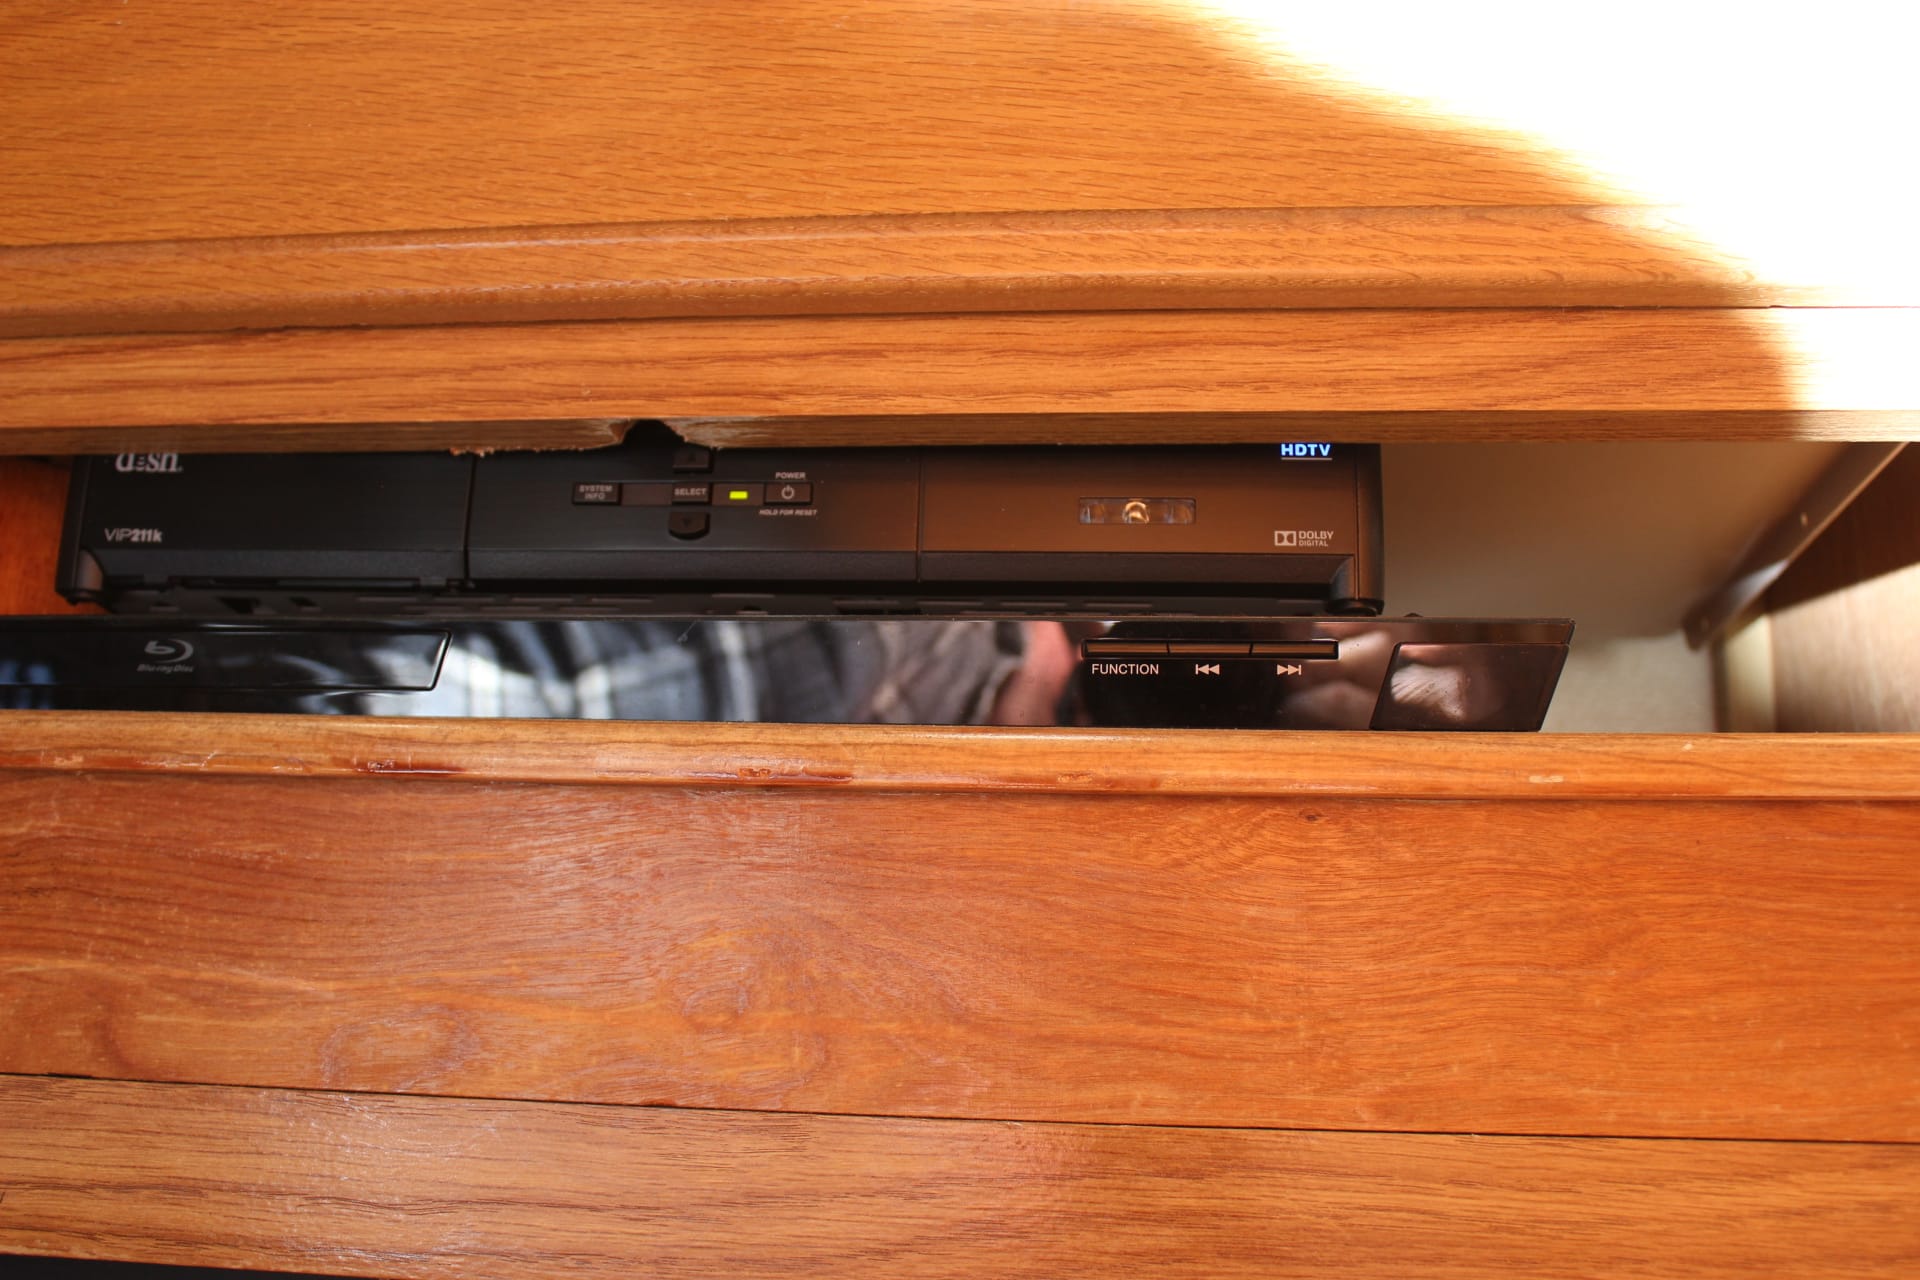
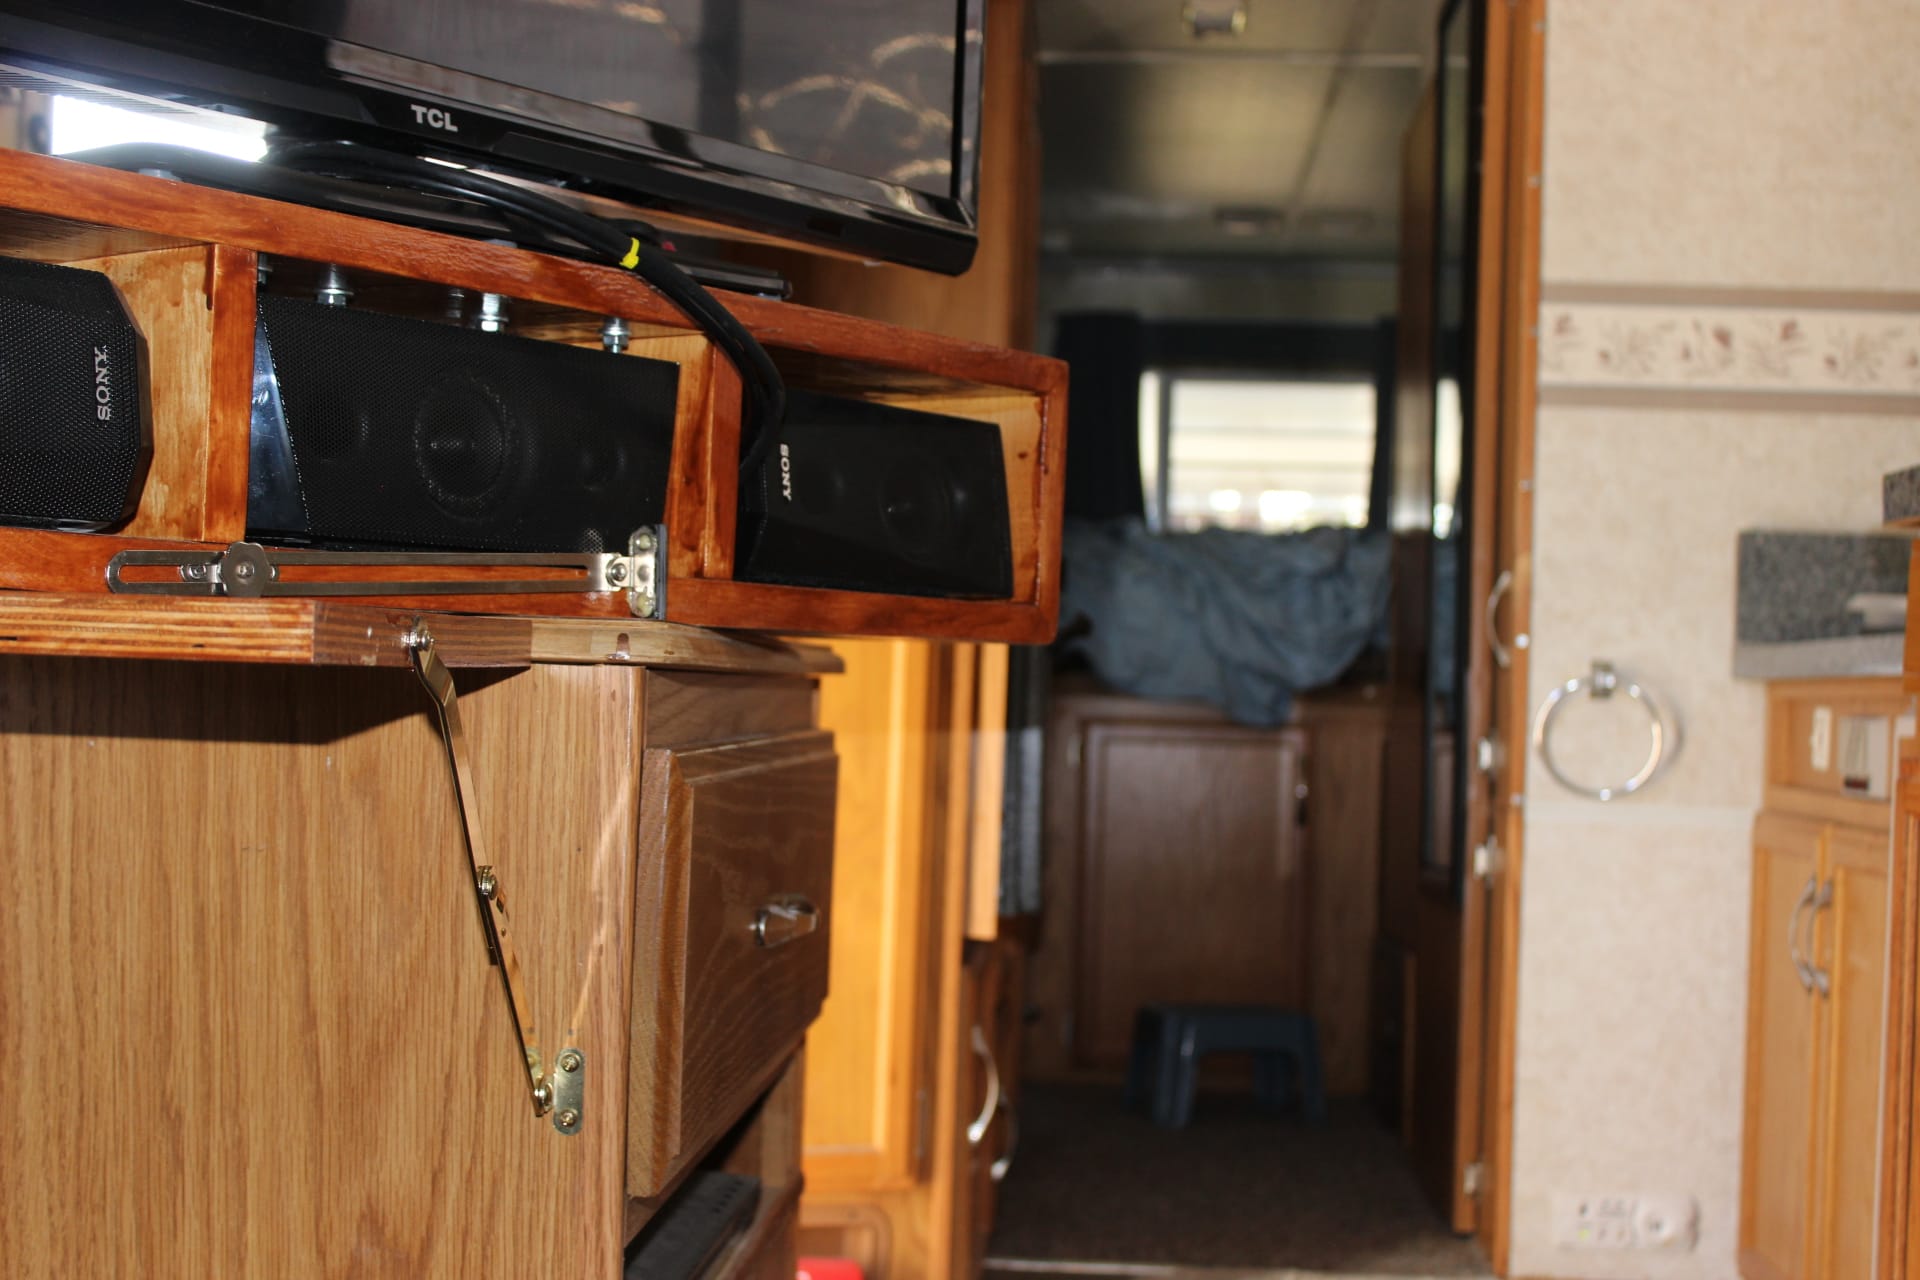
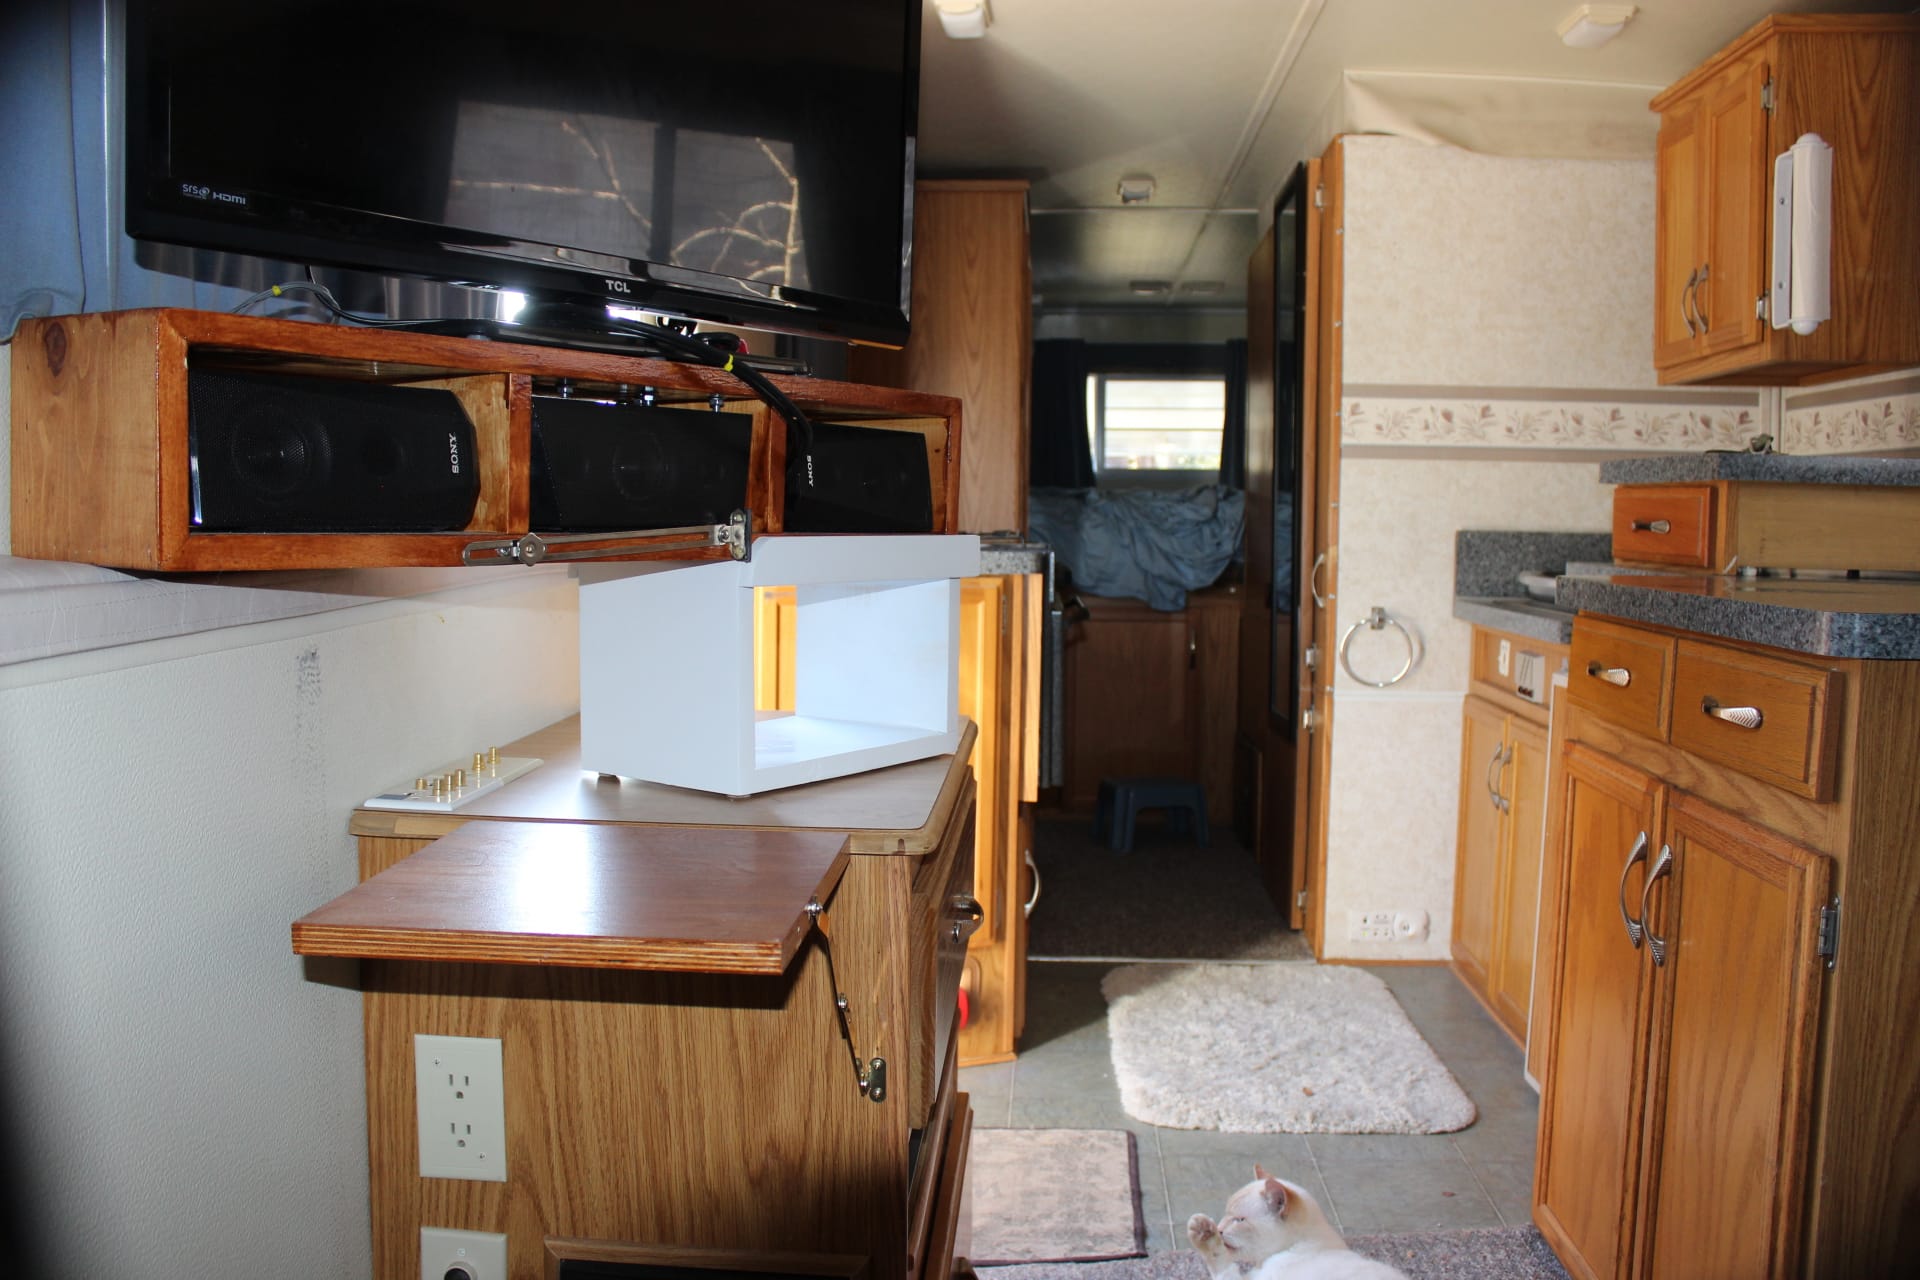
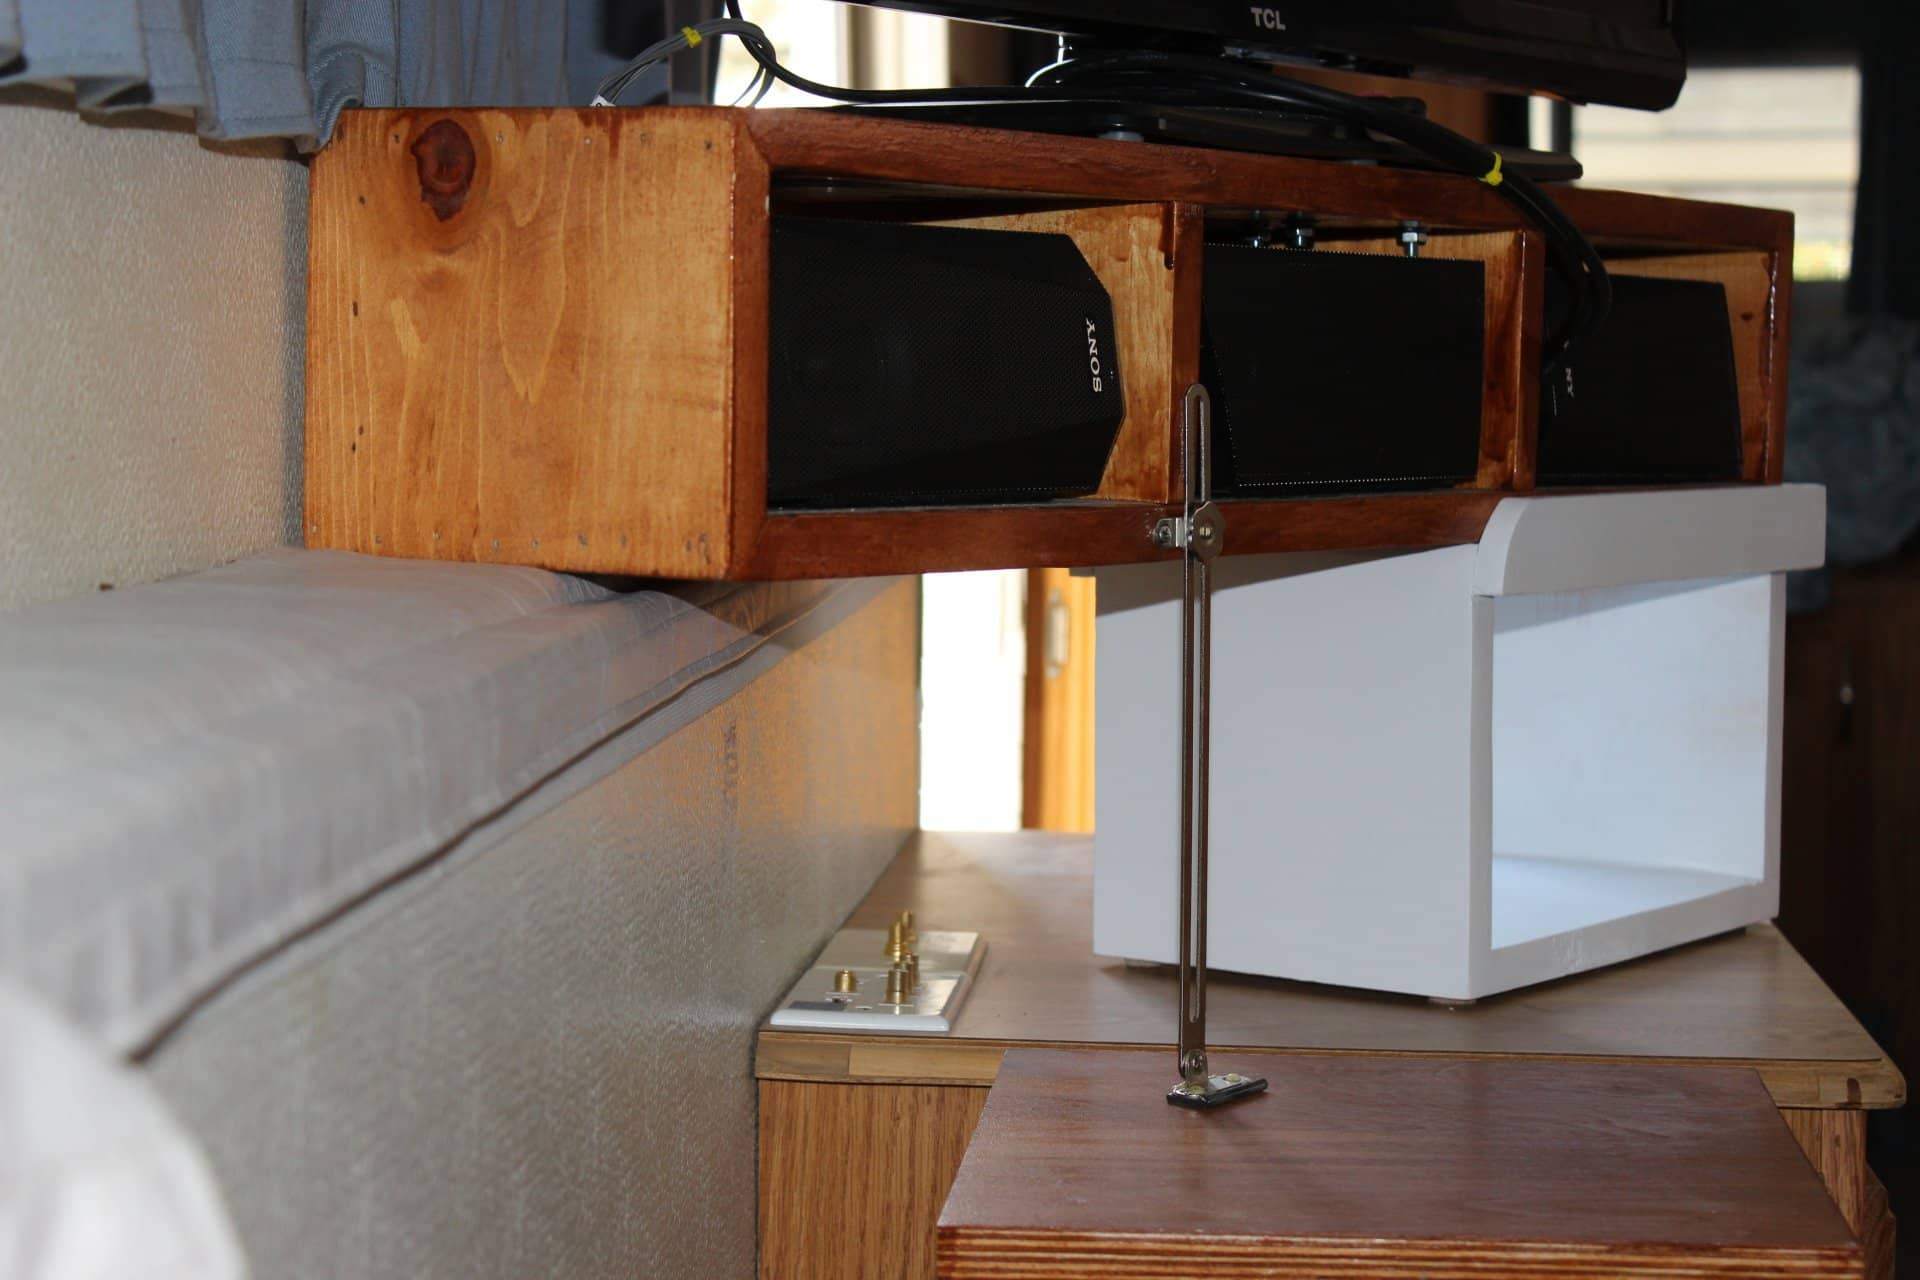
Move inside for the next part which is where my creativity came in handy. As you enter inside the door to your immediate right is a cabinet that people put their TV on with 3 storage drawers, so I’ll call it the entertainment center. Like I said we wanted to take it all with us so after I purchased a 32” flat screen at Fry’s I also picked up a Sony BDV-E3100, which is a lower end surround sound/ DVD/CD/FM/AM receiver and amplifier. It had all the components, sub-woofer, middle speaker, L&R speakers as well as the surround sound L&R speakers (which I didn’t use at all in the trailer) and it was a fairly flat unit so it wouldn’t take up much room (image 1517) so as to leave room for the Satellite receiver box (image 1517…that’s it on top of the amplifier).
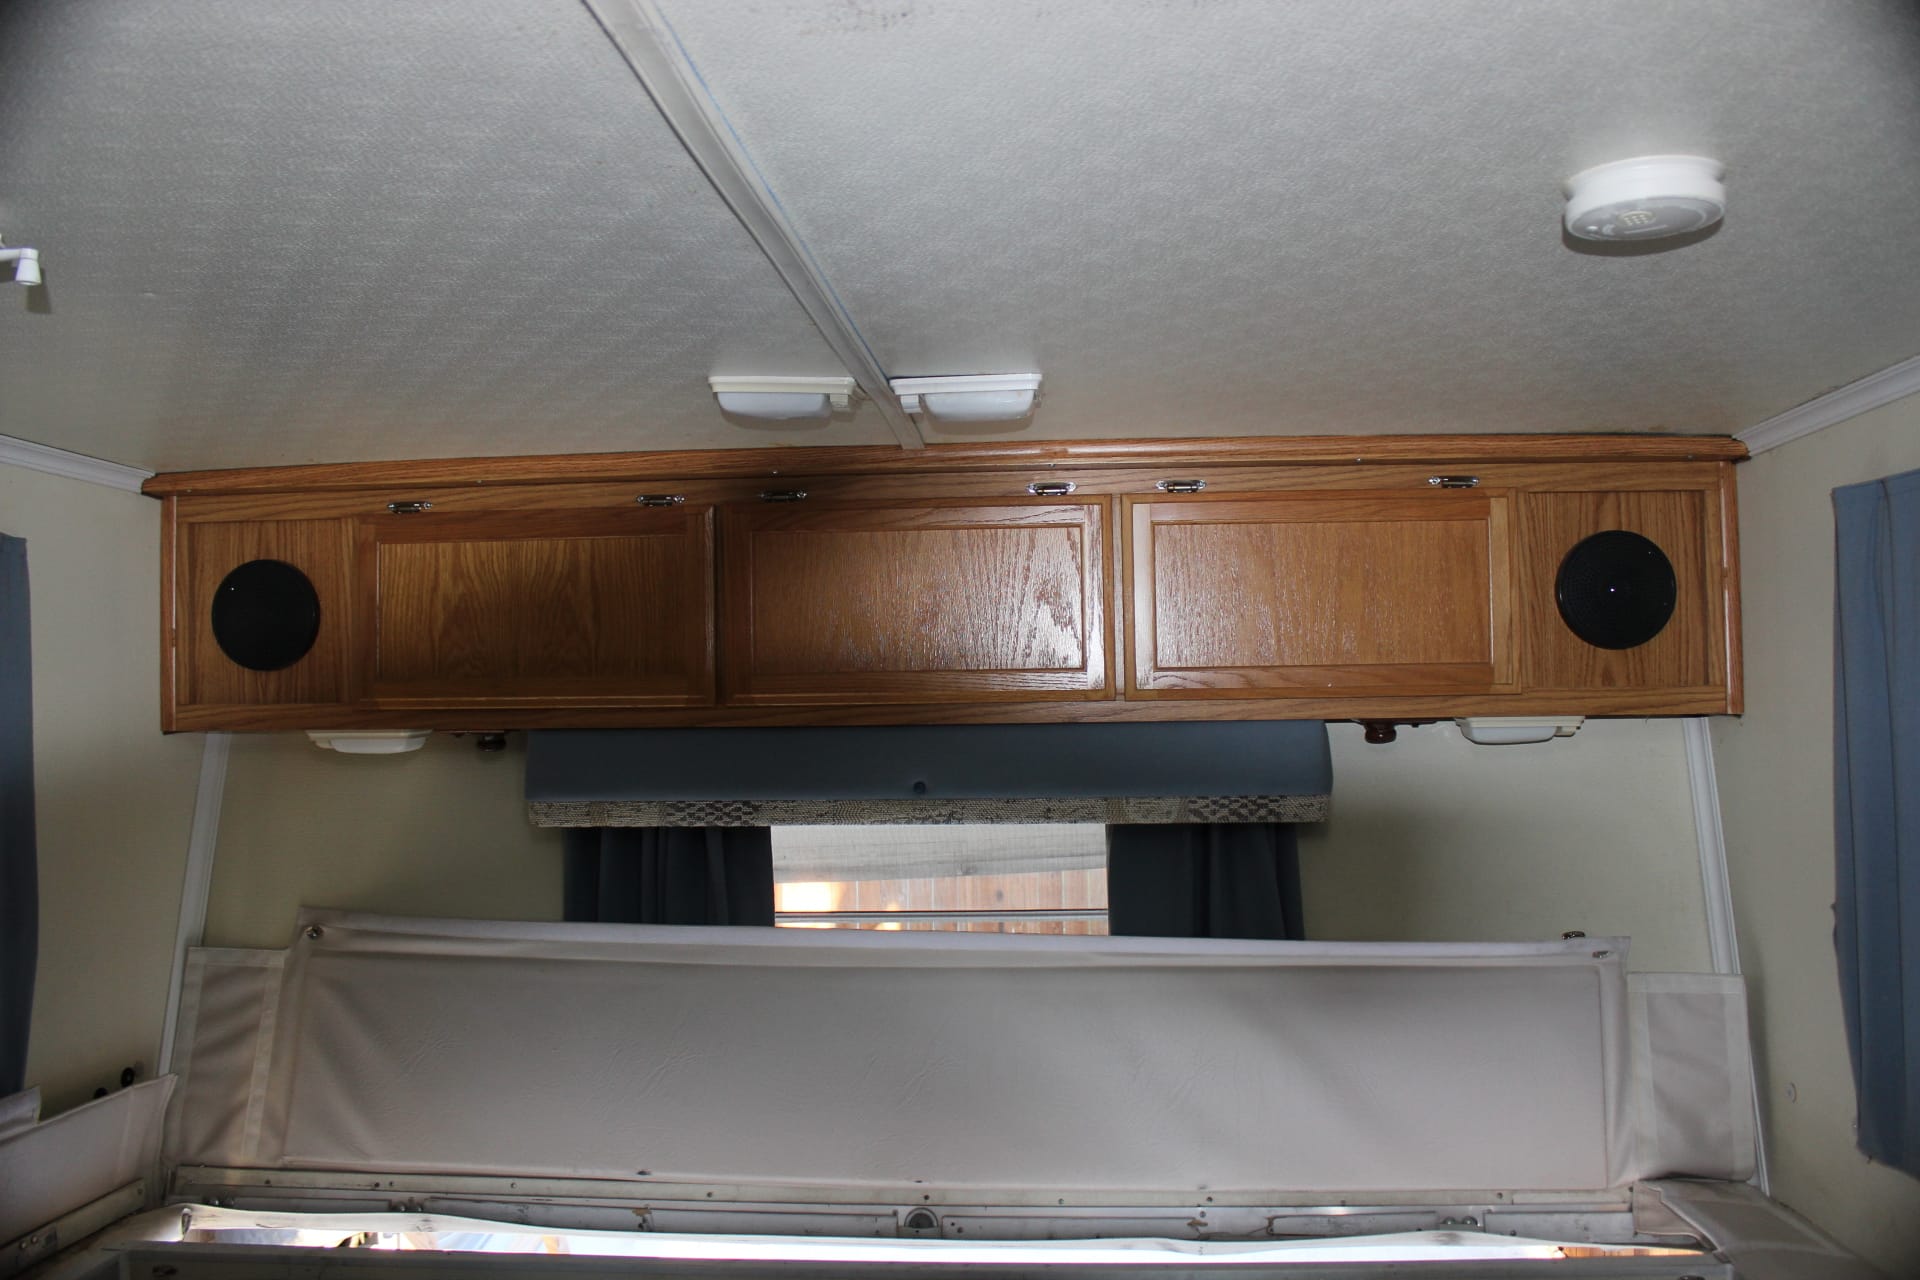
For the surround sound speakers I used the speakers in the overhead storage cabinet (image 1571) on the end of the front of the trailer. Normally these have an FM radio/CD player (above the fridge, image 1572, 1578) hooked up to them, but my trailer didn’t come with one so I had to fish the wires out of the access where the radio would normally be located at, and then splice and run wires from there back underneath the trailer and up into where the entertainment cabinet is located, then hook them into the amp where the surround sound plugs in. They work and do a pretty good job…mind you it aint like being at the IMAX or even at home with your home theater but it’s close enough….especially when your ruffin it out in the wilderness (at the campground….. in the air conditioning…..laying on the couch)!
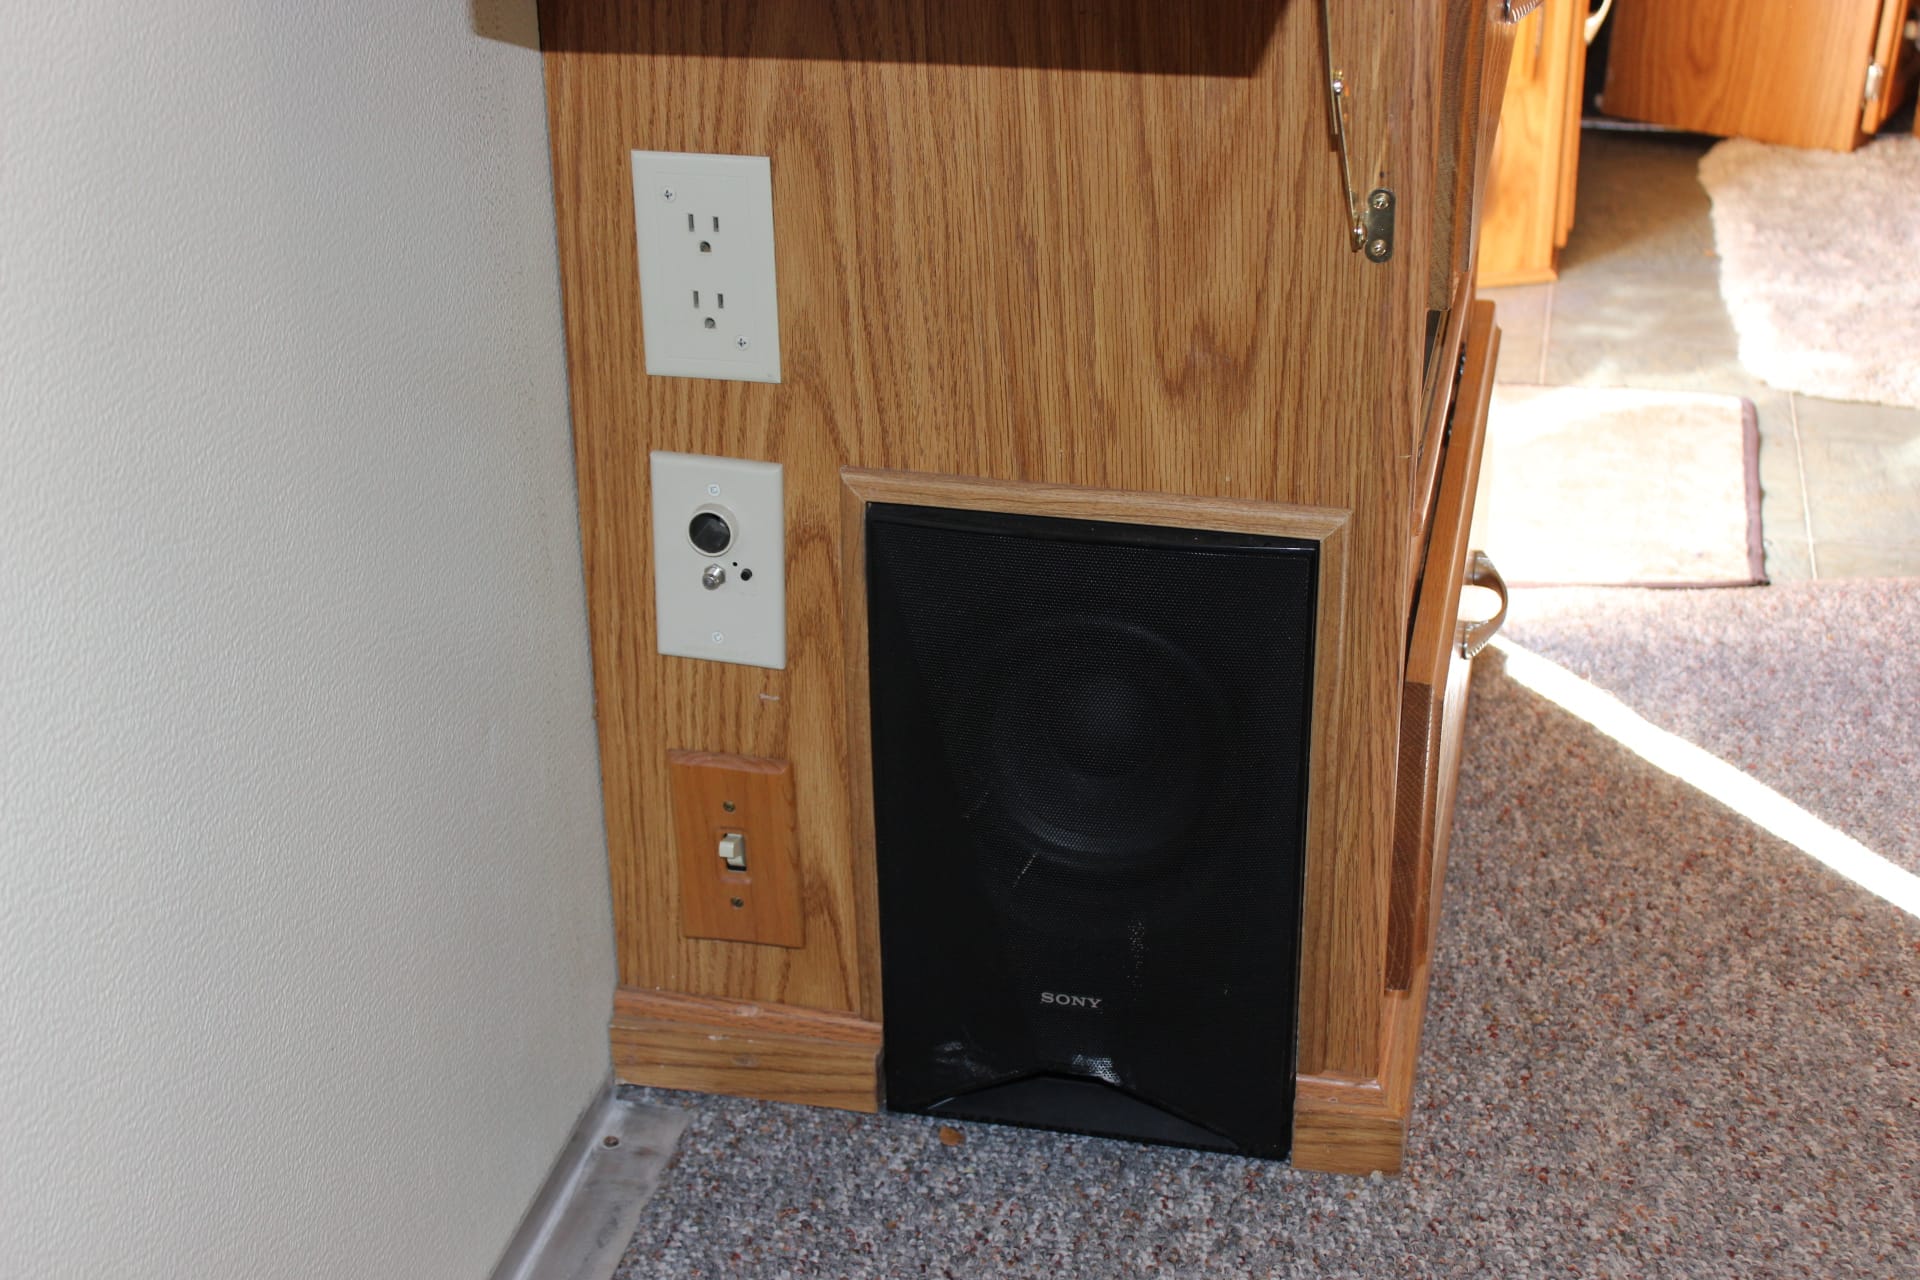
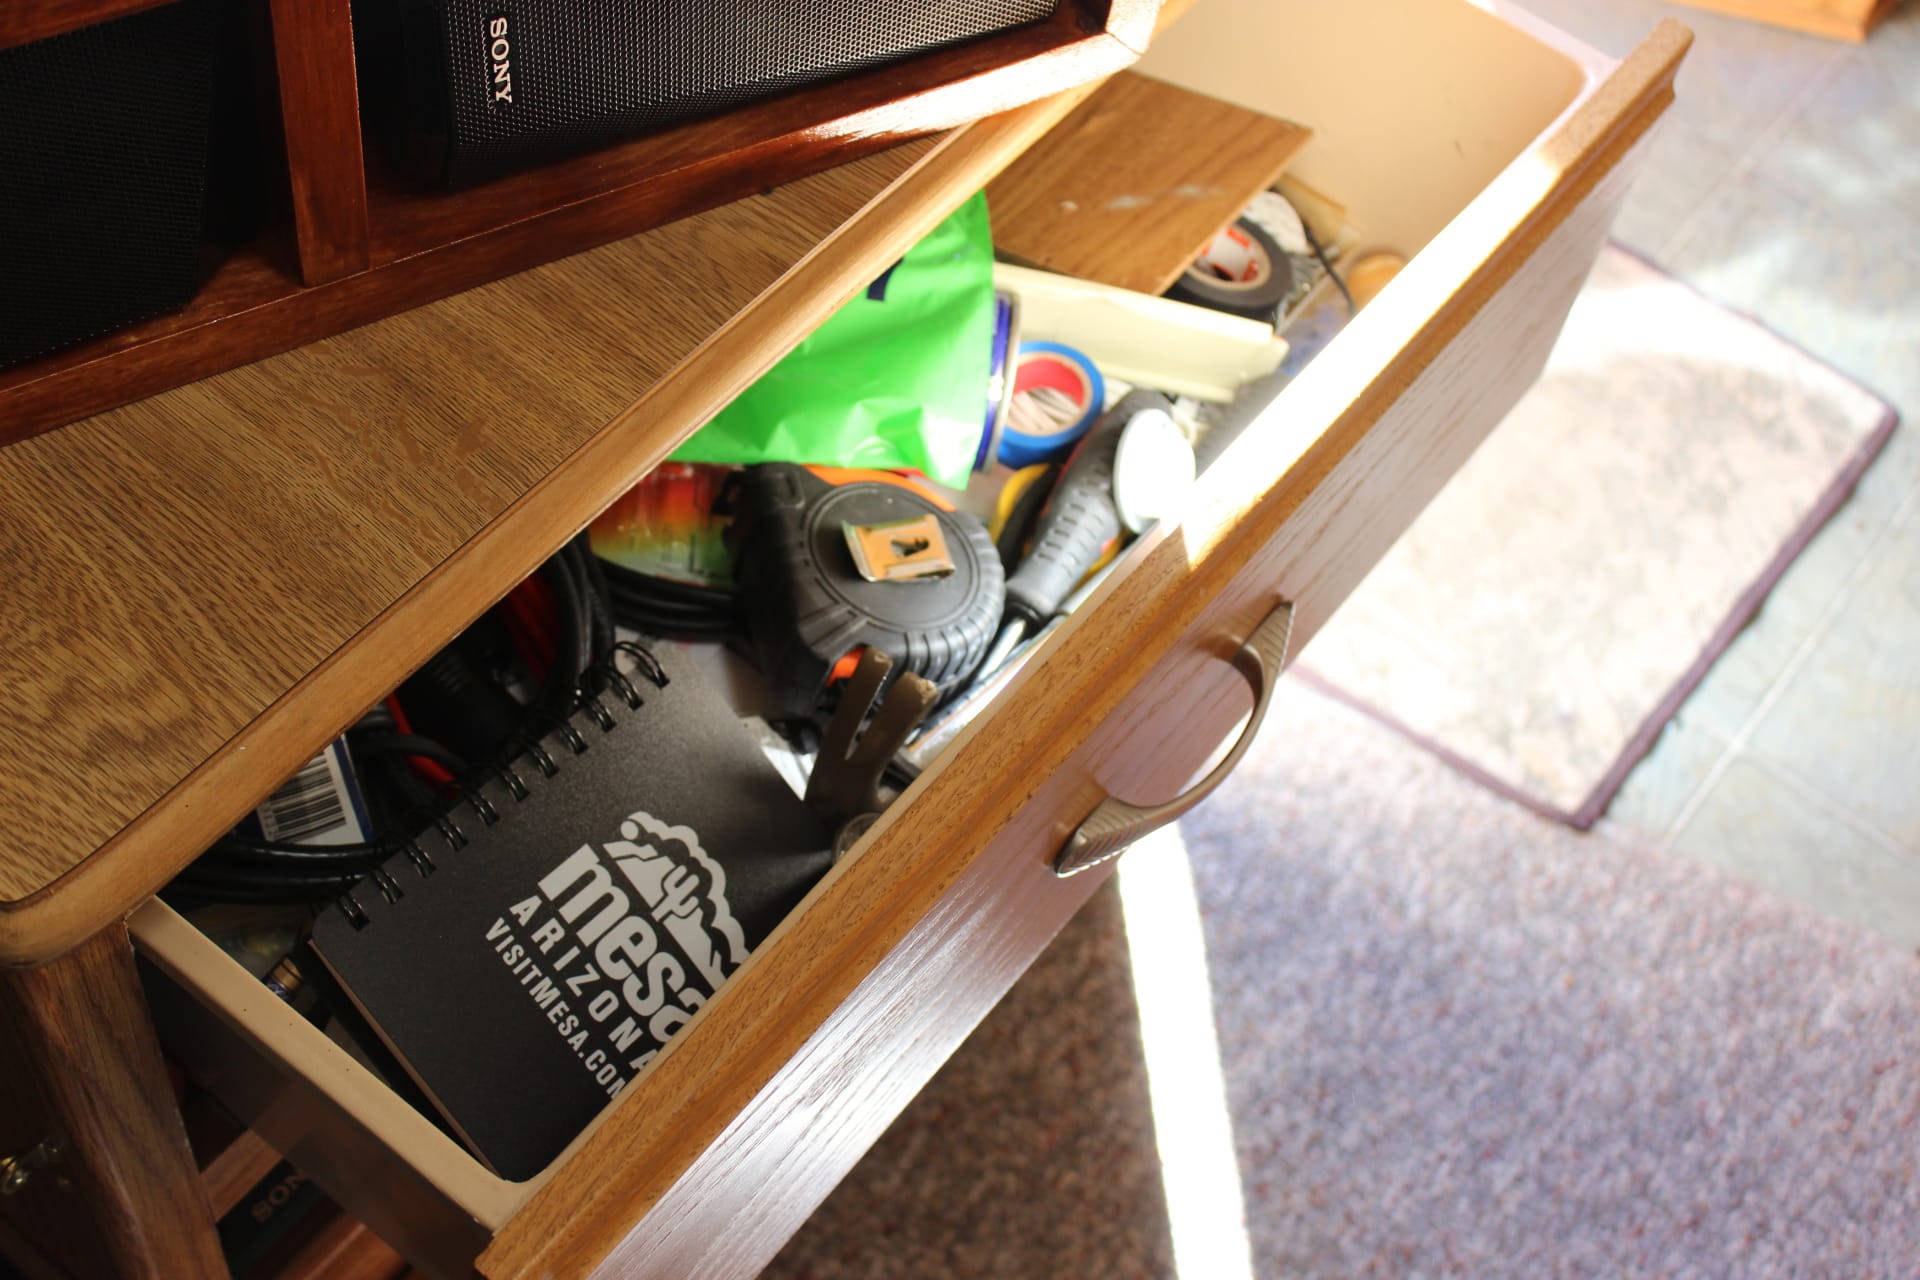
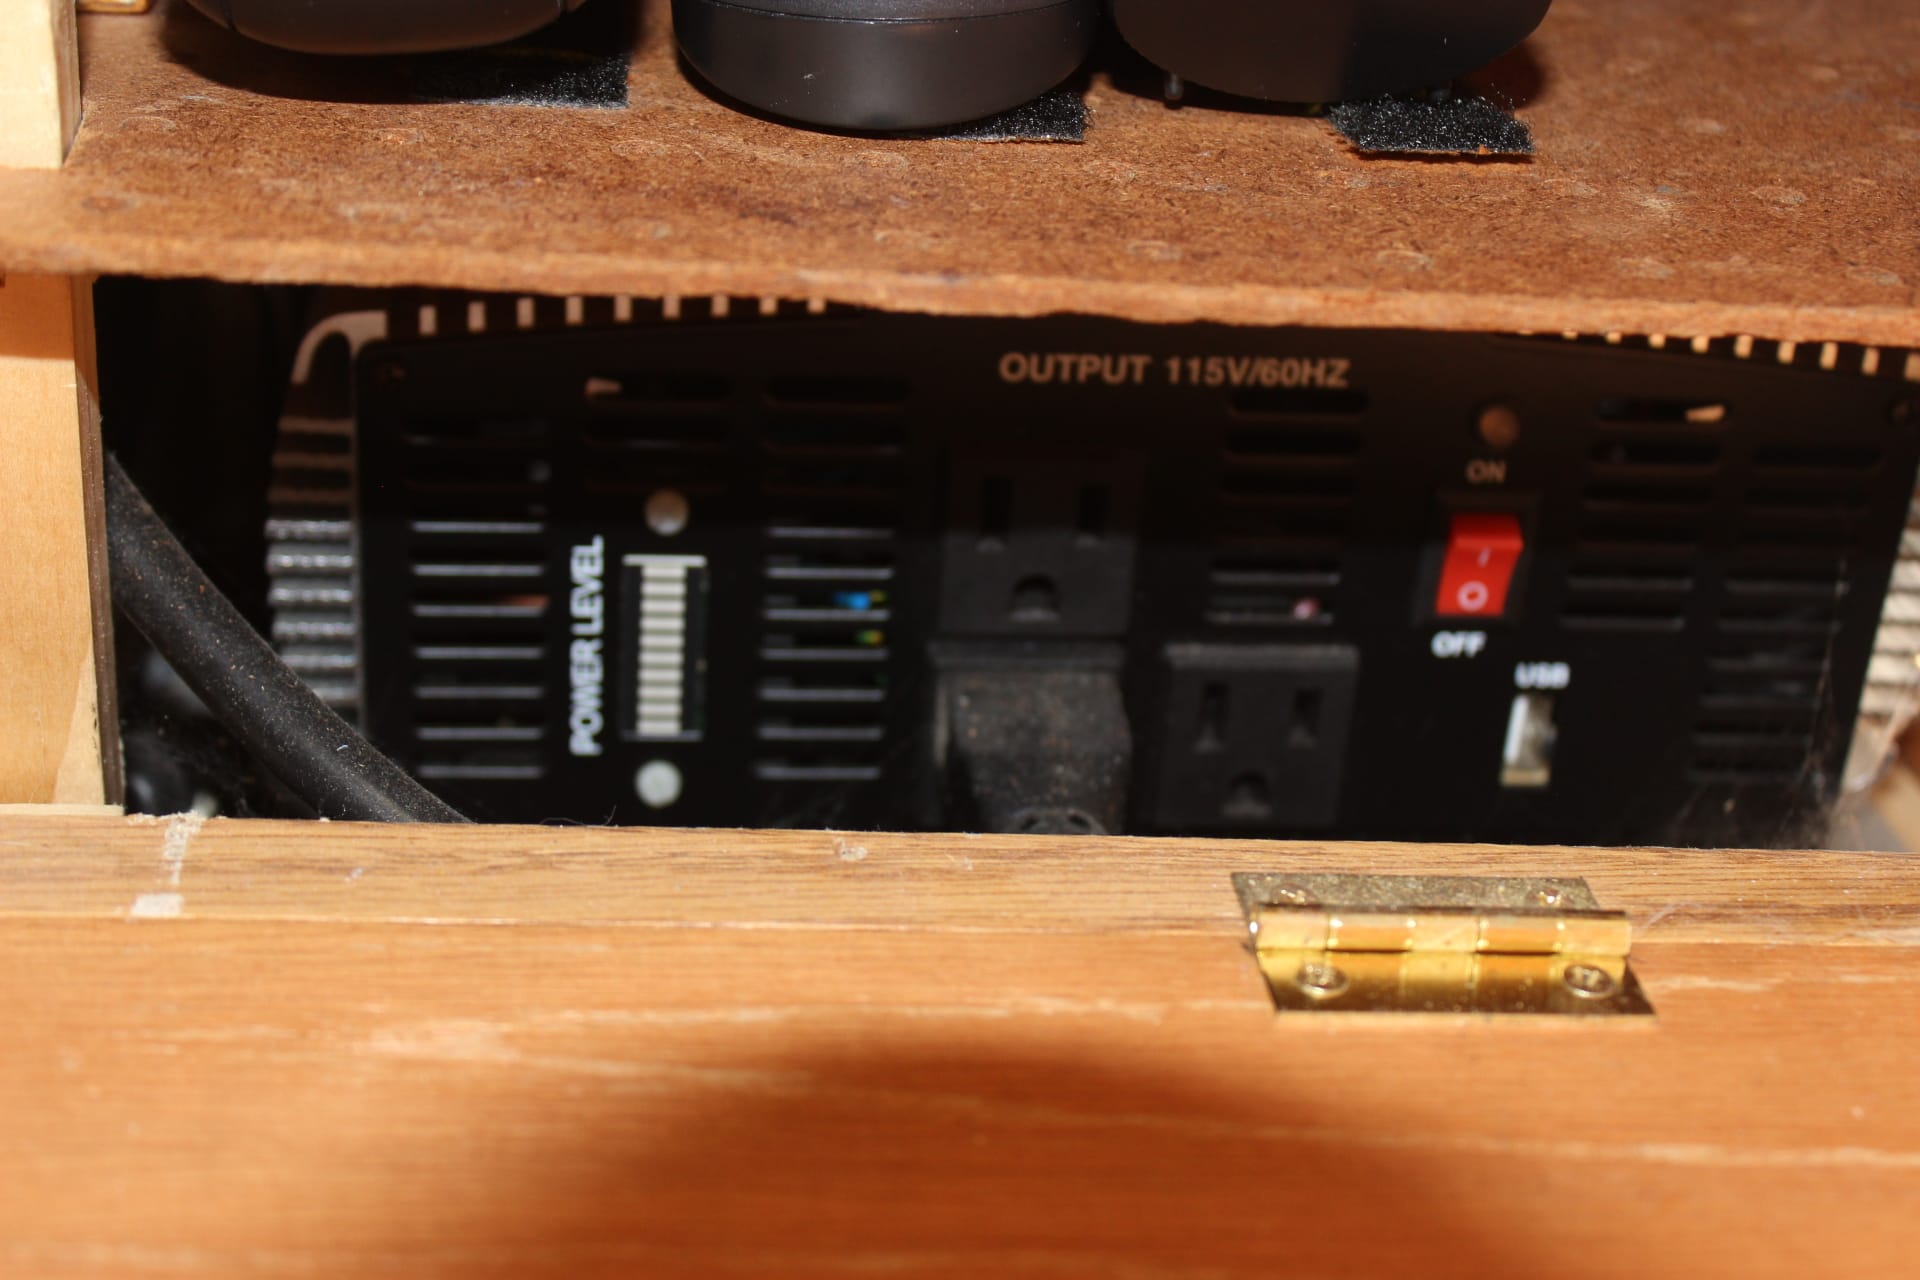
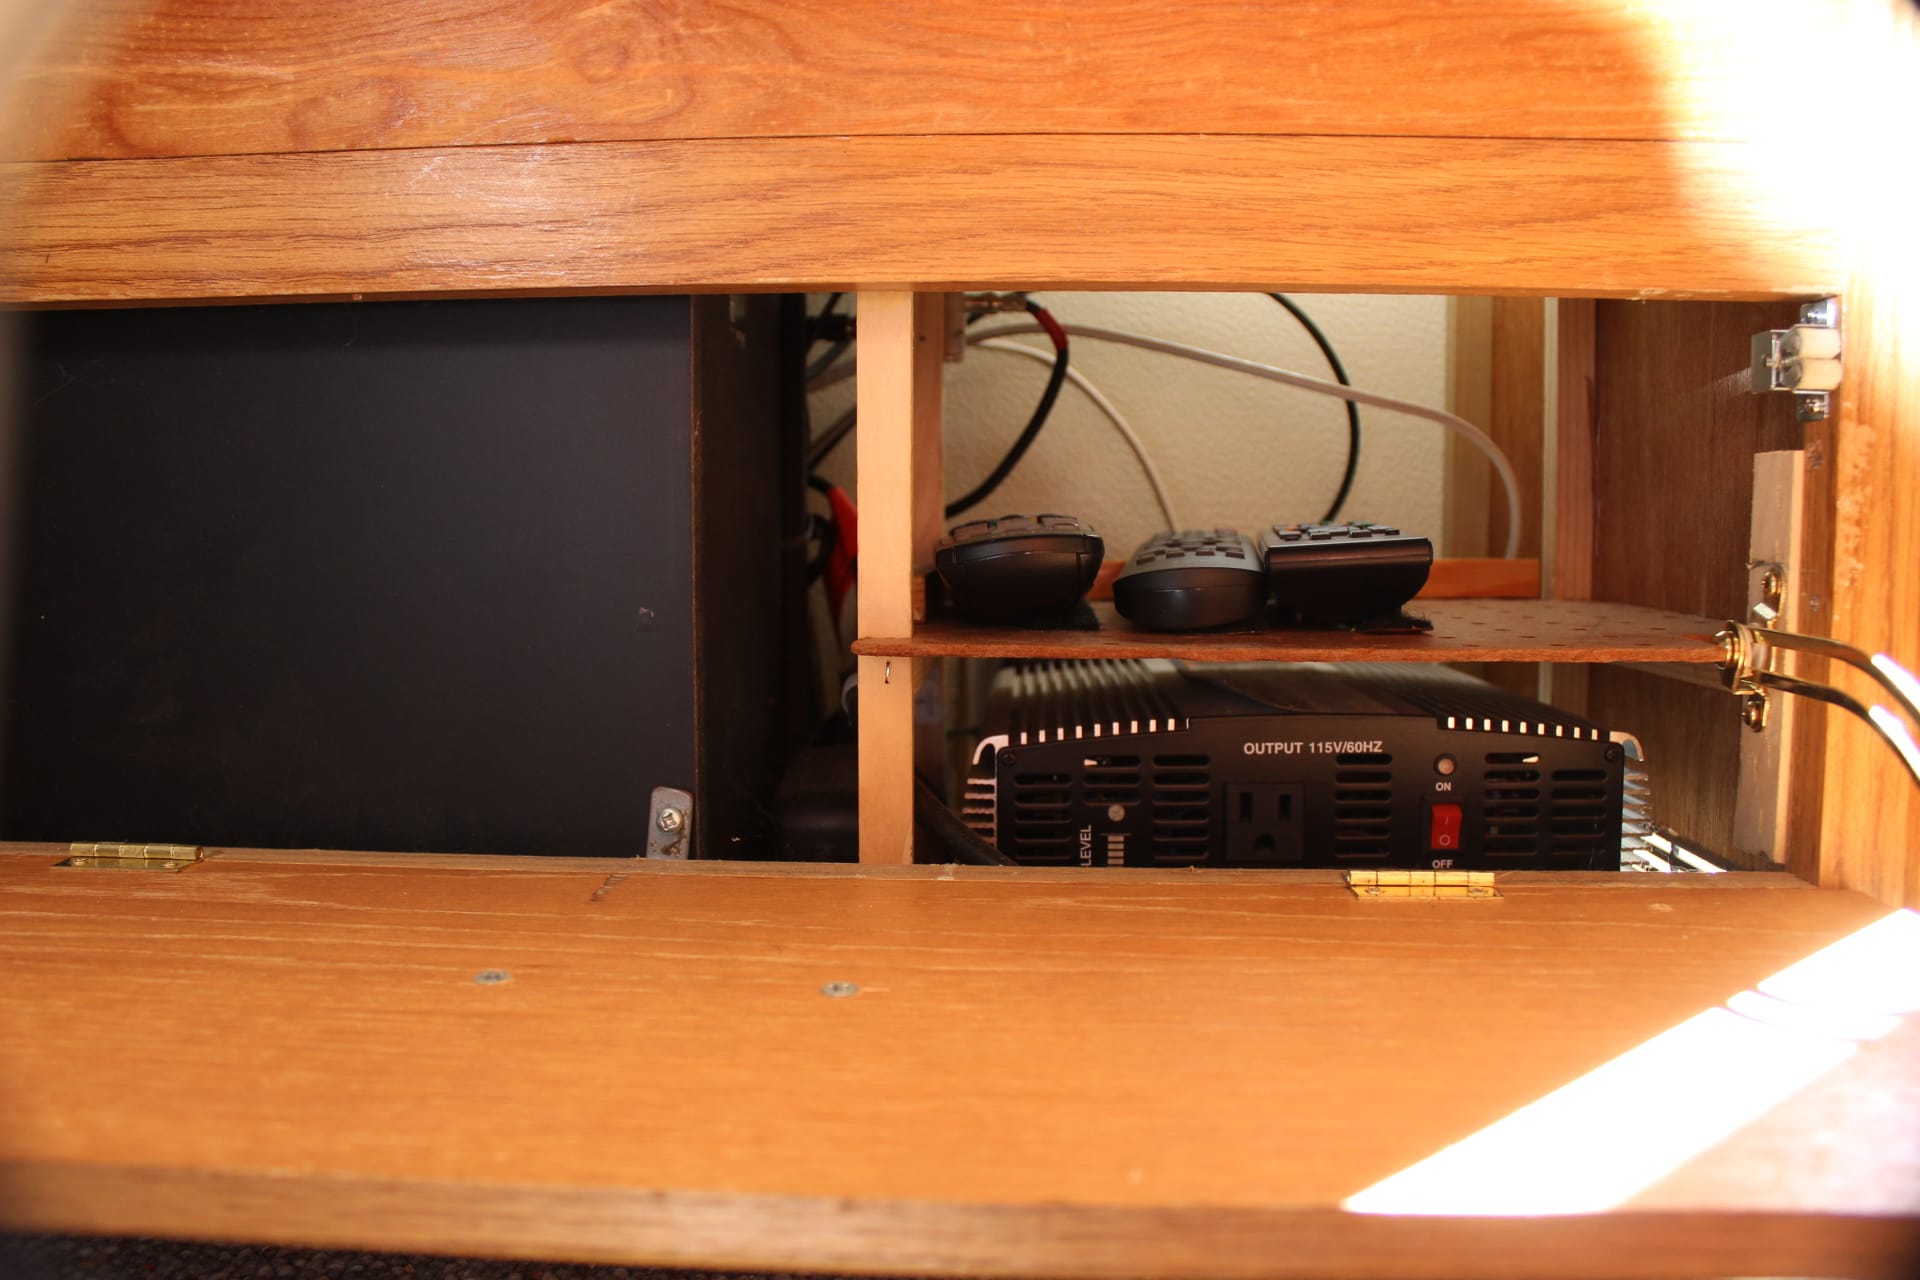
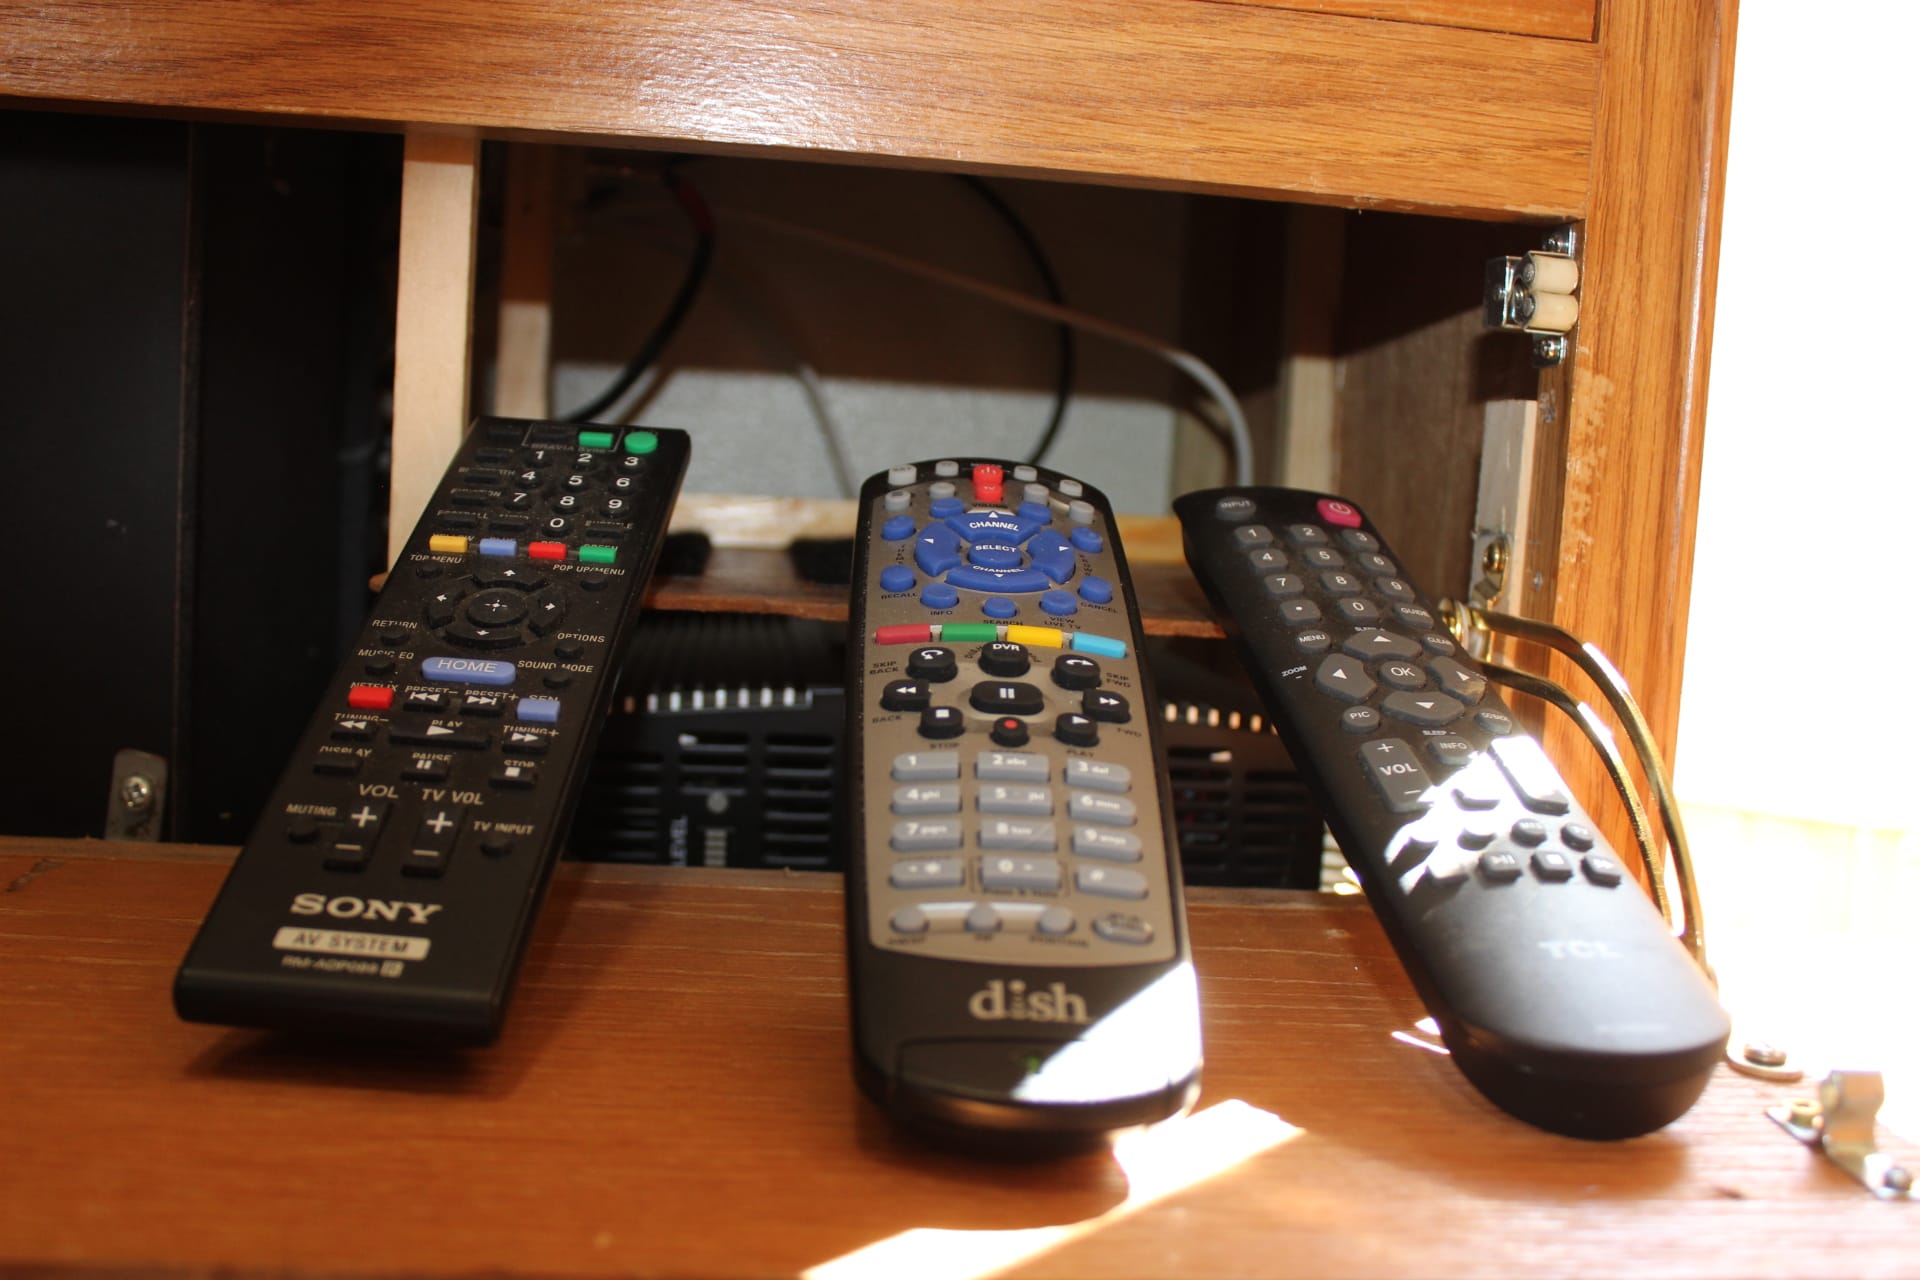
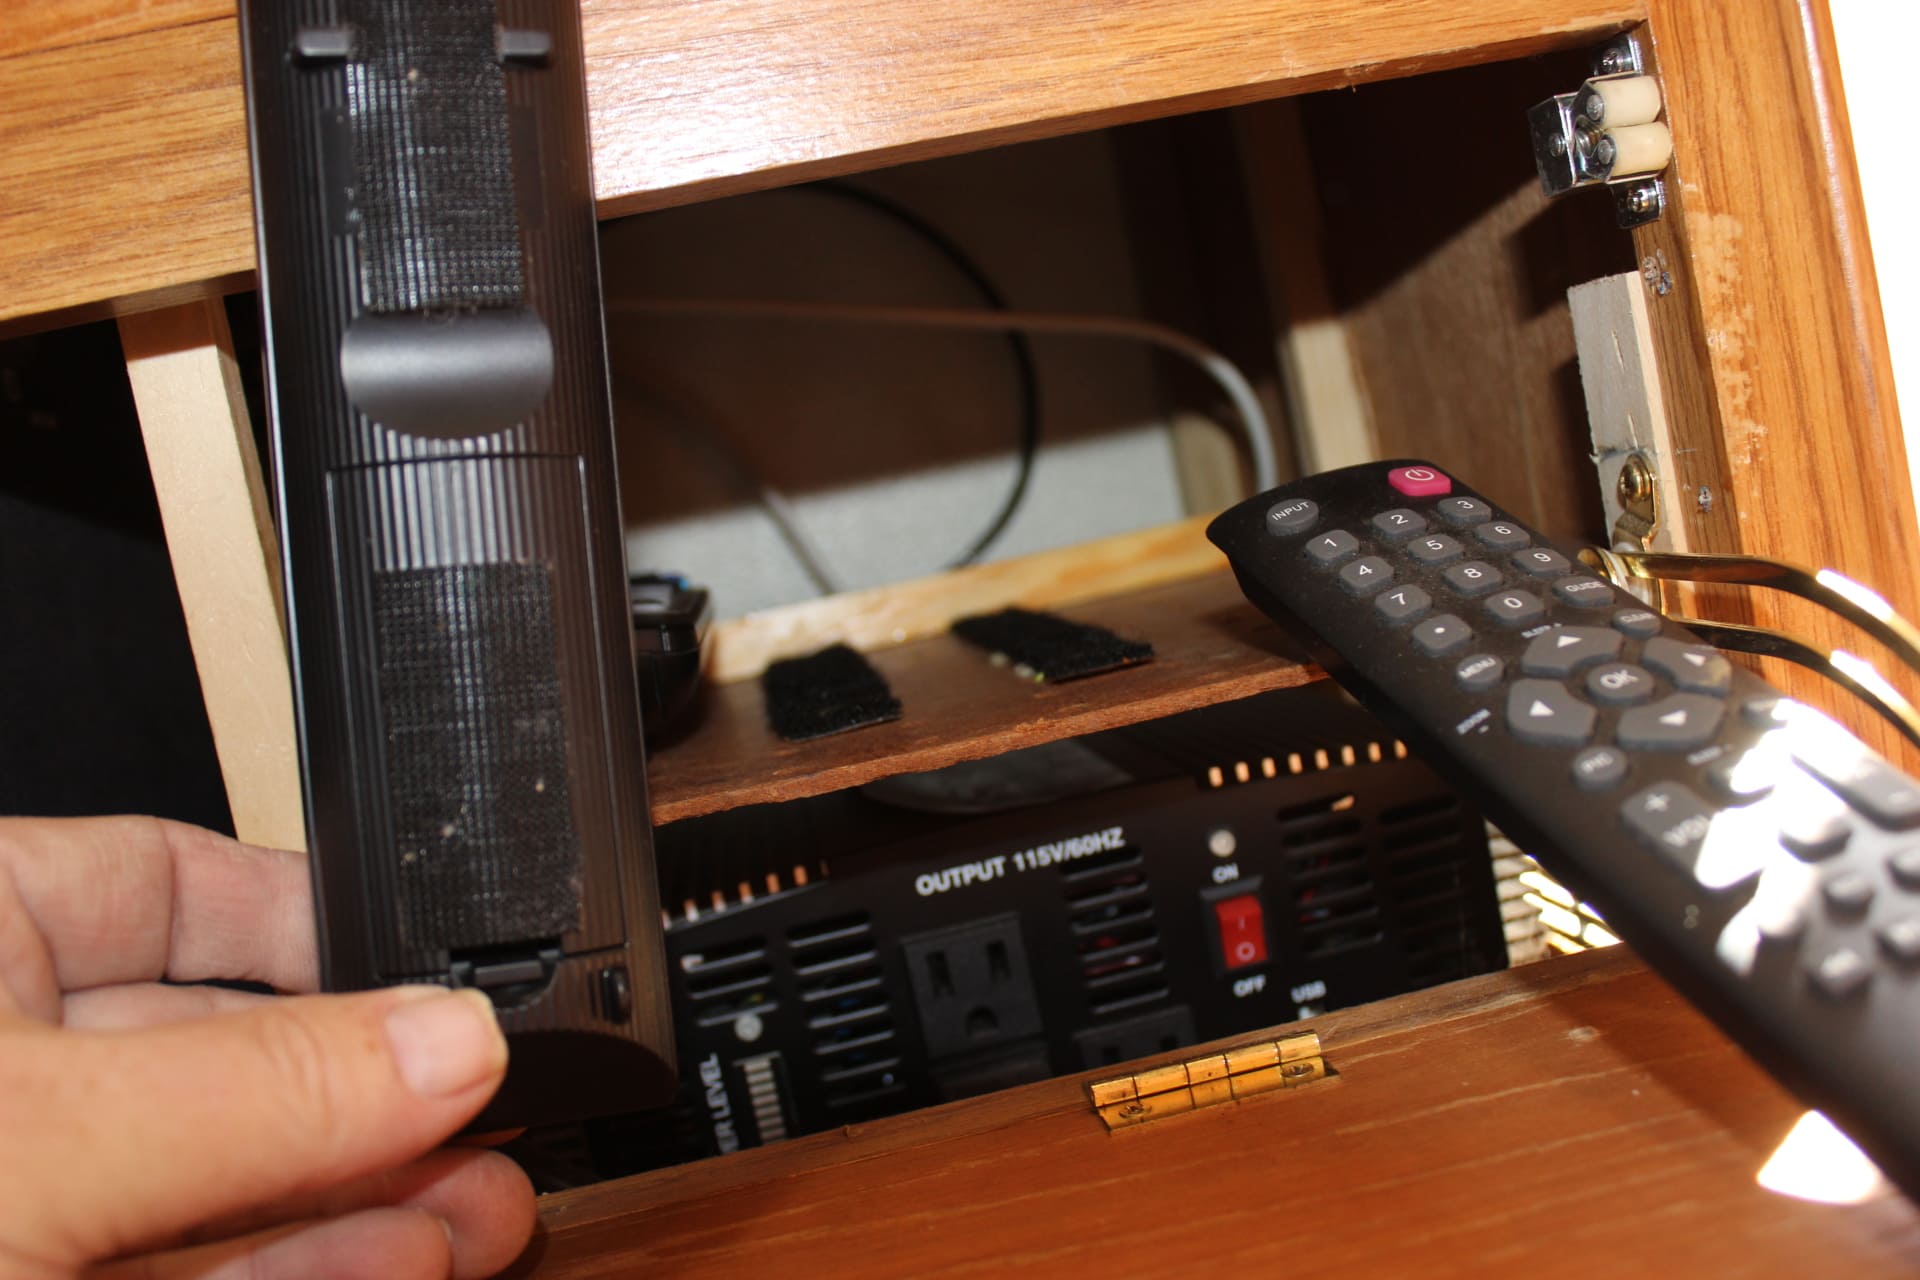
What I did was take out that whole cabinet out of the trailer and remove the bottom two drawers (I left the top one intact …image1516). That made room on the side for the sub-woofer to be placed (image 1515). This took up half of the cabinet where the lower two drawers were (image 1518). The amp and satellite boxes (image 1523 rest on top of the sub-woofer with some padding in between the components so as to not rattle things a bit (it does a nice job!) and the other part of the lower two drawers were dedicated to housing the power inverter (image 1519) which I ran dedicated wires all the way back to the rear storage compartment to its own breaker that runs directly off the battery bank. Above that is a place where the remotes (all 3) are stored with the help of Velcro (images 1521, 1524, 1525). I kept the front panel from the bottom draw and hinged it with a drawer stop as well so one could open and close it and keep everything in order (images 1518, 1521, 1522). What you can’t see is the hard drive for the DVR which is behind the sub-woofer next to the shell wall as well as a power strip that powers everything and connects to a selector switch where one can choose between 110AC from an outside source (power pole at the park or a generator or from the 12 volt inverter itself. You can get a pretty good inverter from Horrible Fraught Tools (Harbor Freight) at a very reasonable price. I mean just because you’re in the boonies doesn’t mean you have to give up FOOTBALL!
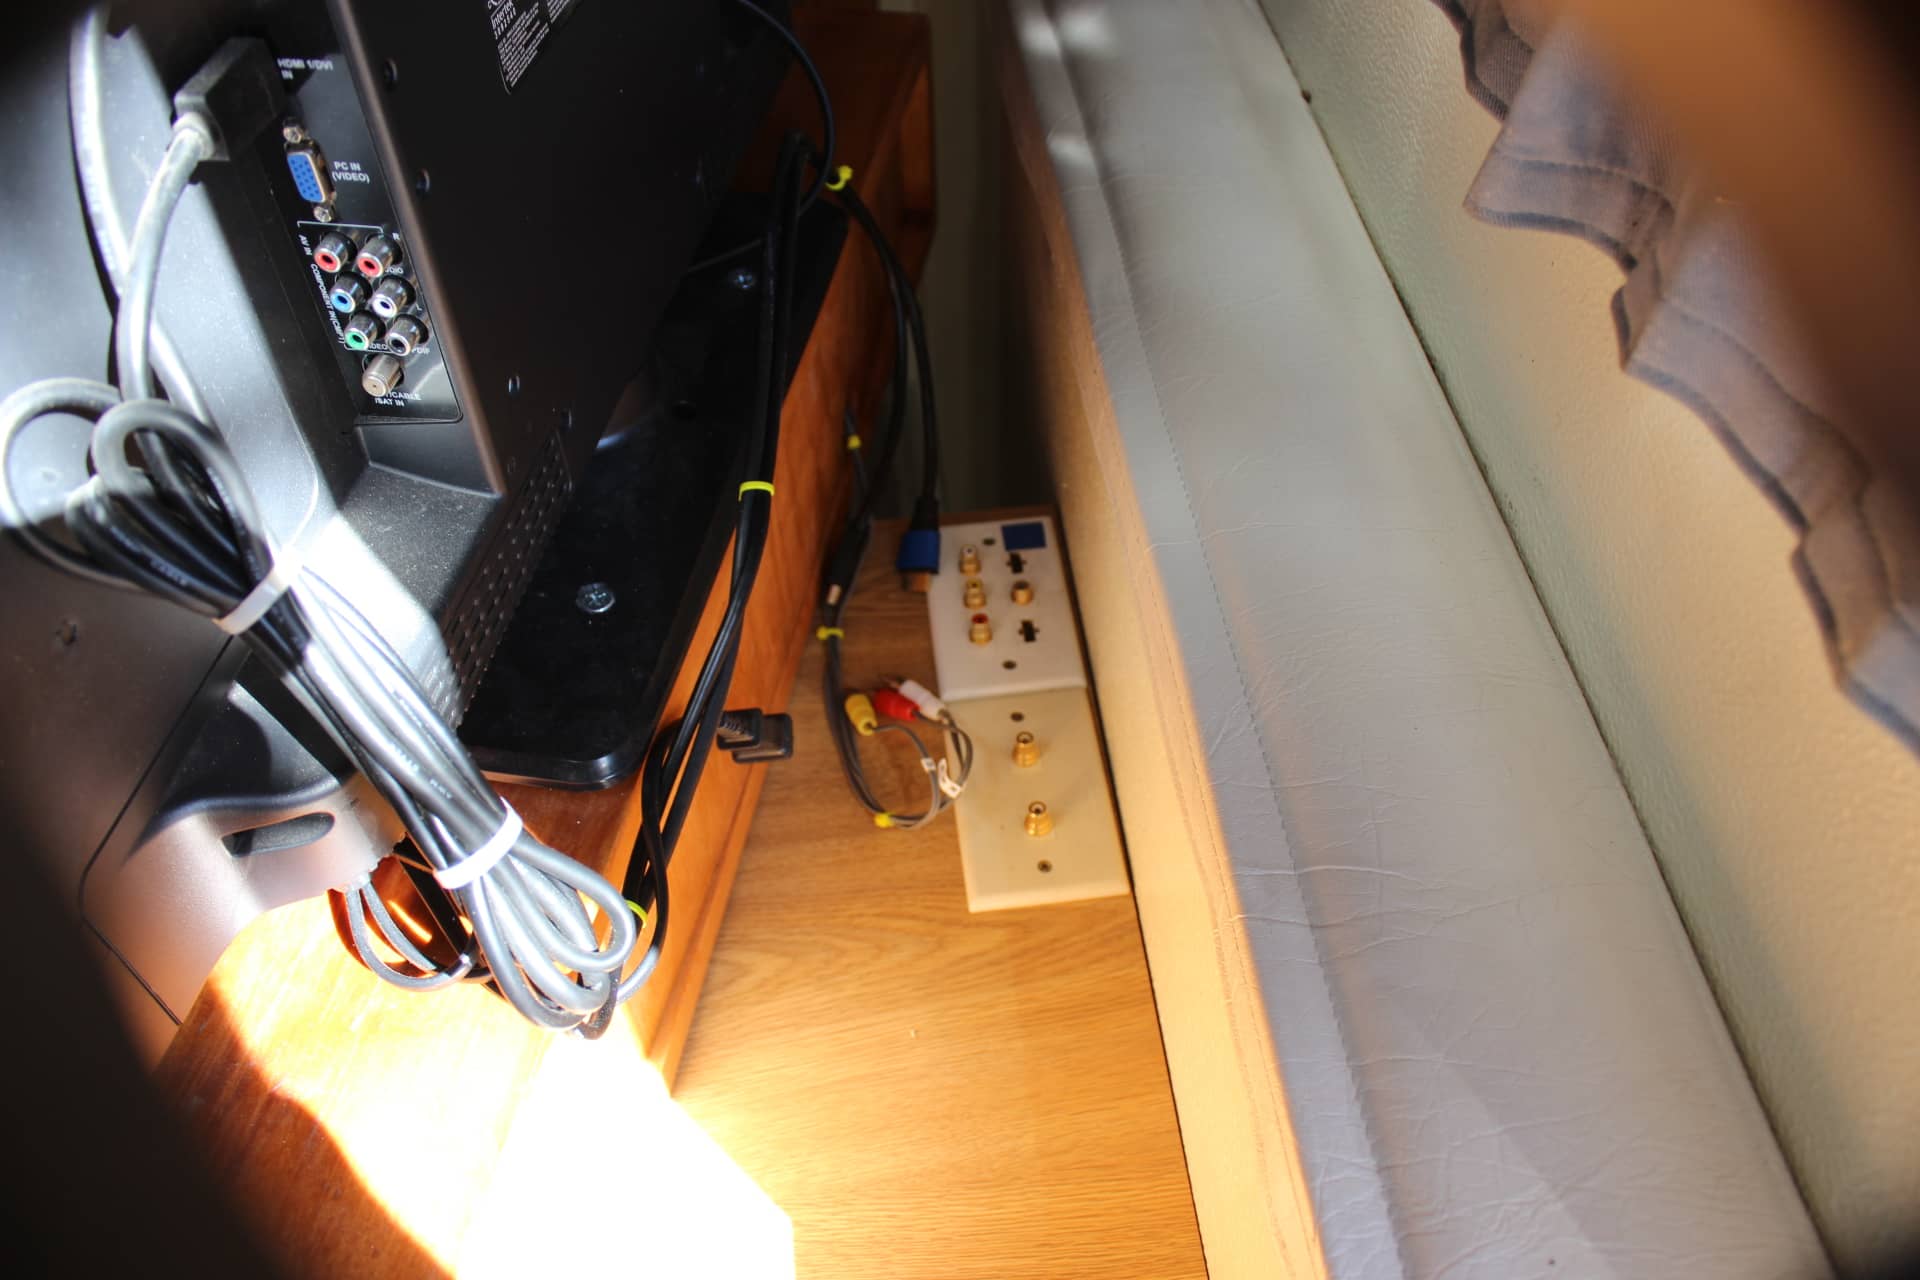
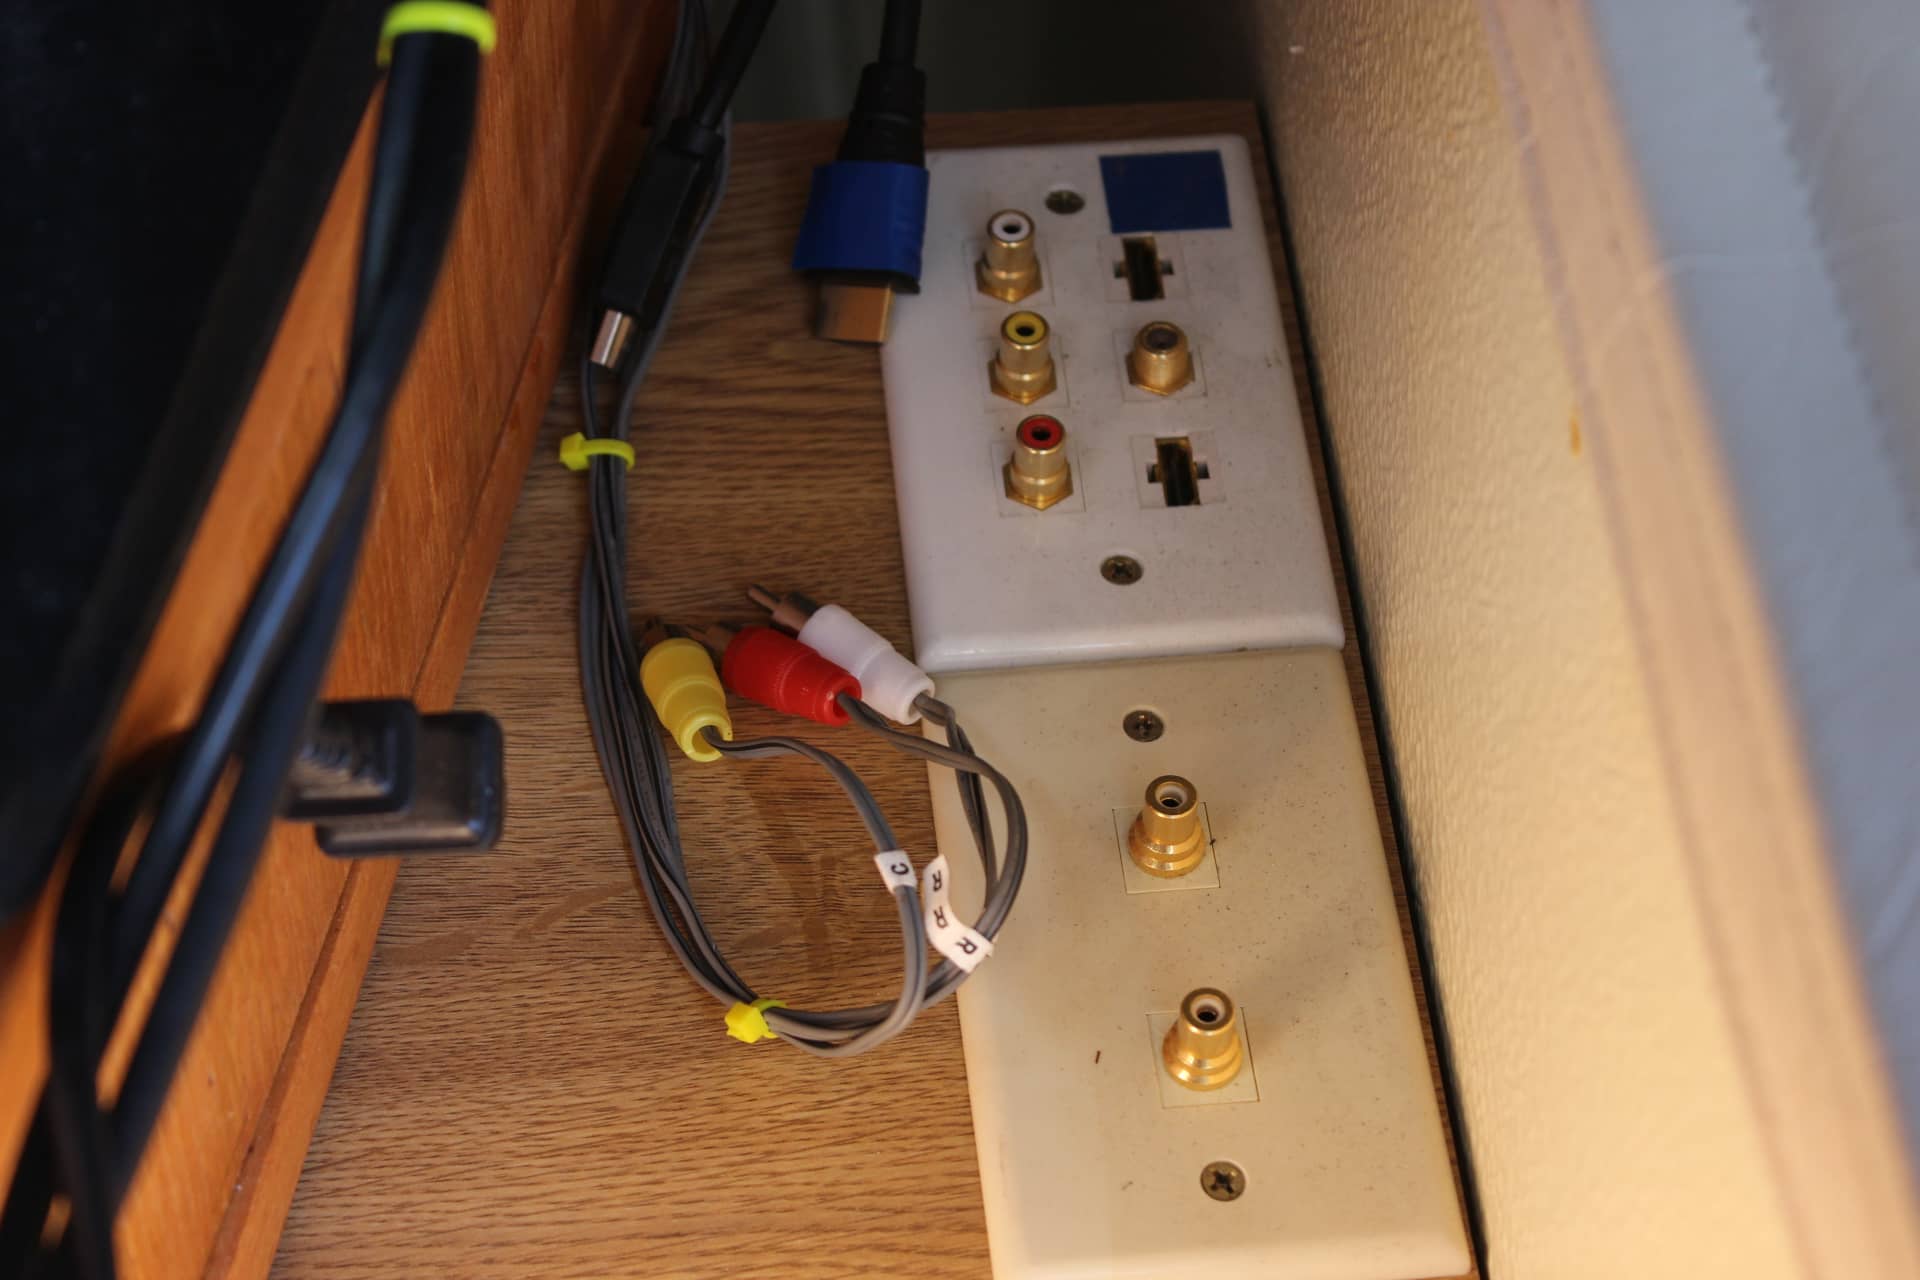
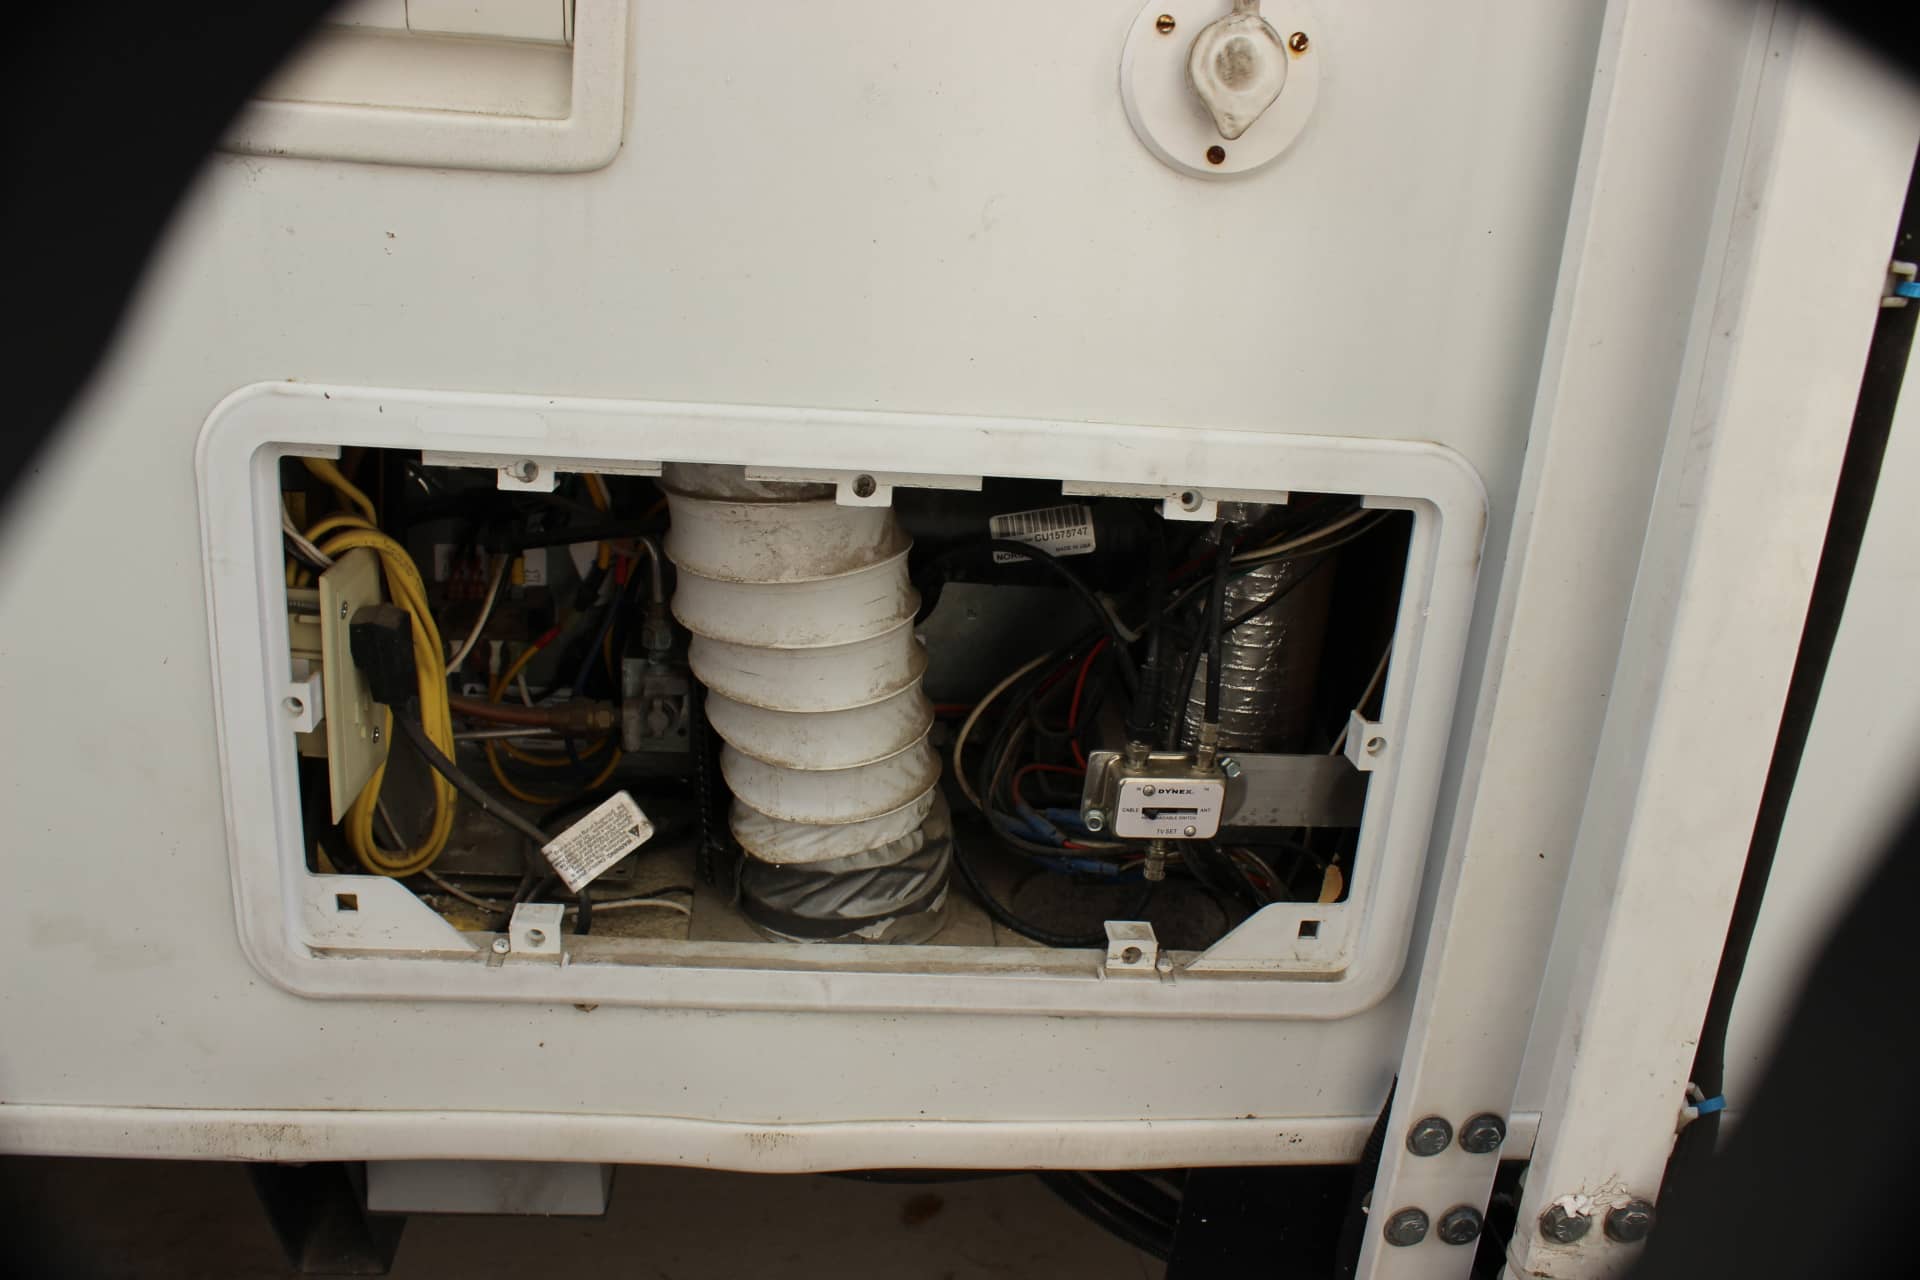
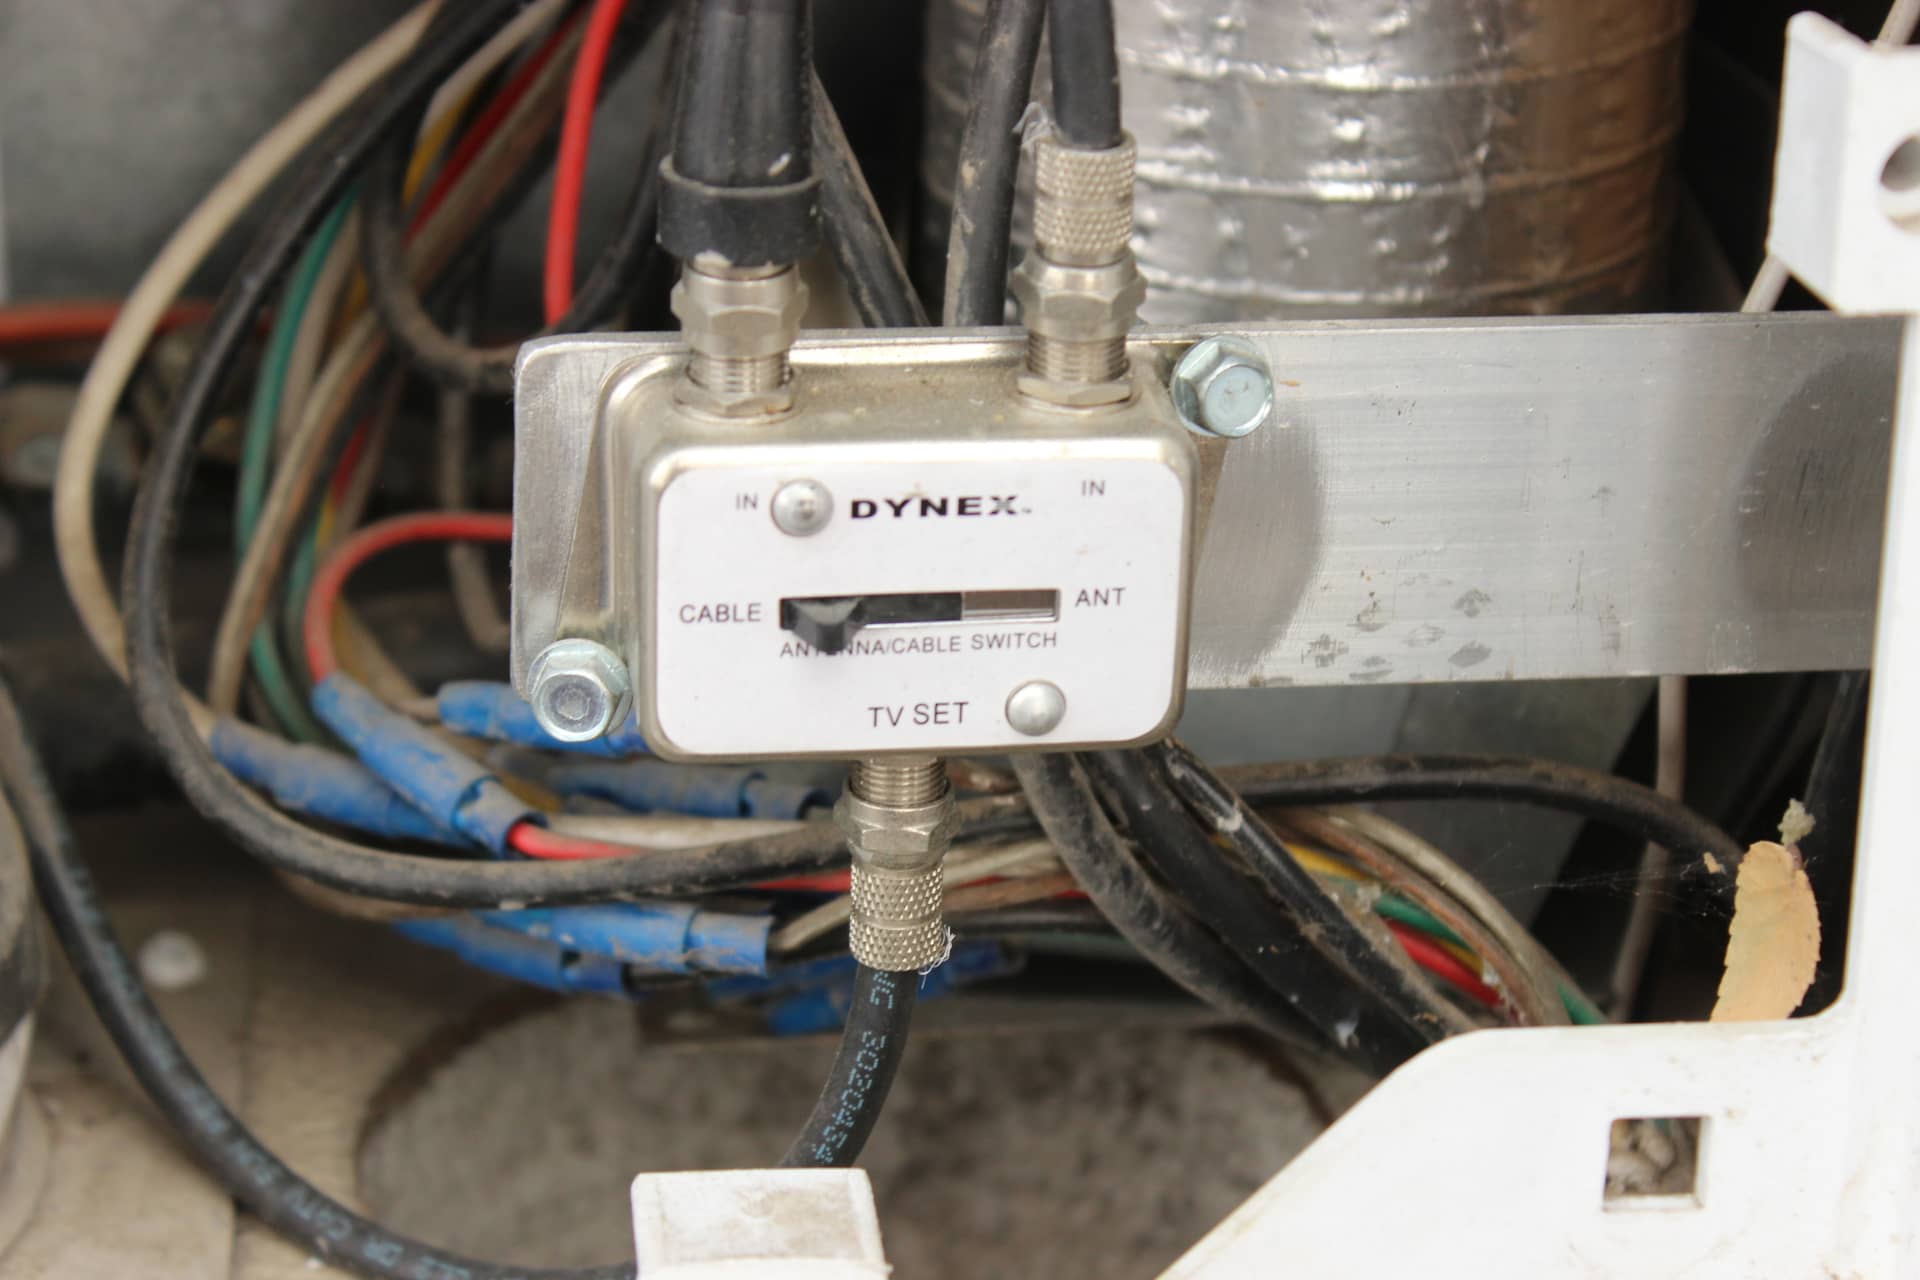
You can see that double pole double throw switch on the side of the cabinet in image 1515 at the bottom on the left side. Also what you can’t see is a coax splitter to the satellite receiver box and one to the coax plug plate(for the crank up air antenna and campground cable TV) on the side of the cabinet right above the power selector switch (image 1515). To toggle between having air antenna and campground cable TV I had to install a slide switch inside the access hatch for the refrigerator (image 1557) and so to switch from one to the other you have to take off the hatch access door (very simple to do especially if you have tough long thumbnails) and slide the switch to the appropriate position (image 1558). The other plate on the top of the cabinet is for hooking up the cable/antenna TV to the TV with a coax cable and to the amp with some RCA connectors. Wheeeew!!!….I tried to cover every situation I could think of regarding the television input….I think I got them all accept telepathy from Mars!
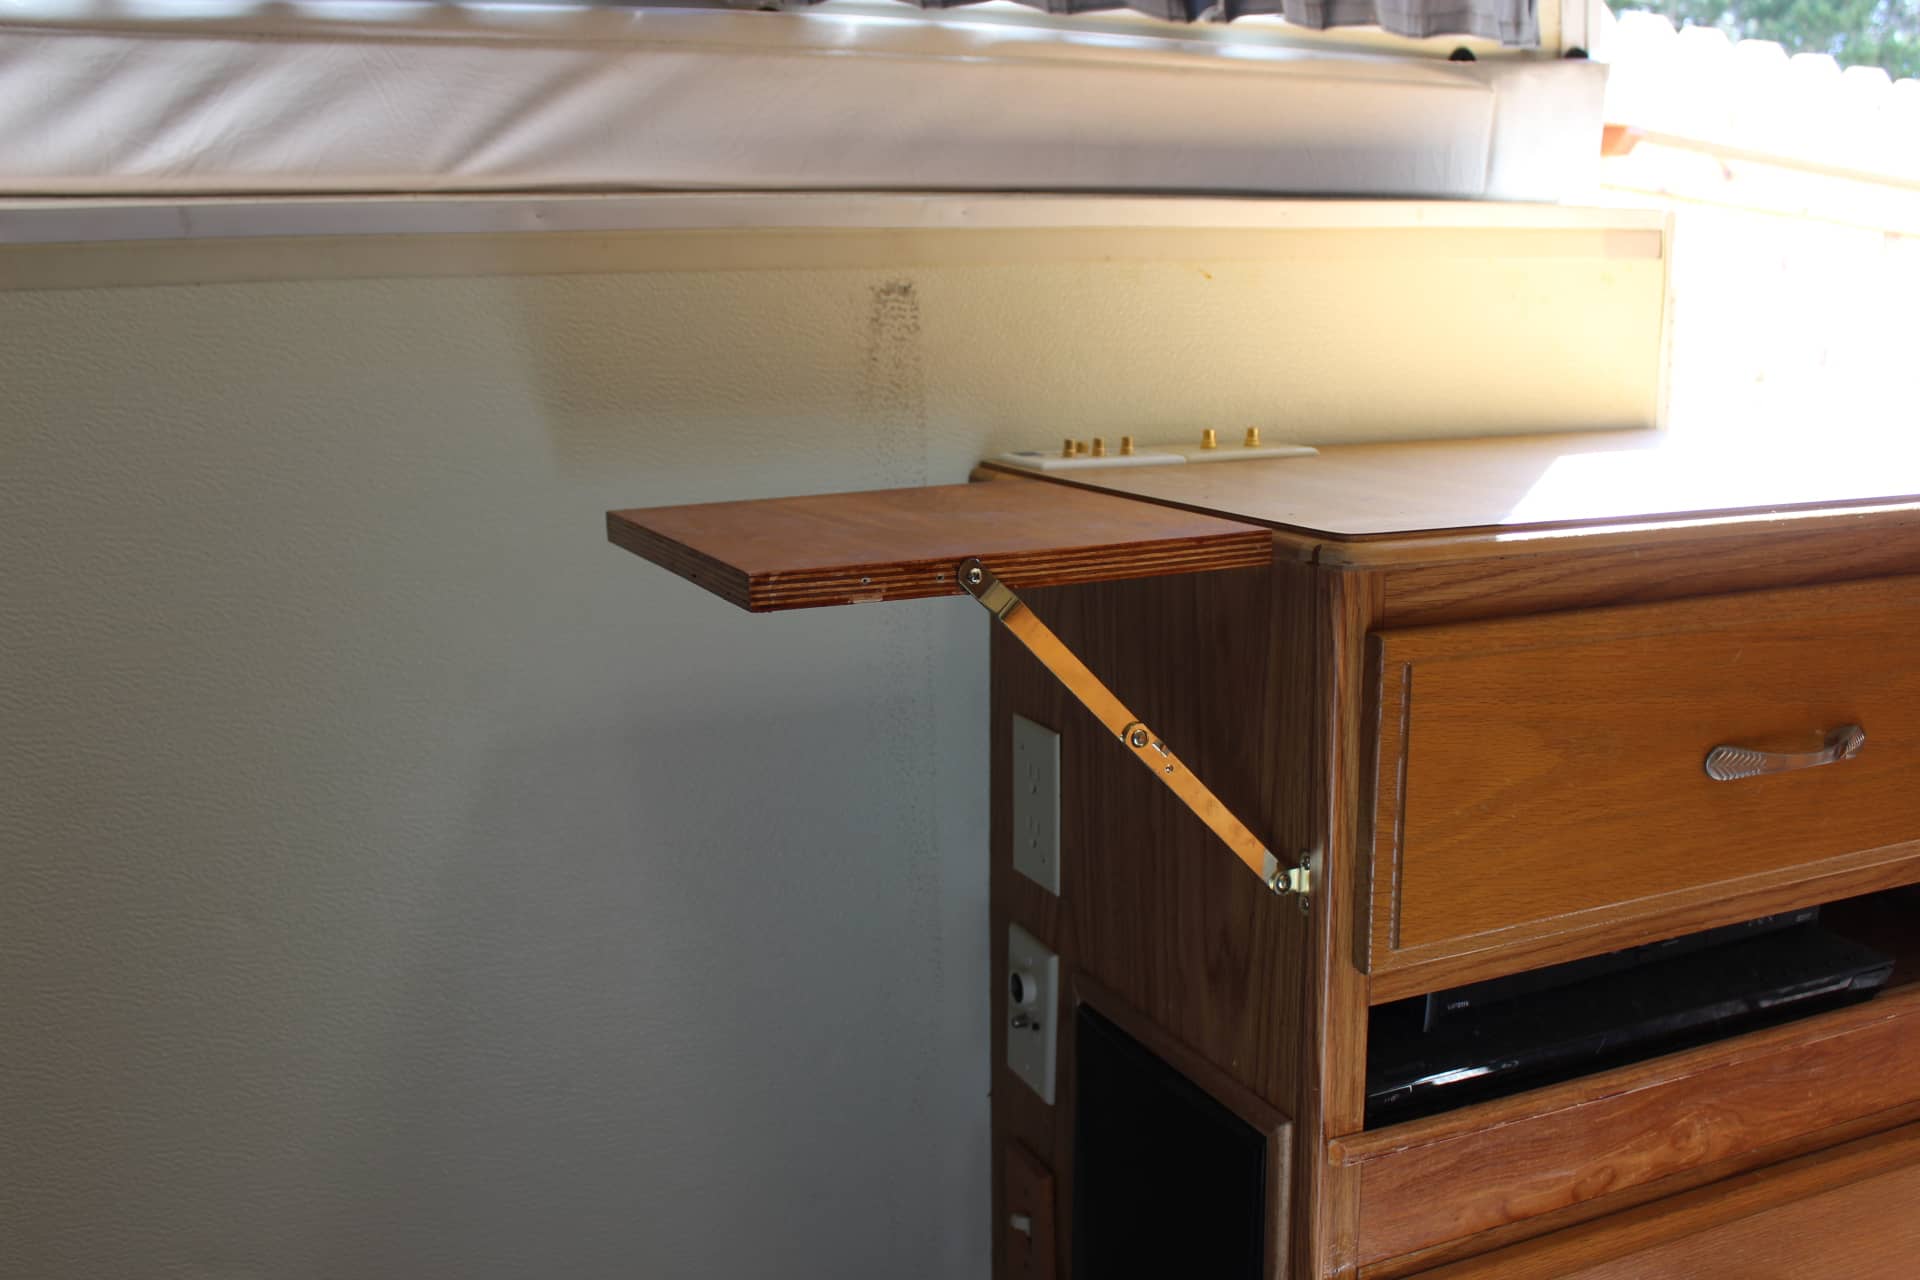
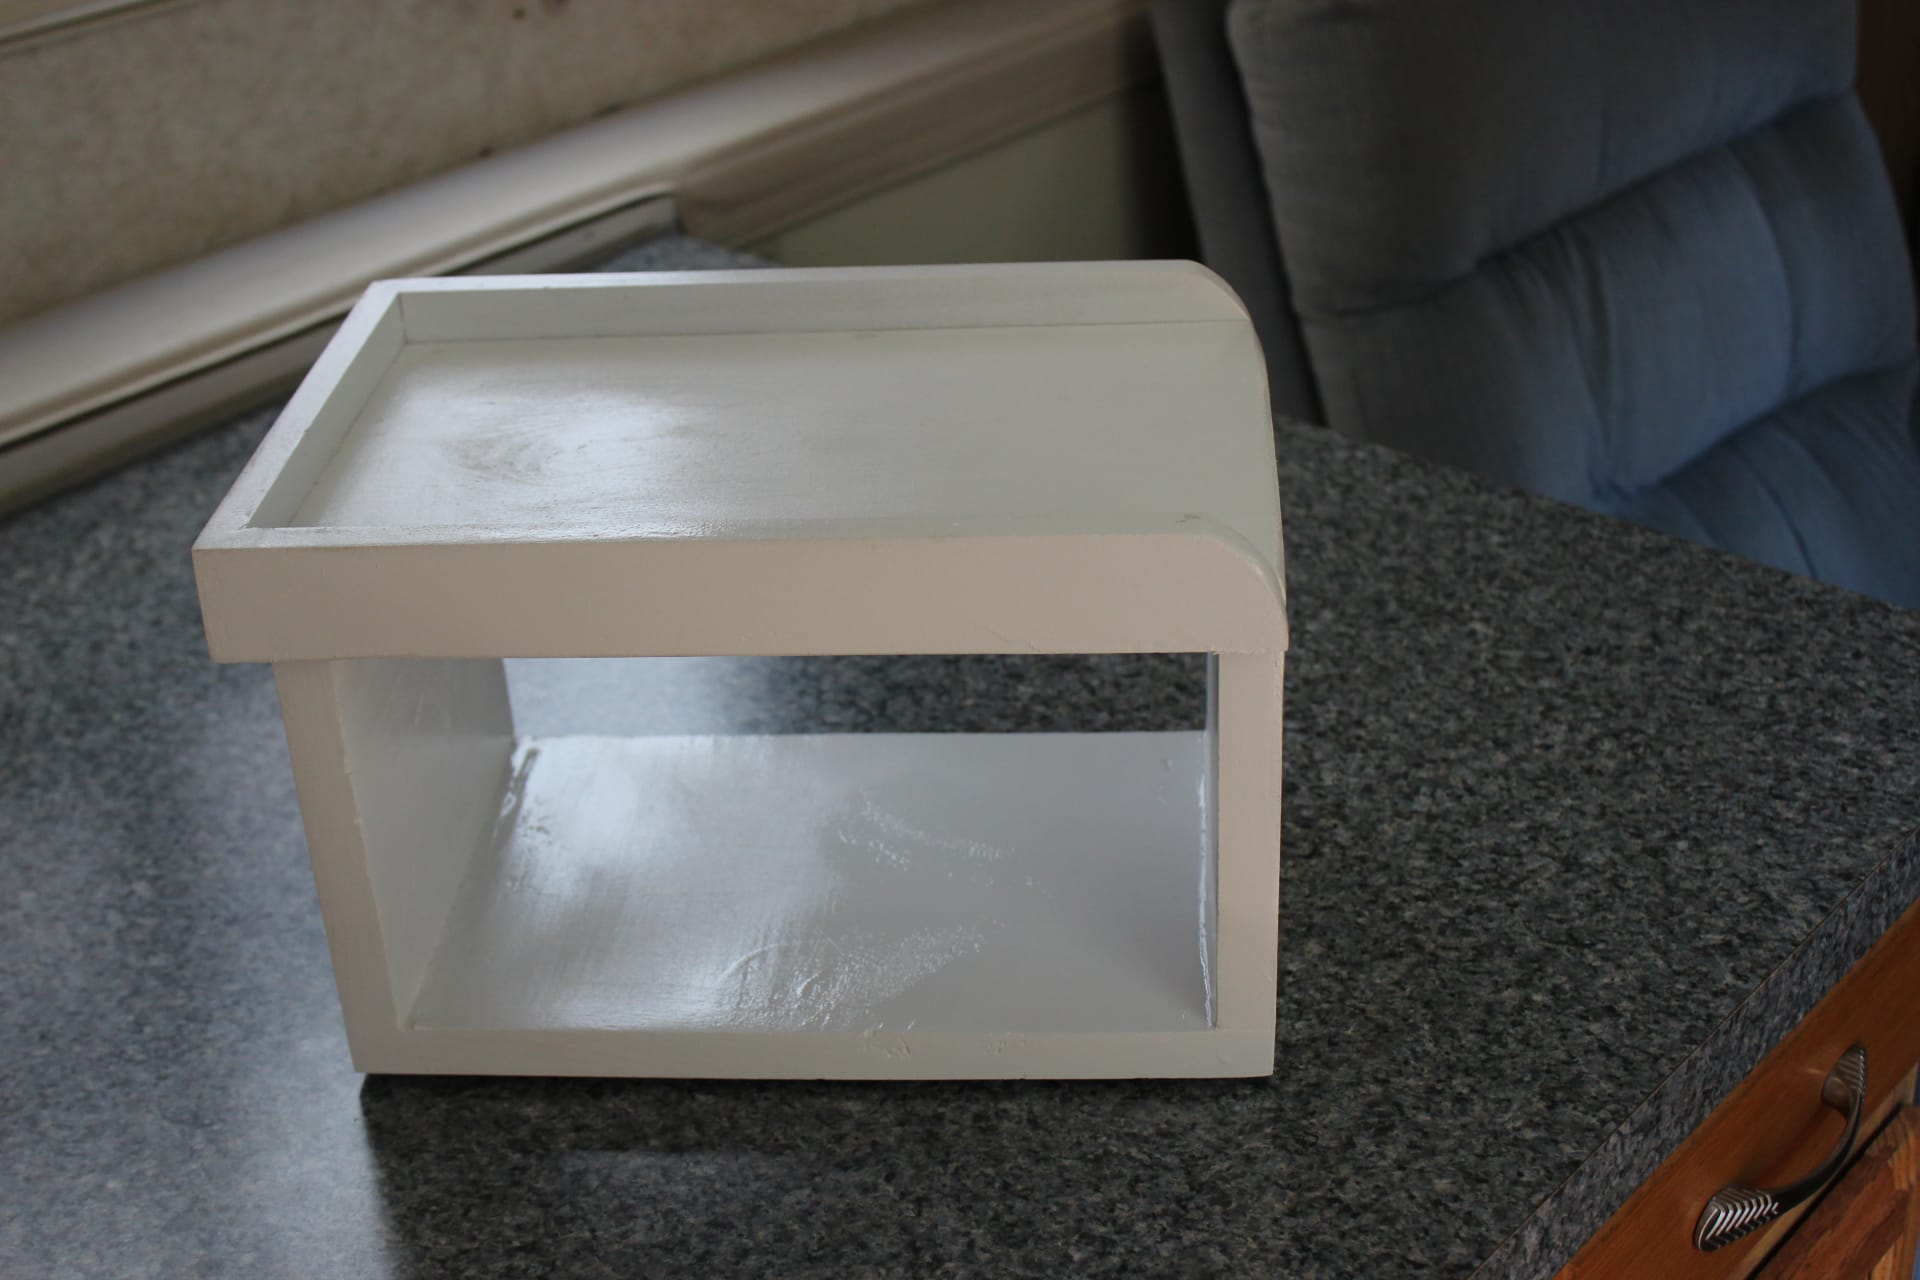
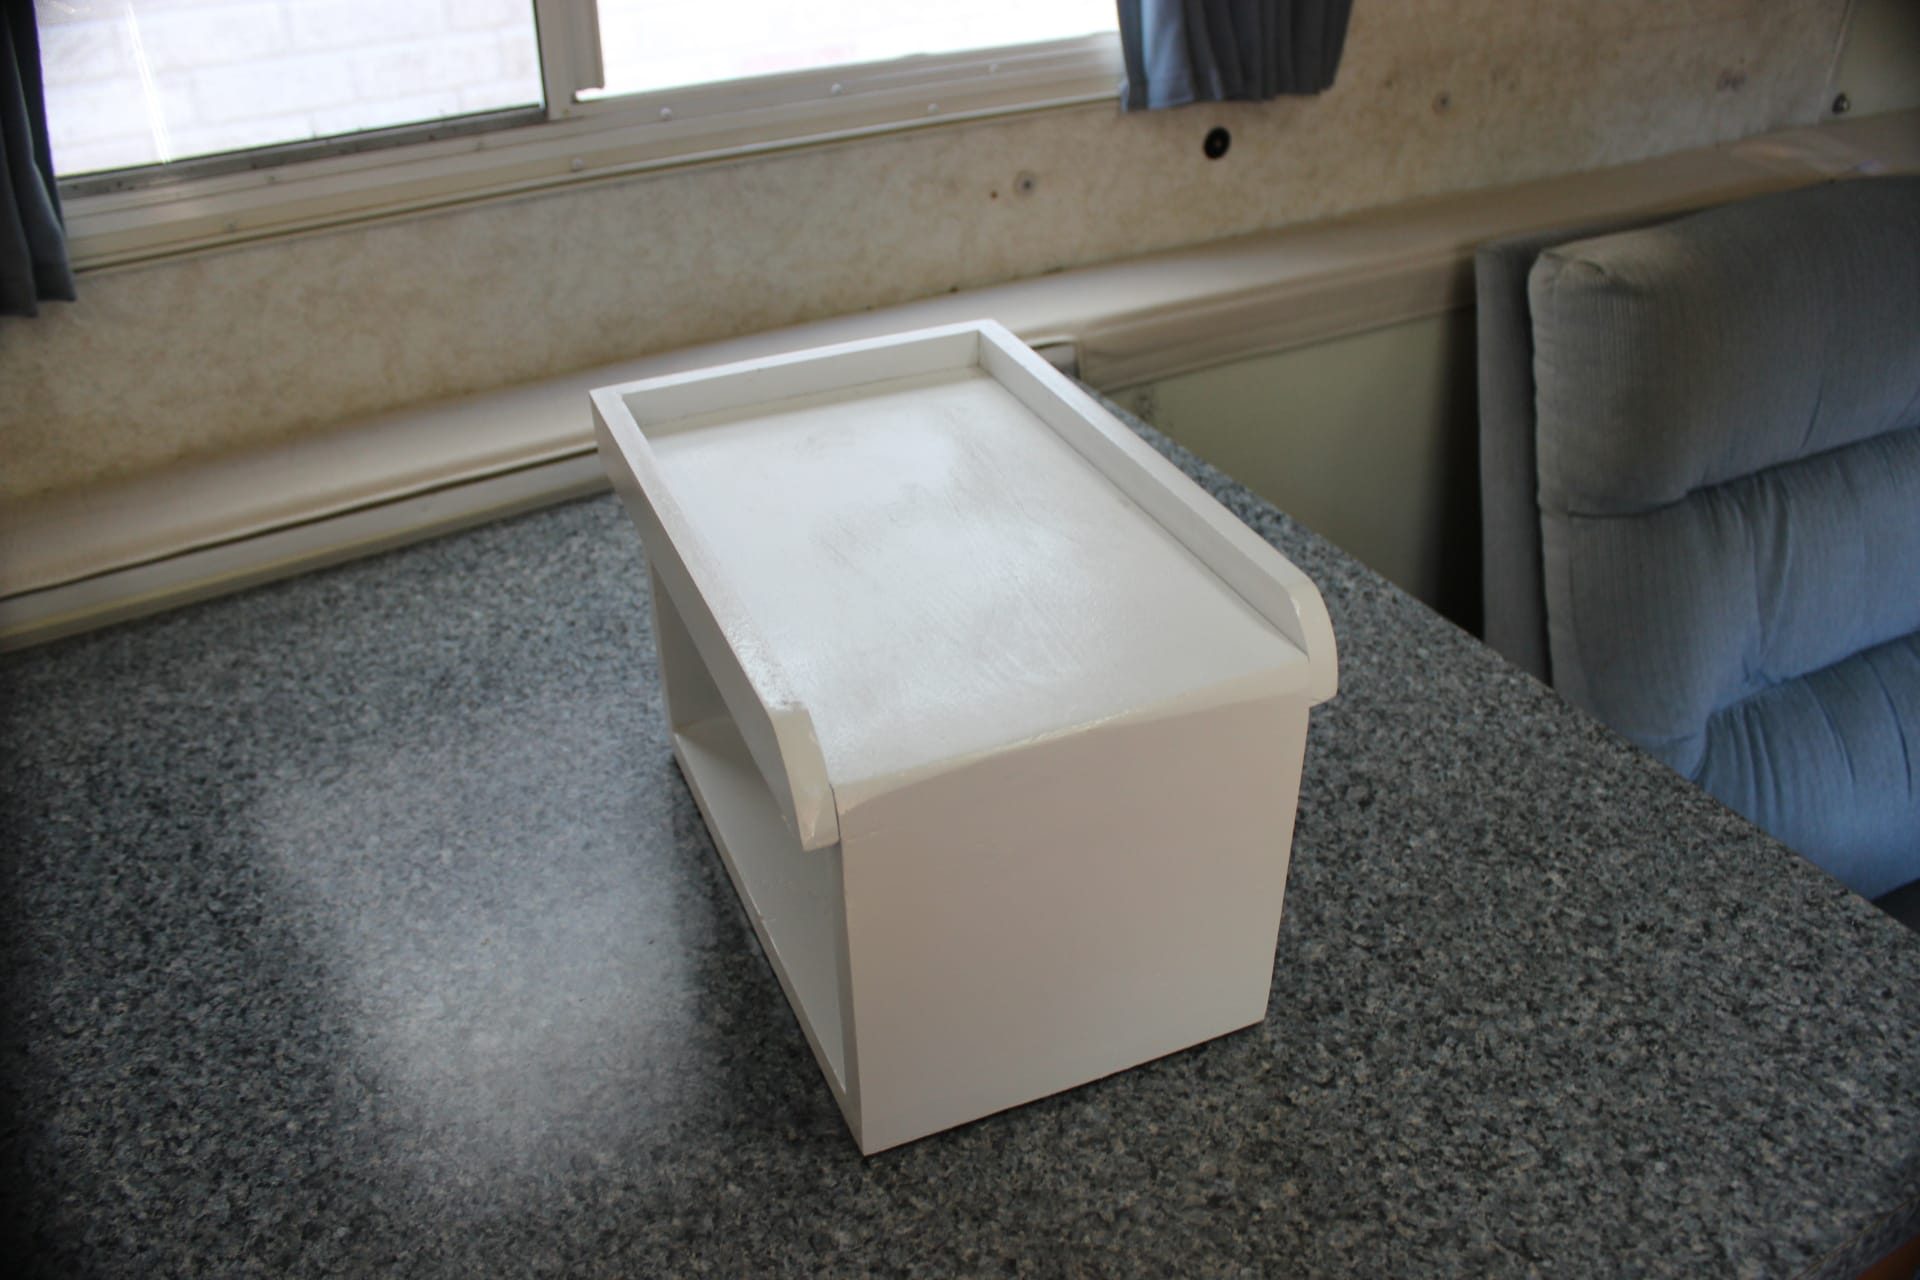
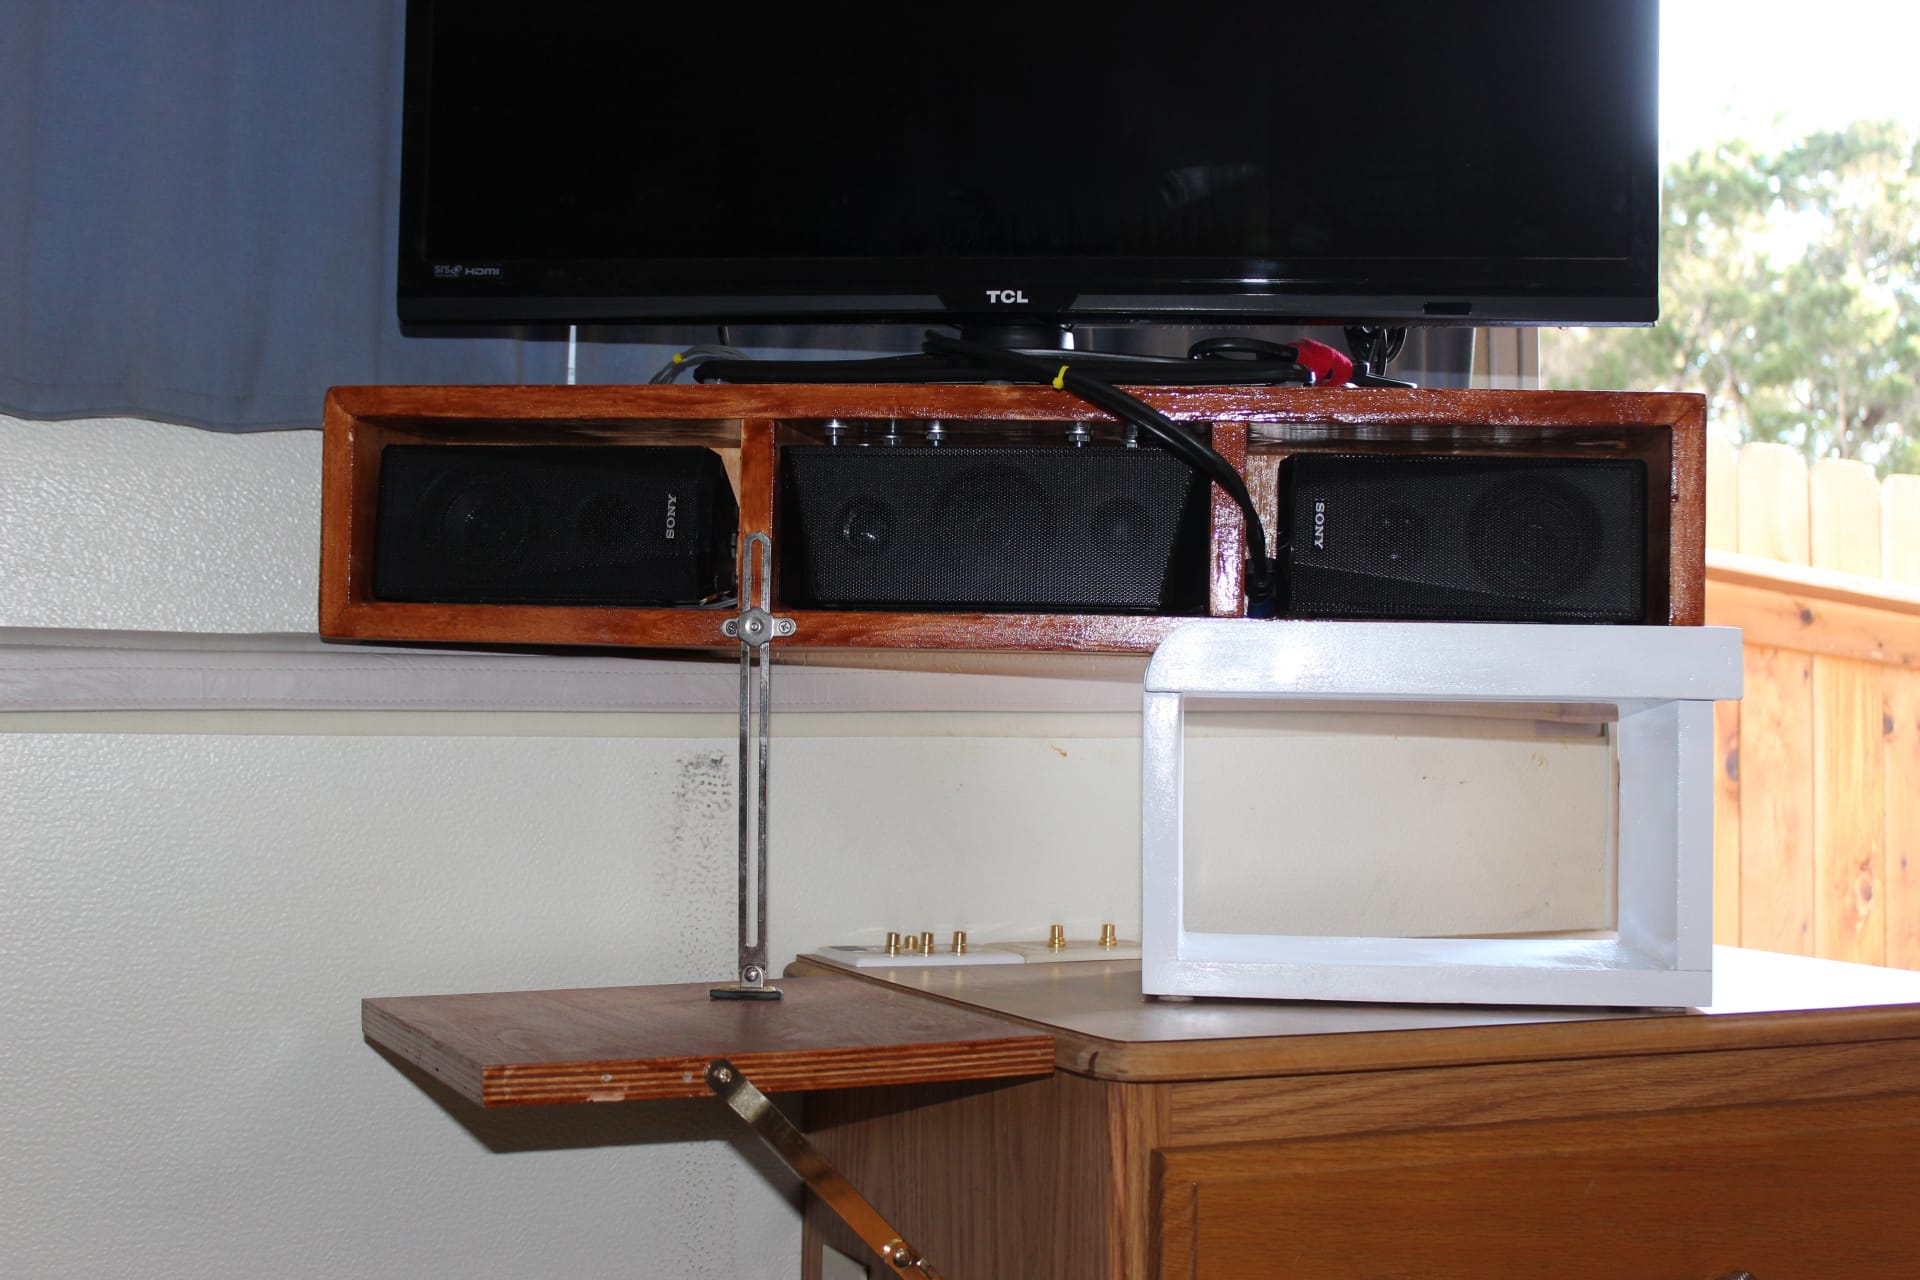
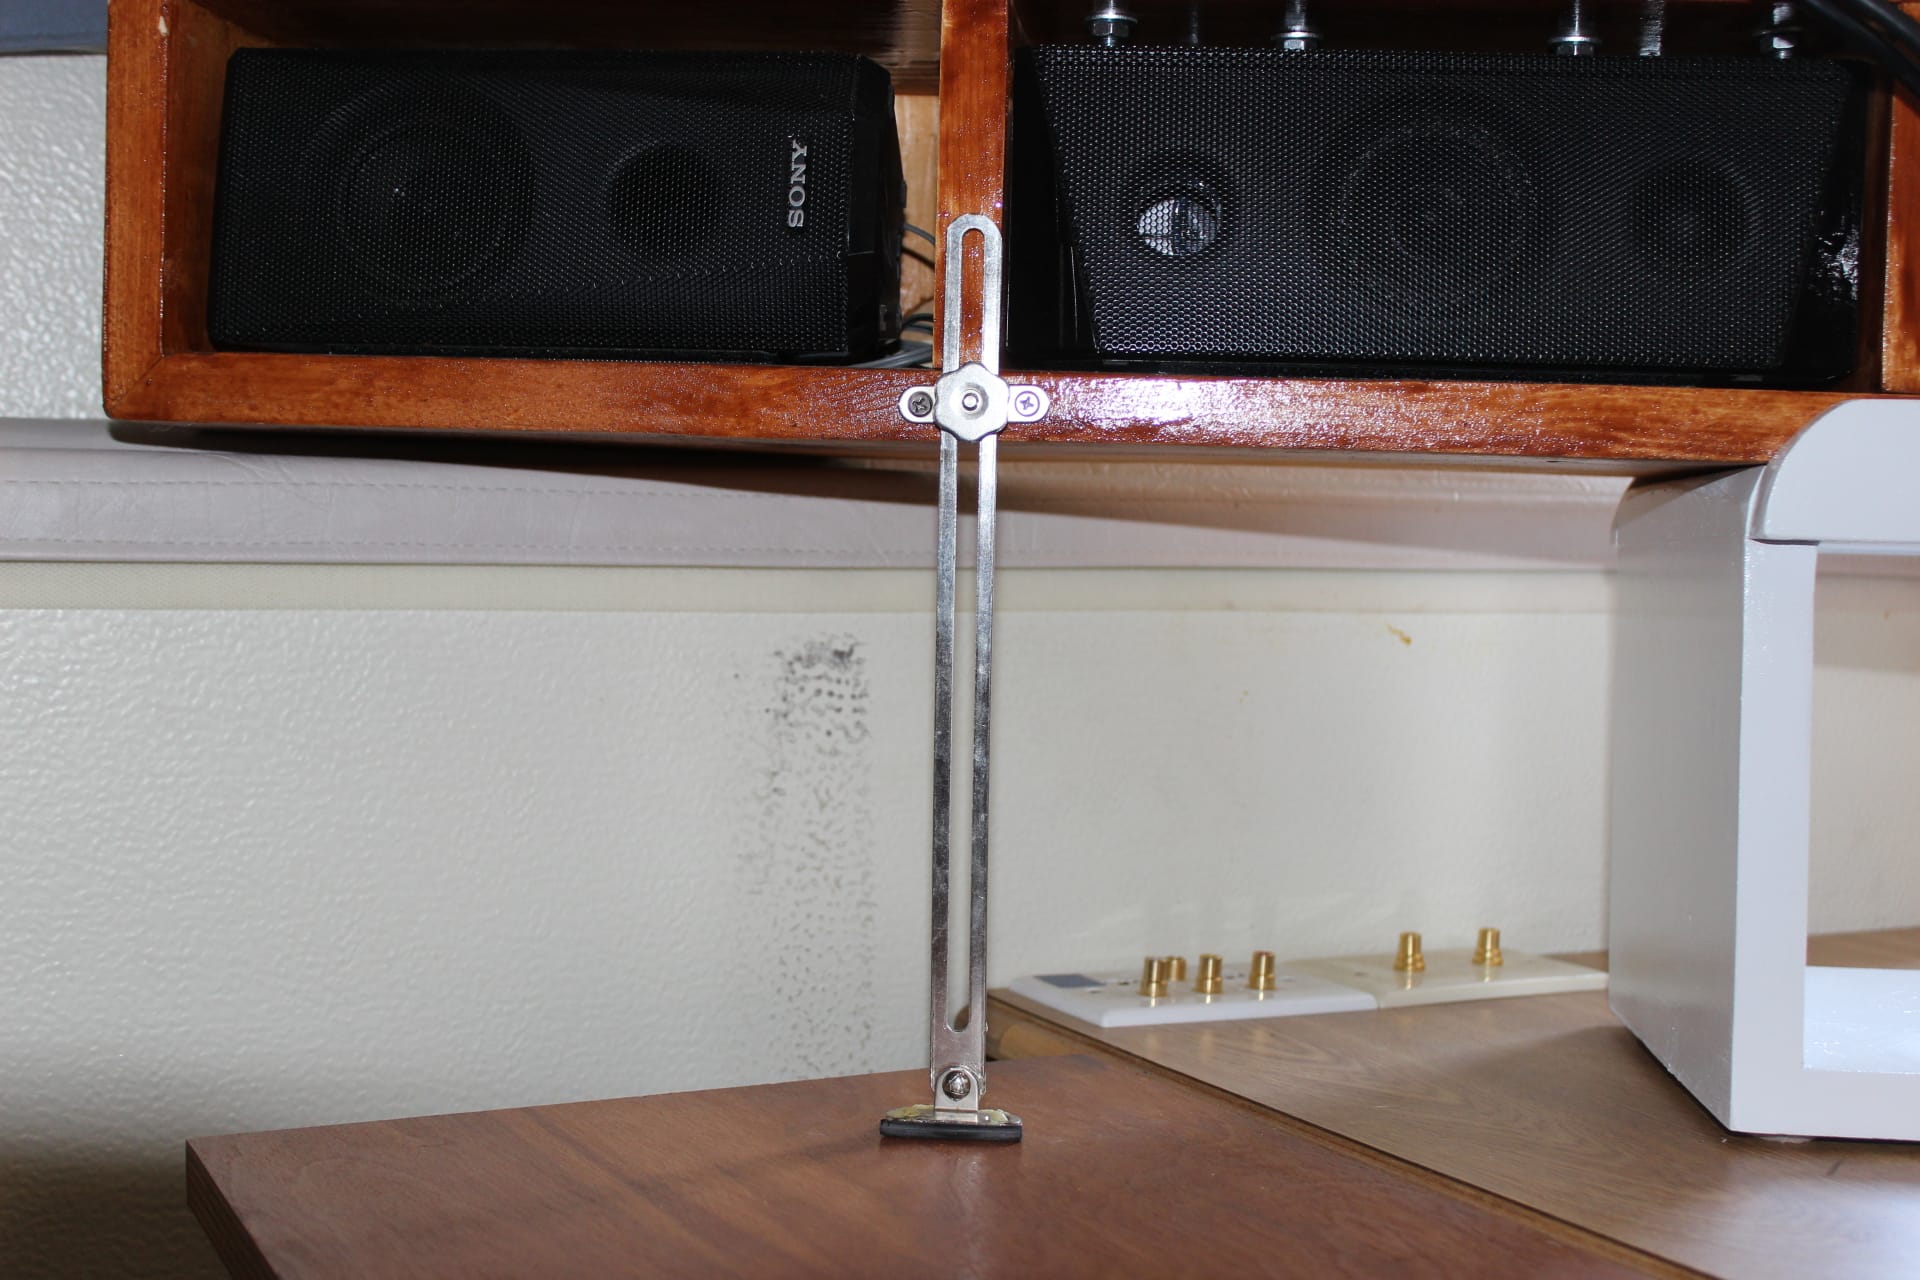
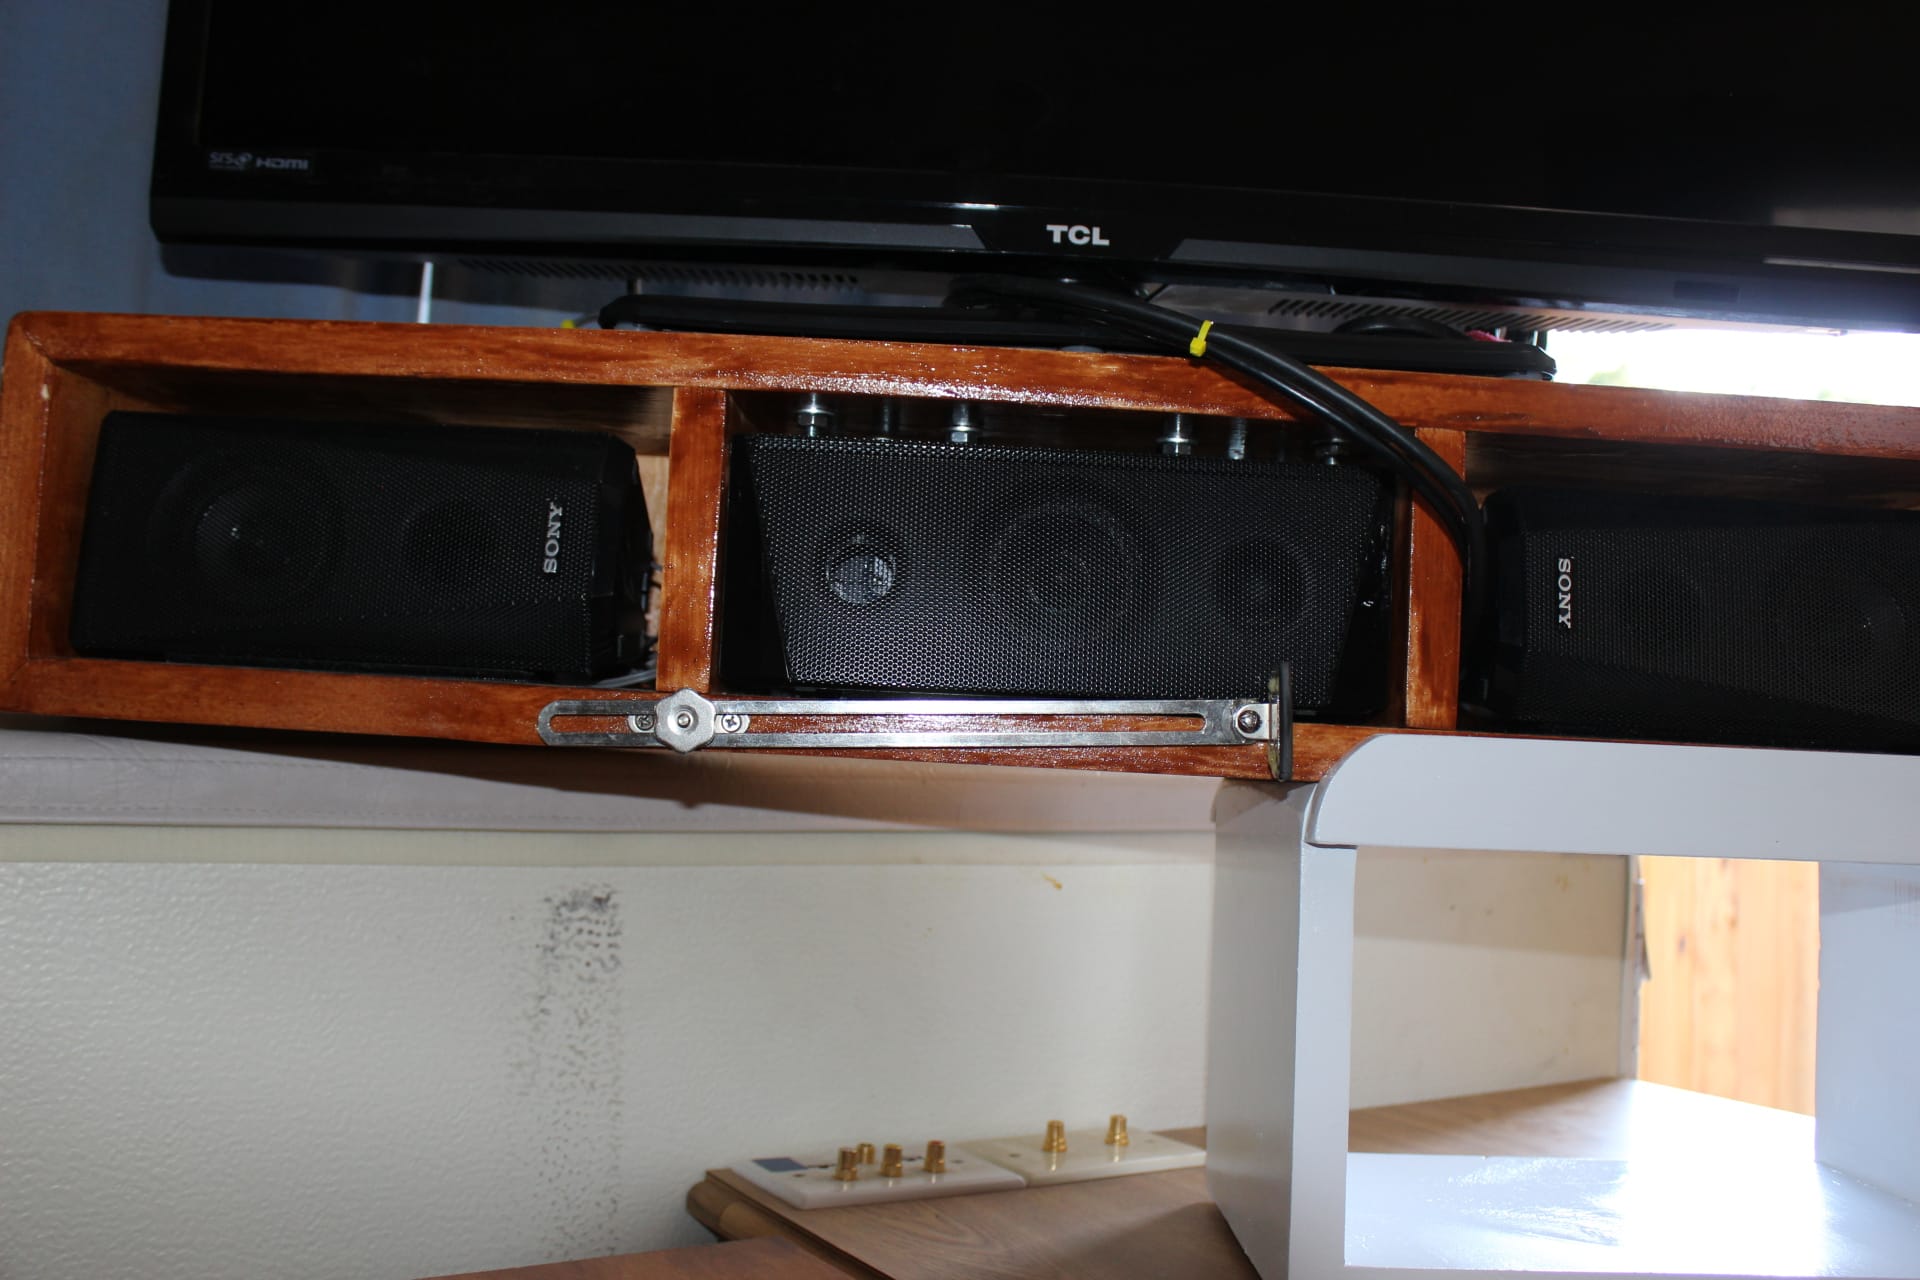
I also tacked on a fold down shelf on the side of the entertainment cabinet to help with the placement of the TV since it’s a bit long (images 1513, 1514). But since then we had trouble with its placement and being a bit long too (maybe I should have gotten a smaller TV???…..NAAAAHHHH!!!). When the TV is sitting on the little fold down shelf (which helps a lot) it still sticks out into the walking space (image 1664) unless you cock it at a shallow angle to your viewing (well that’s no good!). So to resolve this was simple. Build a box that is the height of the ledge where the weather flap folds down onto (images 1665, 1666). Then you can place the TV on the ledge and the box and get the proper angle plus move the TV out of your walking space (images 1667, 1671). I also added a folding 9” friction box lid support (image 1668) to the TV speaker array box (under the TV itself) on the front side, off center and closer to the wall. To the foot of this 9” support I glued a piece of rubber to keep it from slipping around (image 1670). This support keeps the TV from wobbling on the weather flap and can fold up when you store the TV for traveling Image 1669). By doing this I have created a bit more cabinet top space to place stuff on (image 1673).
I mounted the flat screen on a small cabinet (or speaker box array…image 1514) that houses the L & R & middle speakers, and all the hook-ups are color coded to each plug (even the 2 HDMI’s one for the TV and one for the DVD player) and located on the top at the back of the TV stand (images 1526, 1527). The receptacles on top of the TV stand run to the amp. So just match the colors, plug into the power outlet on the side and away you go.
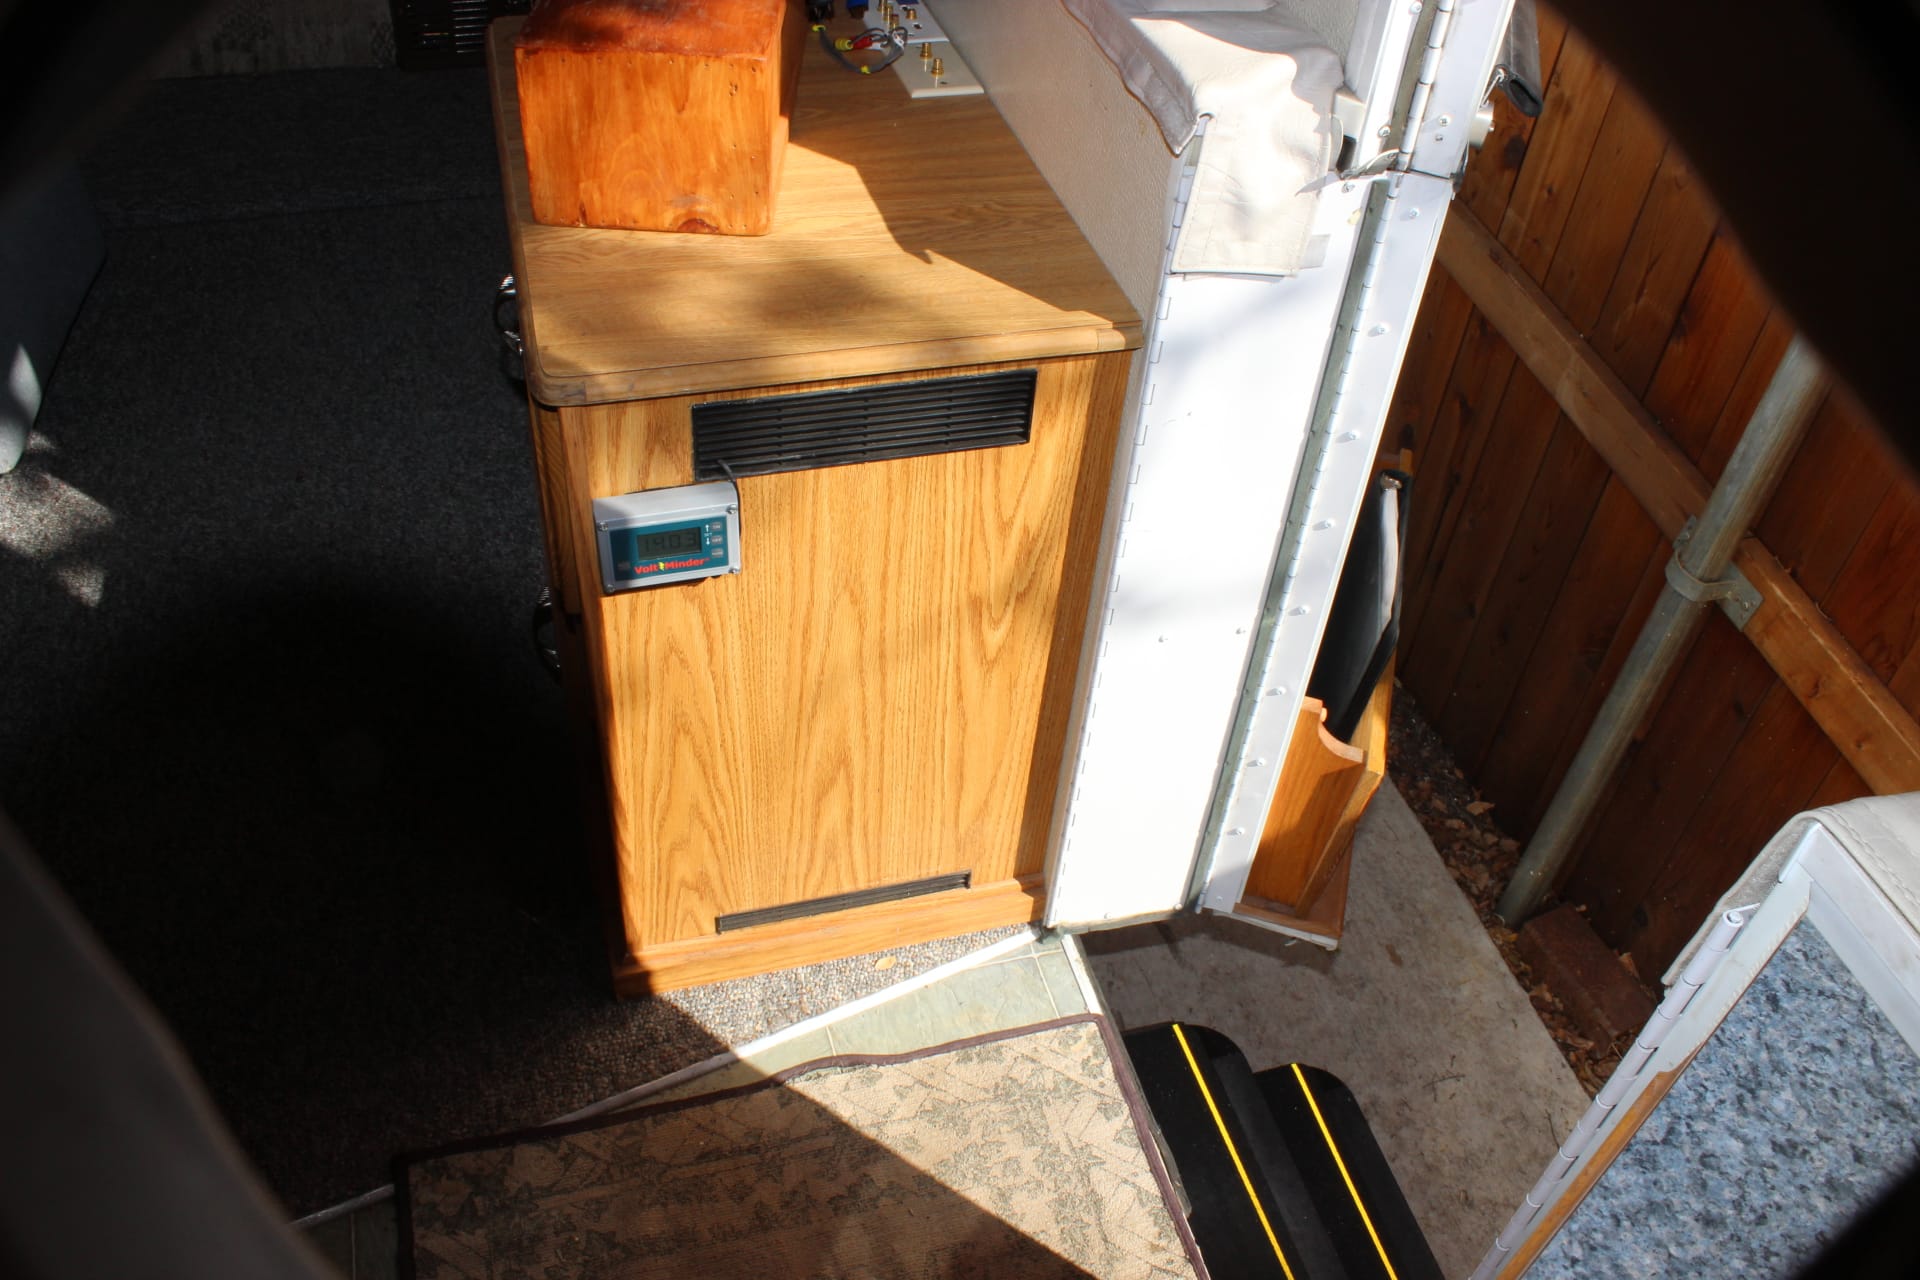
The last thing to do was vent the whole shootin match (image 1528) which also gave a place to run the Volt minder wires.
This was one of the more ambitious projects for sure!!!!!!! But worth it!!!!!!