It seems that on the forum one of the hot topics is the refrigerator fan. I have read a lot of threads on people that have replaced their fan with a fan of the same type, only to have it burn out in short order.
Well my fan works ok, but there is also the fact that the absorption refrigerators don’t do well in very hot climates. I have never experienced this, nor will I ….probably….however….I want to be prepared and ready to make the most of what I have.
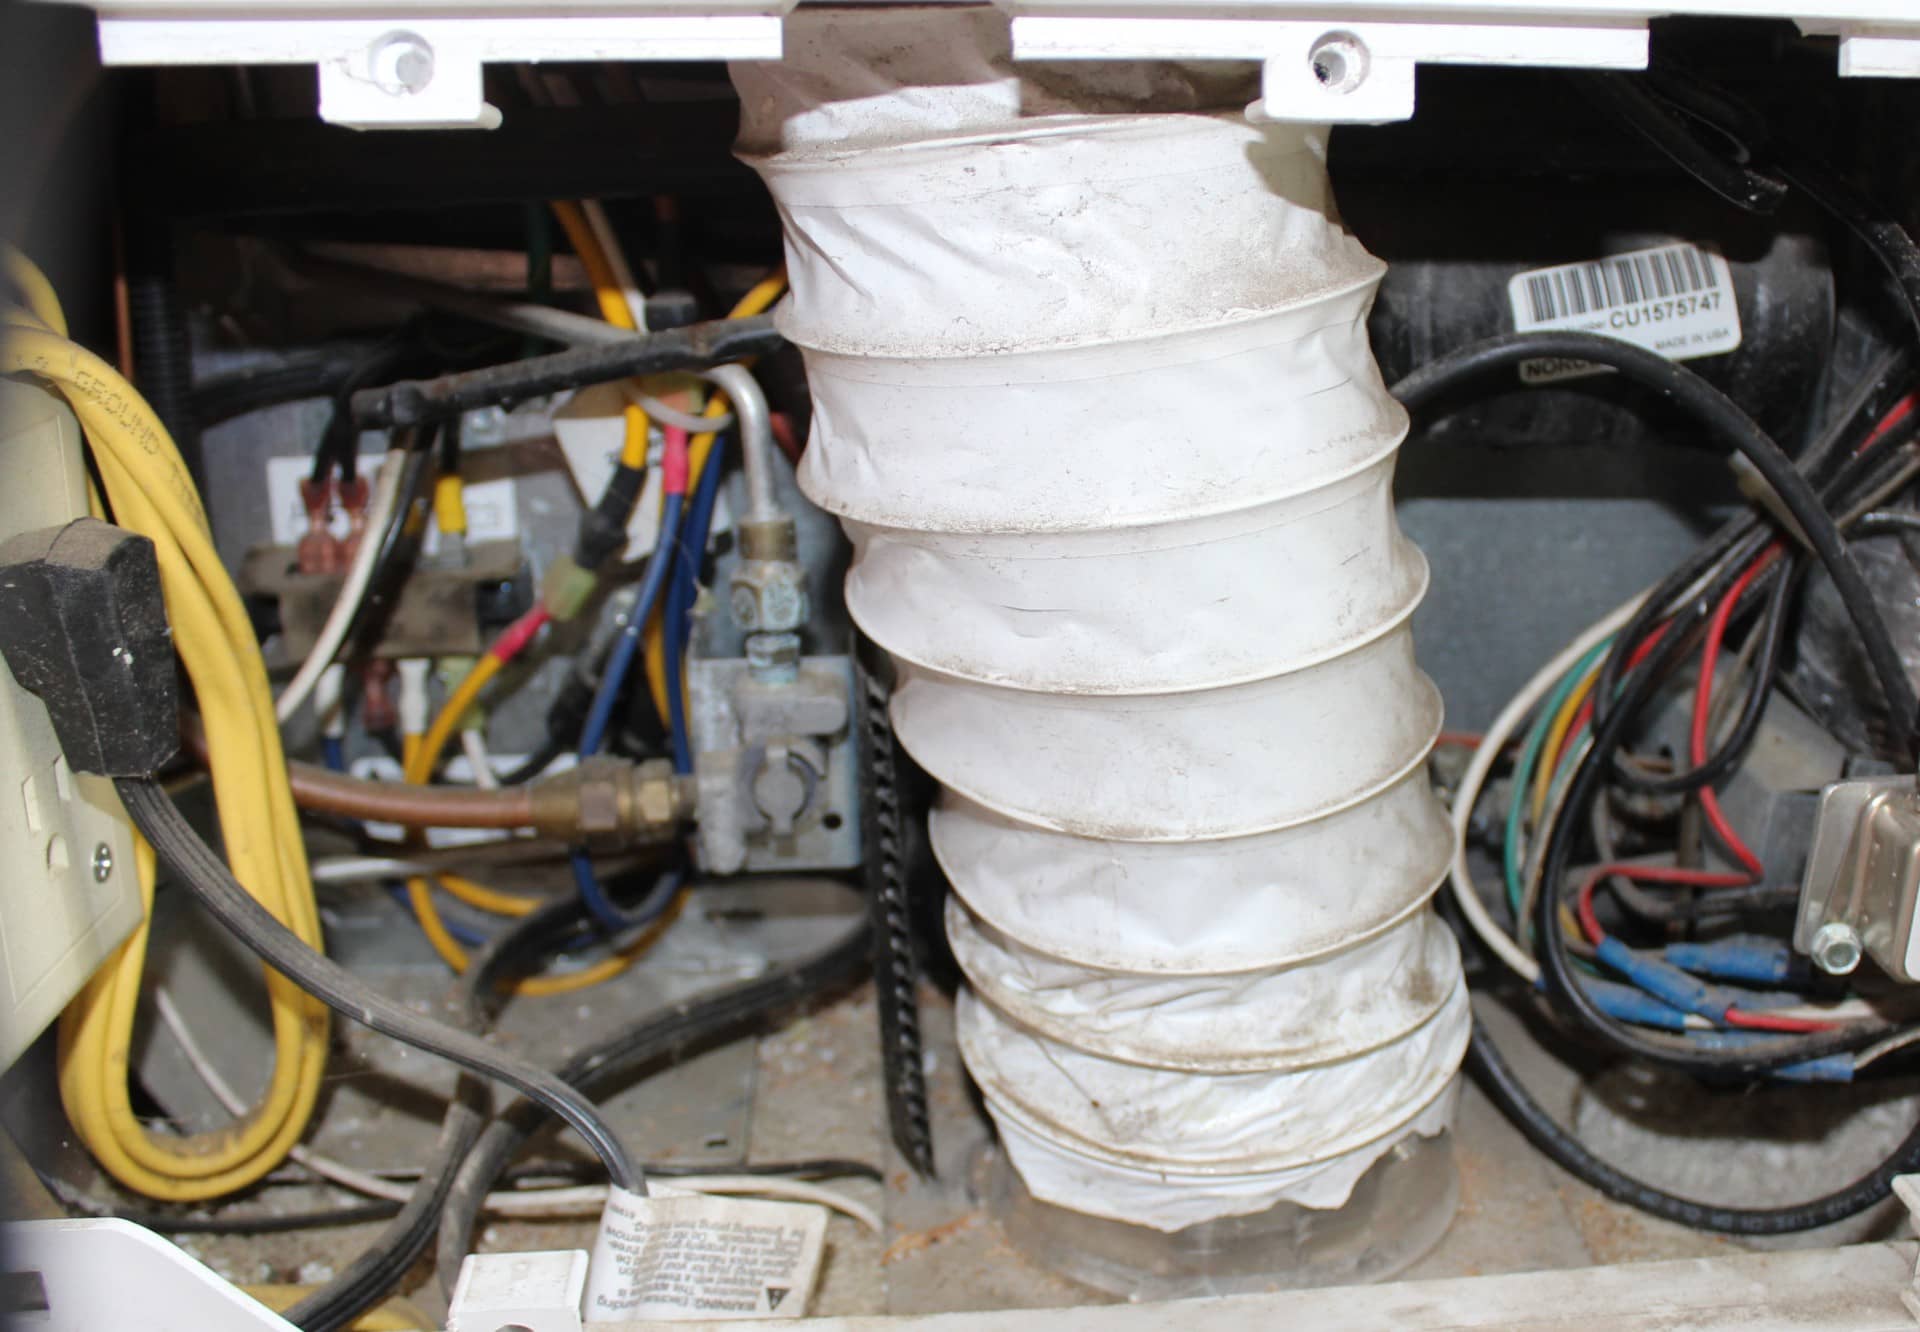
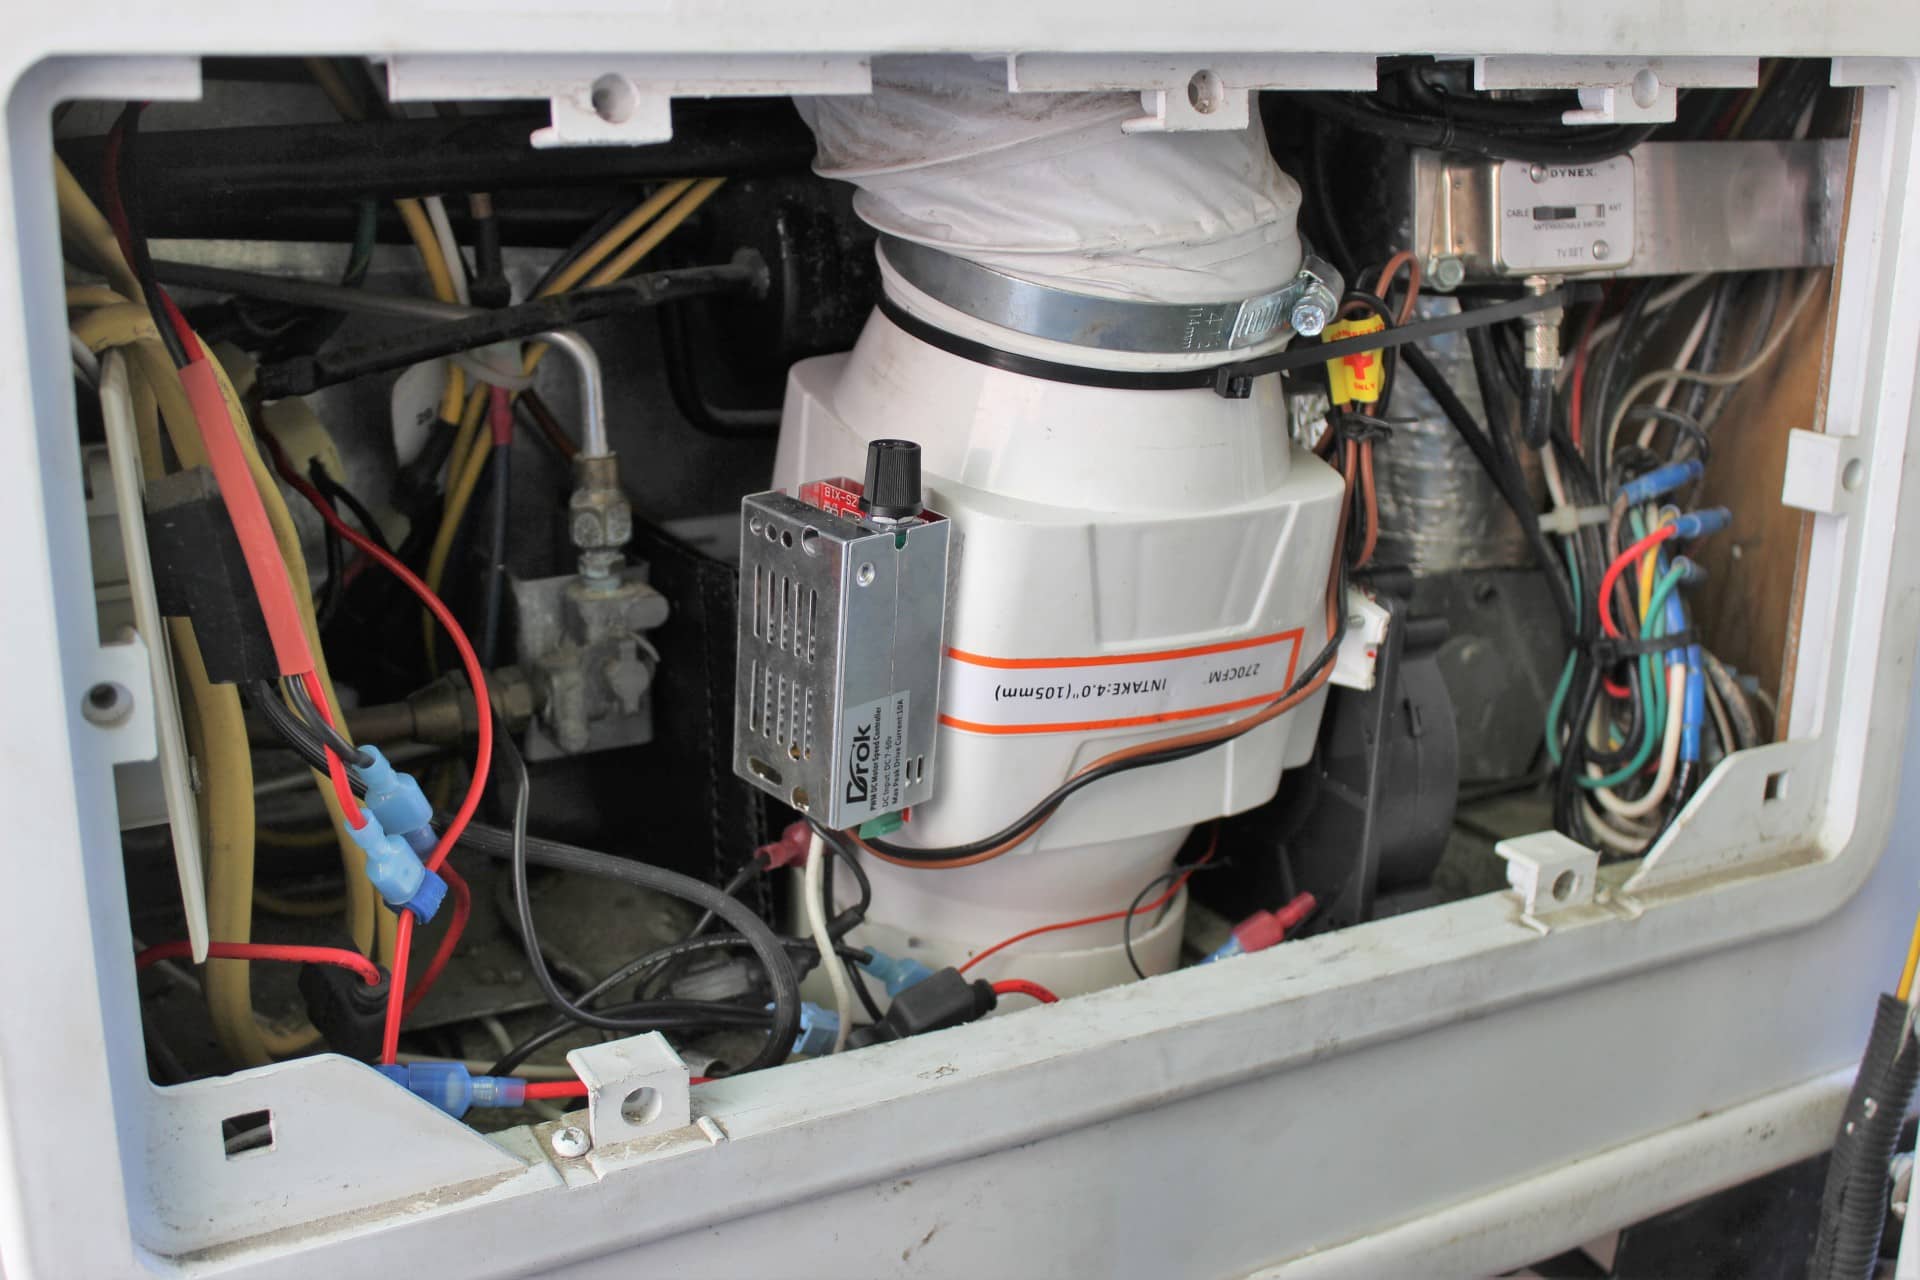
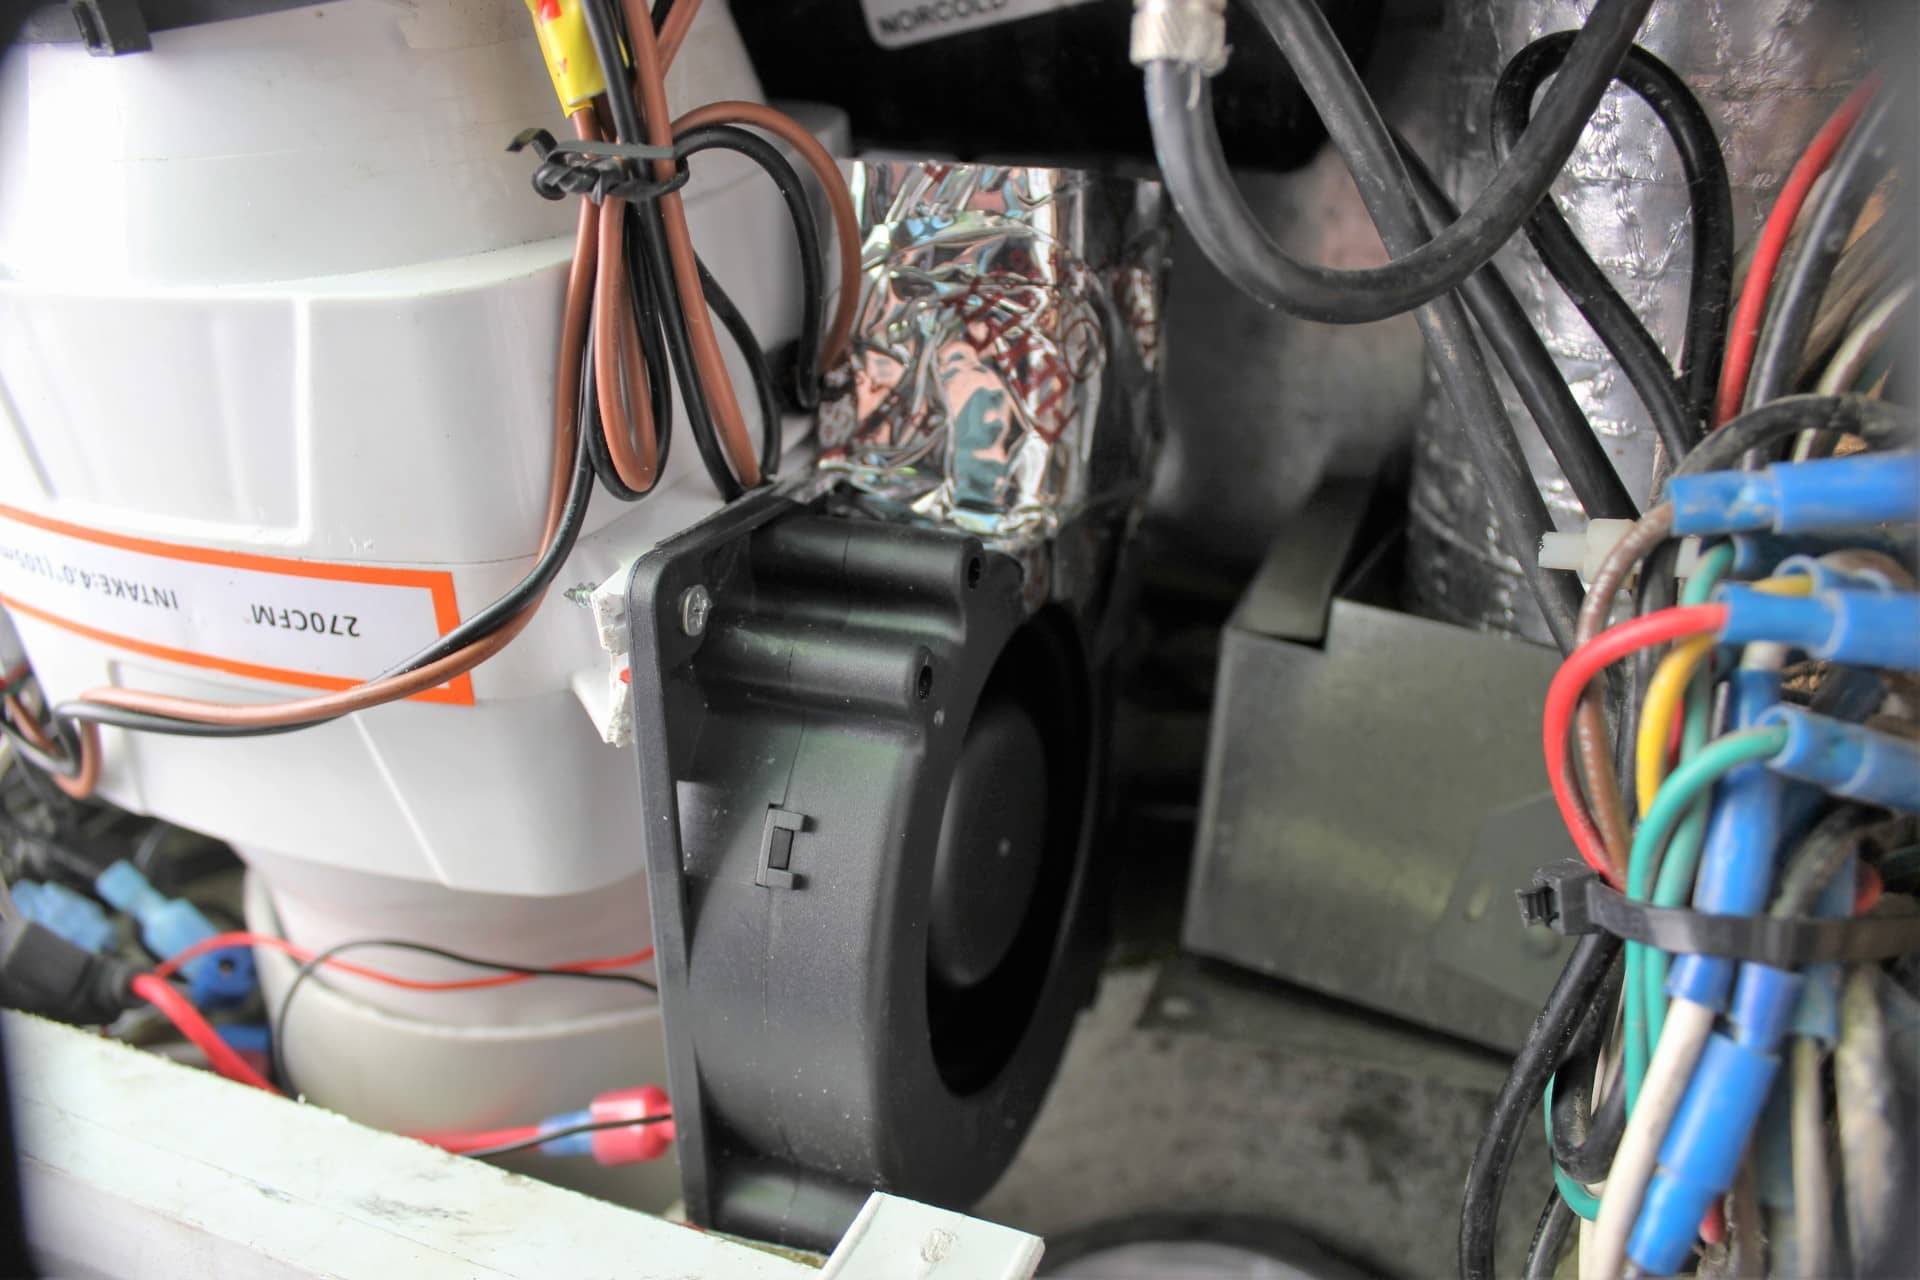
The problem it seems is that inside the enclosure where the refrigerator sits, the heat builds up from the coils on the back of the fridge. If it gets too hot in there, the performance of the refrigerator itself will suffer. Namely the temp inside the fridge will go up and not keep everything inside cold. So in order to keep things cold on the inside, you must keep things as cool as possible on the outside (that is, on the inside of the cabinet where the back of the fridge and its coils is located). So in order to do this, Trailmanor uses a fan (image 2018) that evacuates the hot air at the top of the coils thru a 4” dryer vent hose (image 2016) that’s connected to an aluminum vent stack (image 2017) and pushes it out the bottom of the trailer (image 2019). This was mainly (as I understand it) for when the Trailmanor was folded down and locked up for towing. So since the sides of the trailer are folded down over the side vents of the refrigerator access cabinet, the only place to evacuate the hot air was out the bottom of the trailer. This worked fairly well, but in my opinion, just didn’t move enough air for proper cooling of that space.
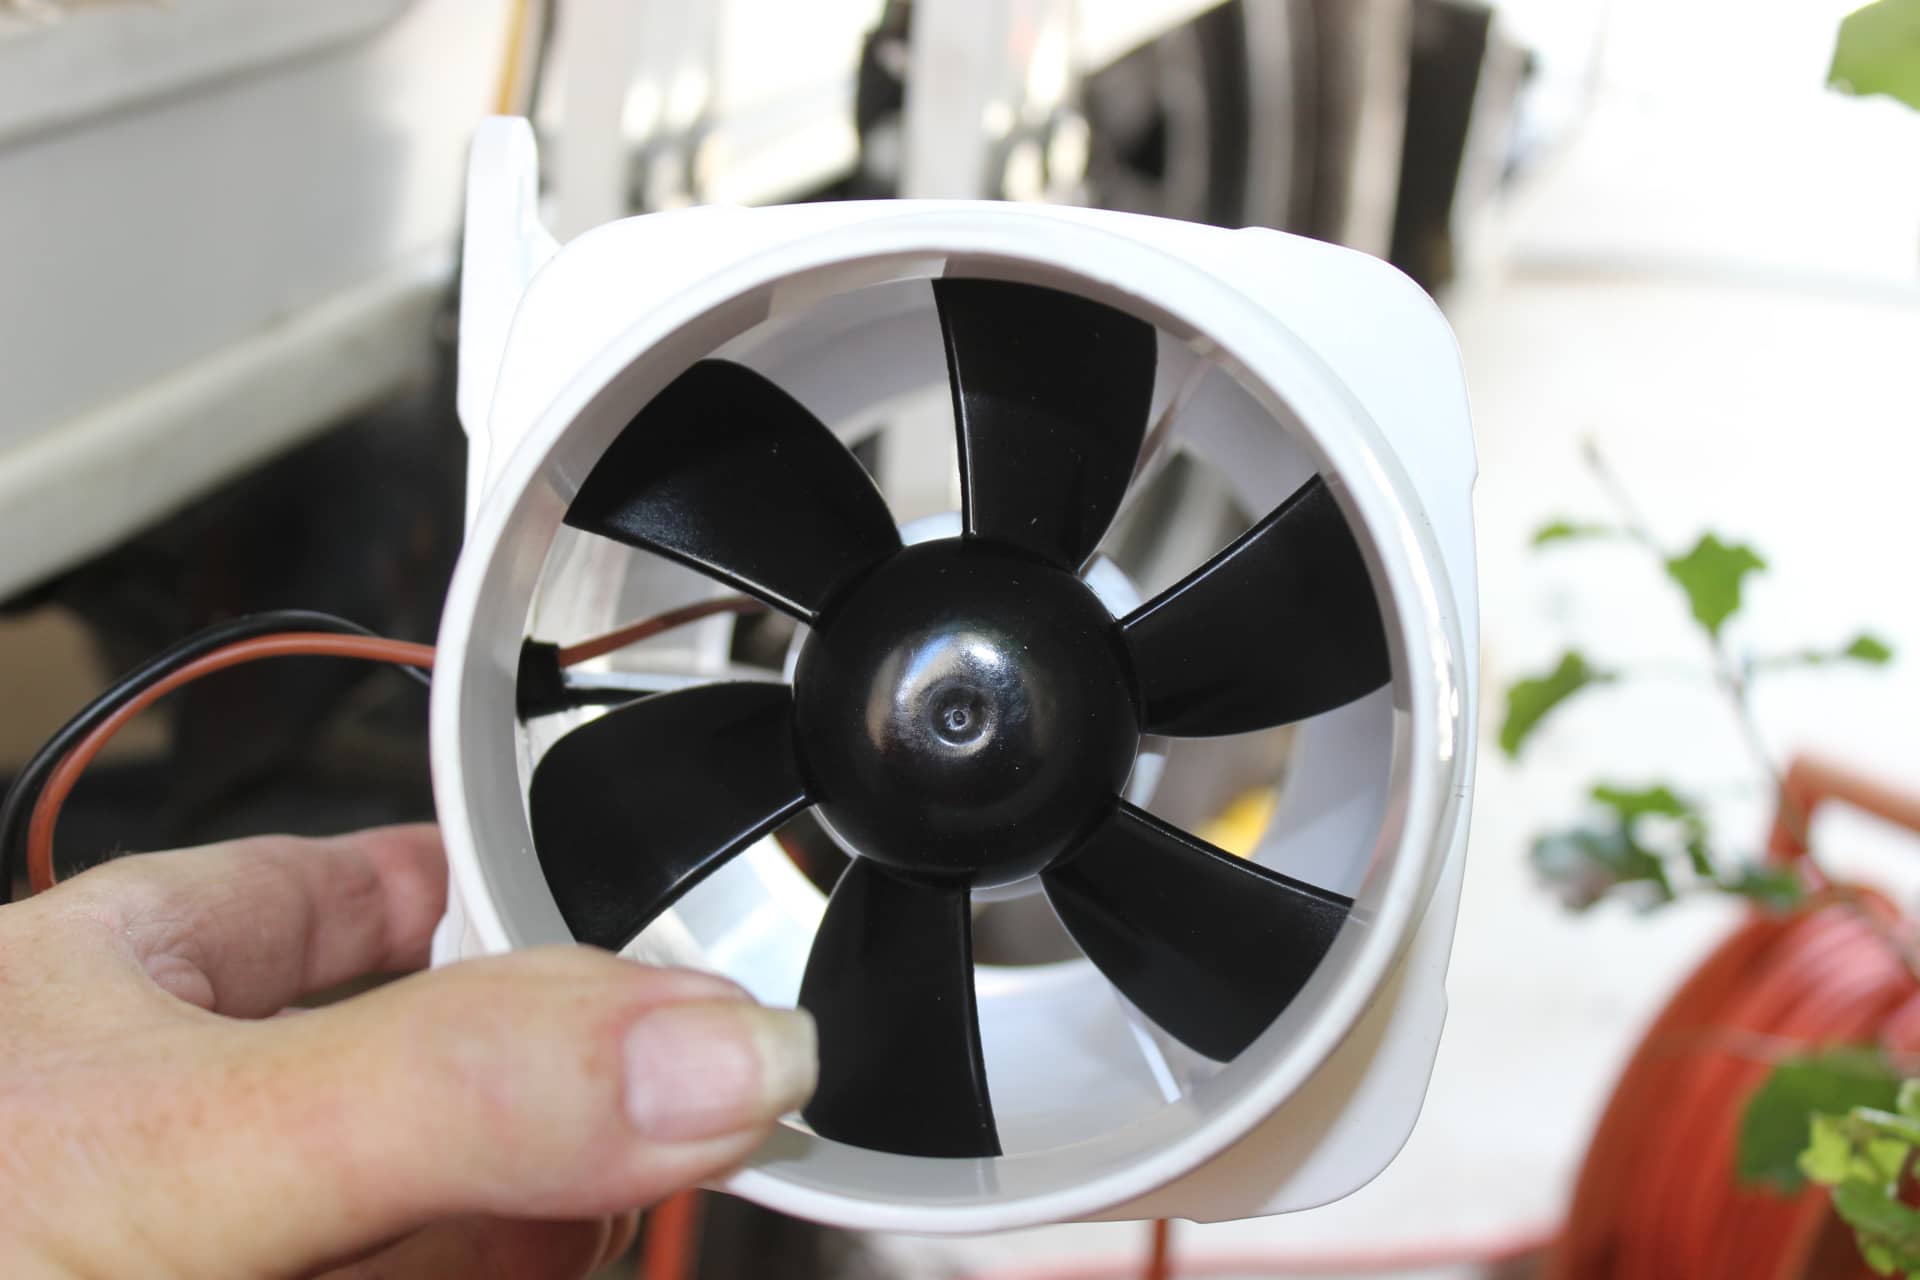
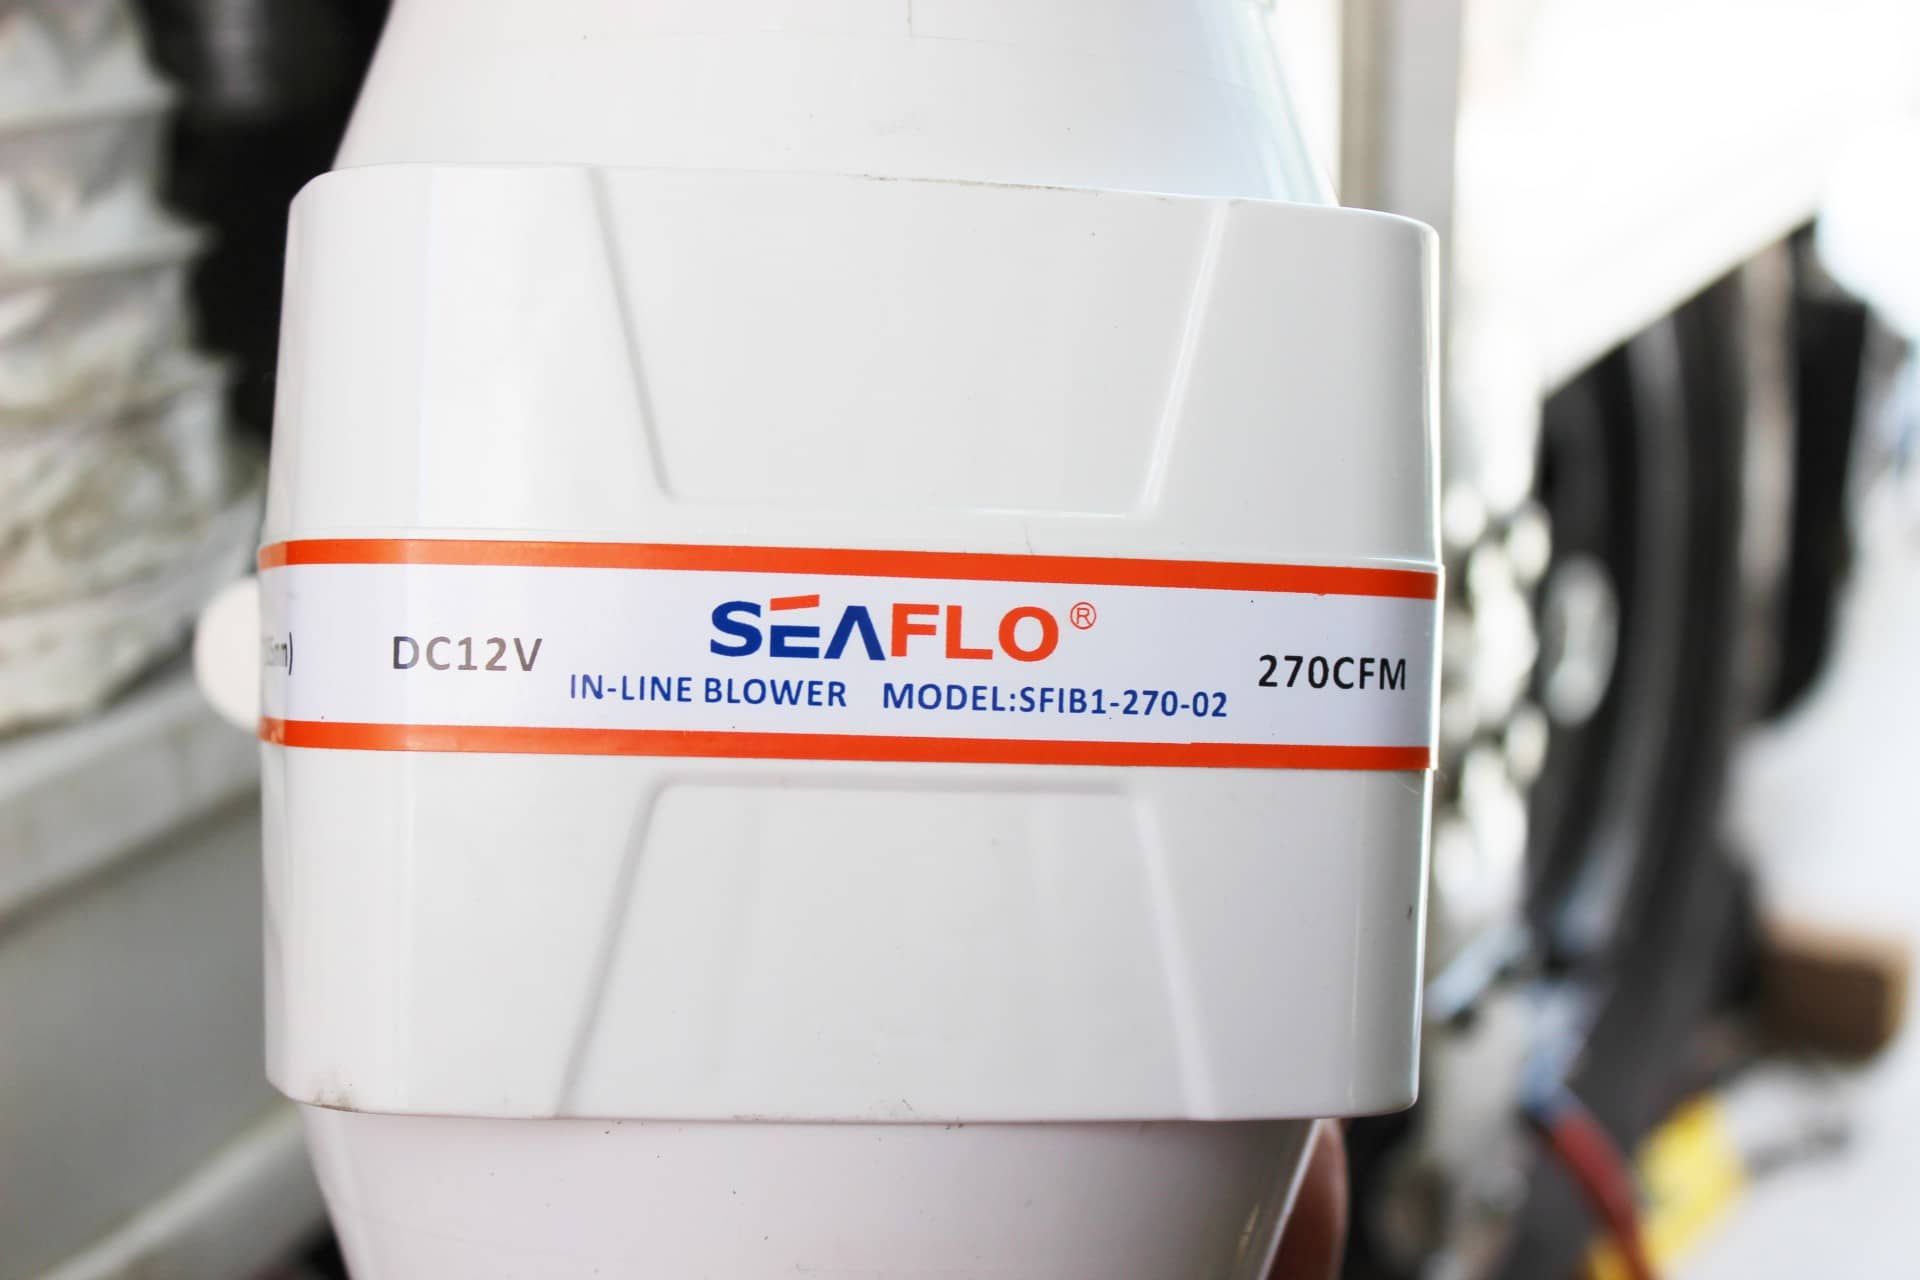
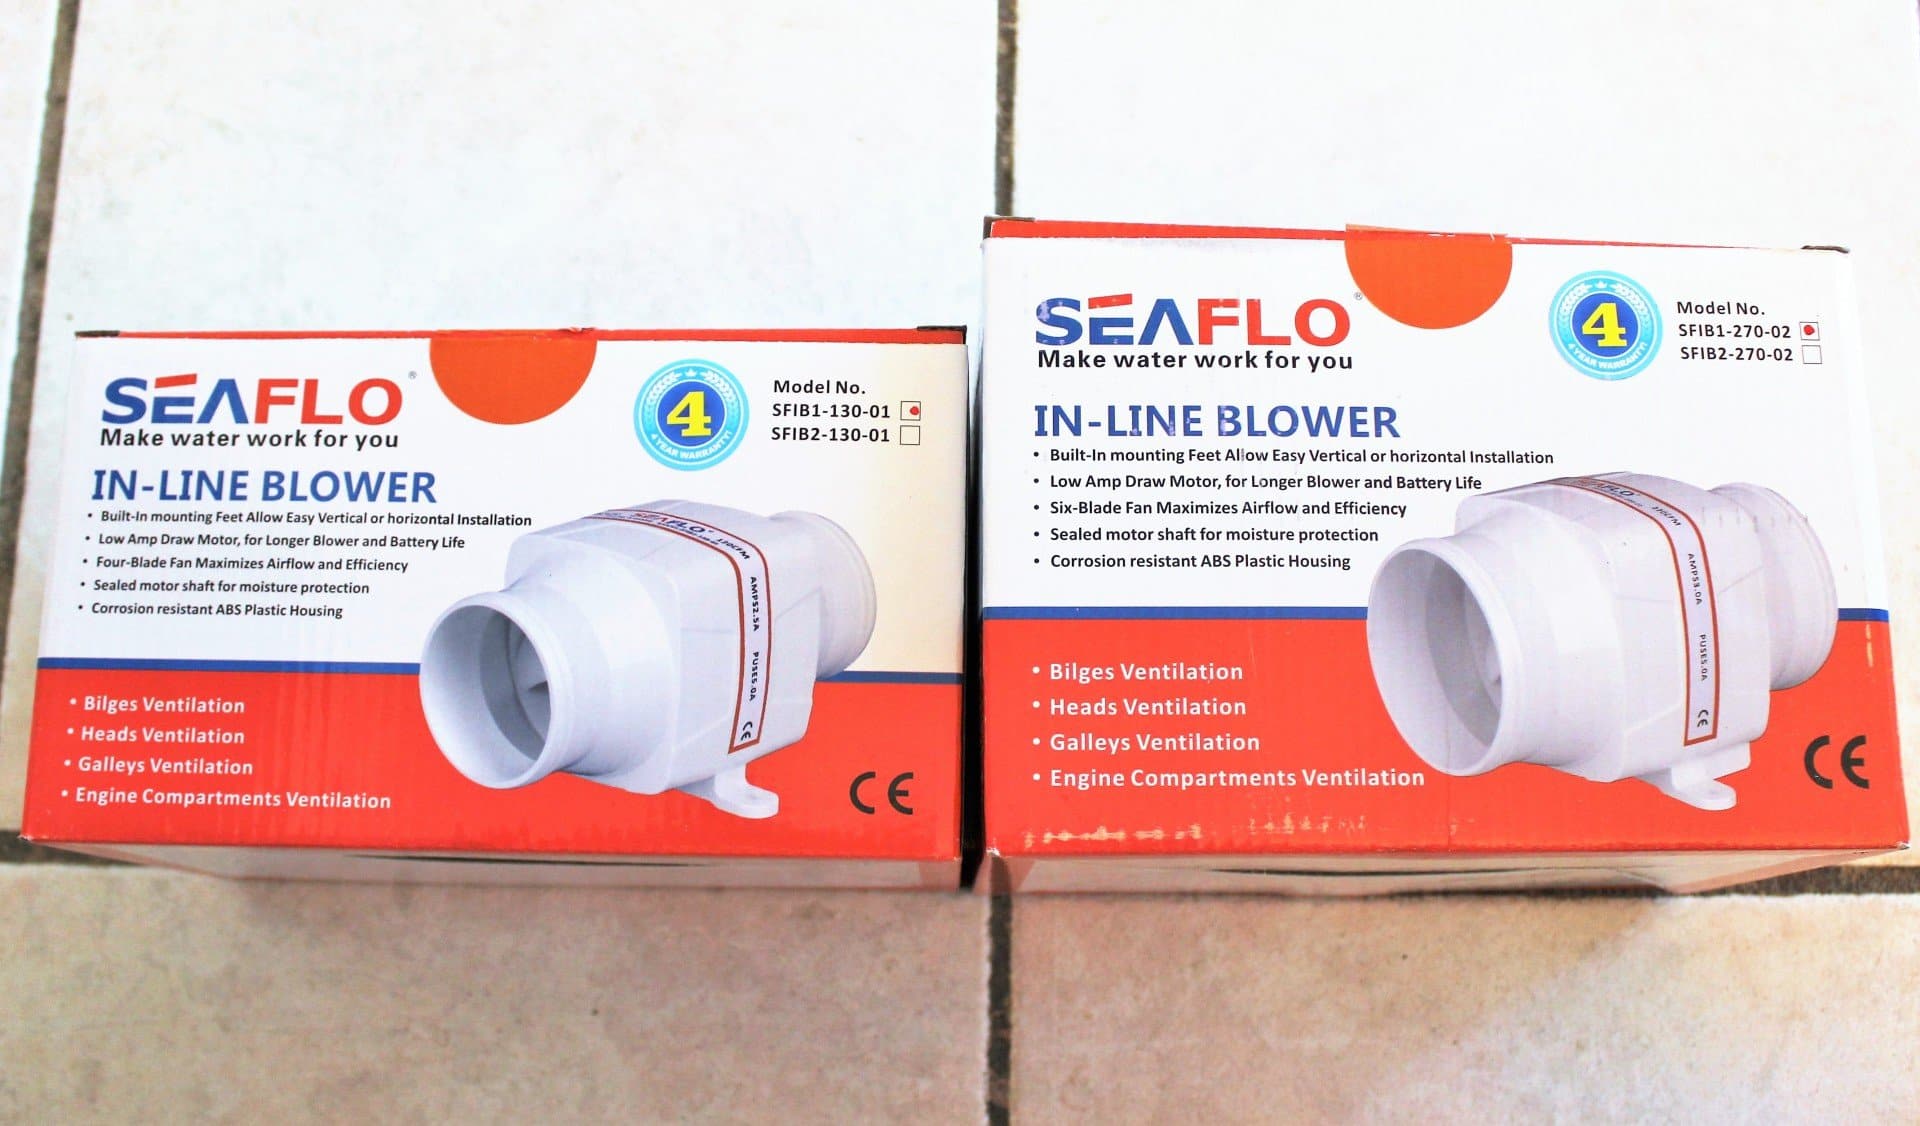
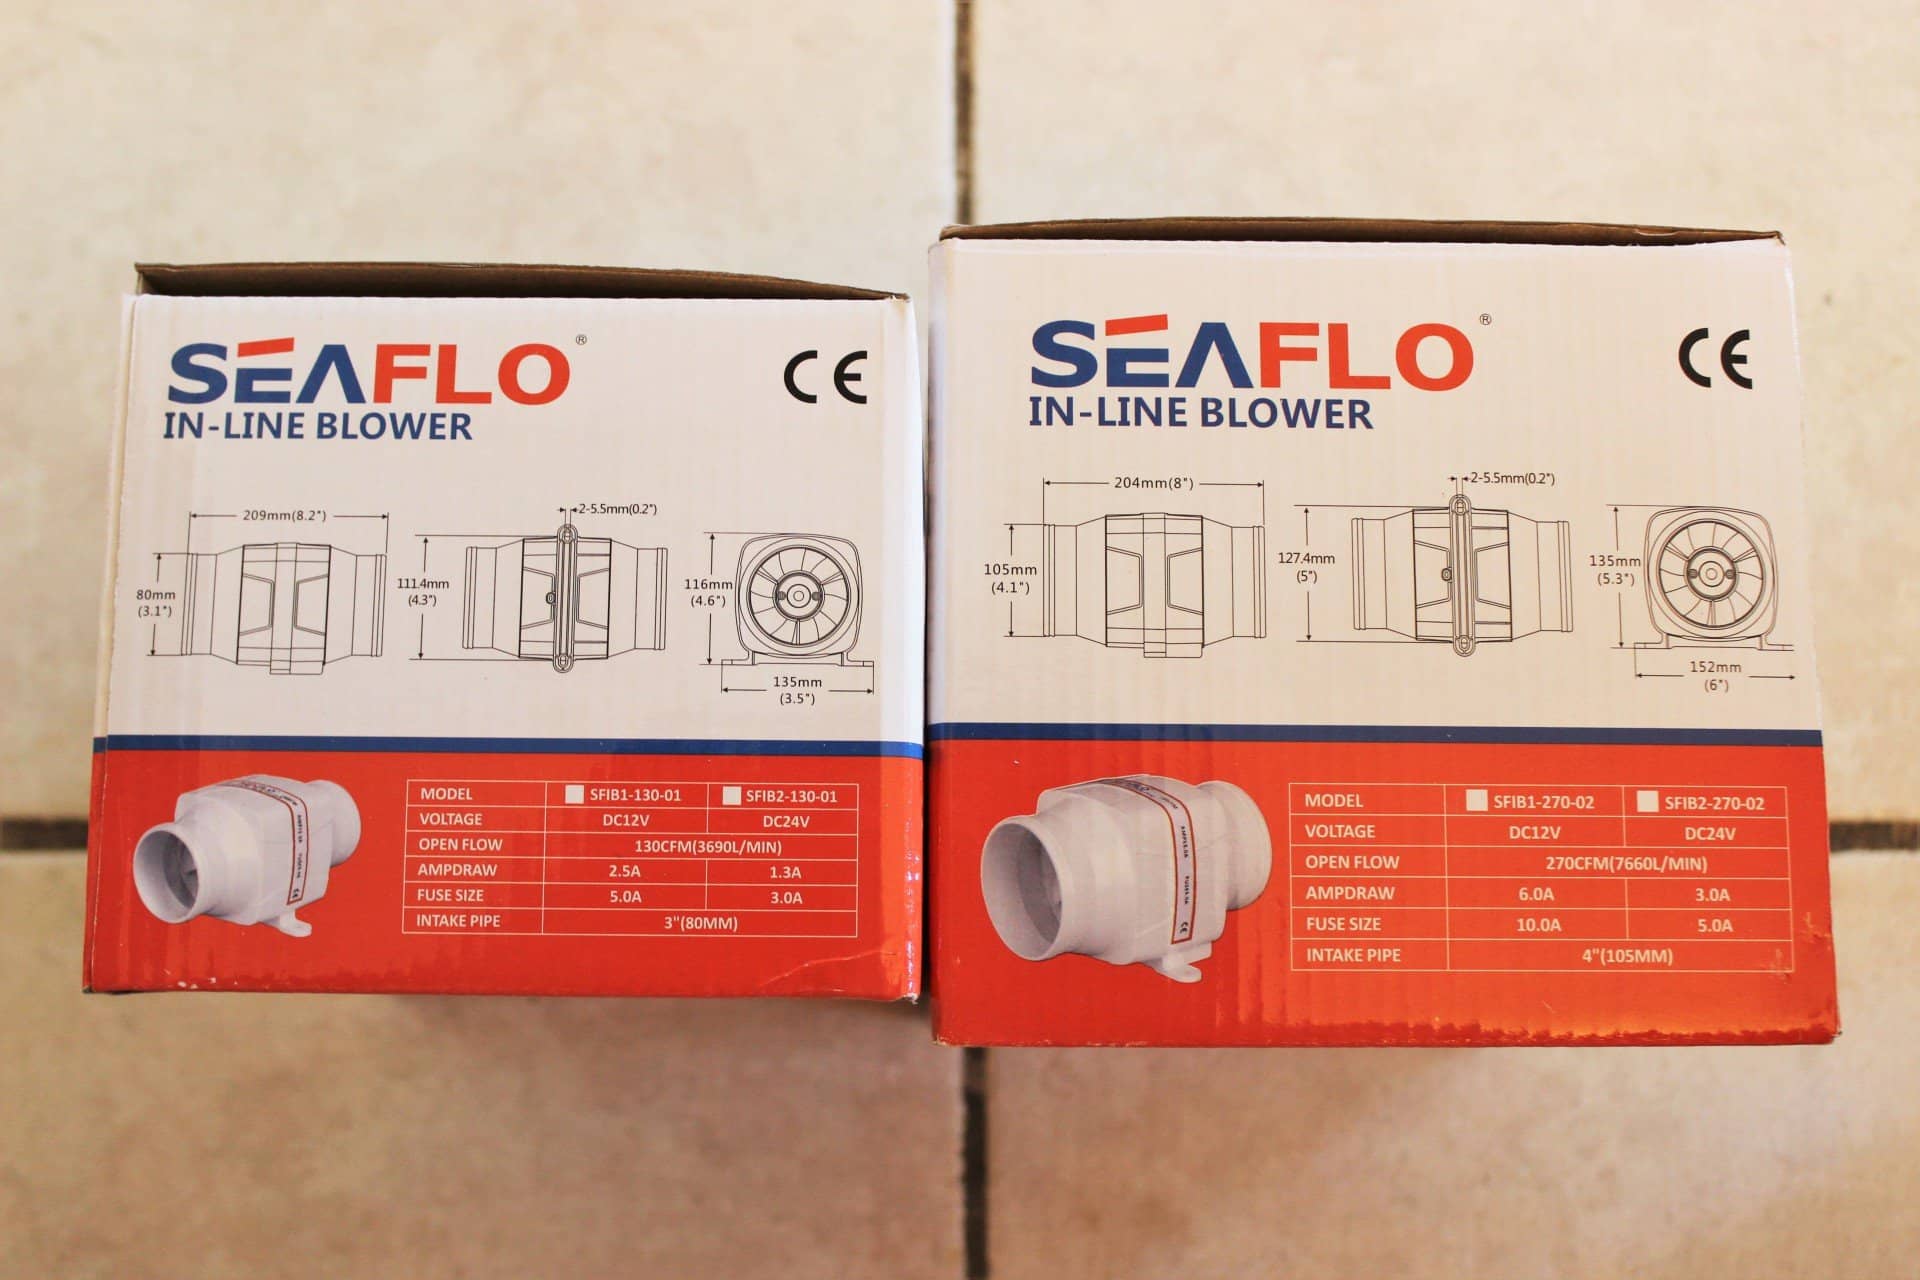
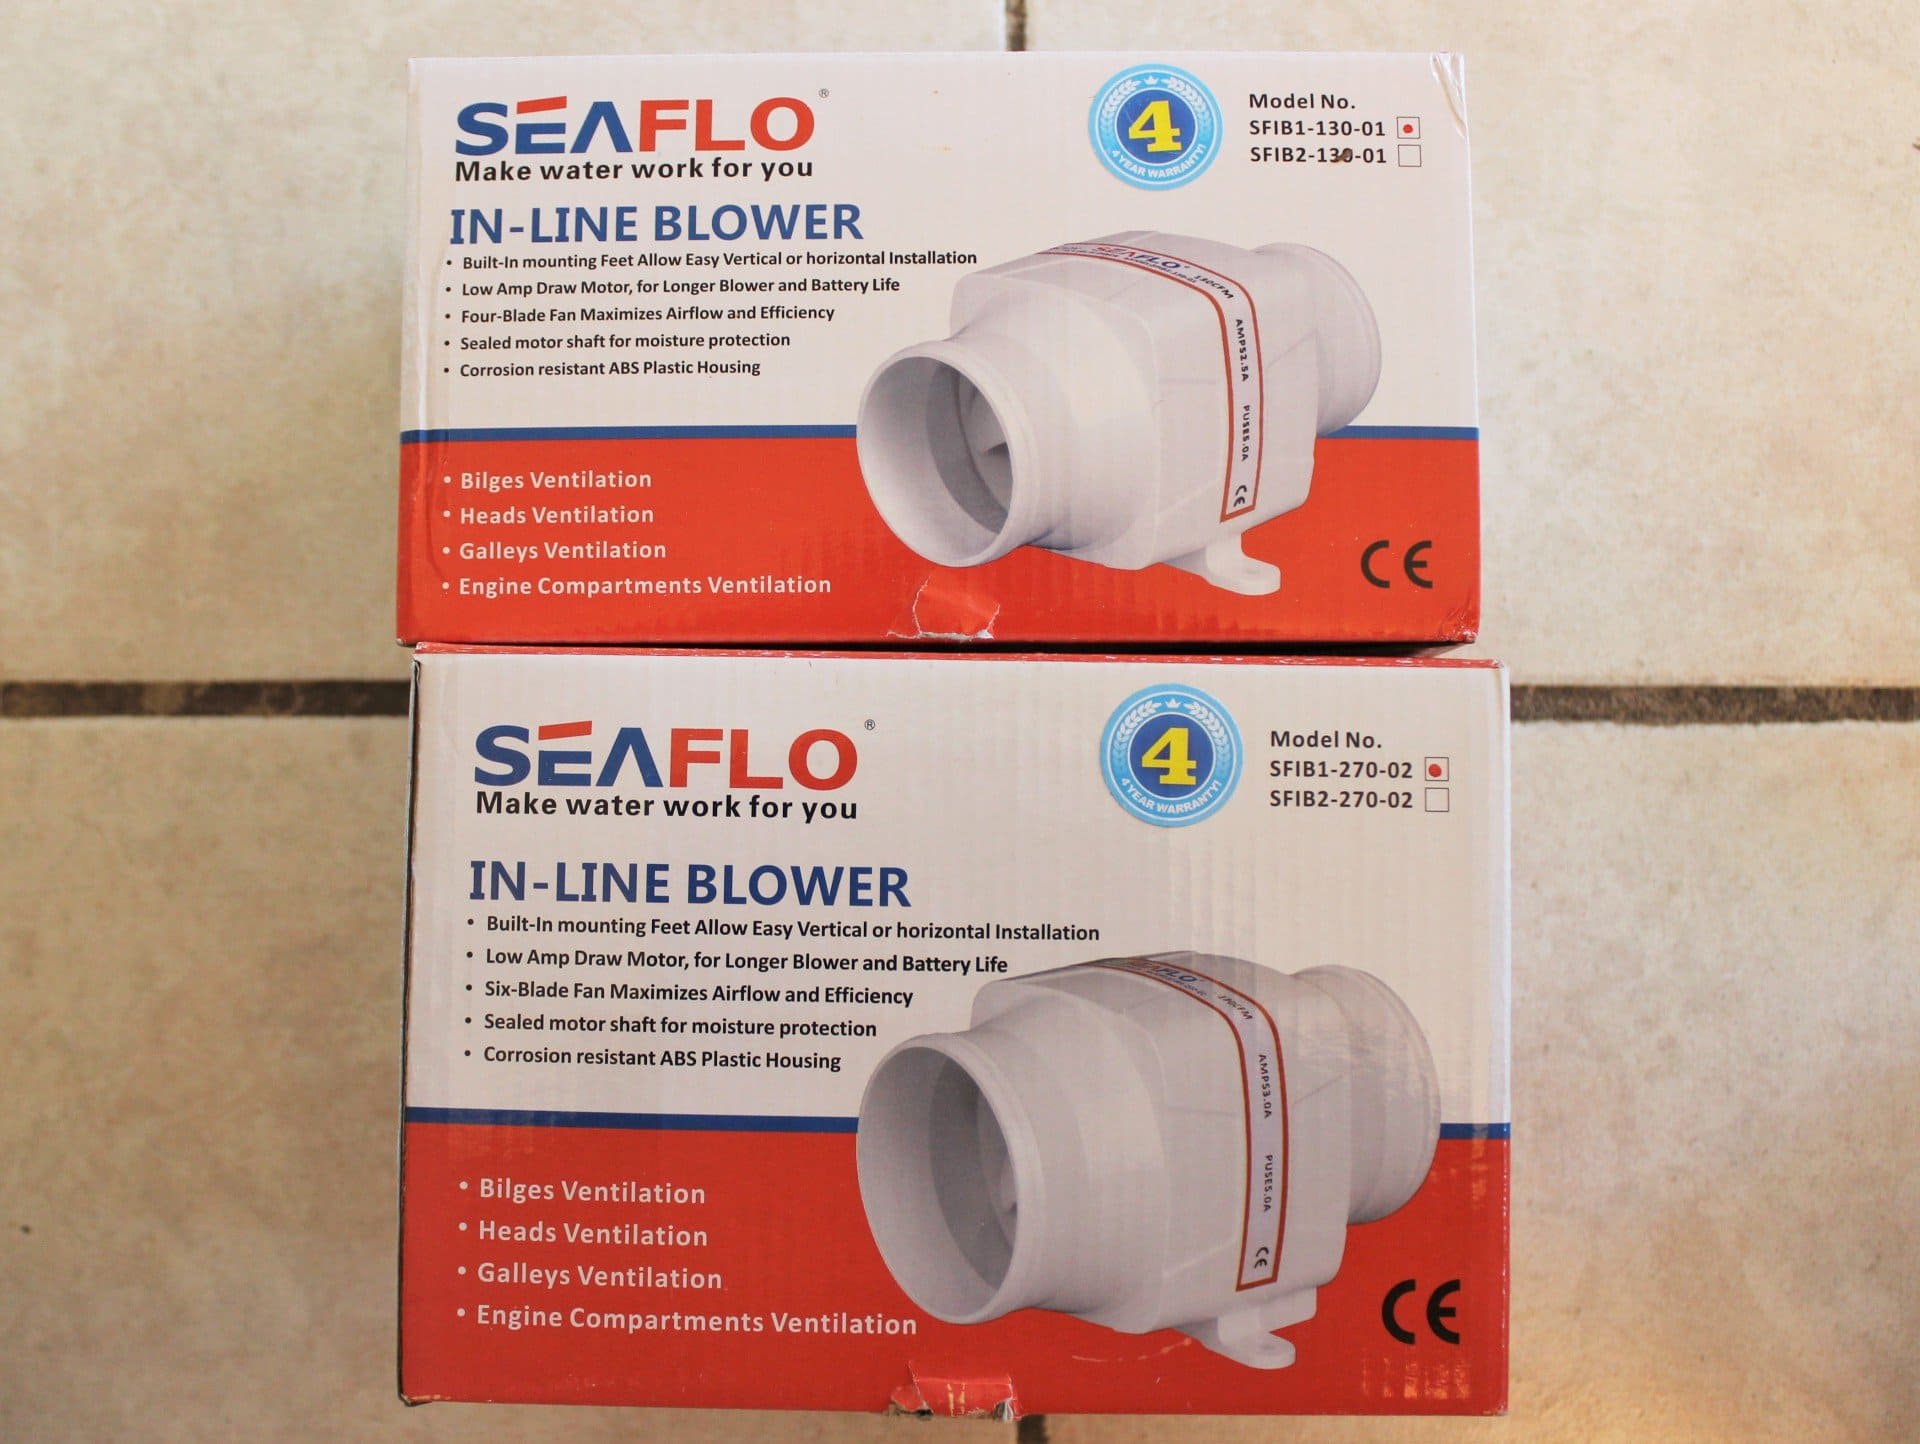
I looked at all sorts of fans for the job. Trailmanor uses a computer case cooling fan for this application. I thought this could be improved, and I didn’t want to use a puny computer fan either. Then in my search I stumbled across the Seaflo bilge blower fans (images 2073, 2075, 2074, 2077, 2029). These are used to evacuate the explosive fumes that collect in the engine compartments of boats. If you have a boat that the motor is inboard, you will have bilge blower fans that you turn on and run for a time before you ever try to start the engine. Otherwise instead of the engine starting, you would be blown to pieces from the ignition of the fuel vapors that collect in the engine/bilge compartment.
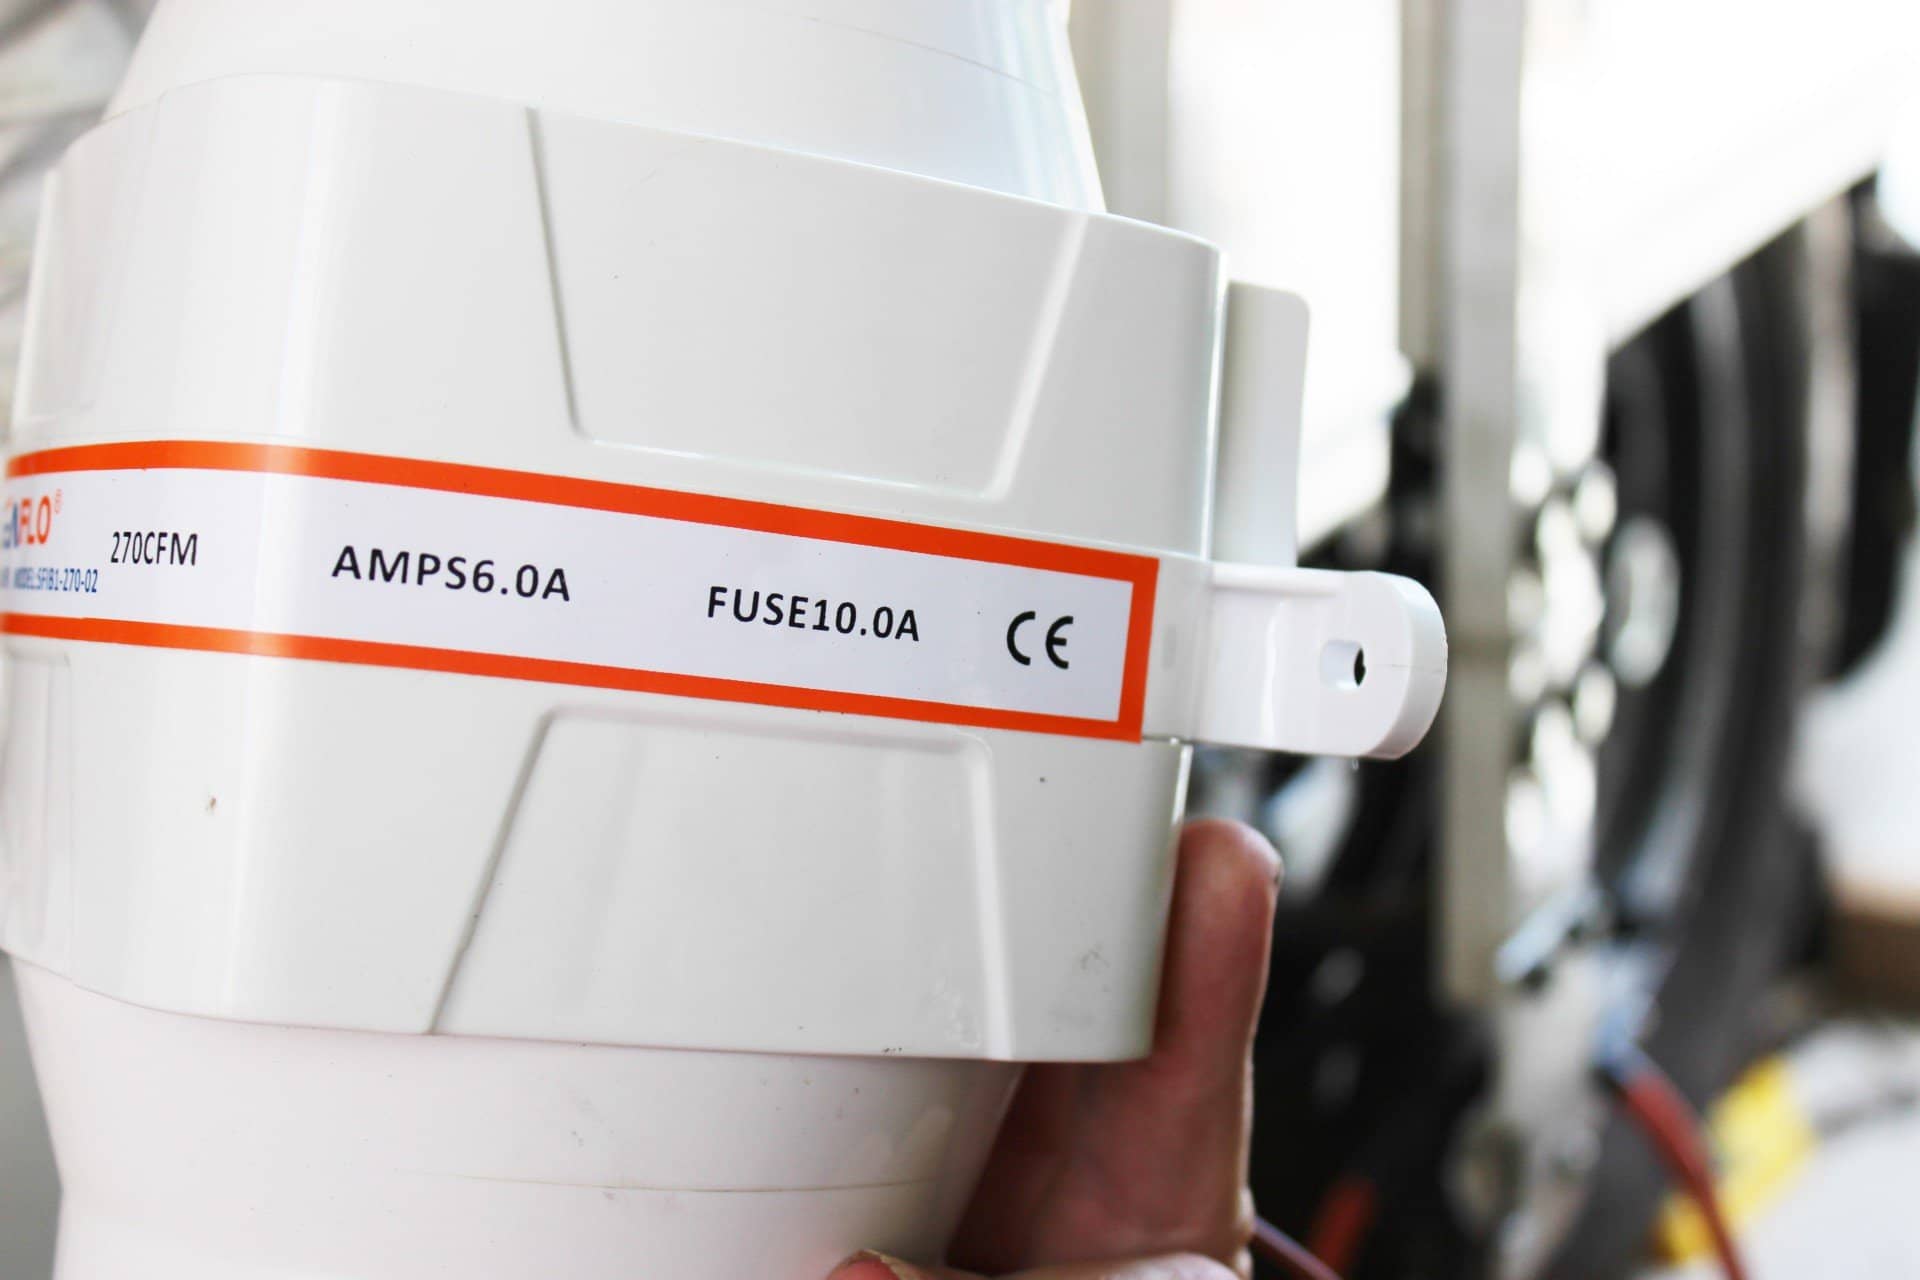
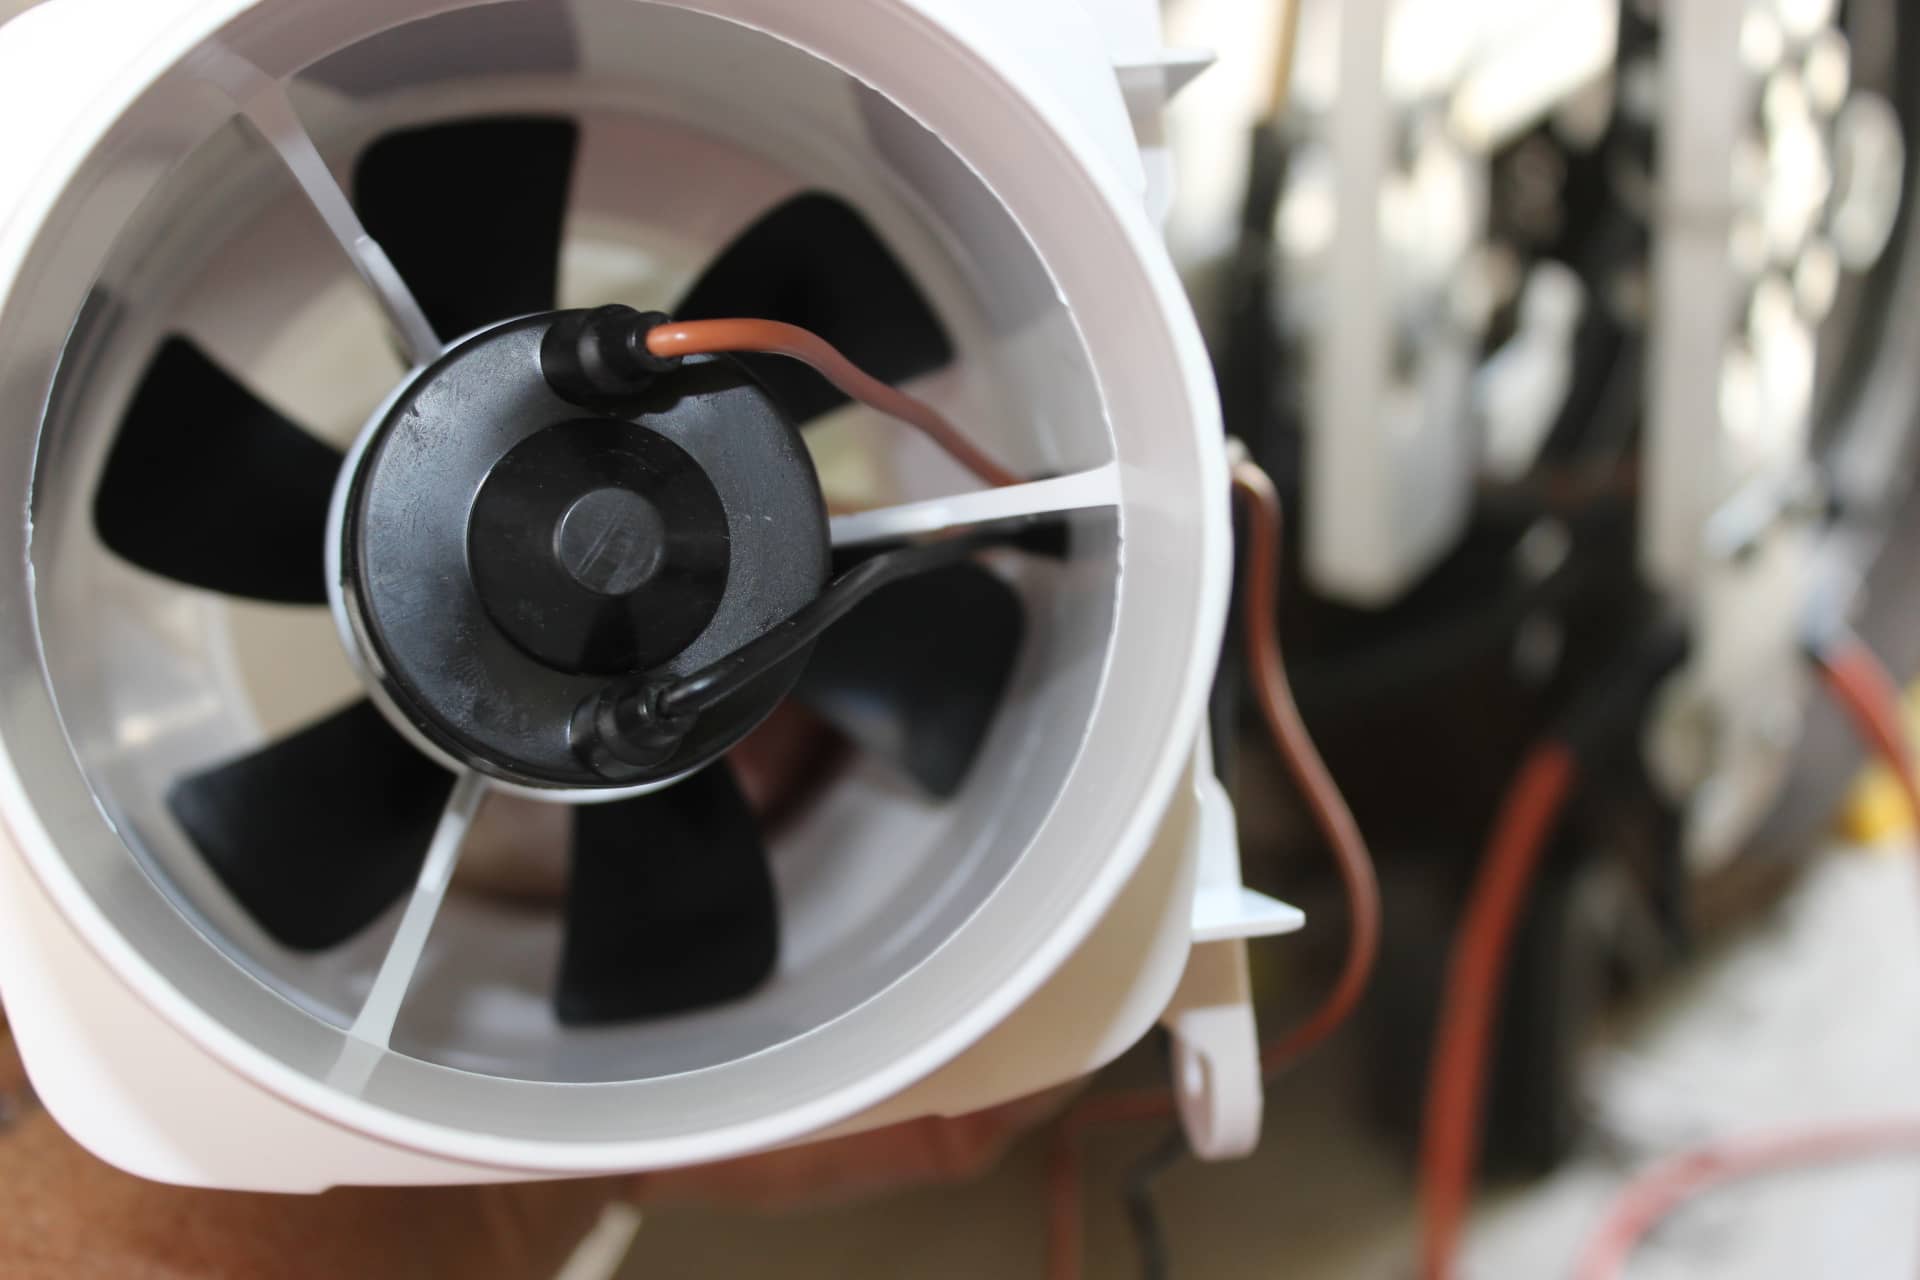
These looked perfect for this job. Heavy duty, with mounting brackets built into the body of the unit (image 2030) and they came in two sizes too, 4” and 3” hose barbs. I liked these because the motor and fan look to be very sturdy (images 2028, 2031). So I bought one of each. Since they are constructed with the hose barbs built into the housing they are “in-line” units. That made things simple.
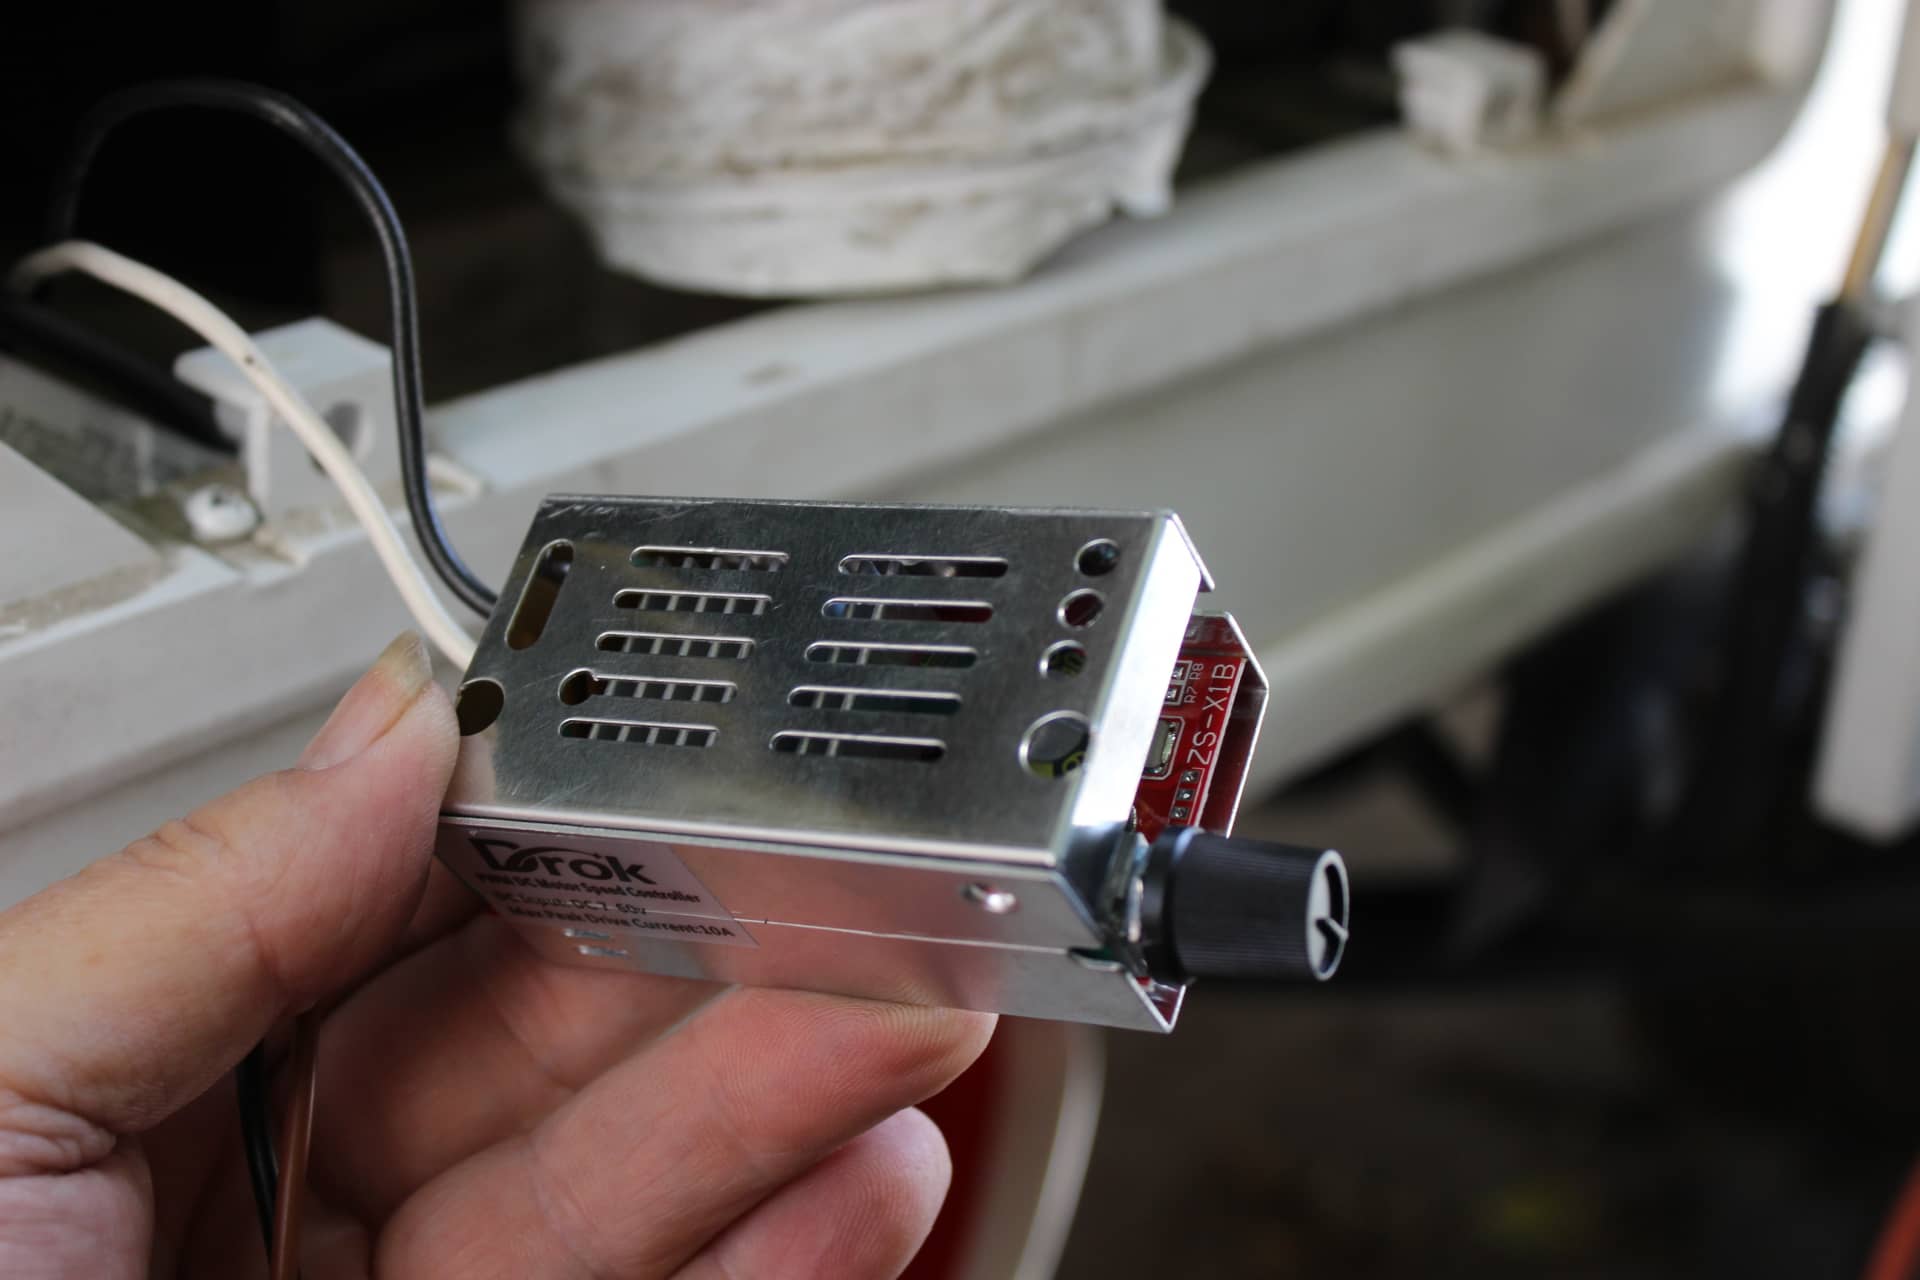
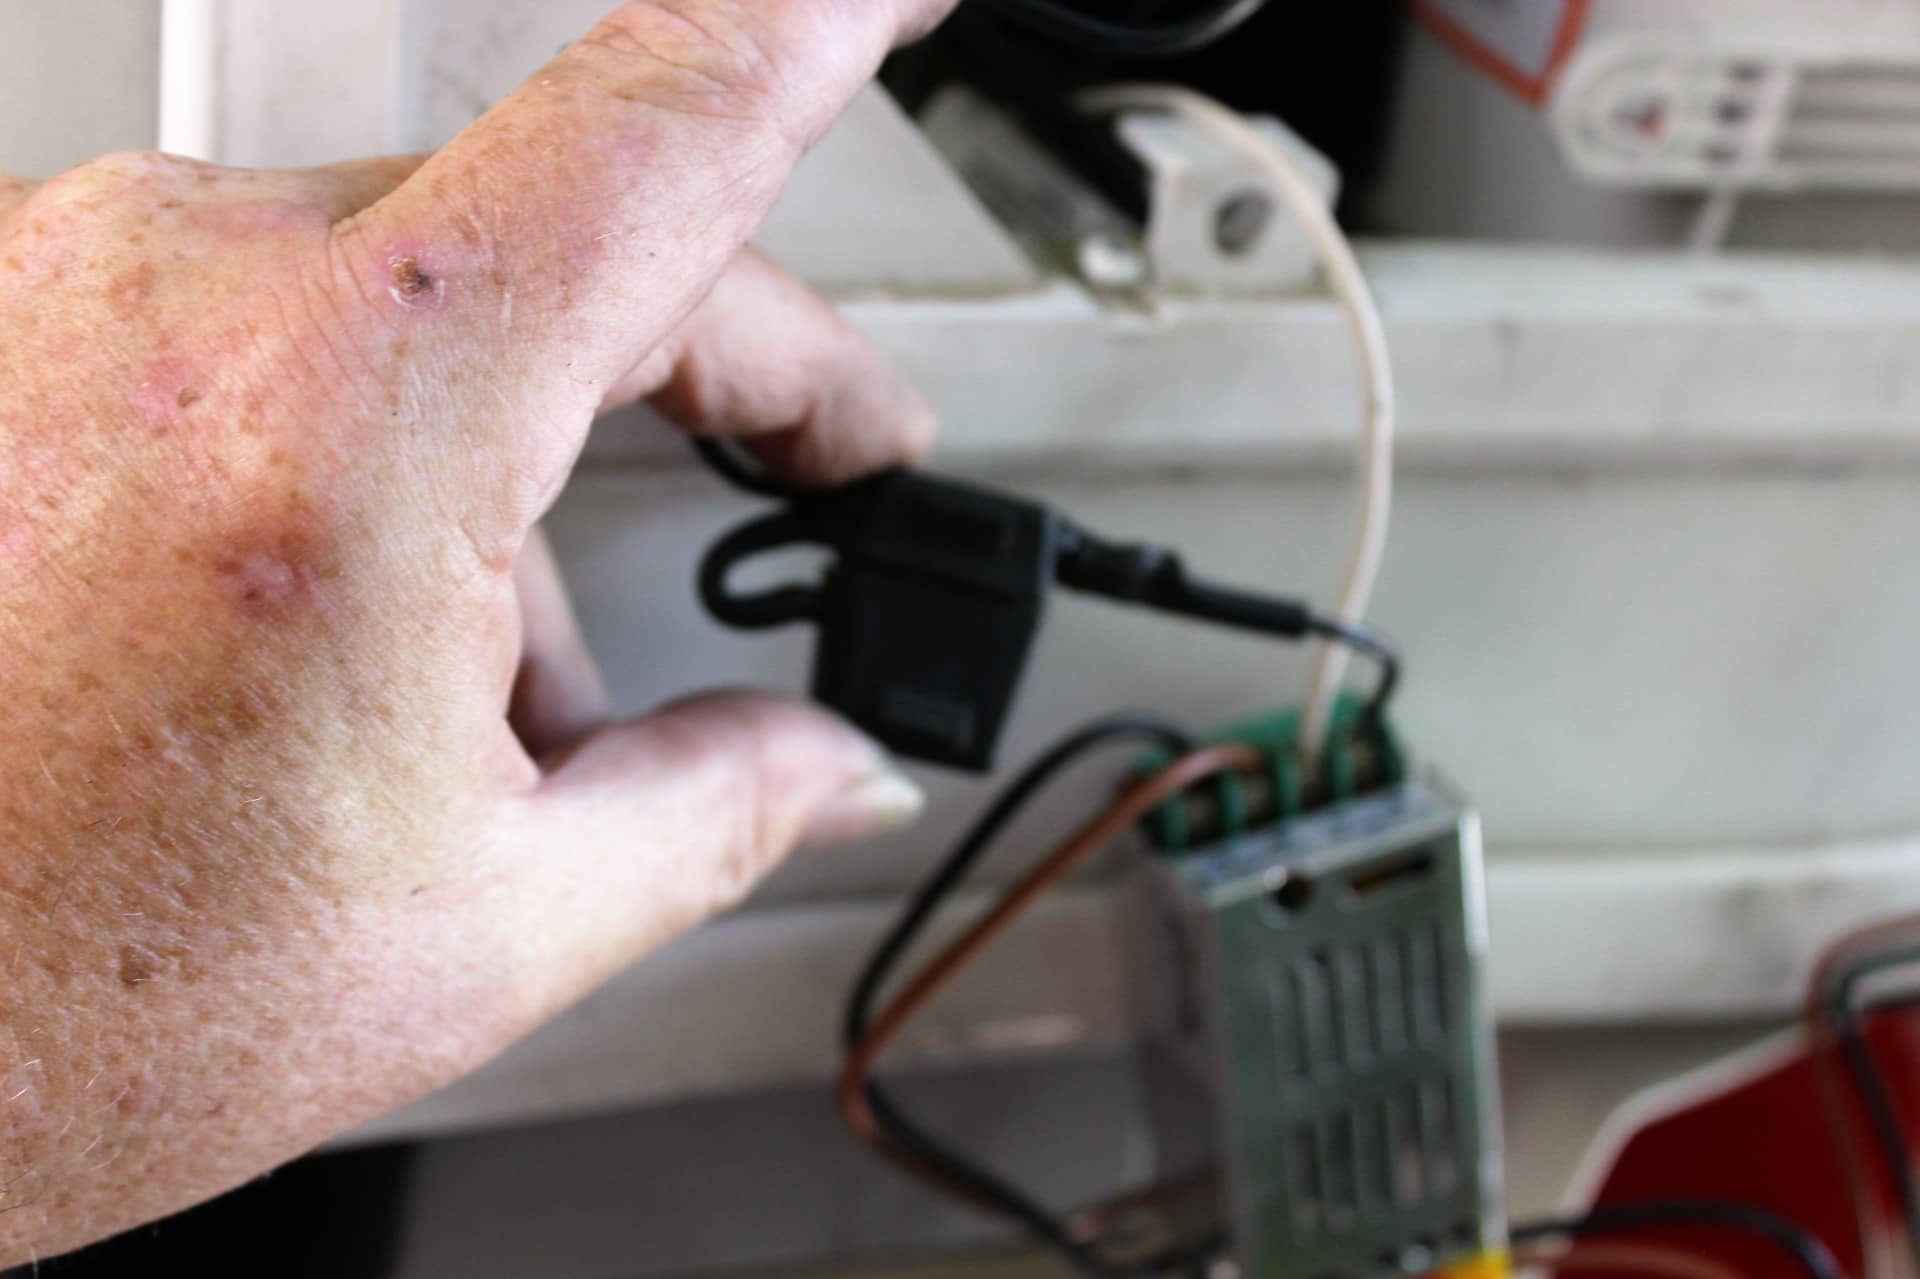
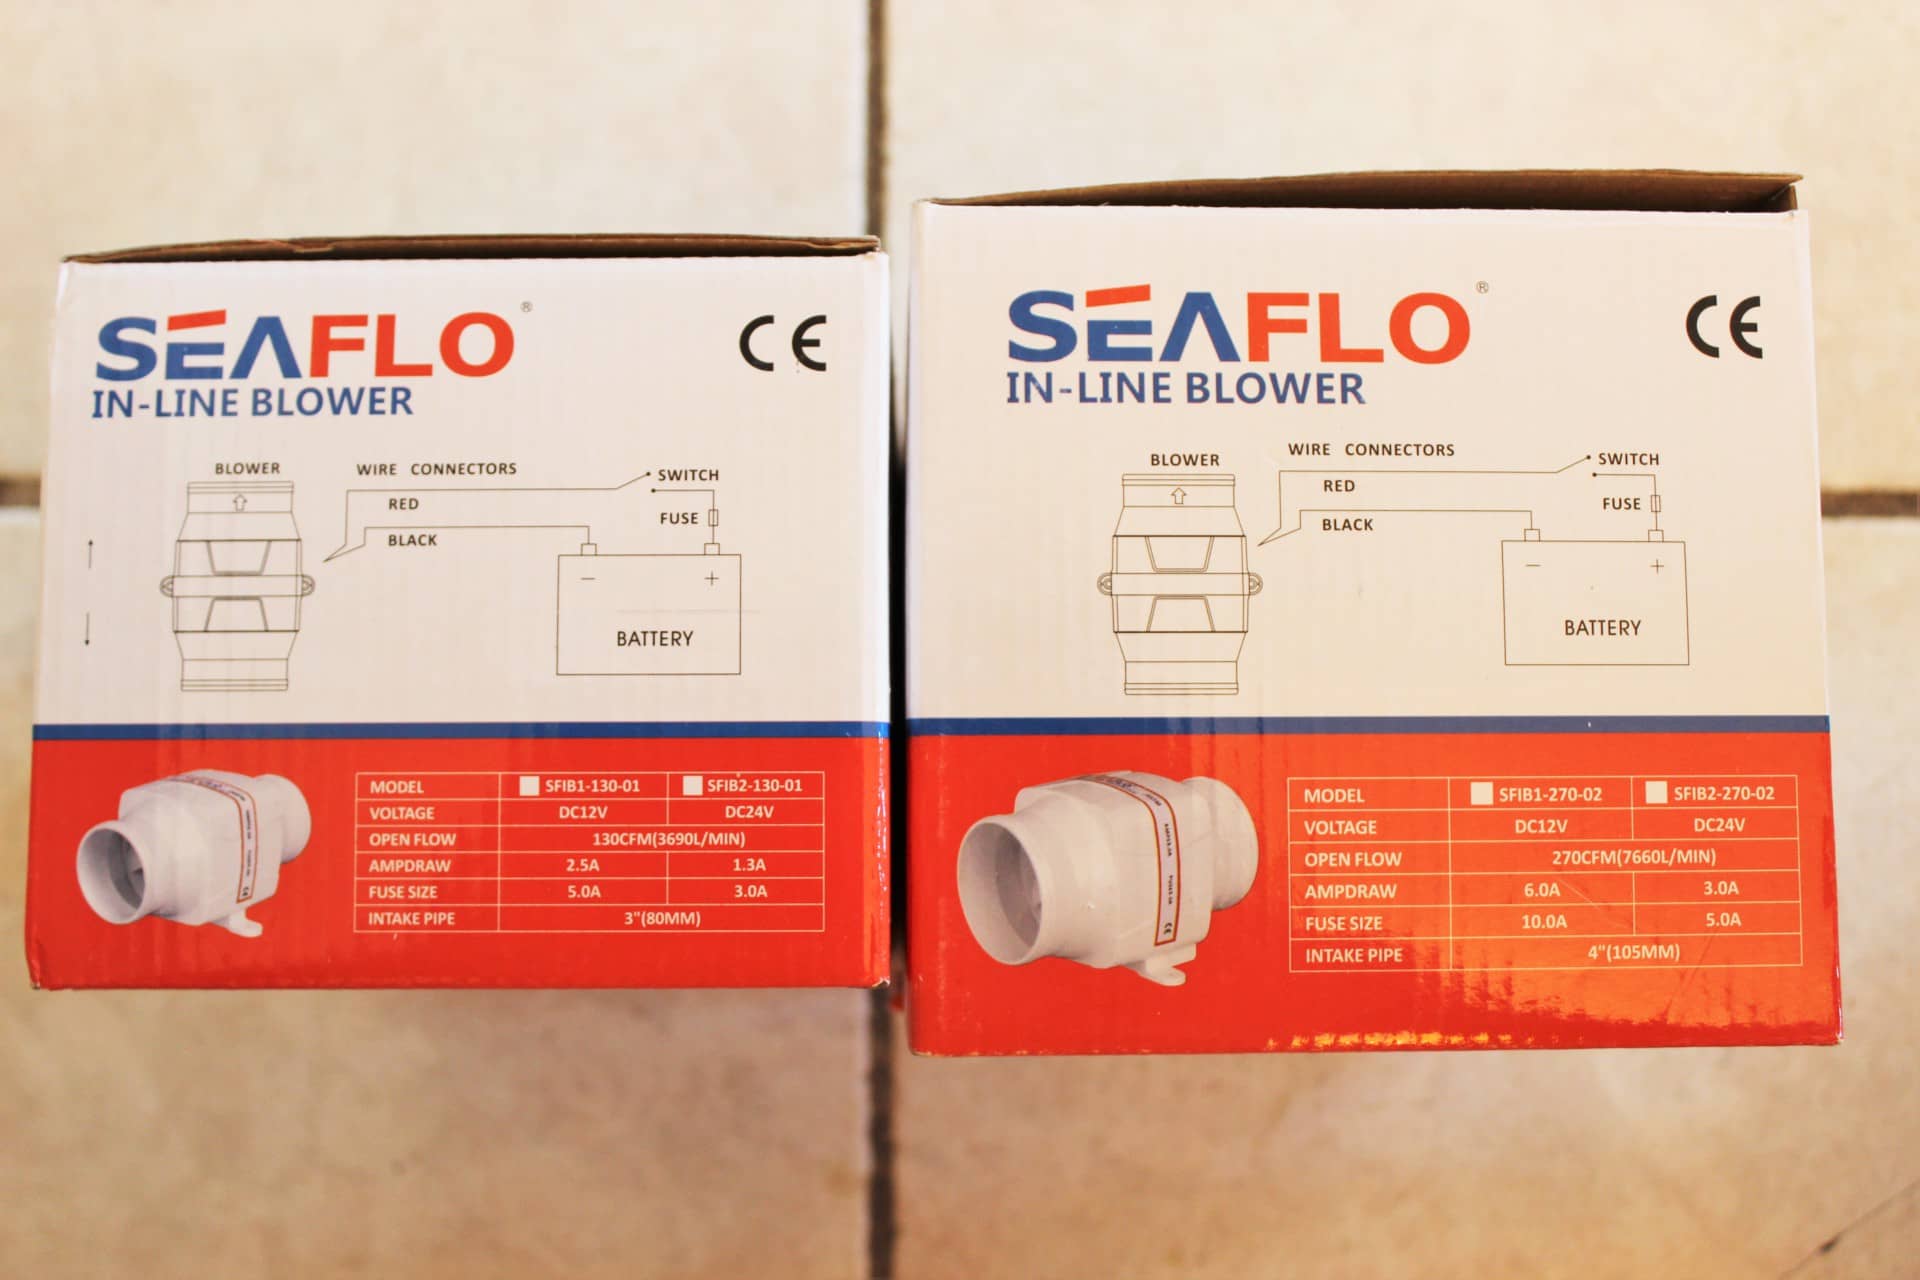
I know that some folks will whine about the power consumption of these fans. But we have never dry camped before and probably won’t. However, so that I can control the power consumption of each unit, I also installed the Drok PWM DC Speed Controller on each unit so that I can control the speed of each unit as well as the power that each unit uses (images 2026, 2027).
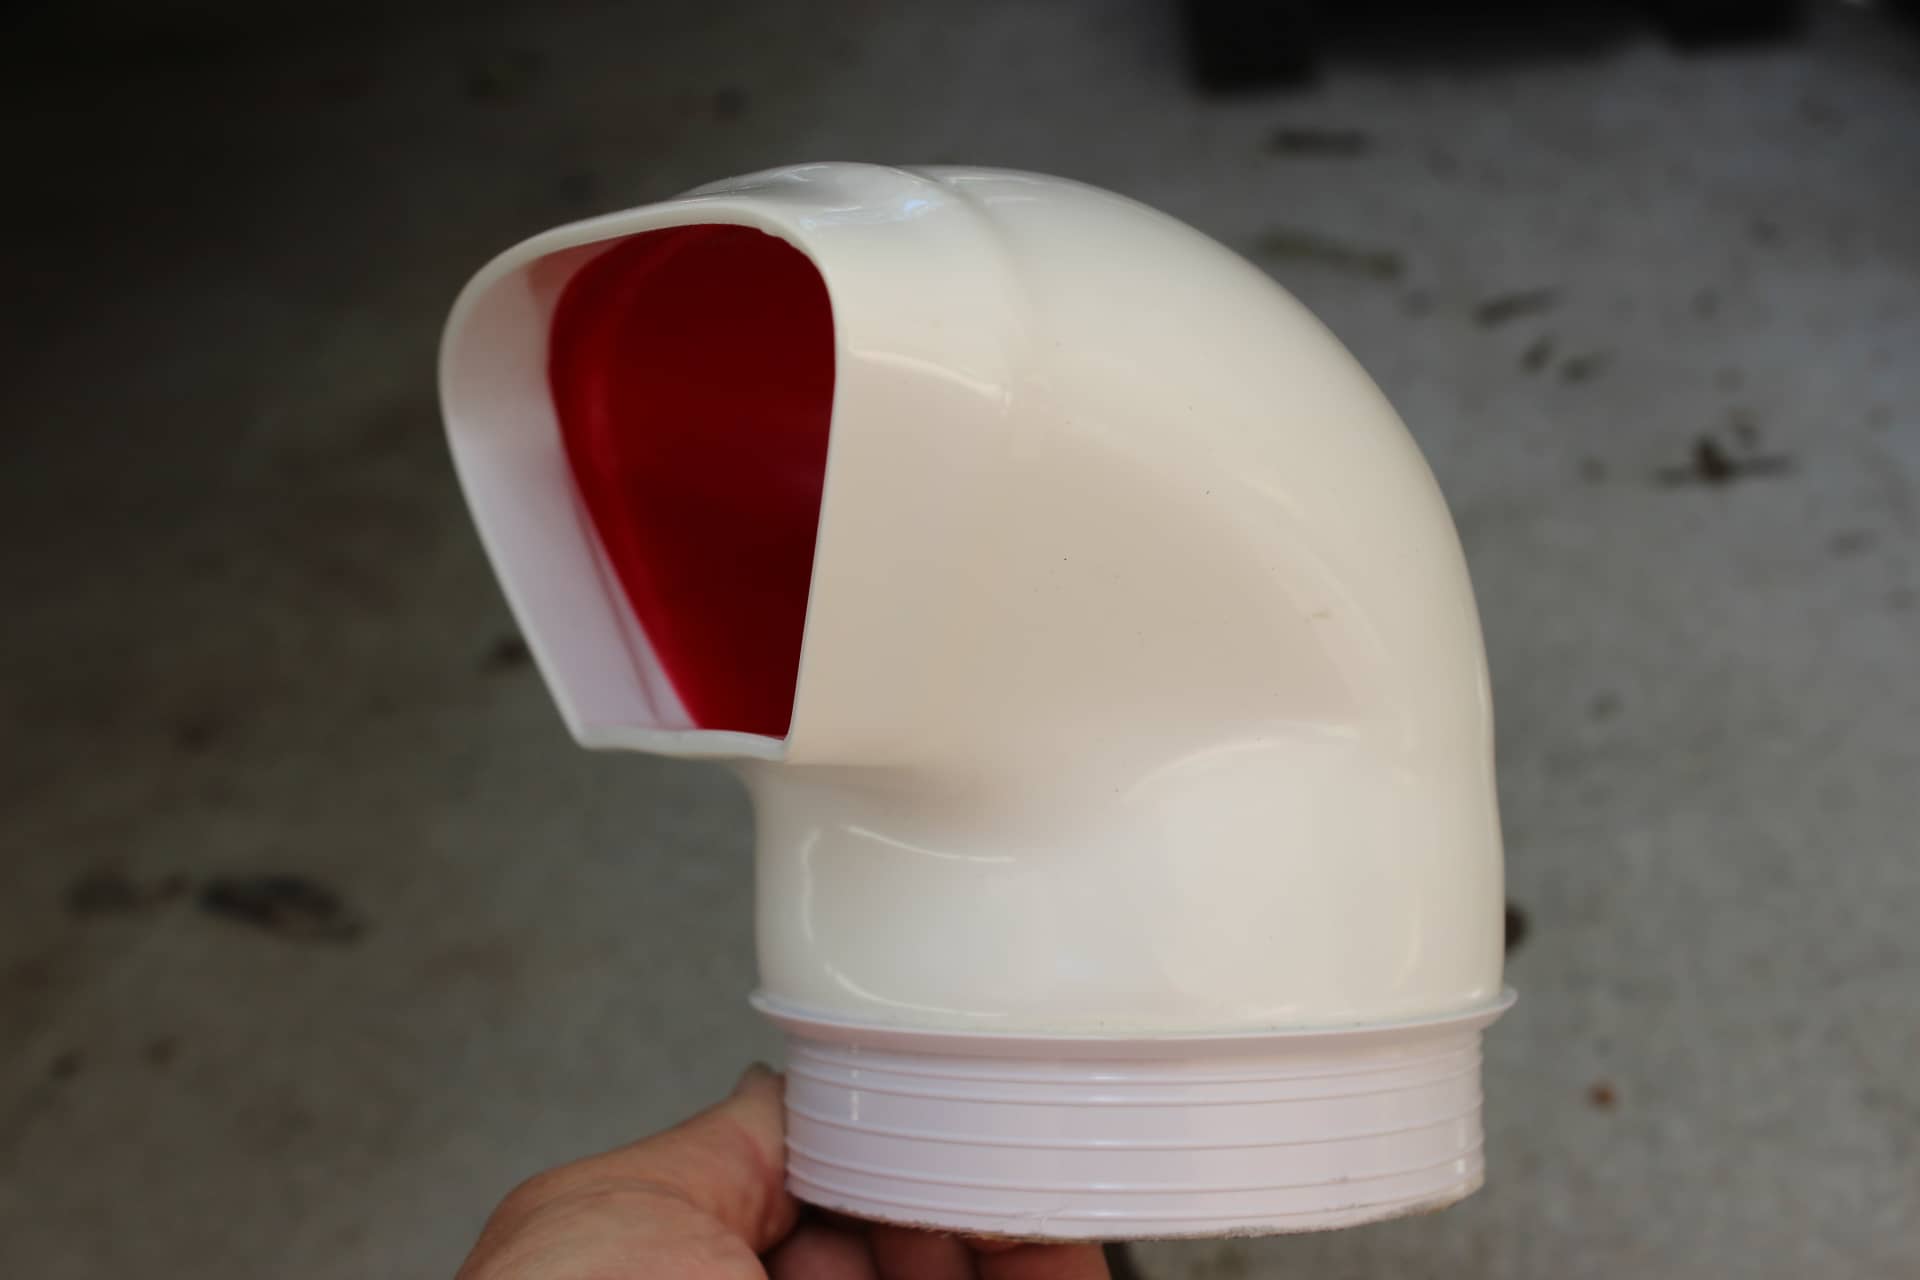
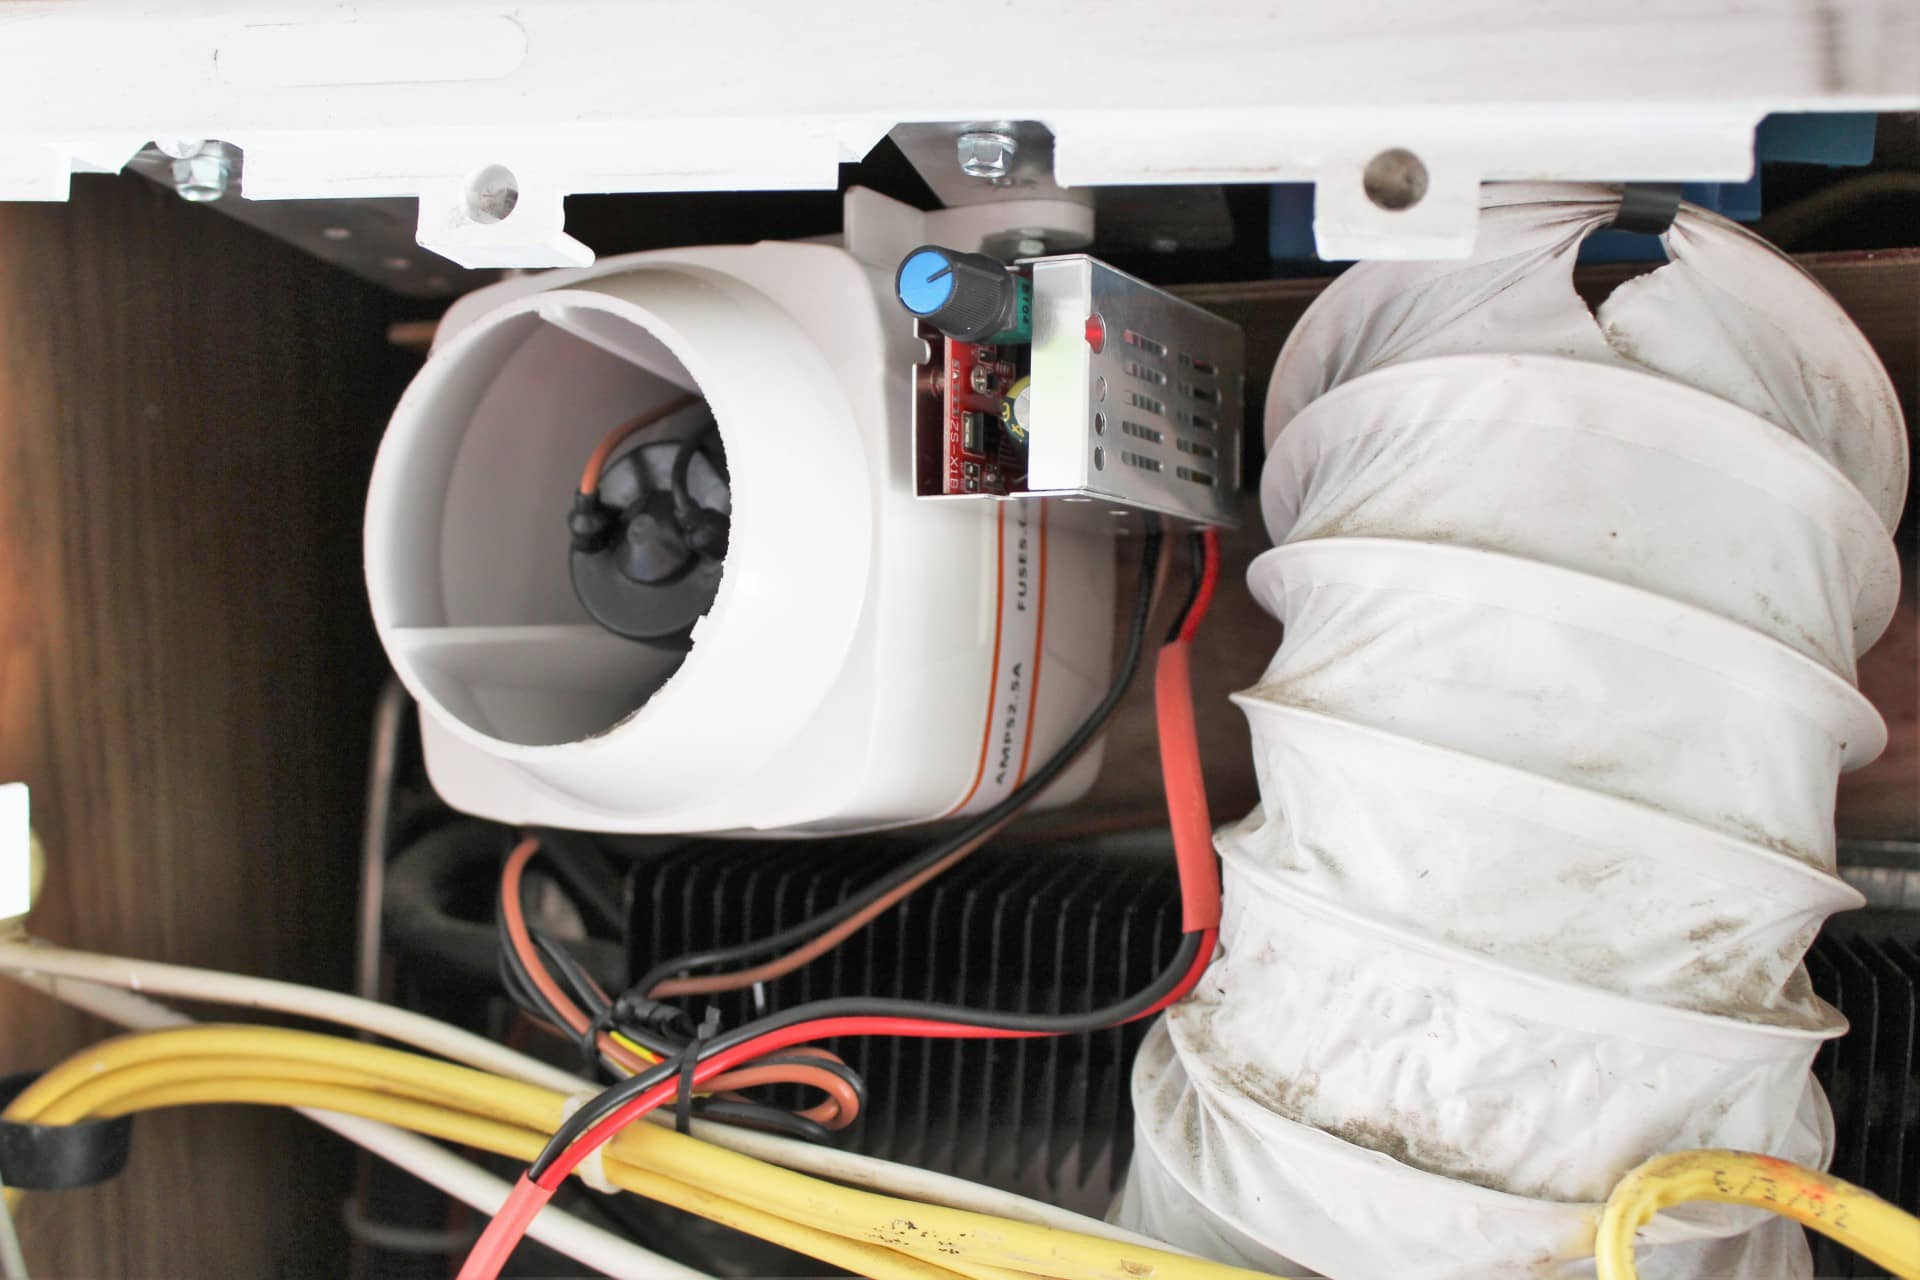
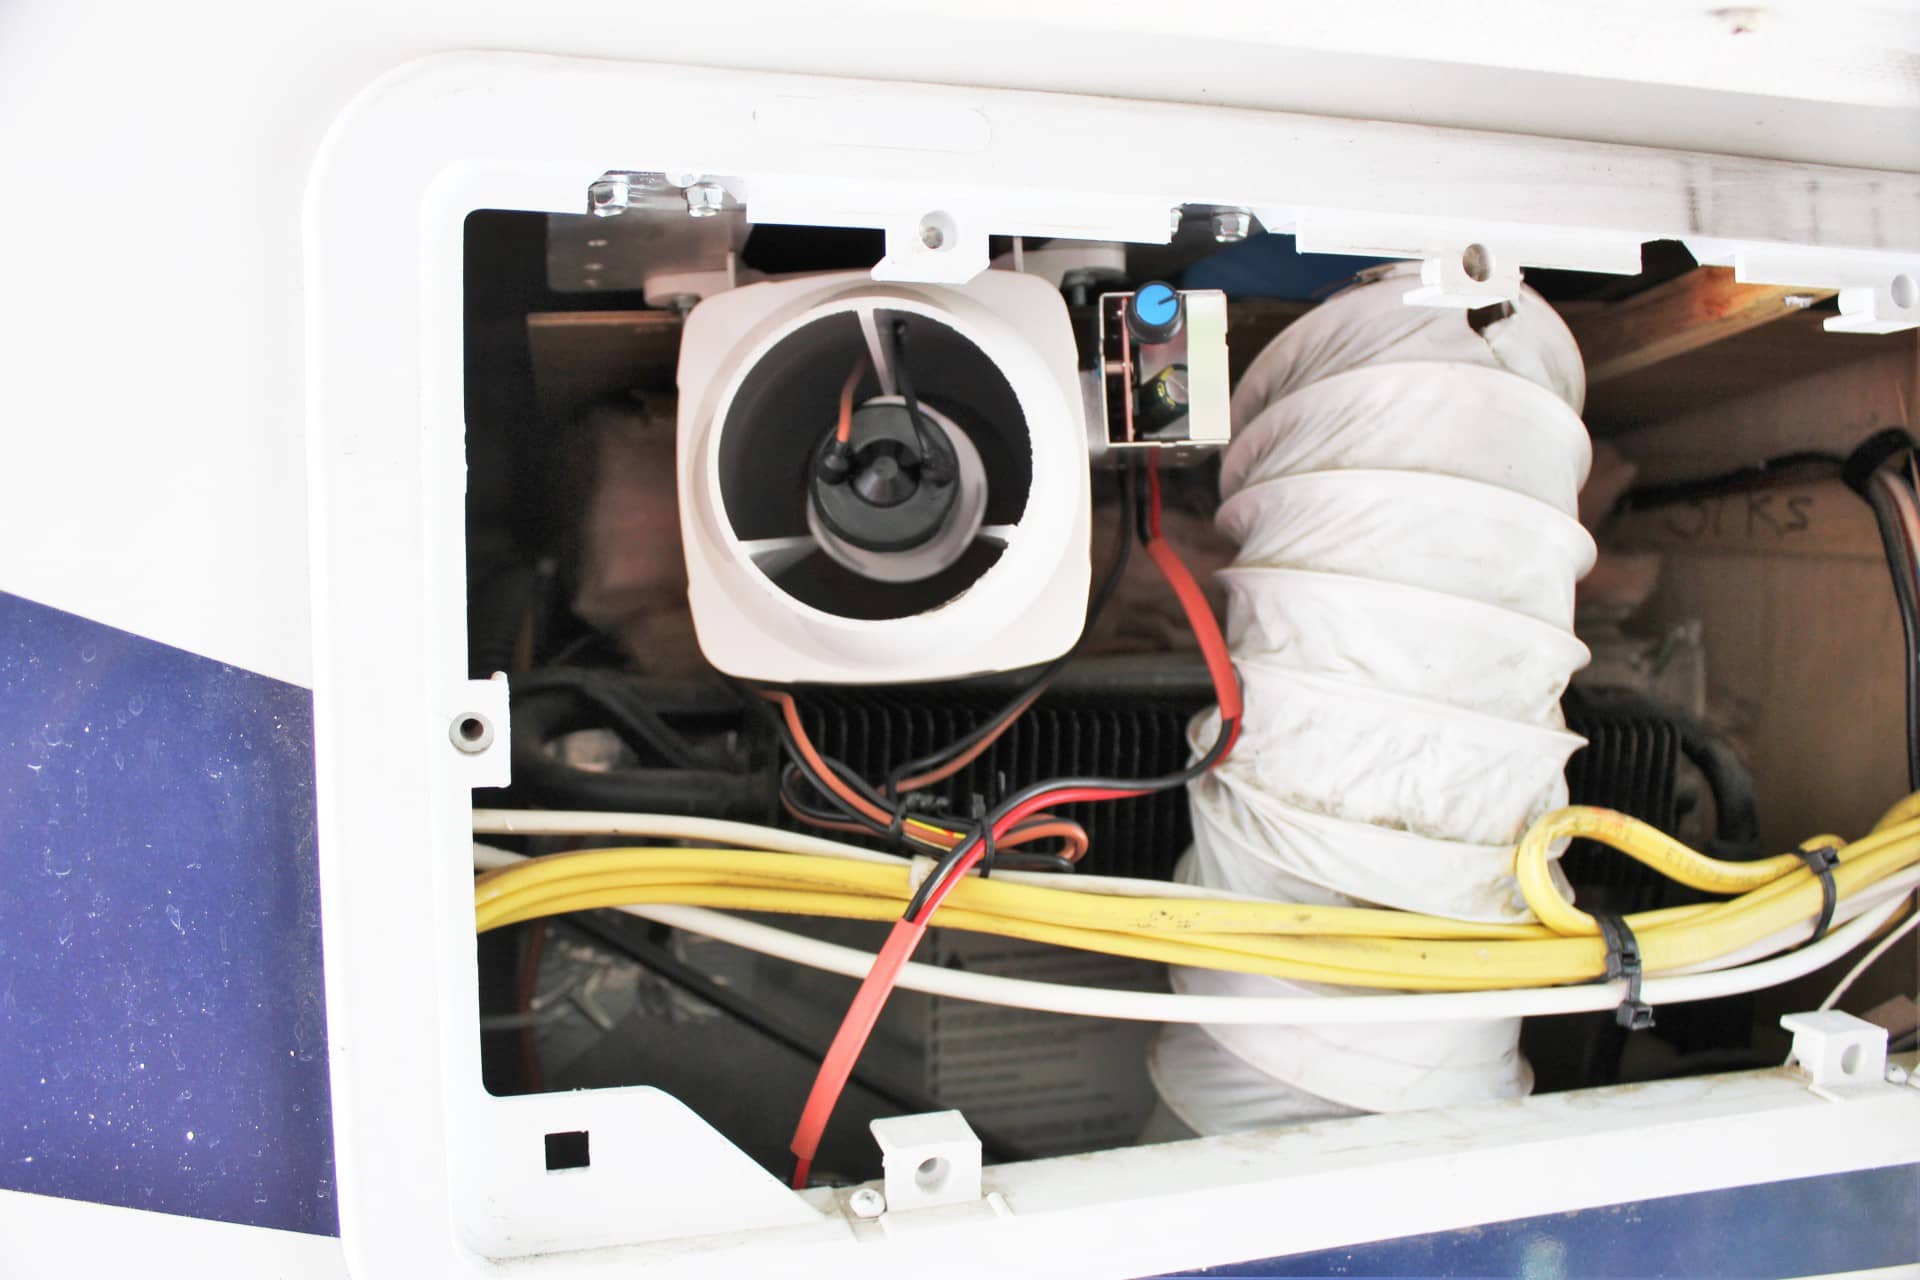
Now the only problem was the space. As it turned out I had just enough space to place the bottom fan in the square hole and tilt it away from the heated coil tube. It can get kinda hot but not enough to start a fire….I just didn’t want to take a chance of melting anything. To make it fit nice and snug I uses a piece of 4” PVC pipe about 4” long and reamed out slightly at one end so that the blower fan would recess into the PVC pipe (image 2060….if you look at the bottom of the blower you can see it sticking up). On the other end I just slipped the 4” hose onto the blower and secured it with a hose clamp.
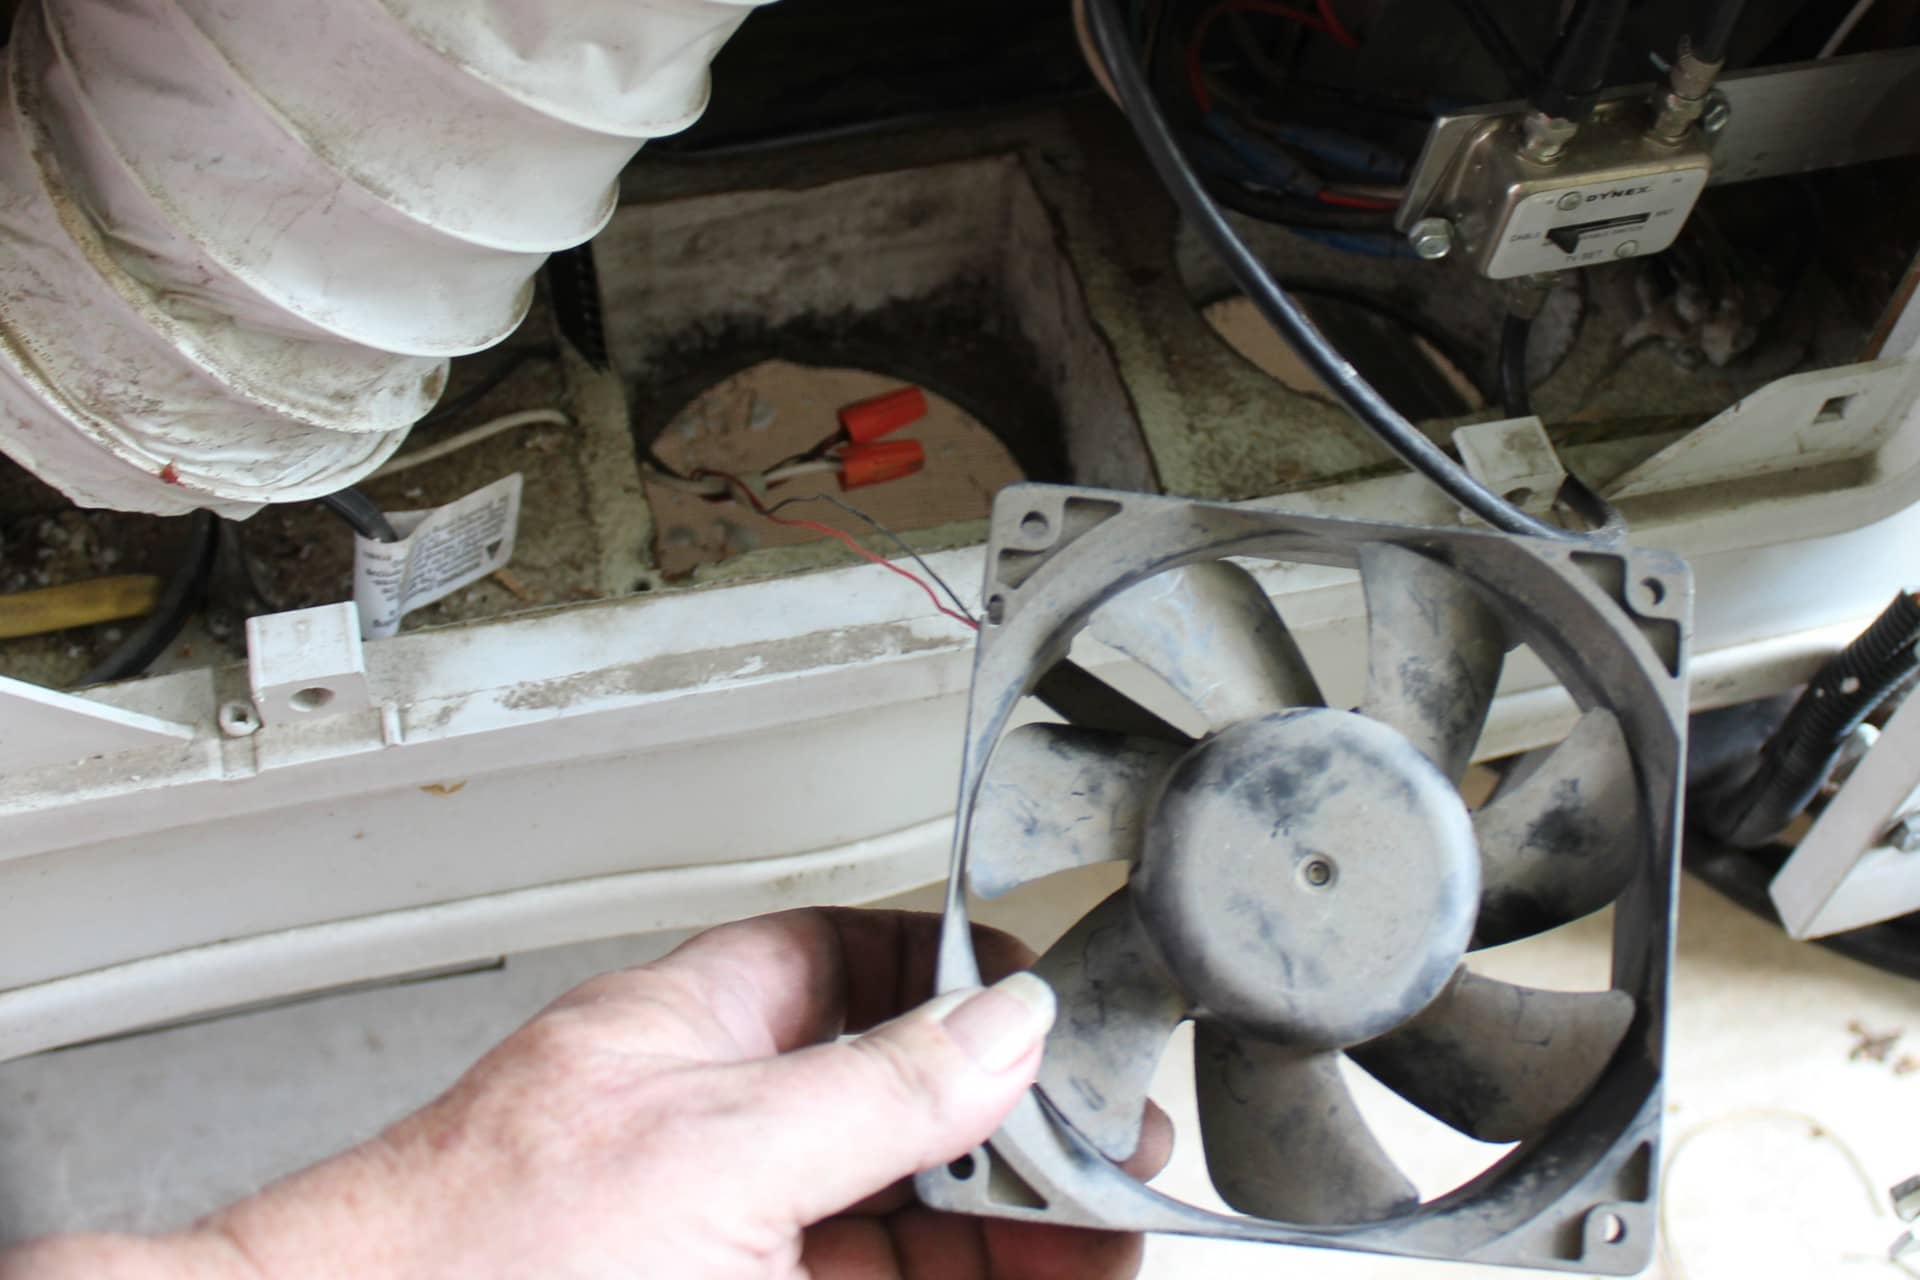
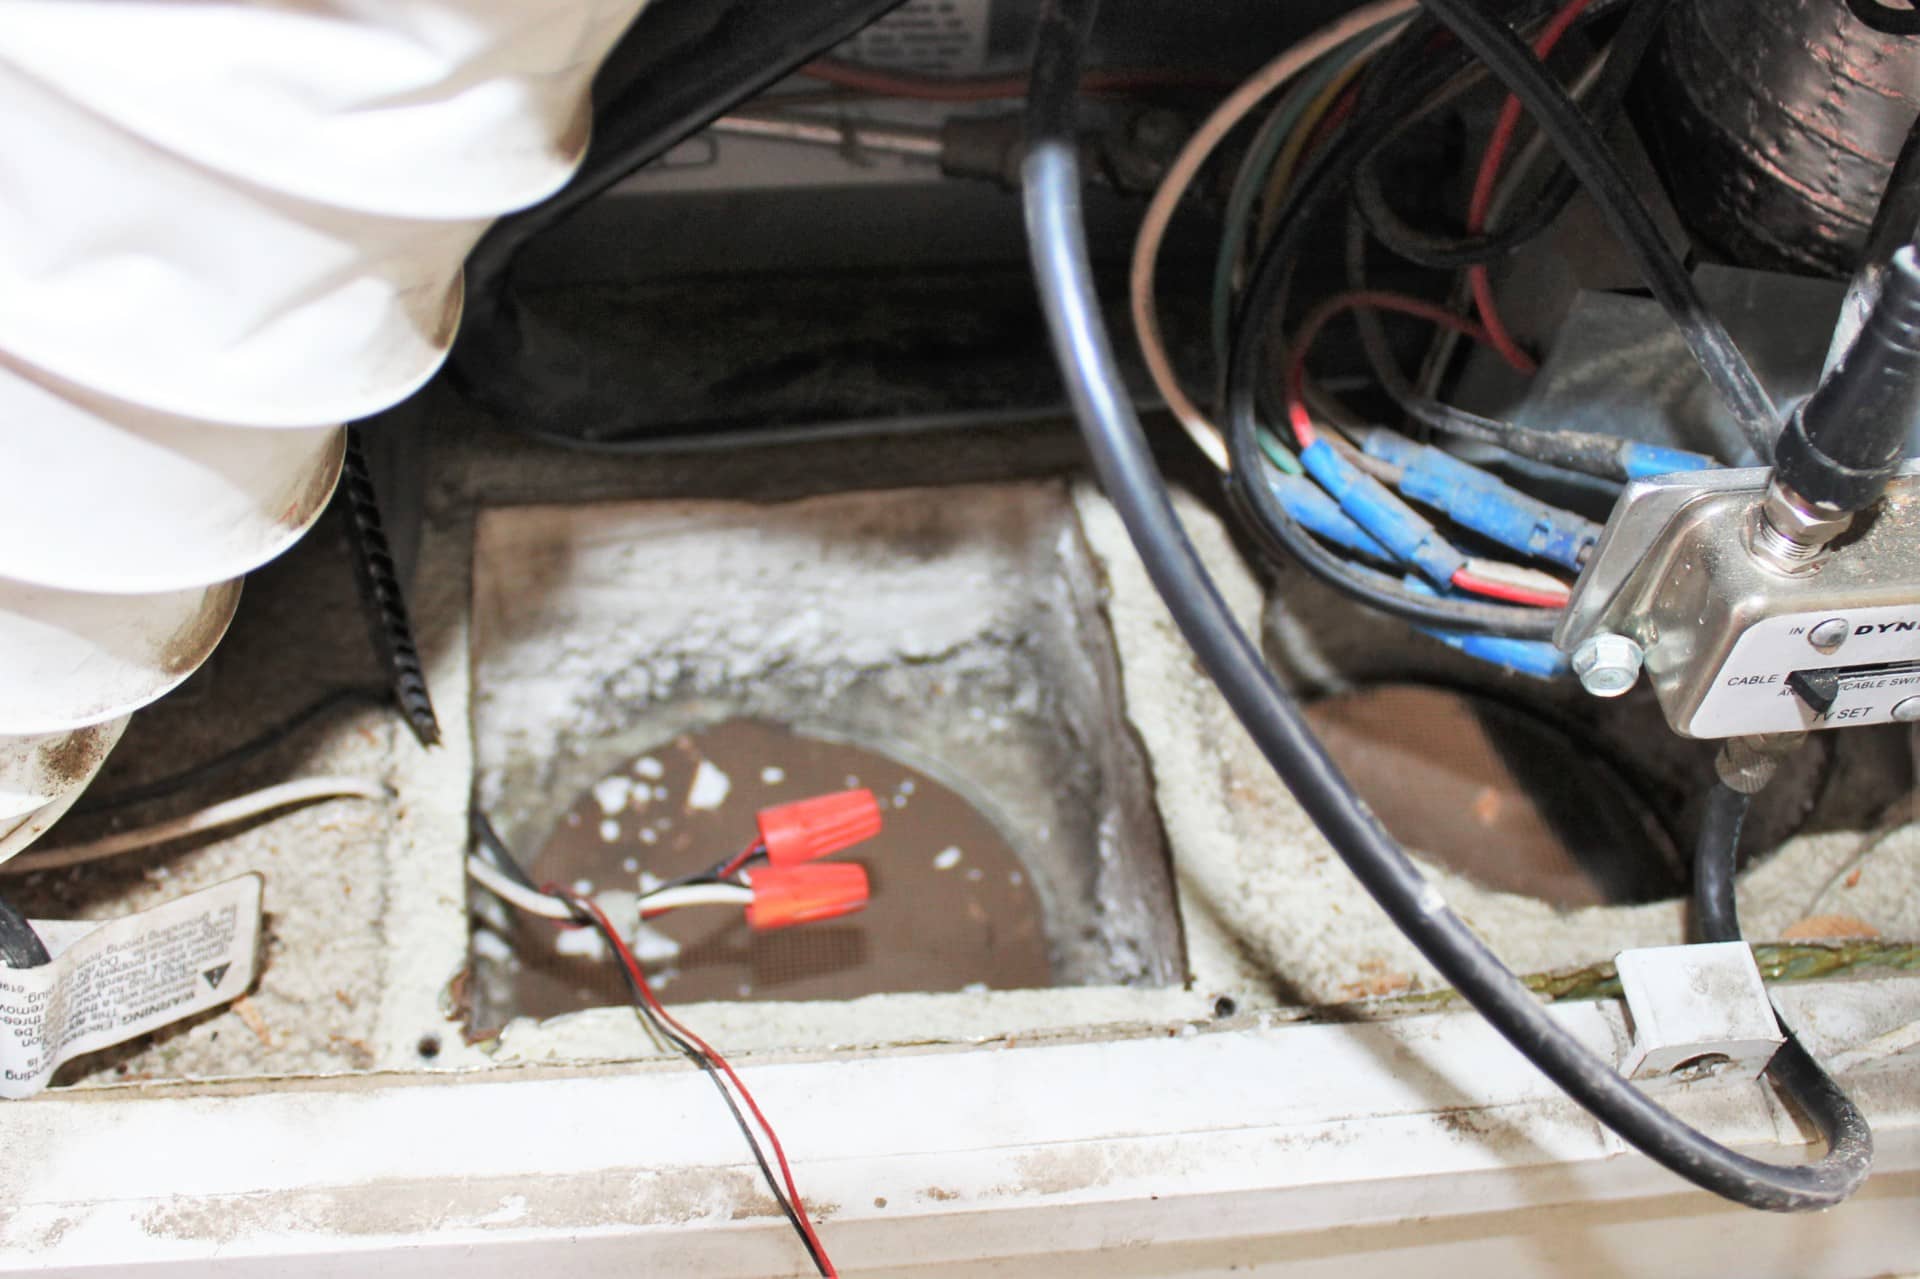
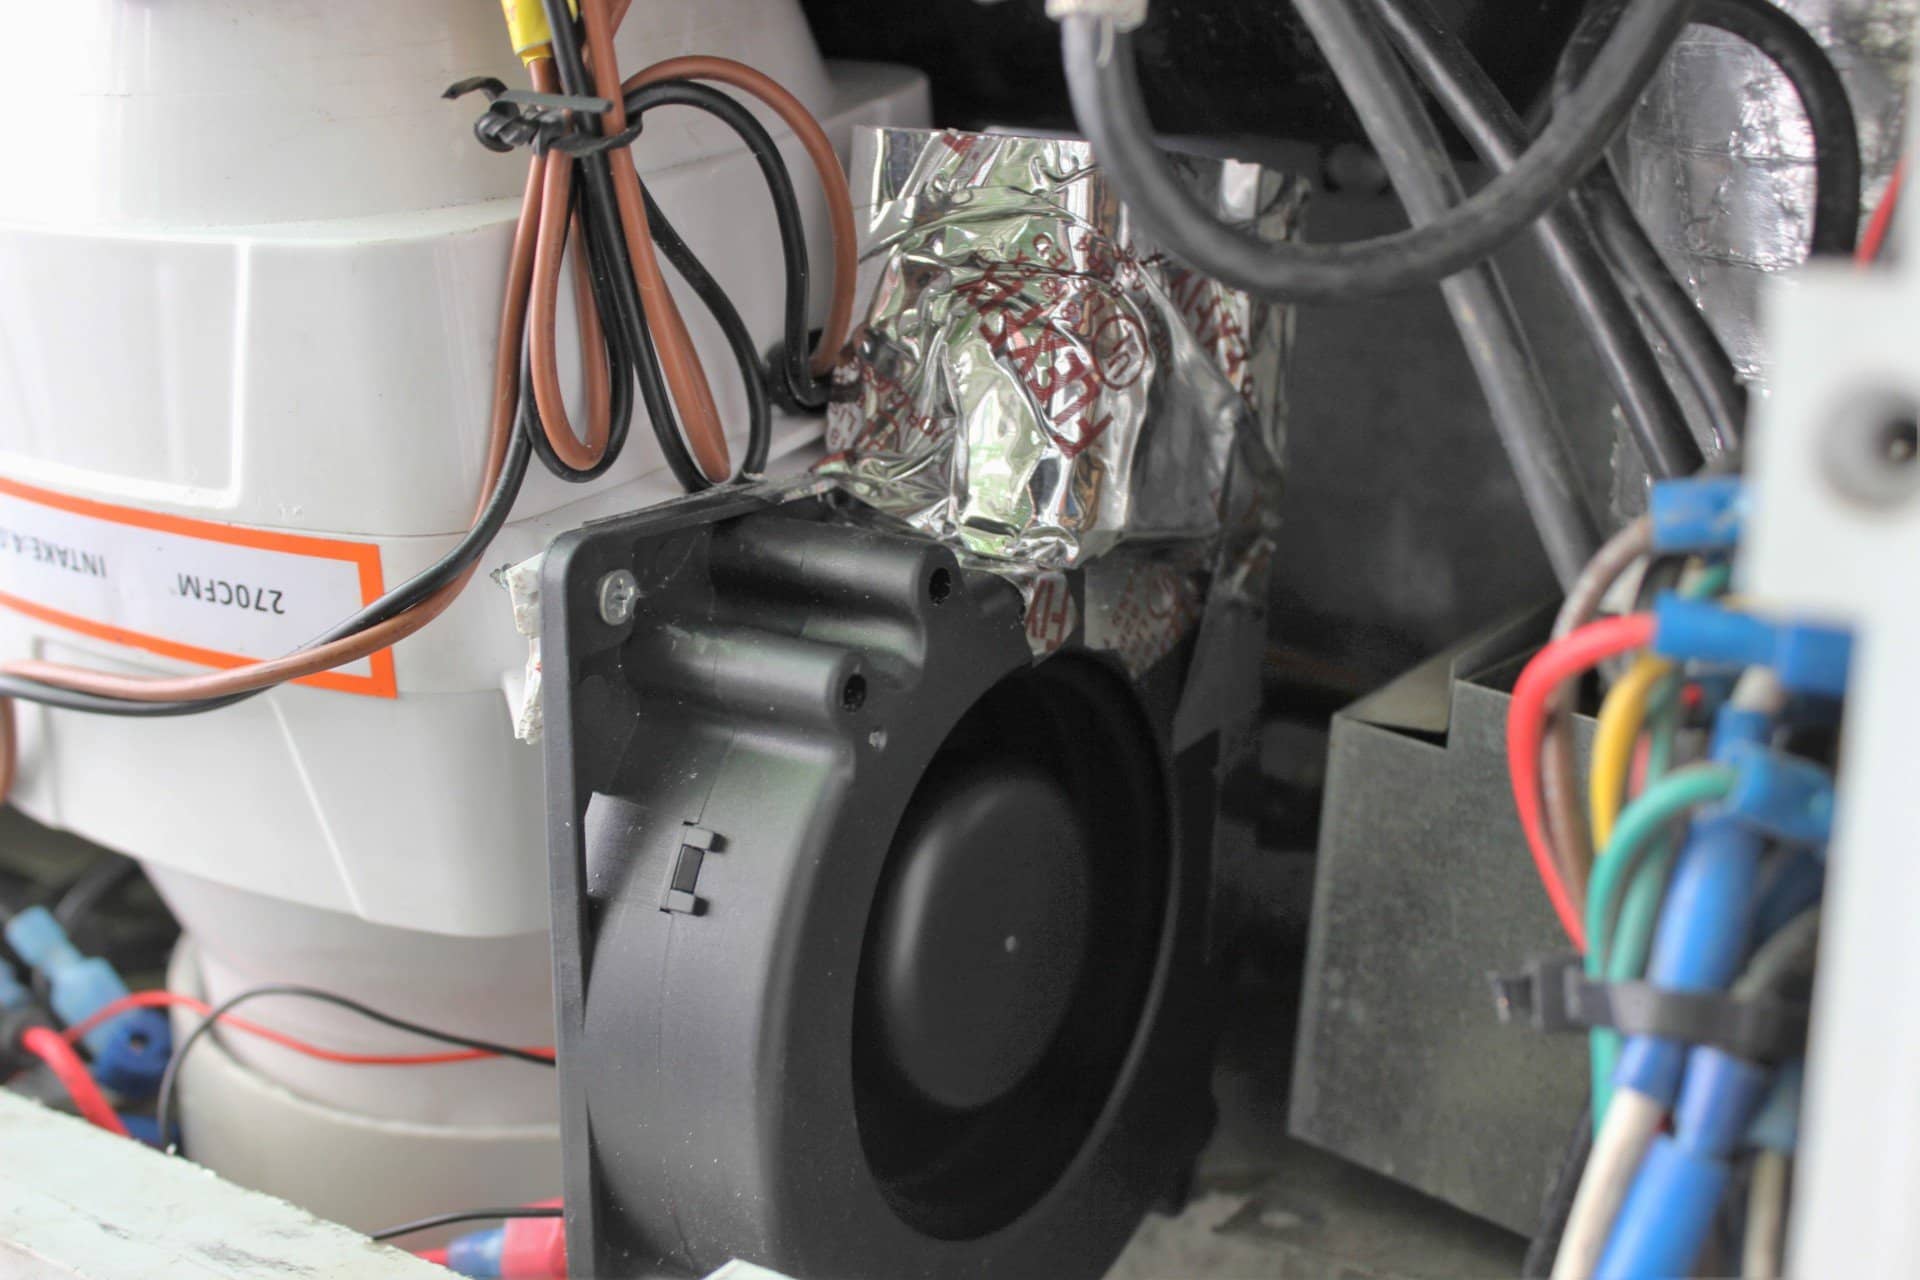
I am not sure who it was but I believe it was a person referred to as “ThePair” on the forum that did a study on this subject. What was brought to light to me was the fact that not only does the Trailmanor have and exhaust hole on the bottom, it also has an intake as well for cool air to come into the compartment. But how to really get that cool air up into the top of the cabinet and maybe set up some sort of convection current? Well originally I had purchased a small squirrel cage fan to exhaust the hot air out of the top of the compartment, but on inspection of the fan it seemed too weak to really do a good job. After learning the performance of the Seaflo, I decided to buy the smaller 3” fan for the top of the compartment when the trailer was in an opened up position. So now I had this squirrel cage fan with a duct that I had made and attached to it, doing nothing. Then I remembered the thread about the convection current being set in motion inside the cabinet. AH HA! I don’t know if this would set a convection current in motion, but it sure can bring in and pump to the upper portion of the cabinet some fresh cooler air to help cool things down a bit. So I found a job for that little fan (images 2061, 2062). There was just the perfect space near the intake hole, and I attached it to the bigger Seaflo’s mounting bracket (which by the way had to be trimmed off so the hatch cover would close right). It sucks in fresh air and blows it straight up into the cabinet avoiding cooling the “chimney” of the fridge. Of course I attached mini blade fuse holders to all of these fans (image 2032).
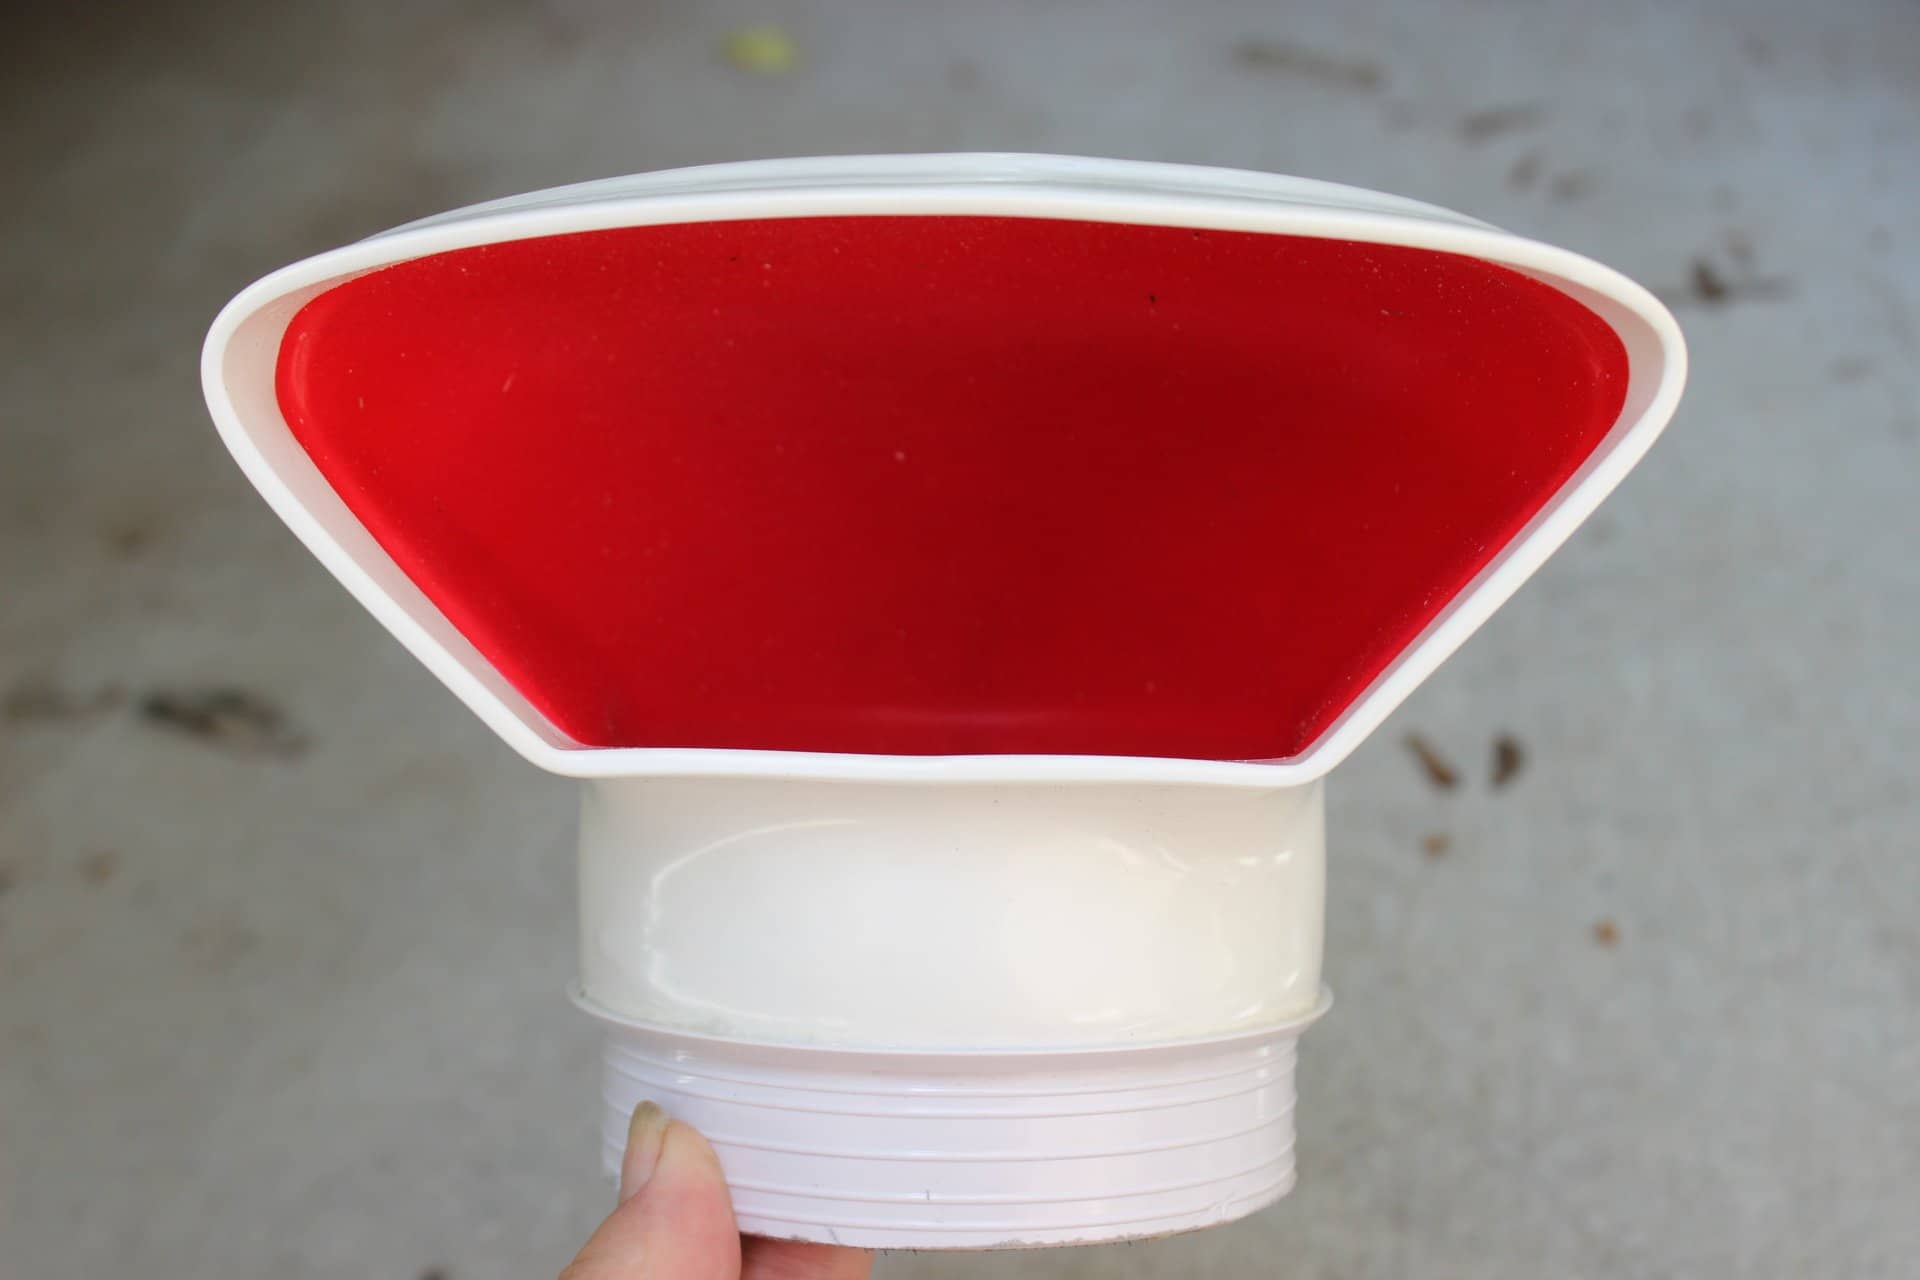
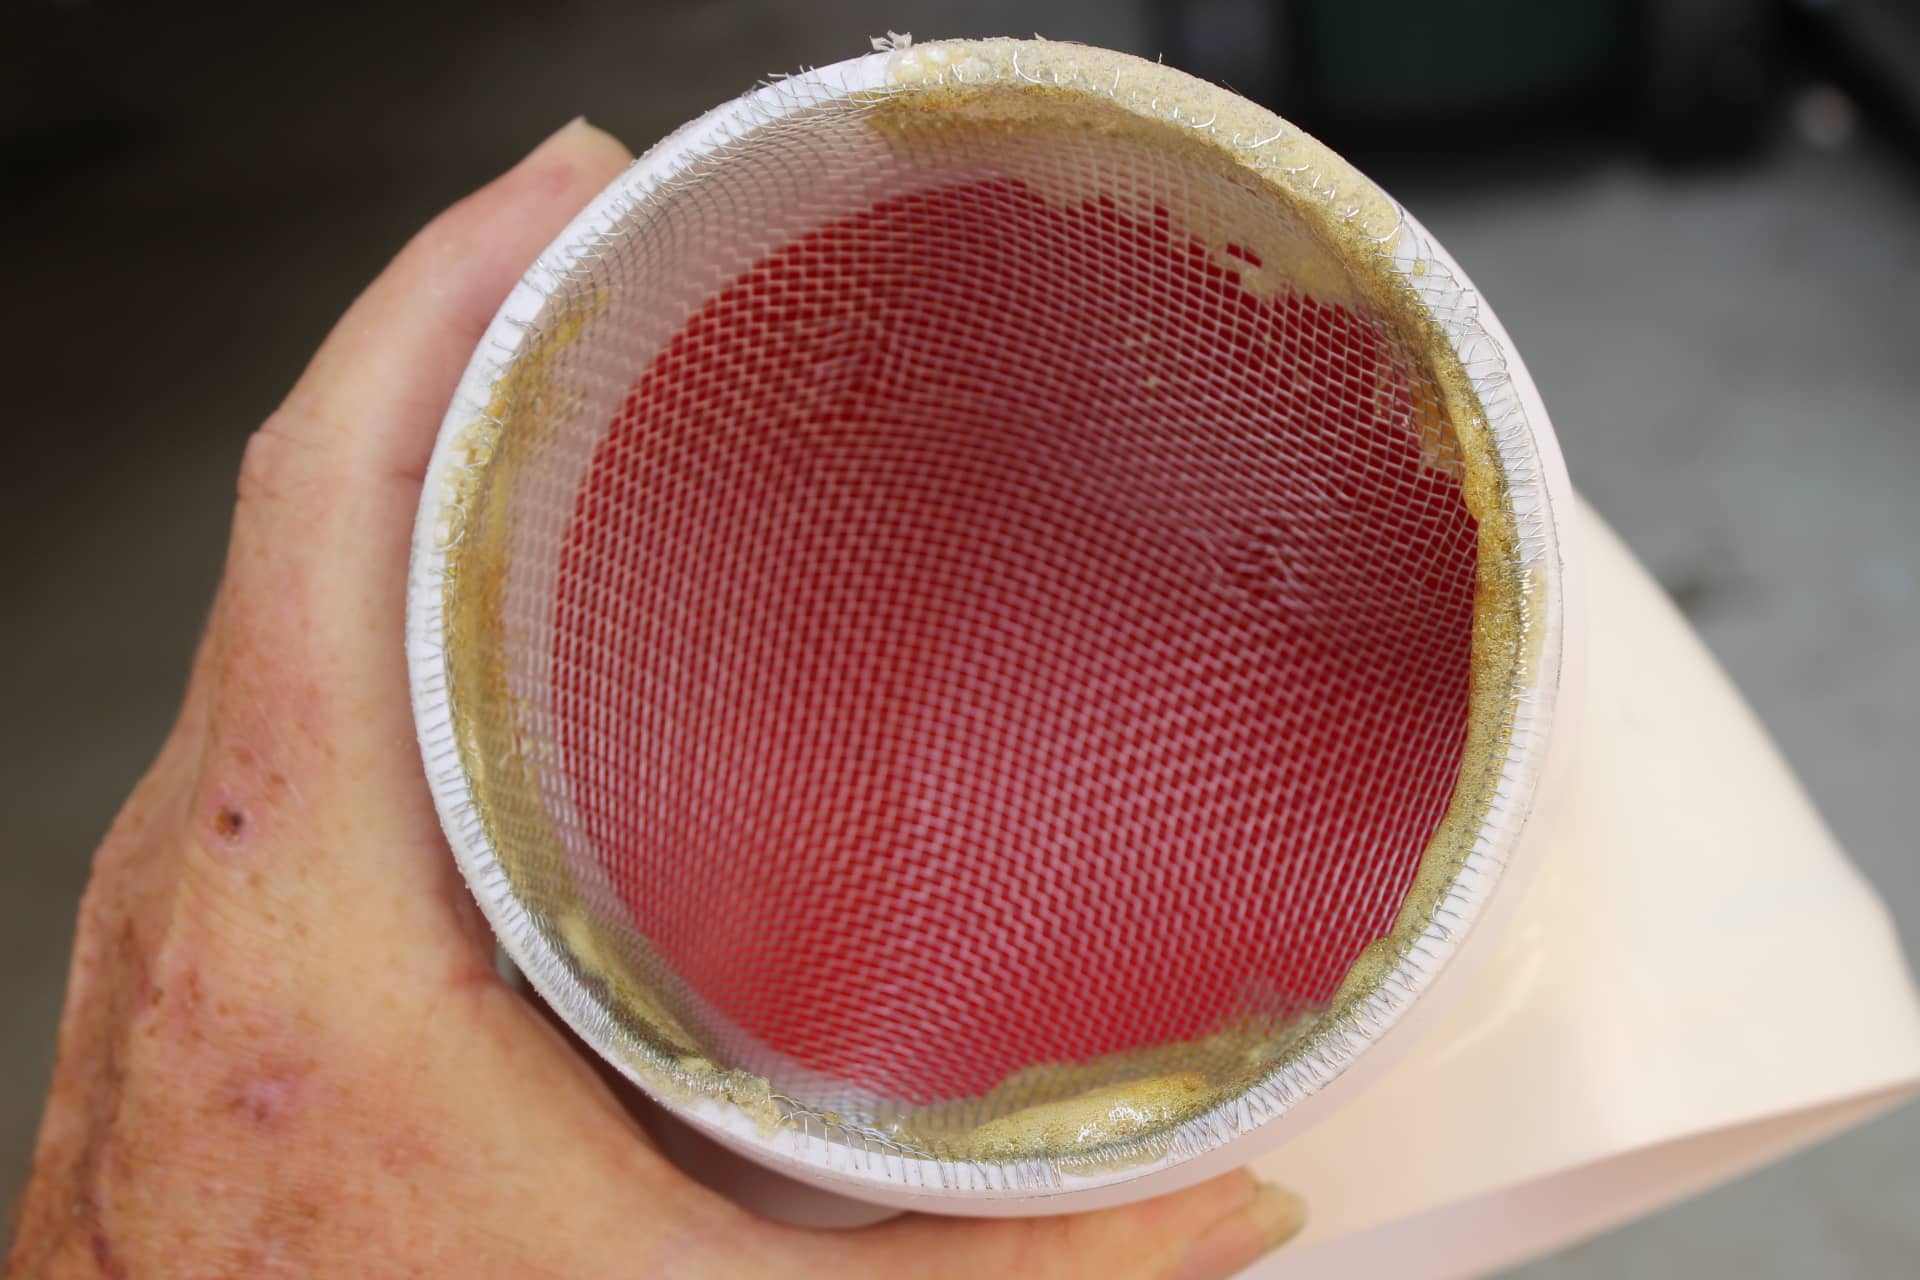
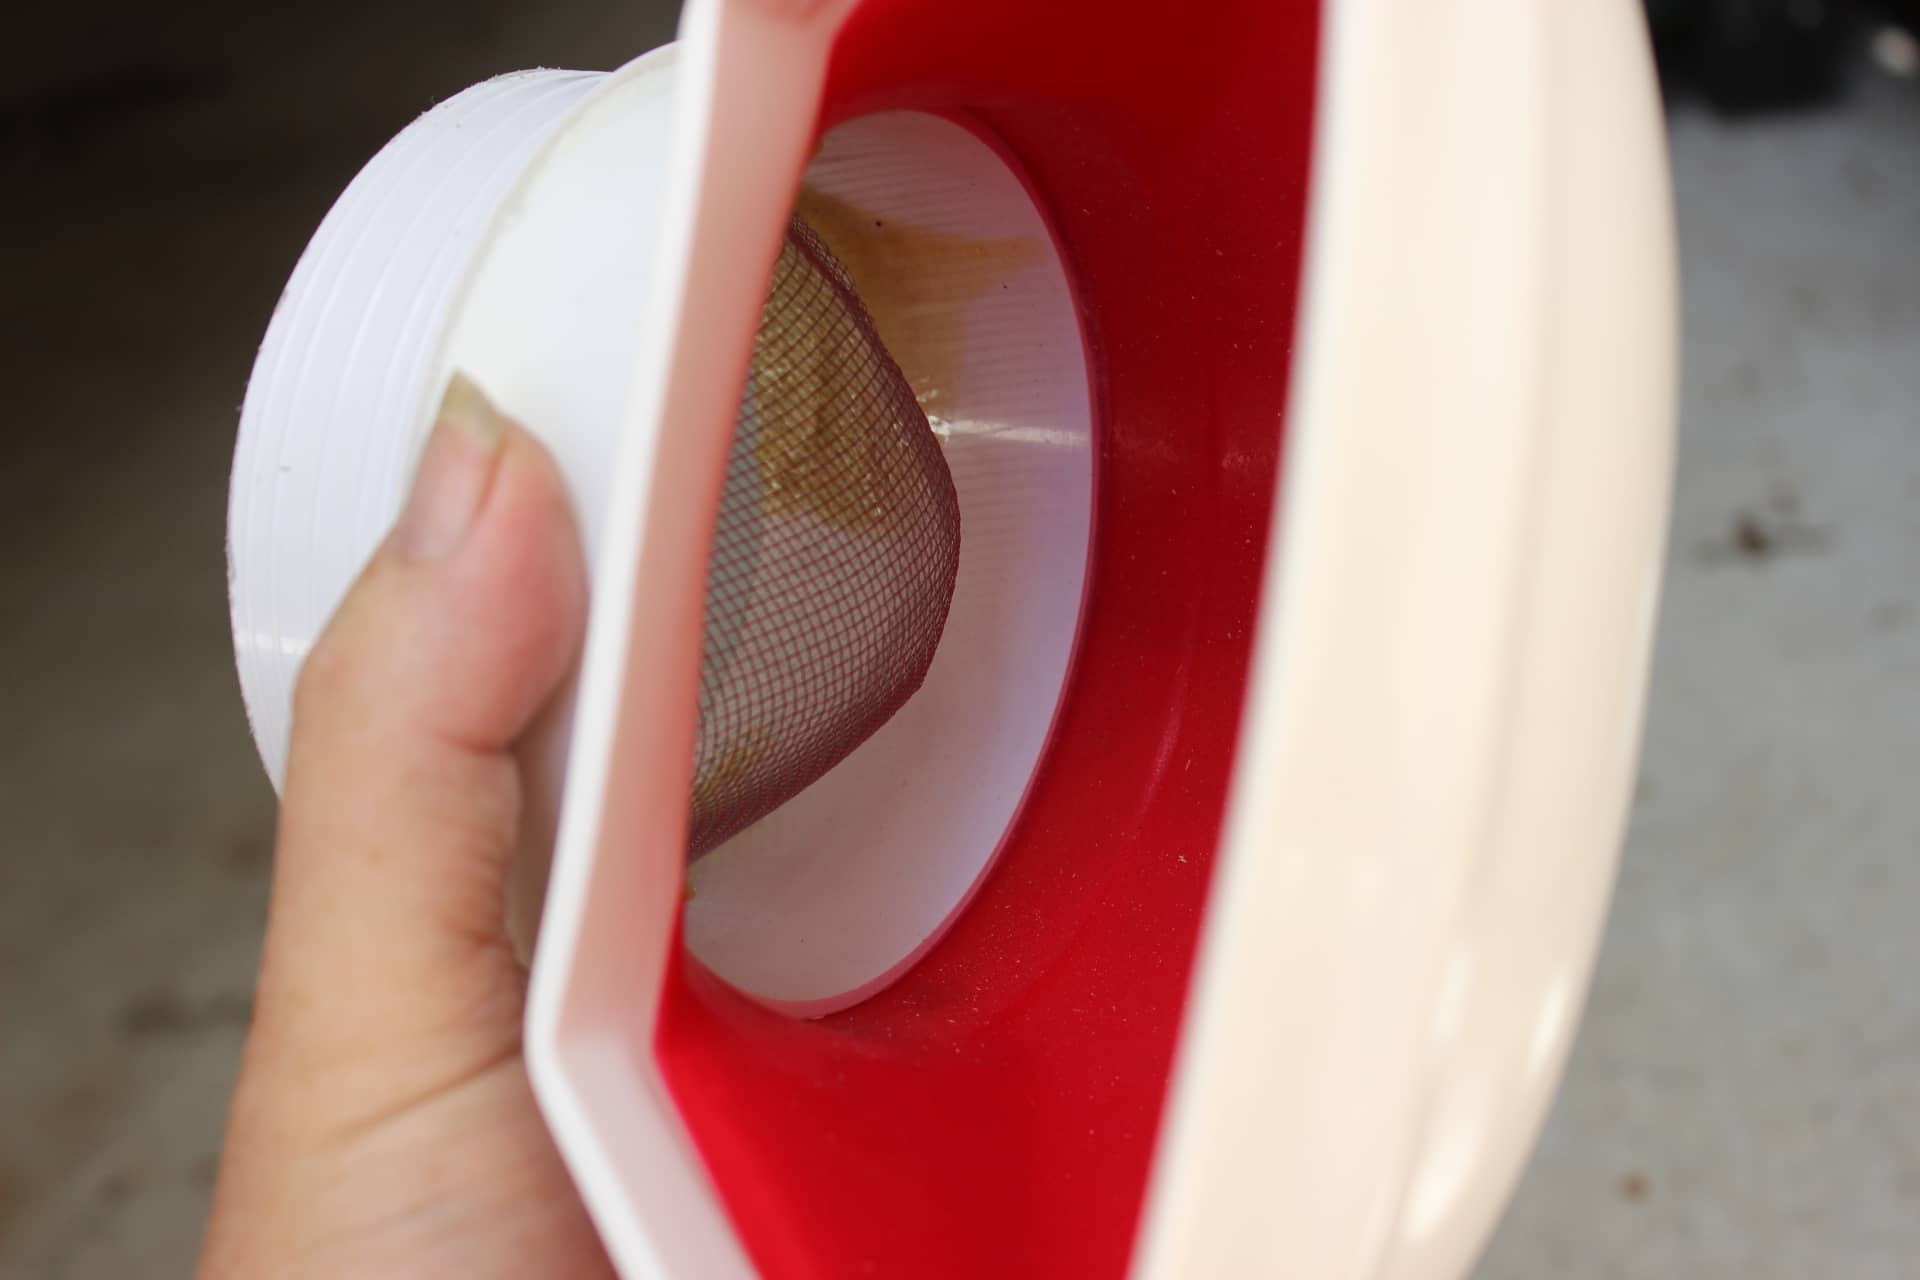
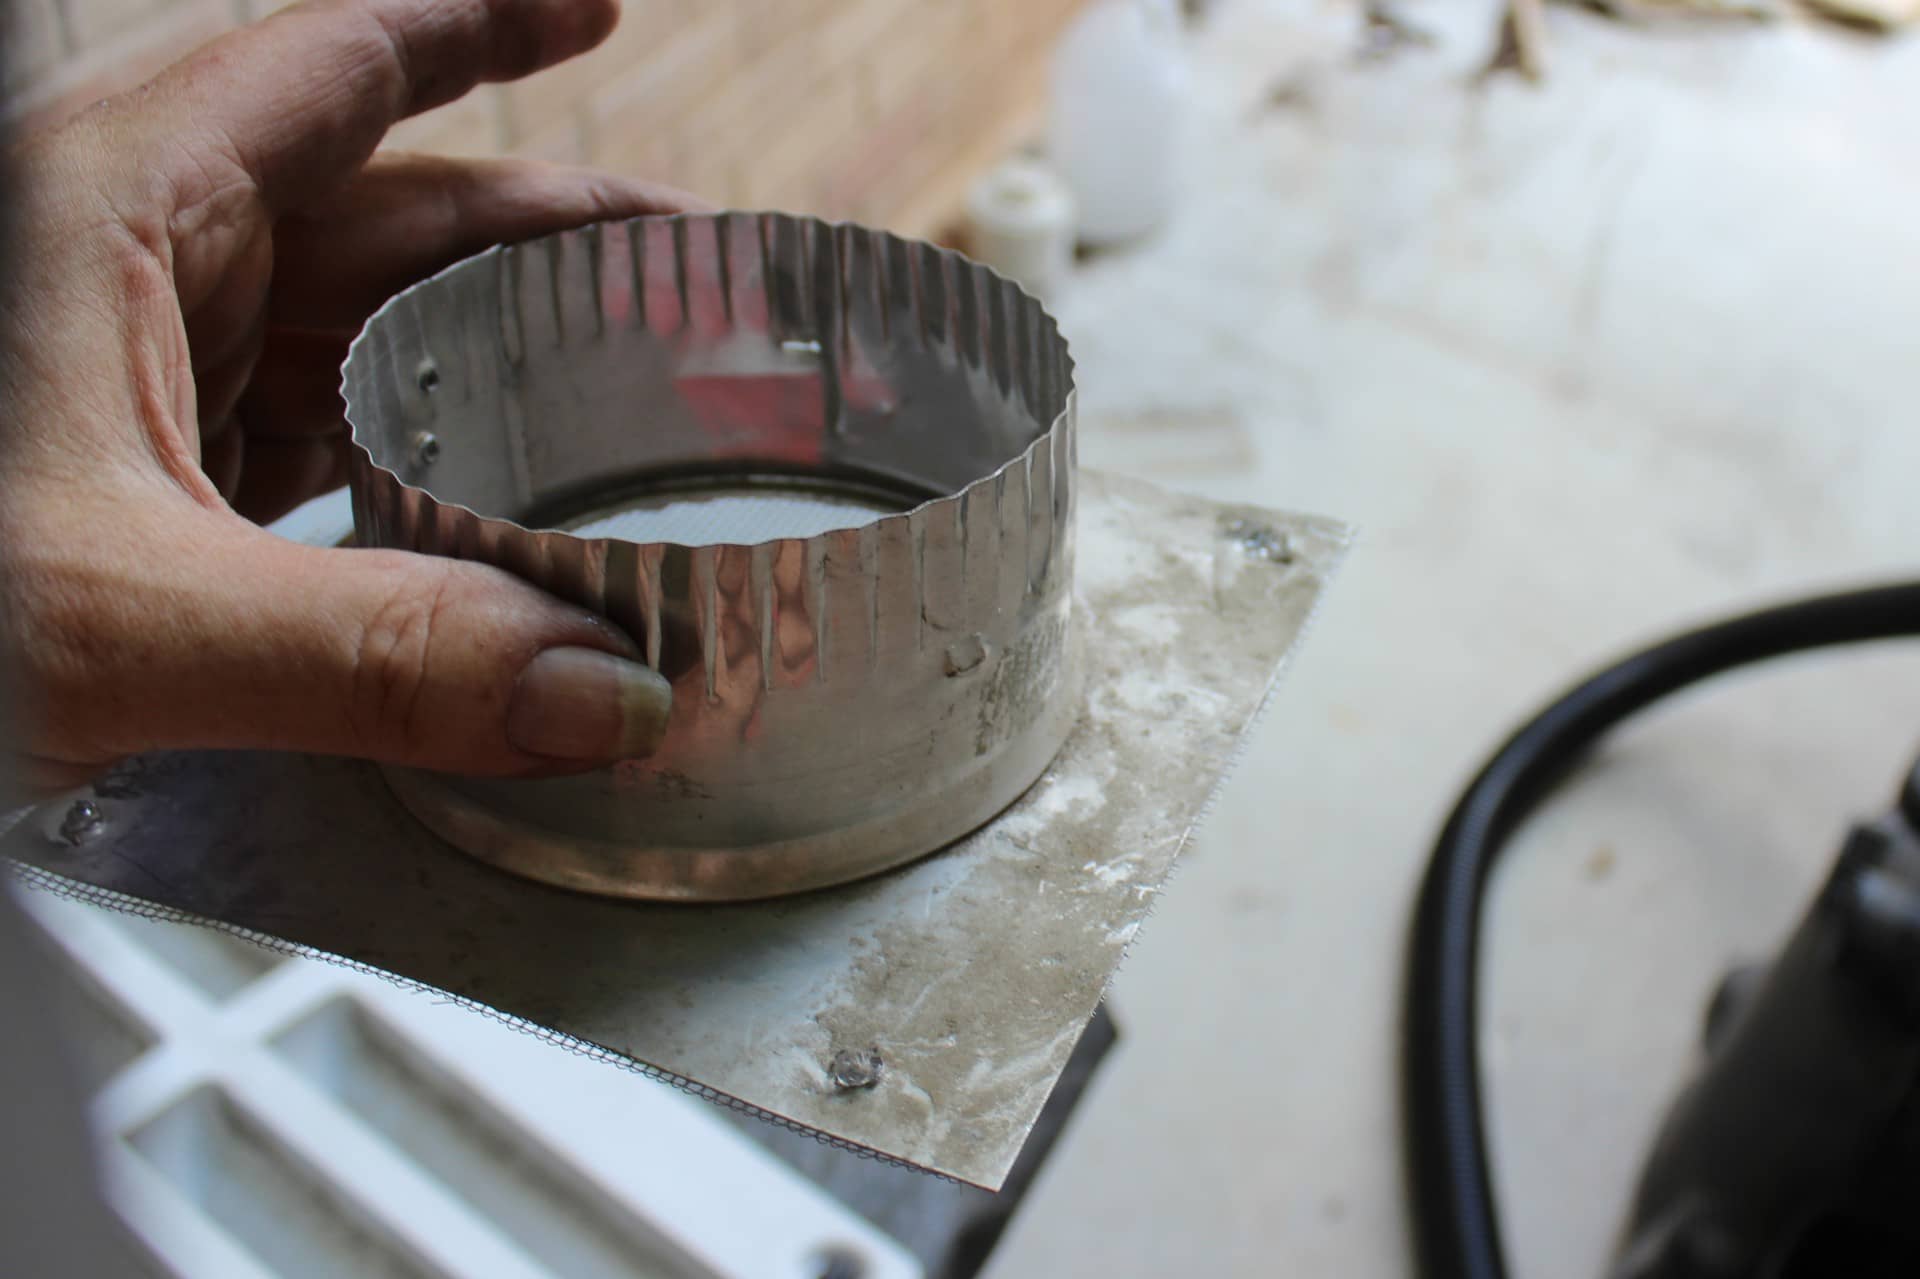
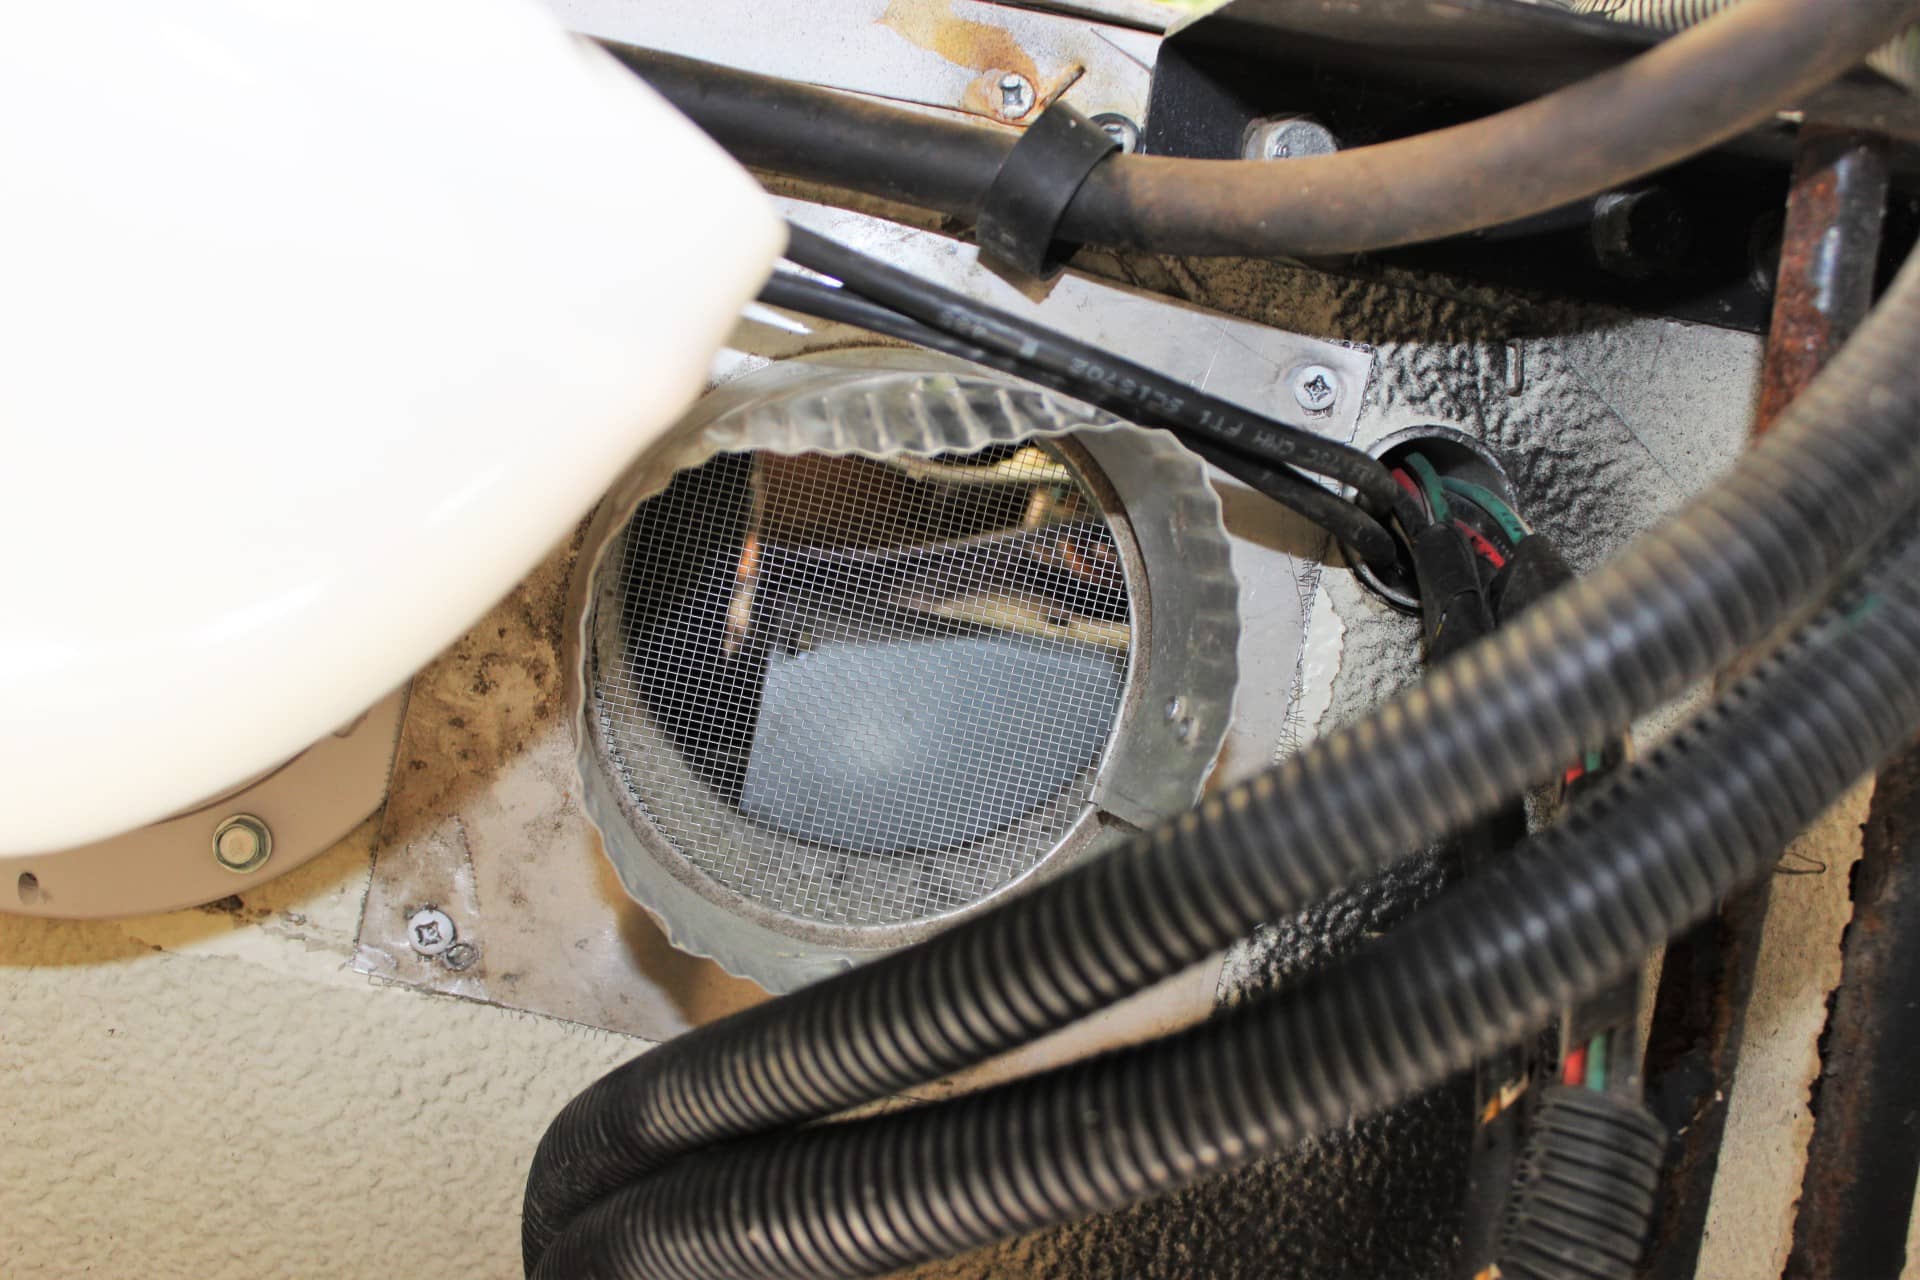
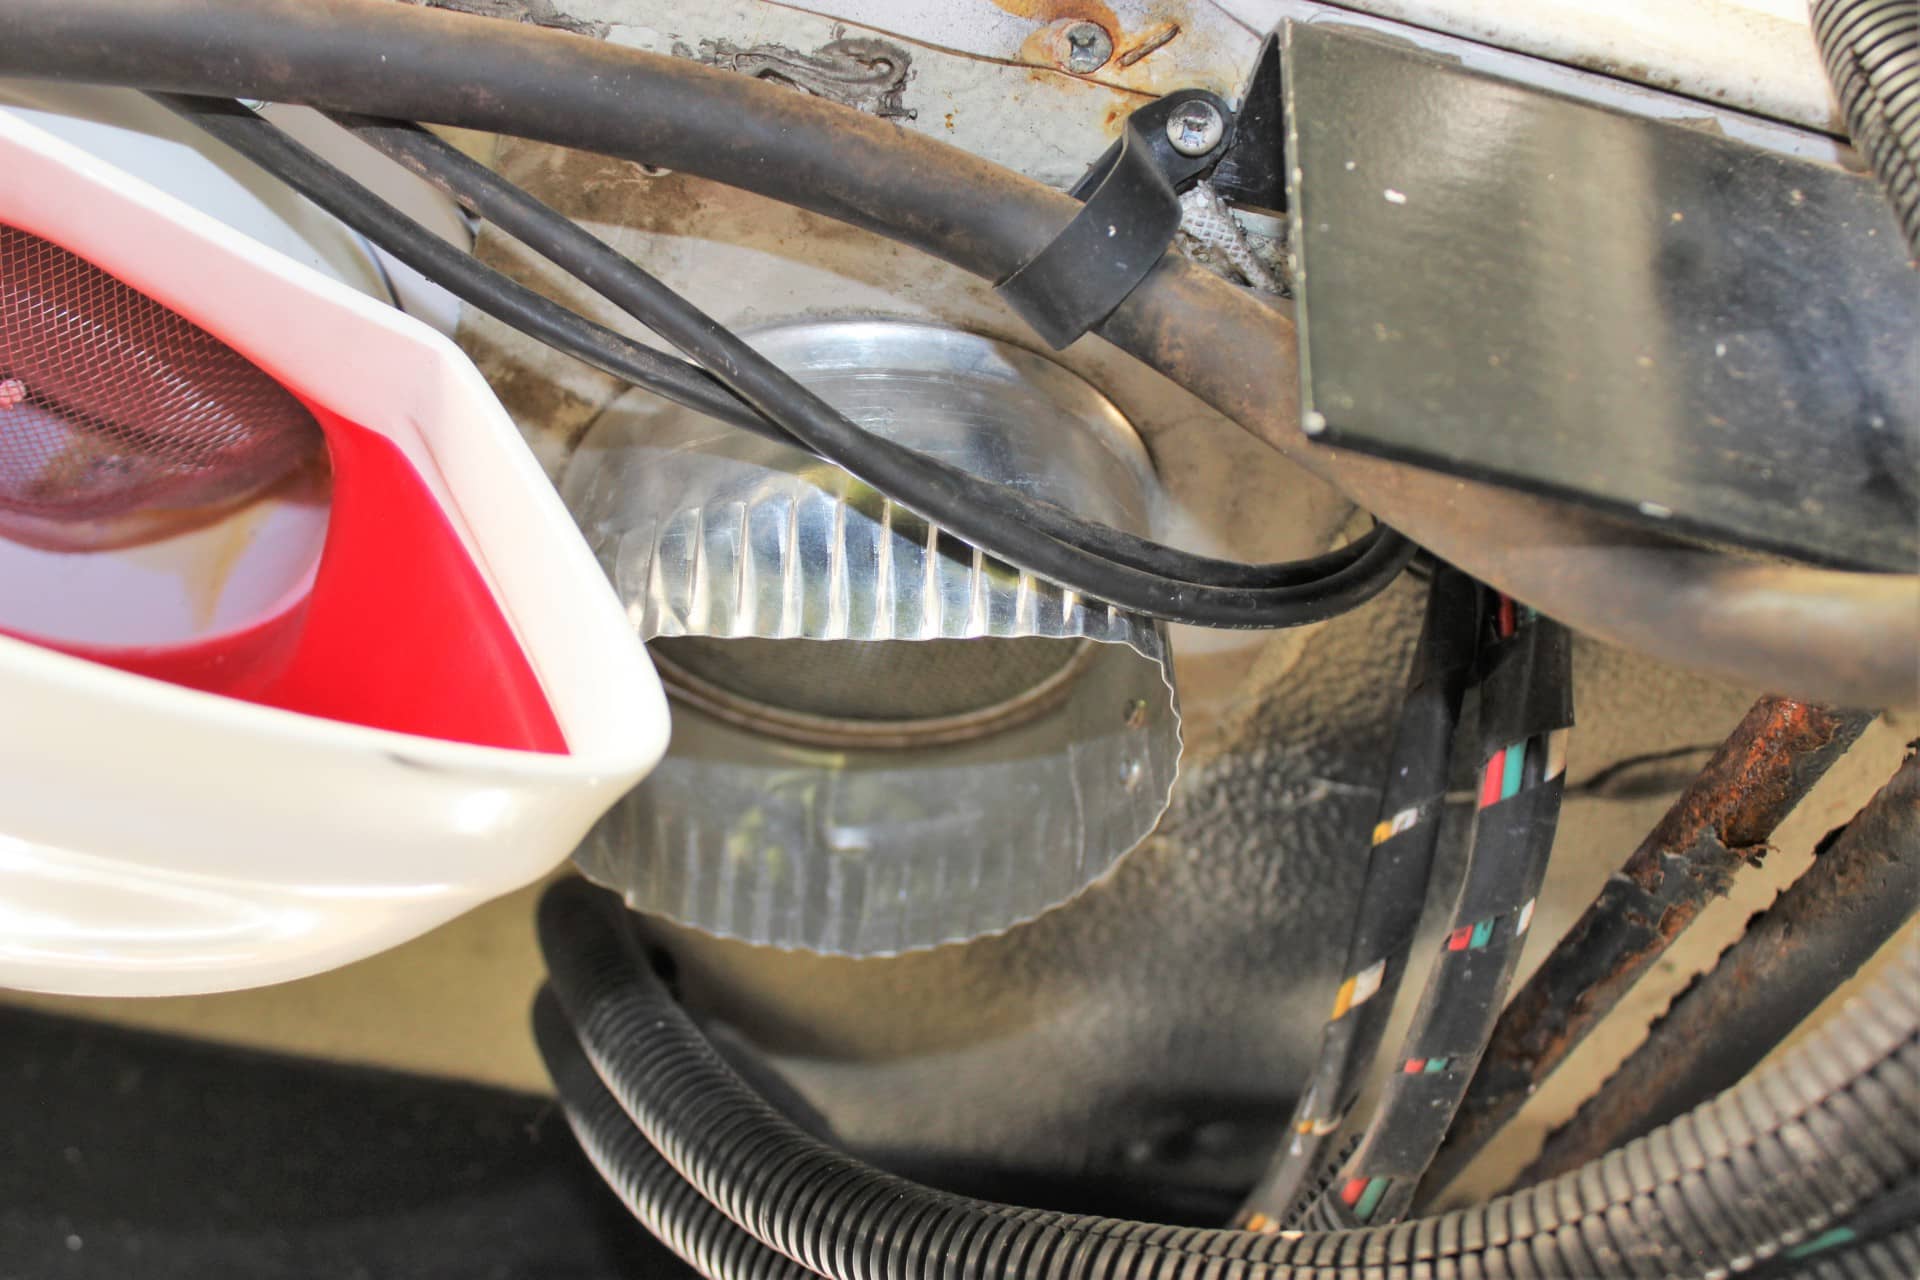
One of the problems is the fact that they (the discharge and the intake holes) are right next to one another underneath the trailer. What’s to stop the hot air being sucked right back into the intake so as to recycle the hot air you’re trying to get rid of? Nothing!….Accept maybe a nautical style vent stack. Lo and behold….I had seen one on Amazon and read that it had a 4” pipe stem on it…PERFECT! (Images 2022, 2023) After tearing off the old plastic screen covering the two holes I placed this vent stack, (like you would see on a sailboat) which I had glued my own piece of aluminum screen wire into (images 2024, 2025), in the discharge hole and turned it slightly so as to form a venturi affect to help form a slight vacuum when going down the road and thereby that would help suck out the hot air (image 2065). Having this vent stack on here like this directs the hot air away from the intake hole so as to NOT recycle the hot air back into the cabinet. I also took the old vent stack that the 4” hose hooked to and placed a piece of aluminum screen wire over the hole, which I placed on the intake hole so it might grab cool air only (images 2037, 2071, 2072).
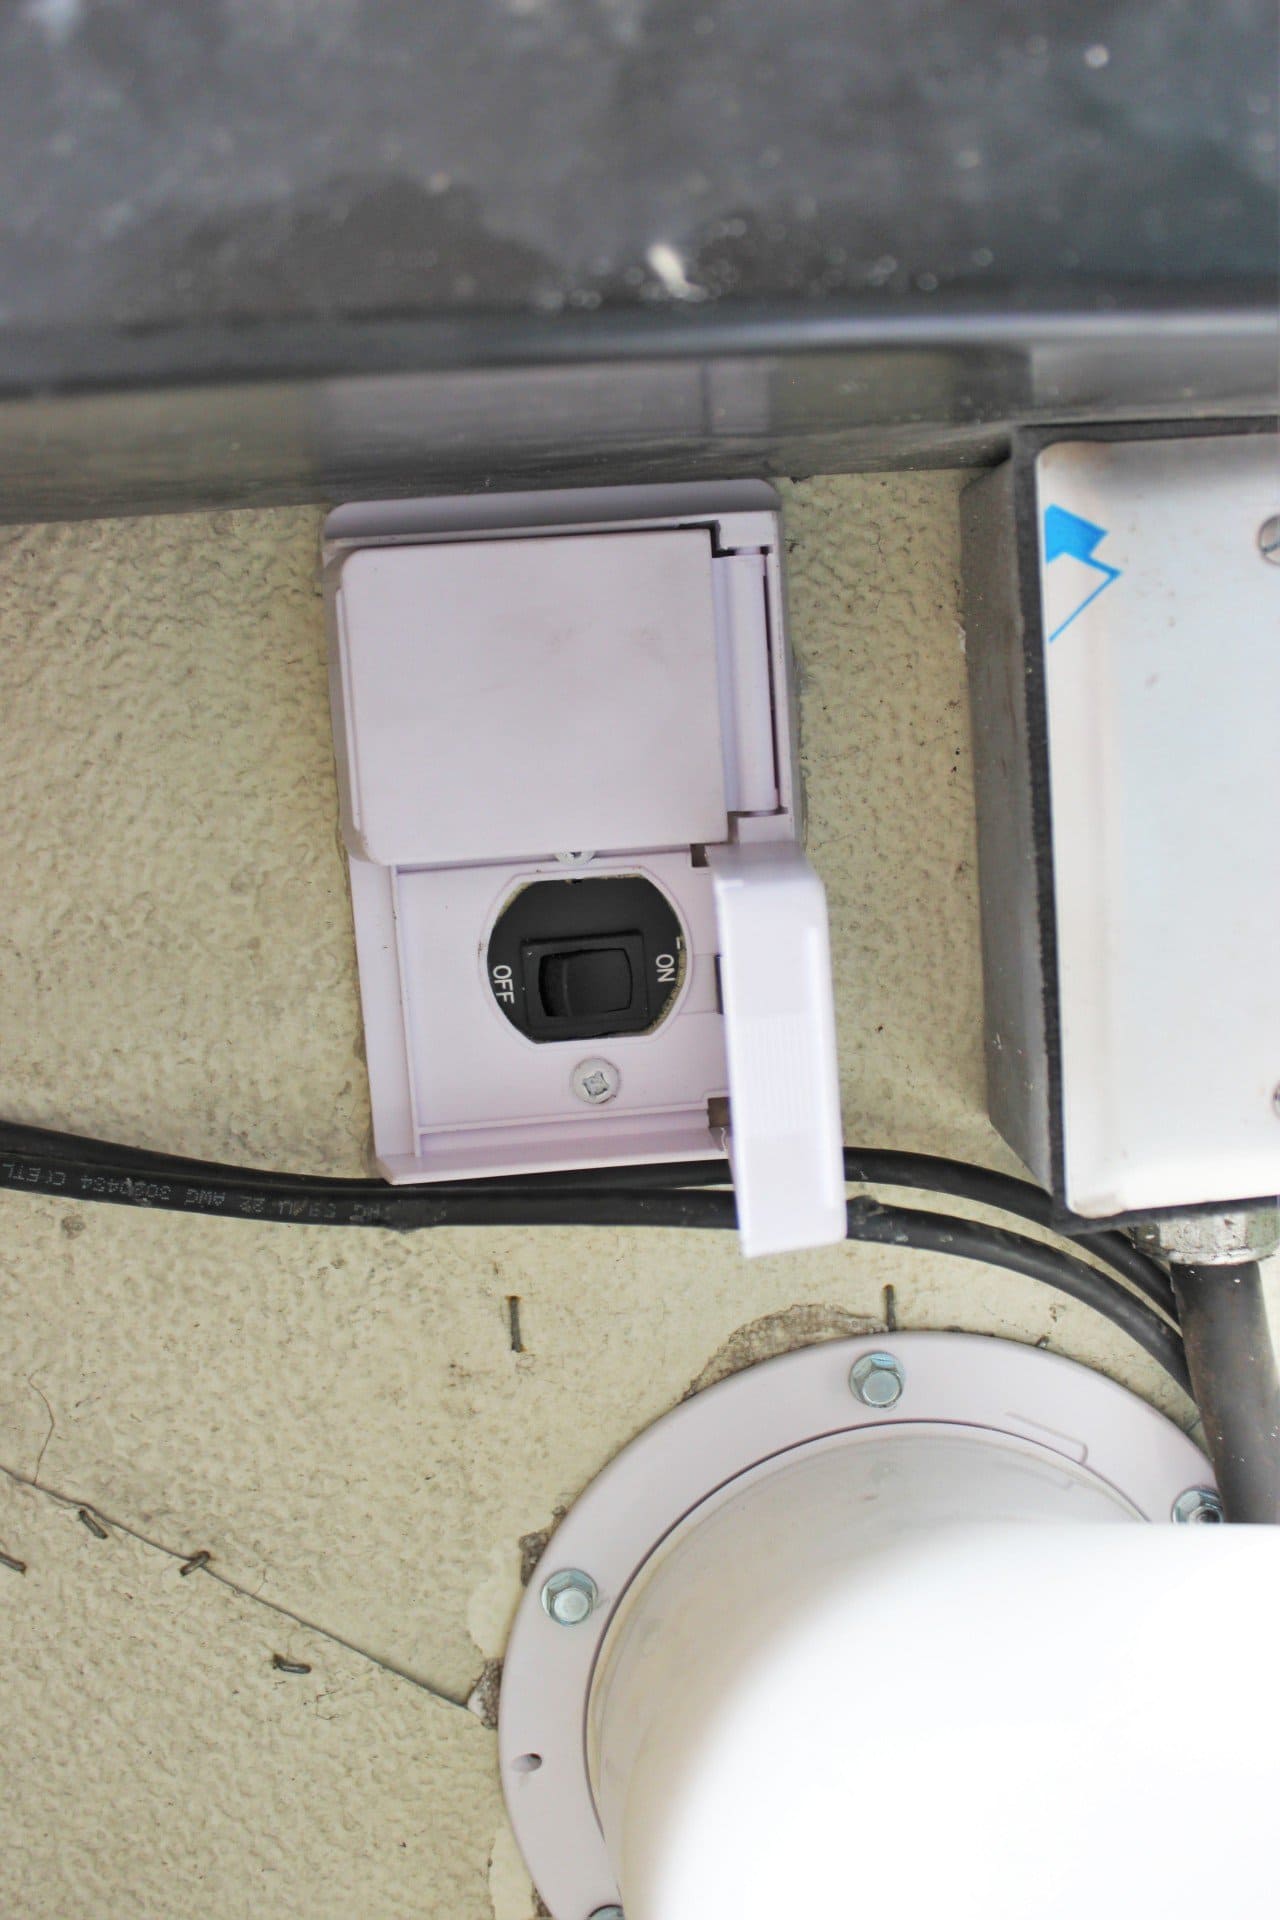
Just recently I had installed some LED lights in my Trailmanor called the “RV Chandelier”. I had bought these from Cramping Worm only to find out that there were no switches with them. So I called the manufacturer (Heng’s Industries) and complained. After I had come up with my own solution for the switches, I received two new switches in the mail. They were really nice, but I didn’t have anything to use them on…..until now. I thought…”What if I get the trailer all closed up and I have left one of the fans on? How will I turn them off without having to open up the trailer again”? Then I remembered those switches. If I put them underneath the trailer, I would have access to them. So that’s what I did using a weather proof cover like the one on the side of the Trailmanor (images 2064, 2066, 2069, 2070). One turns on/off the intake blower fan and the other turns on/off the top Seaflo (3”) exhaust fan. The bottom Seaflo (4”) is controlled by the switch inside on the front of the control panel under the lip of the kitchen sink. Just like the old fridge fan. Once folded up, you don’t want to run the top exhaust fan because that fan would be blowing hot air out the top fridge vent onto the bathroom wall. It is said that this would cause stains to occur on the wall. That would NOT make The Management happy! So if I fold up and get ready to roll and discover that I spaced out the top fan, I can simply turn it off without having to open up the trailer. WHEEEW!
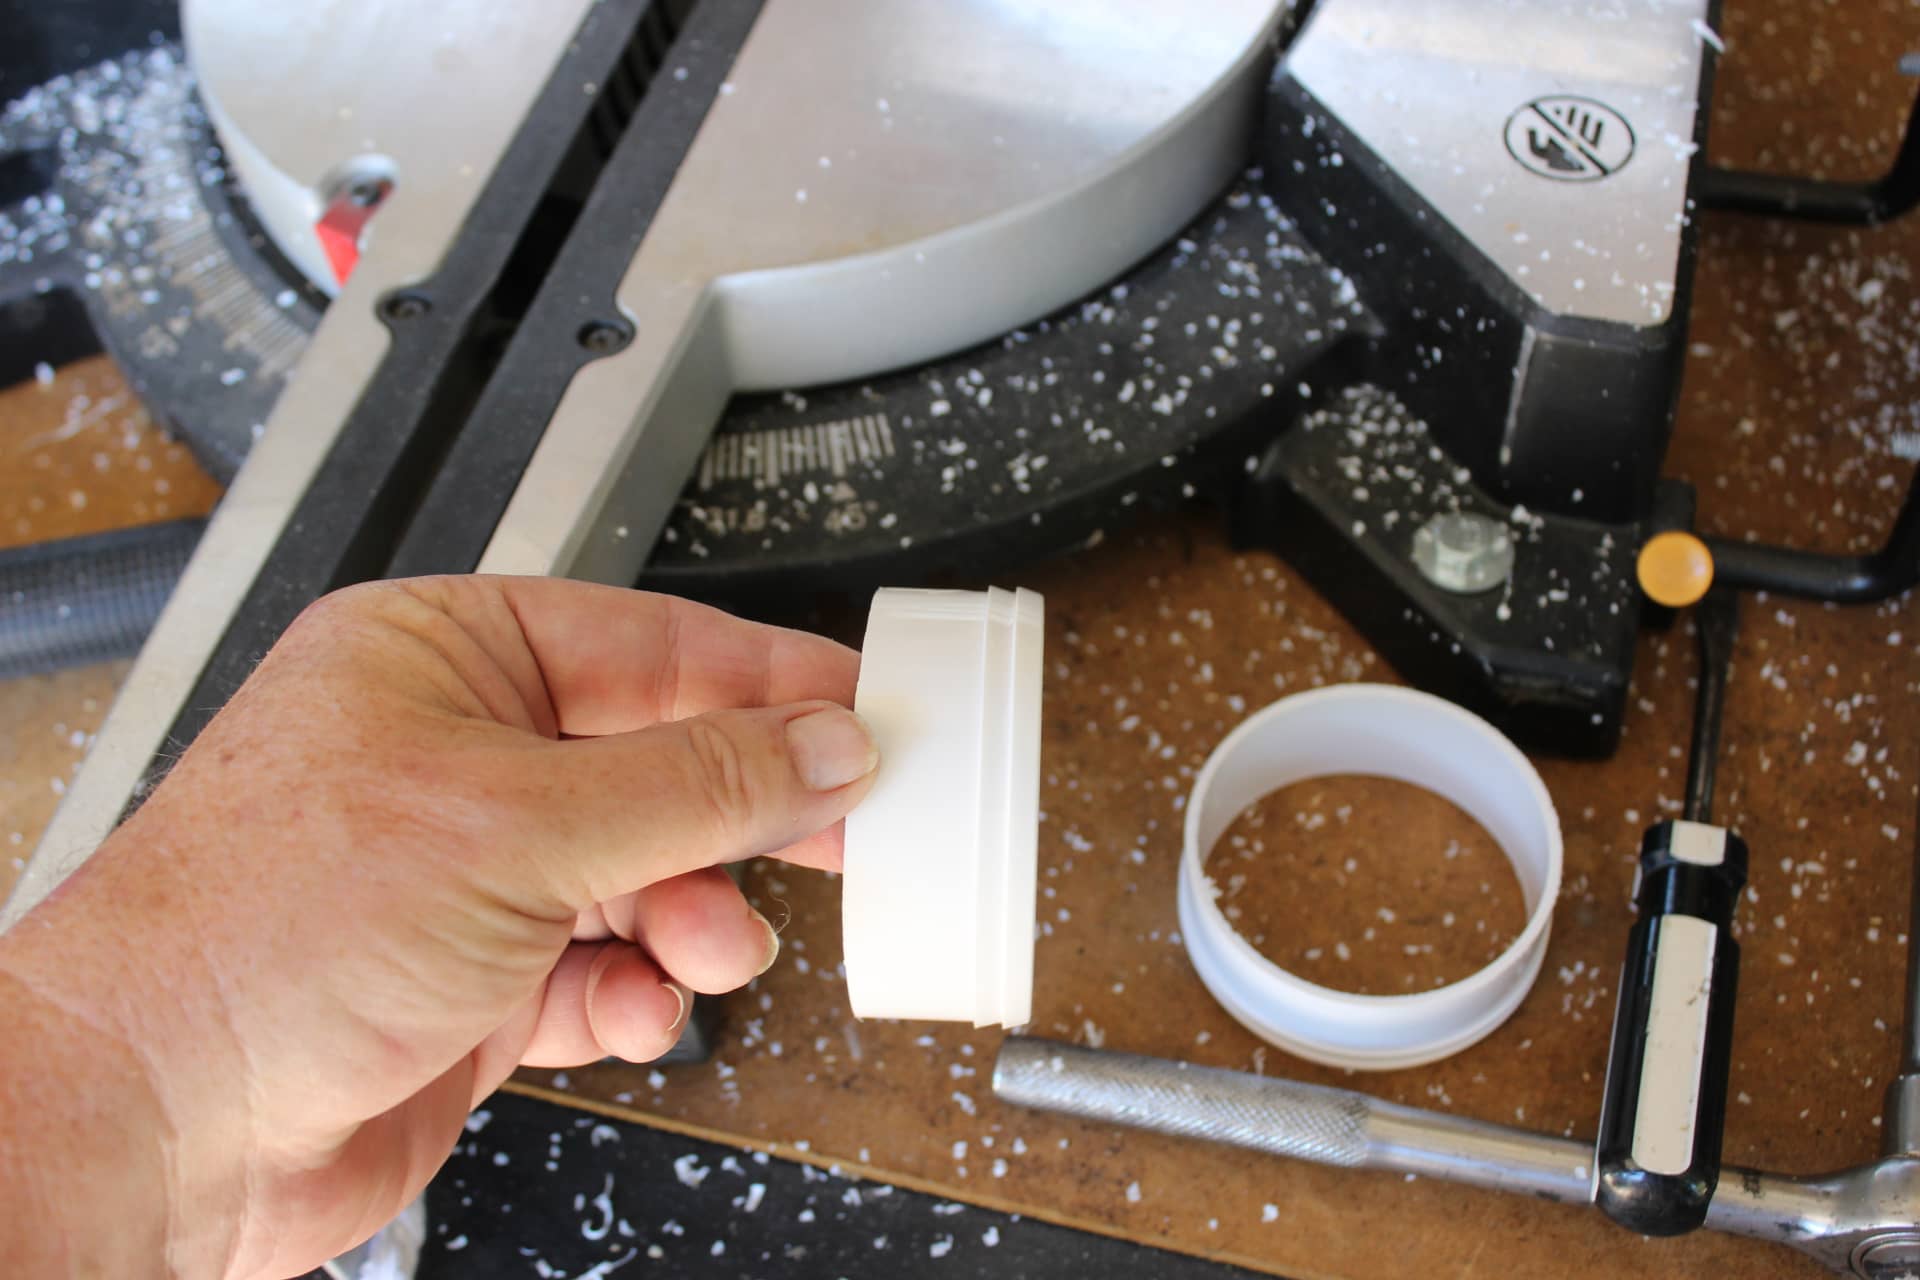
Installing the 3” Seaflo took a little modification in itself. First, it was a bit too long to go in there and be able to close the hatch cover and suck out the hot air. No problem….just take a saw (my power 12”compound slider miter) and whack off both hose barbs on the ends. AHHHH perfect!(image 2079) Next I took a couple of short pieces of aluminum flat stock and drilled some holes in it and screwed the Seaflo to it. Then that whole thing screws to the wood at the top of the cabinet (image 2080) and then angle it a little (image 2081). Make sure that before you get it all screwed down that the hatch cover can close shut tight. That piece of plywood panel that is in there on top of the fridge can still be put back in. It will be stuck back a bit further, but with a piece of ½” square stock about a foot long, you can attach it to the wood where it was originally screwed into.
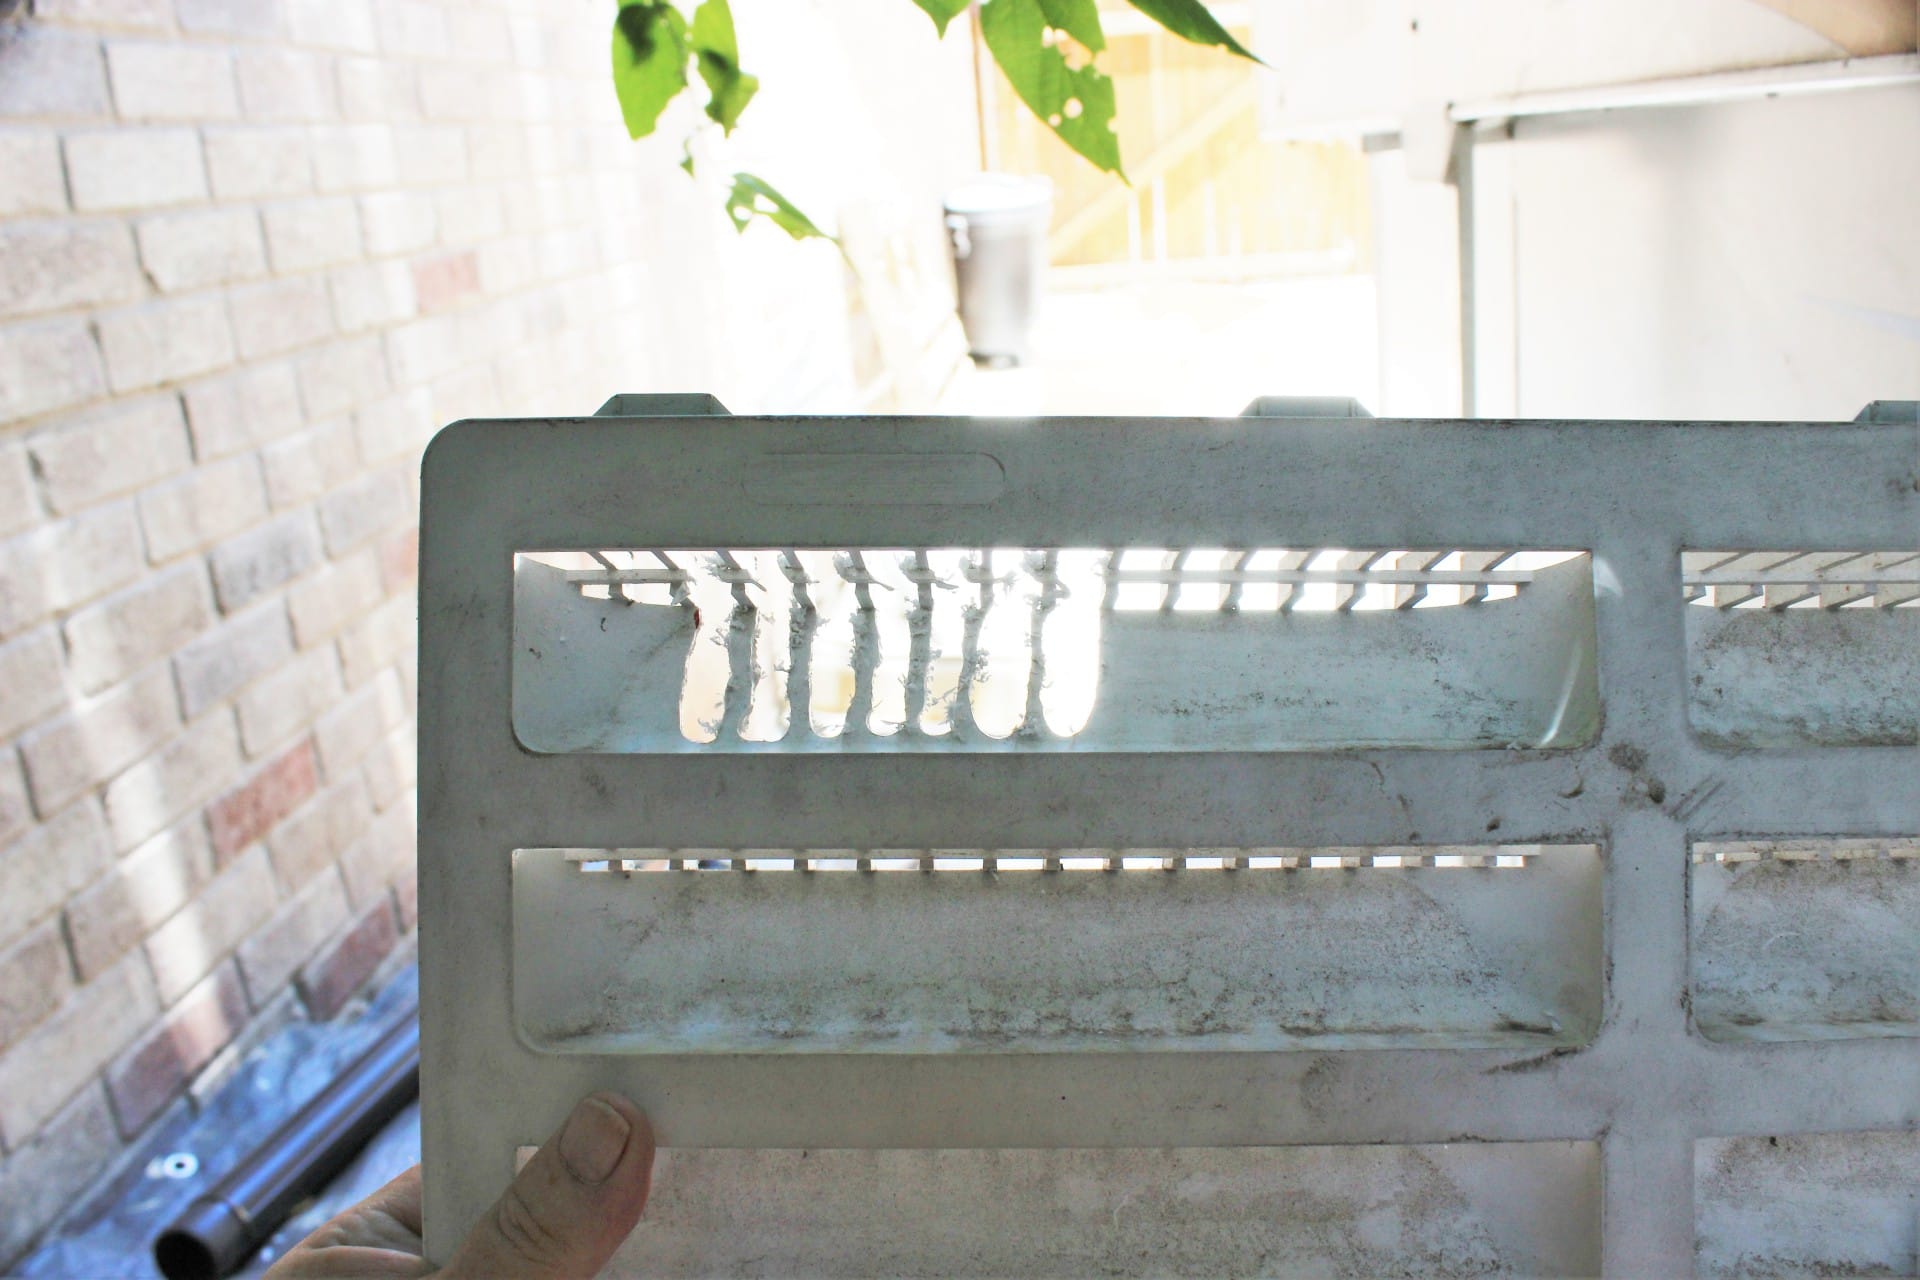
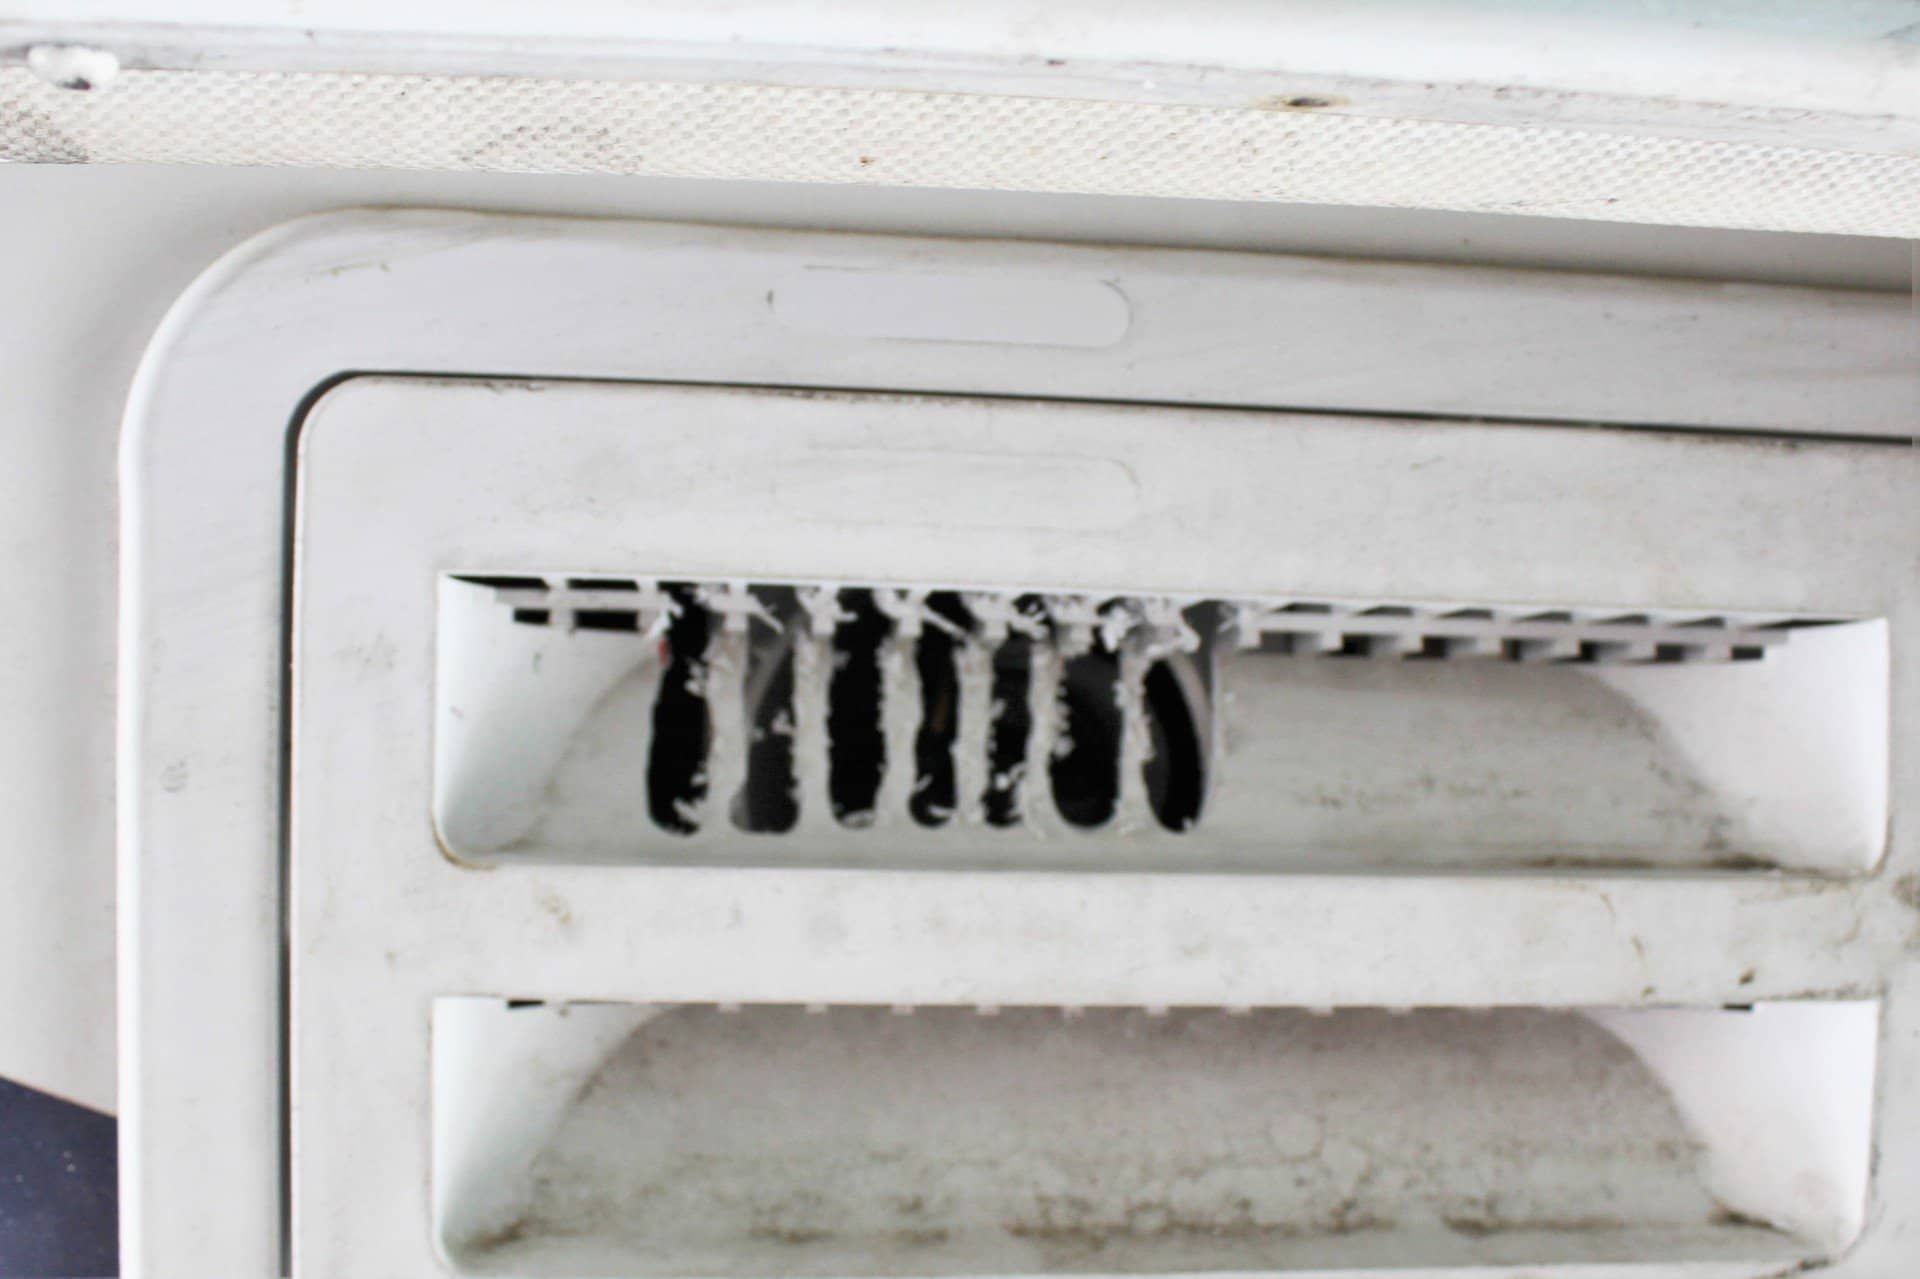
It’s not real pretty, but the last thing I did was to extend the slots in the grate of the cover so as to not restrict the air flow coming out of the cabinet (images 2083, 2084, 2085).
These Seaflo fans really SUCK! The other one is squirrely for sure…..however, I am sure to keep the ambient tempeture of the outside close to the inside. At least that’s the plan……