One thing that I wasn’t counting on when I went to my new Timbren axel-less axels, 16” wheels and tires, was the fact that with the 16” tires and wheels, the spare would not fit under the trailer like I thought. Well it might have fit size wise with a little finagling, the 16” wheels were 8 bolt lugs instead of the 6 bolt lugs on my 15” wheels. So even if I could get it to physically fit in that space, the lugs on the spare tire carrier would not line up to the new wheel (image 1706).
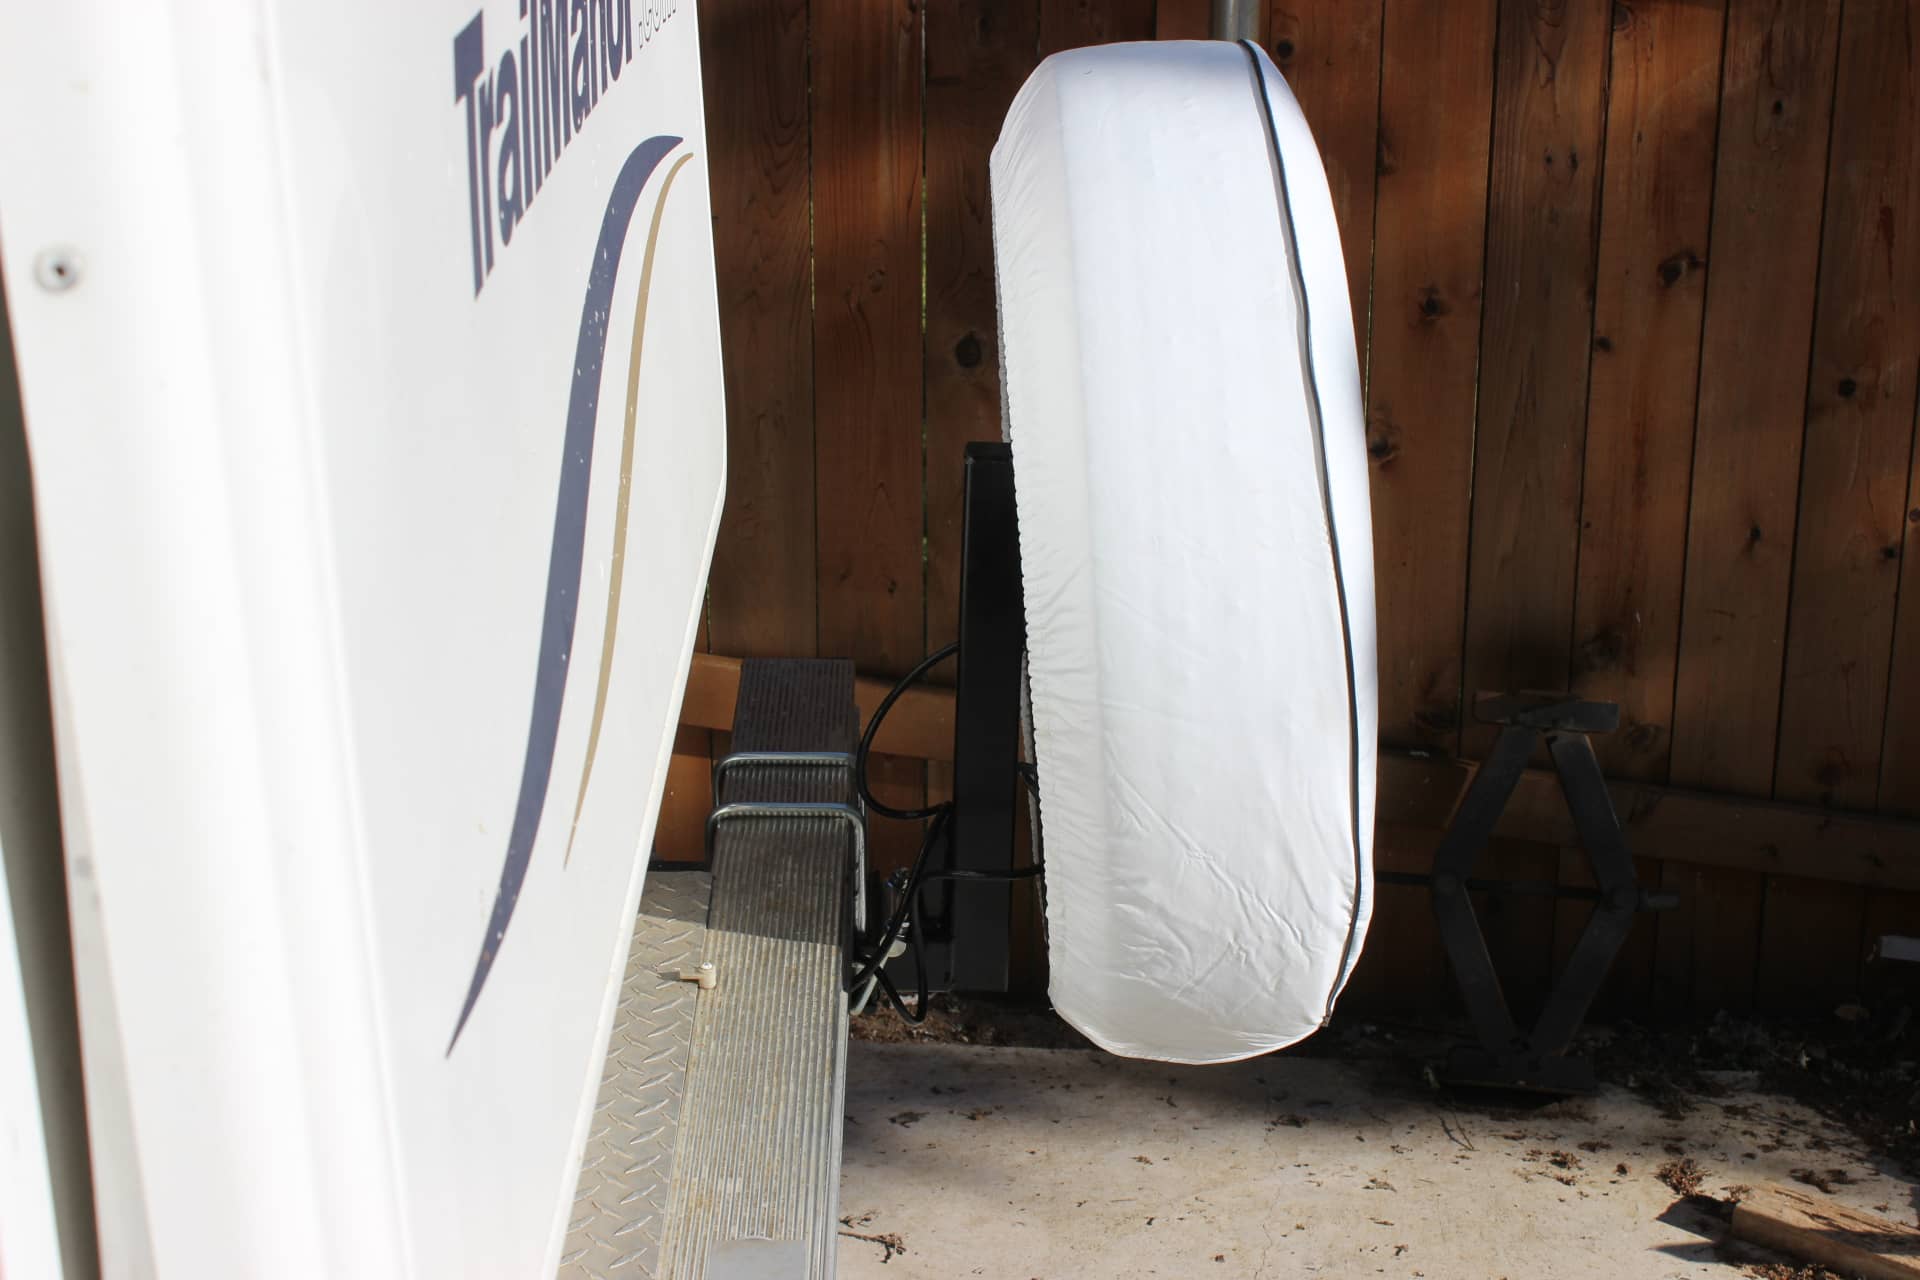
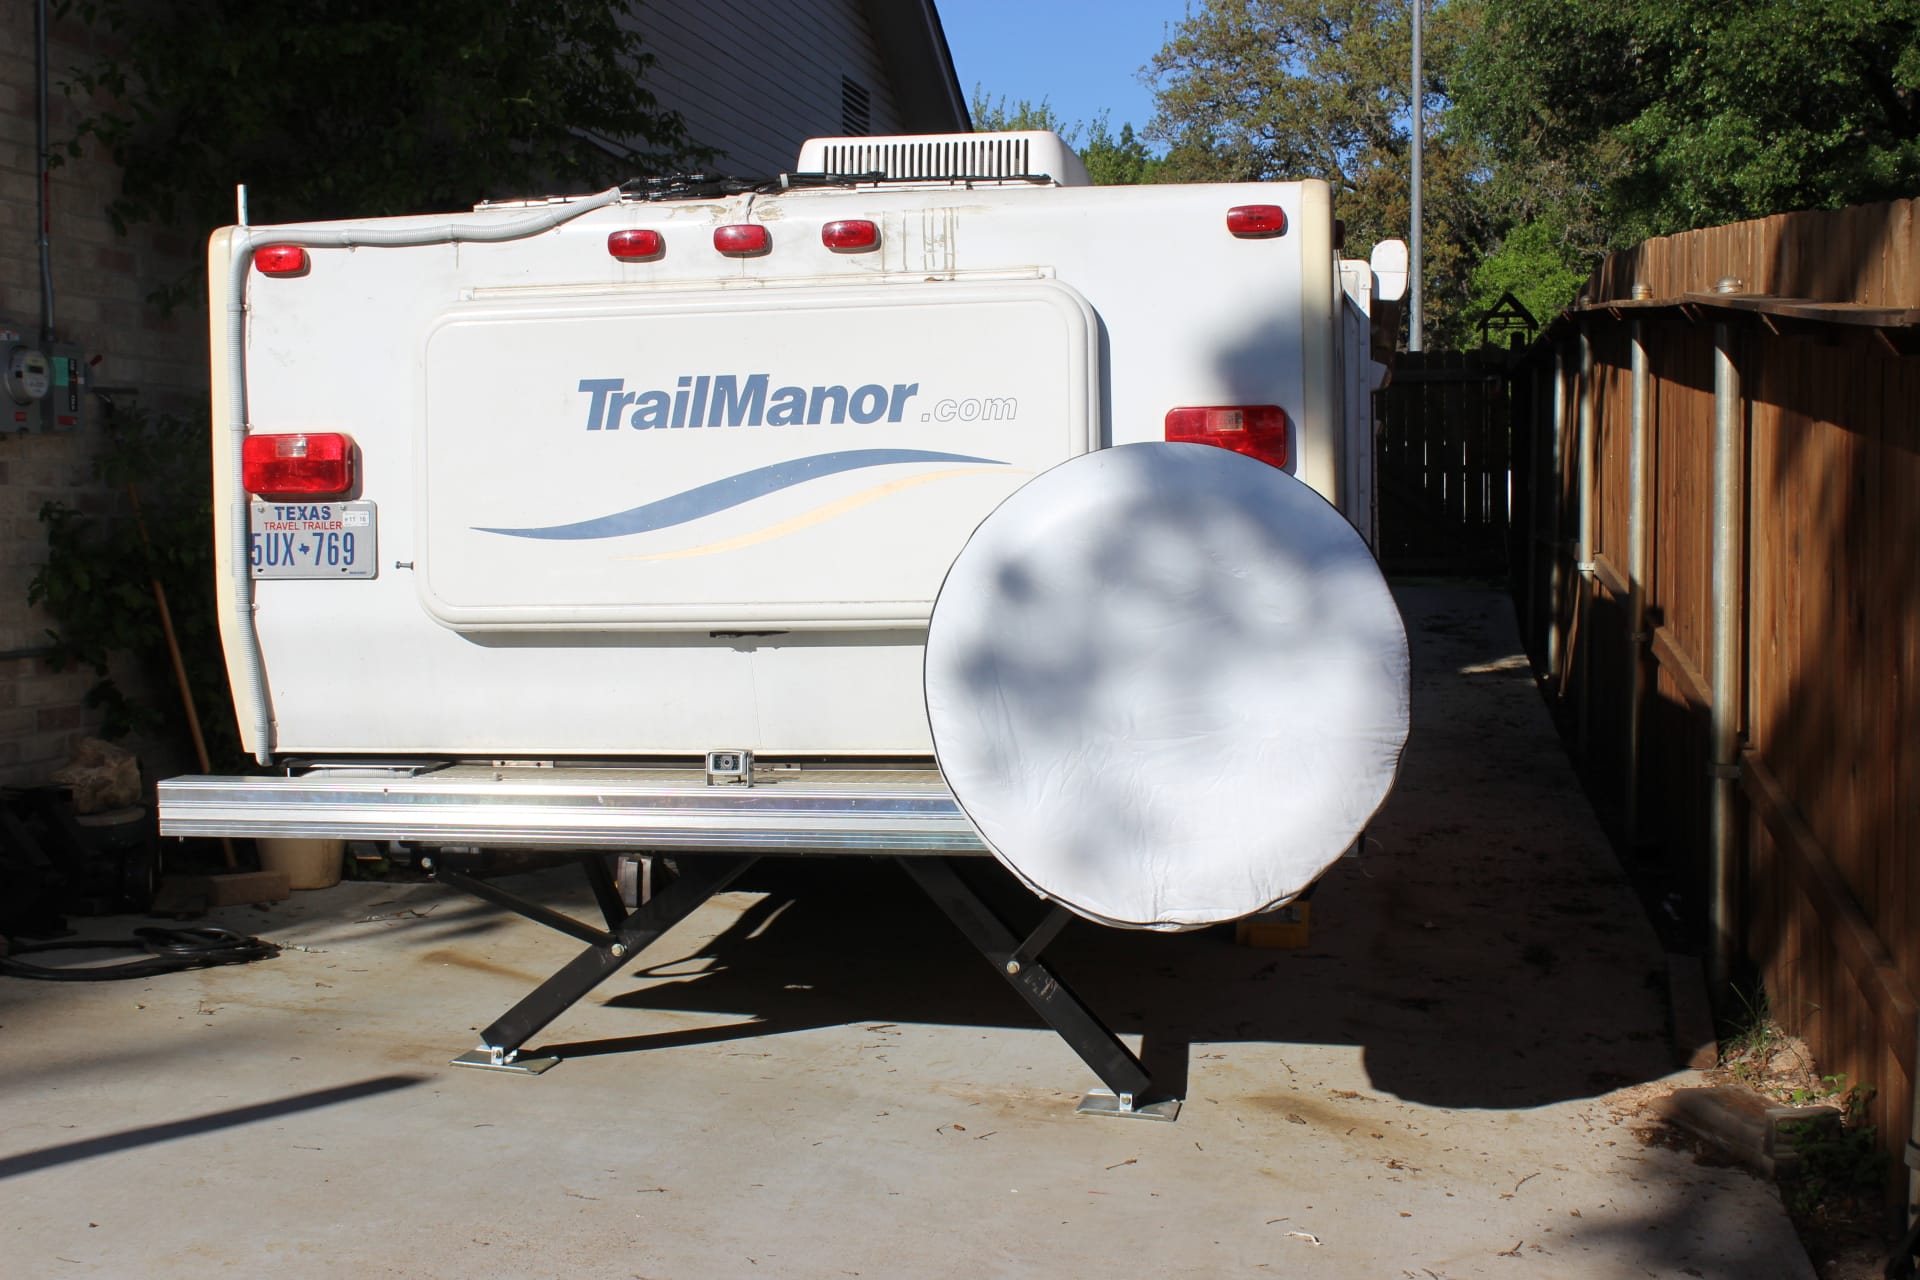
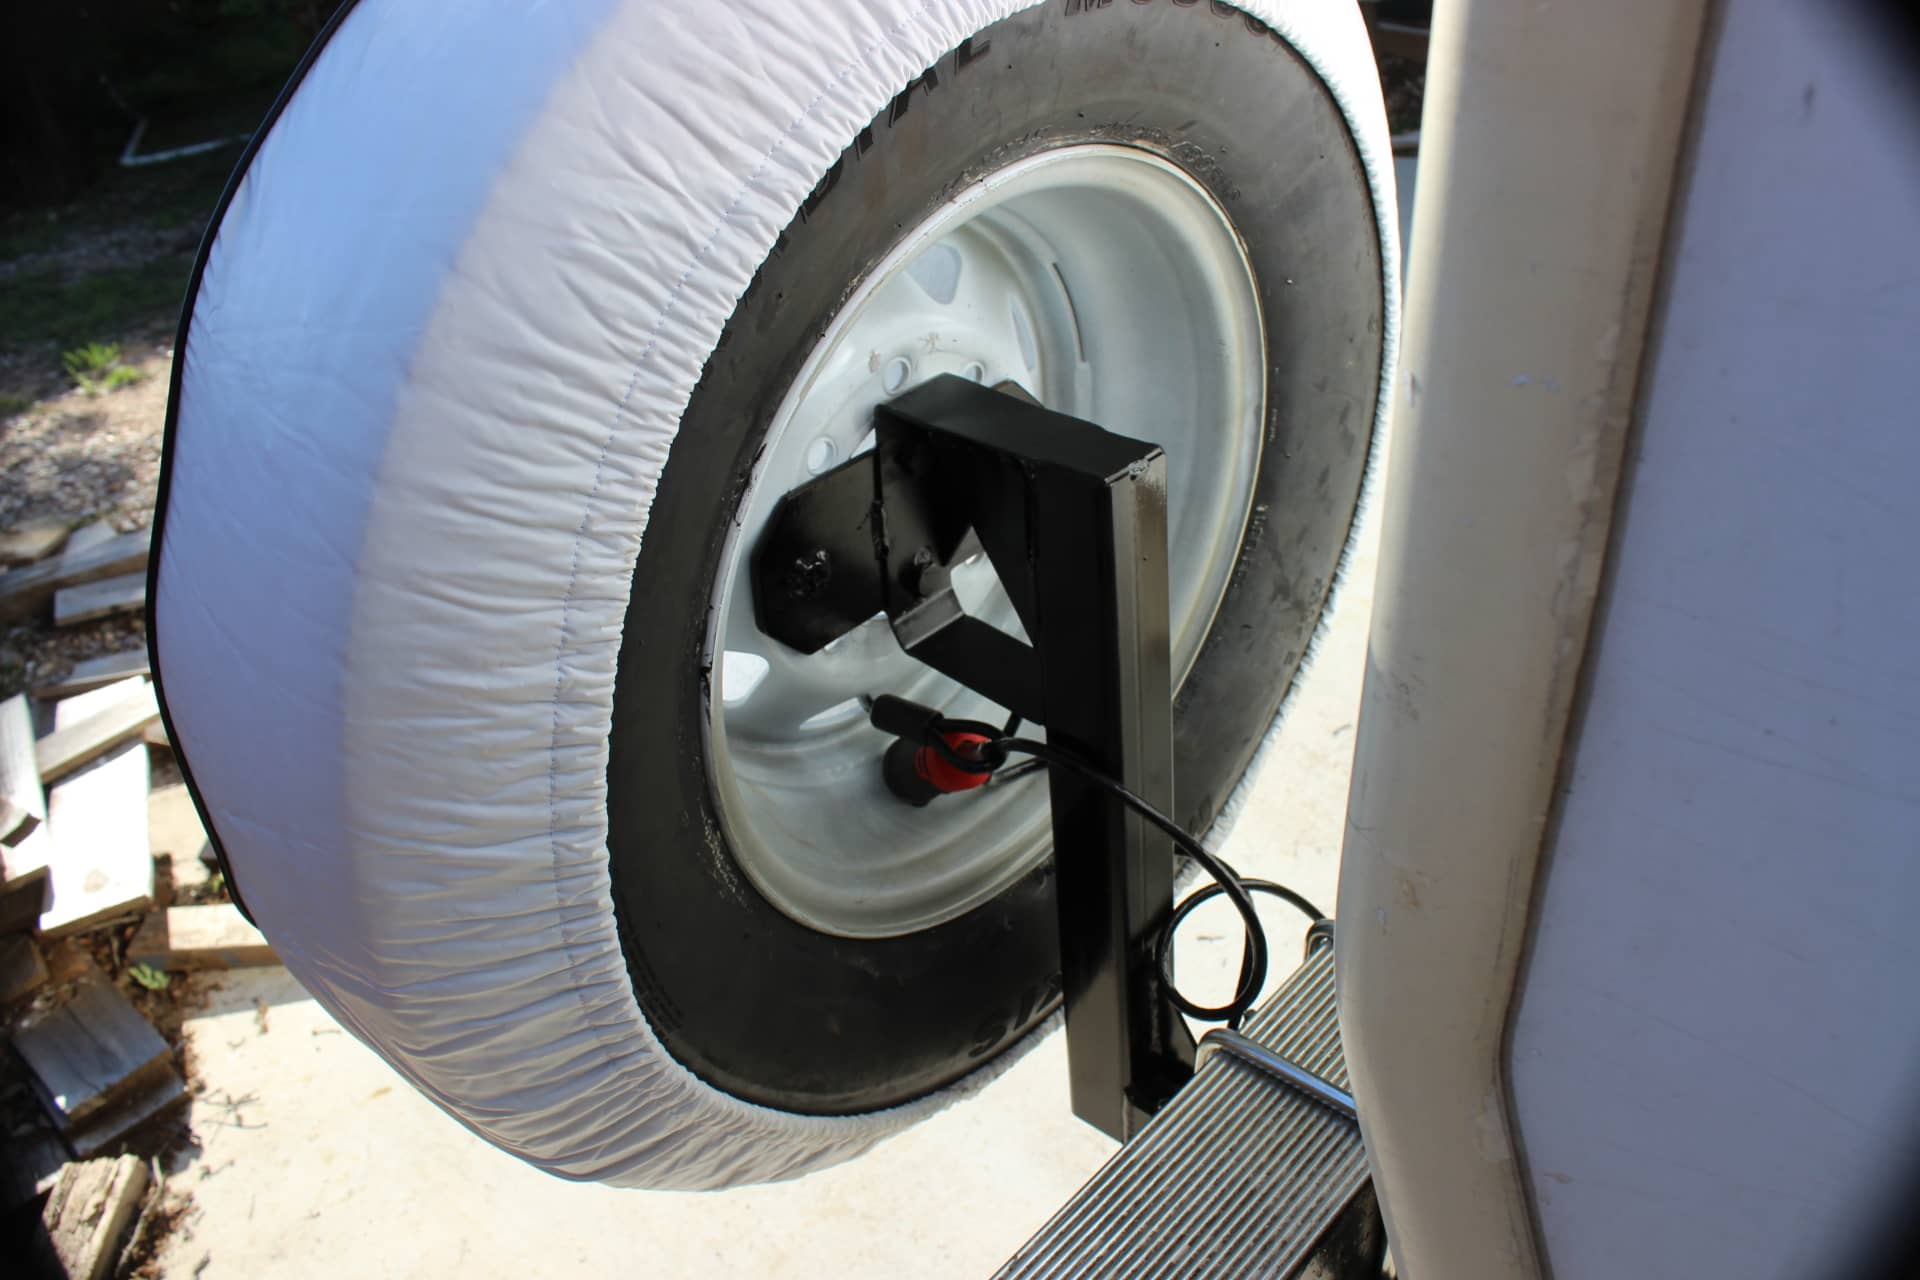
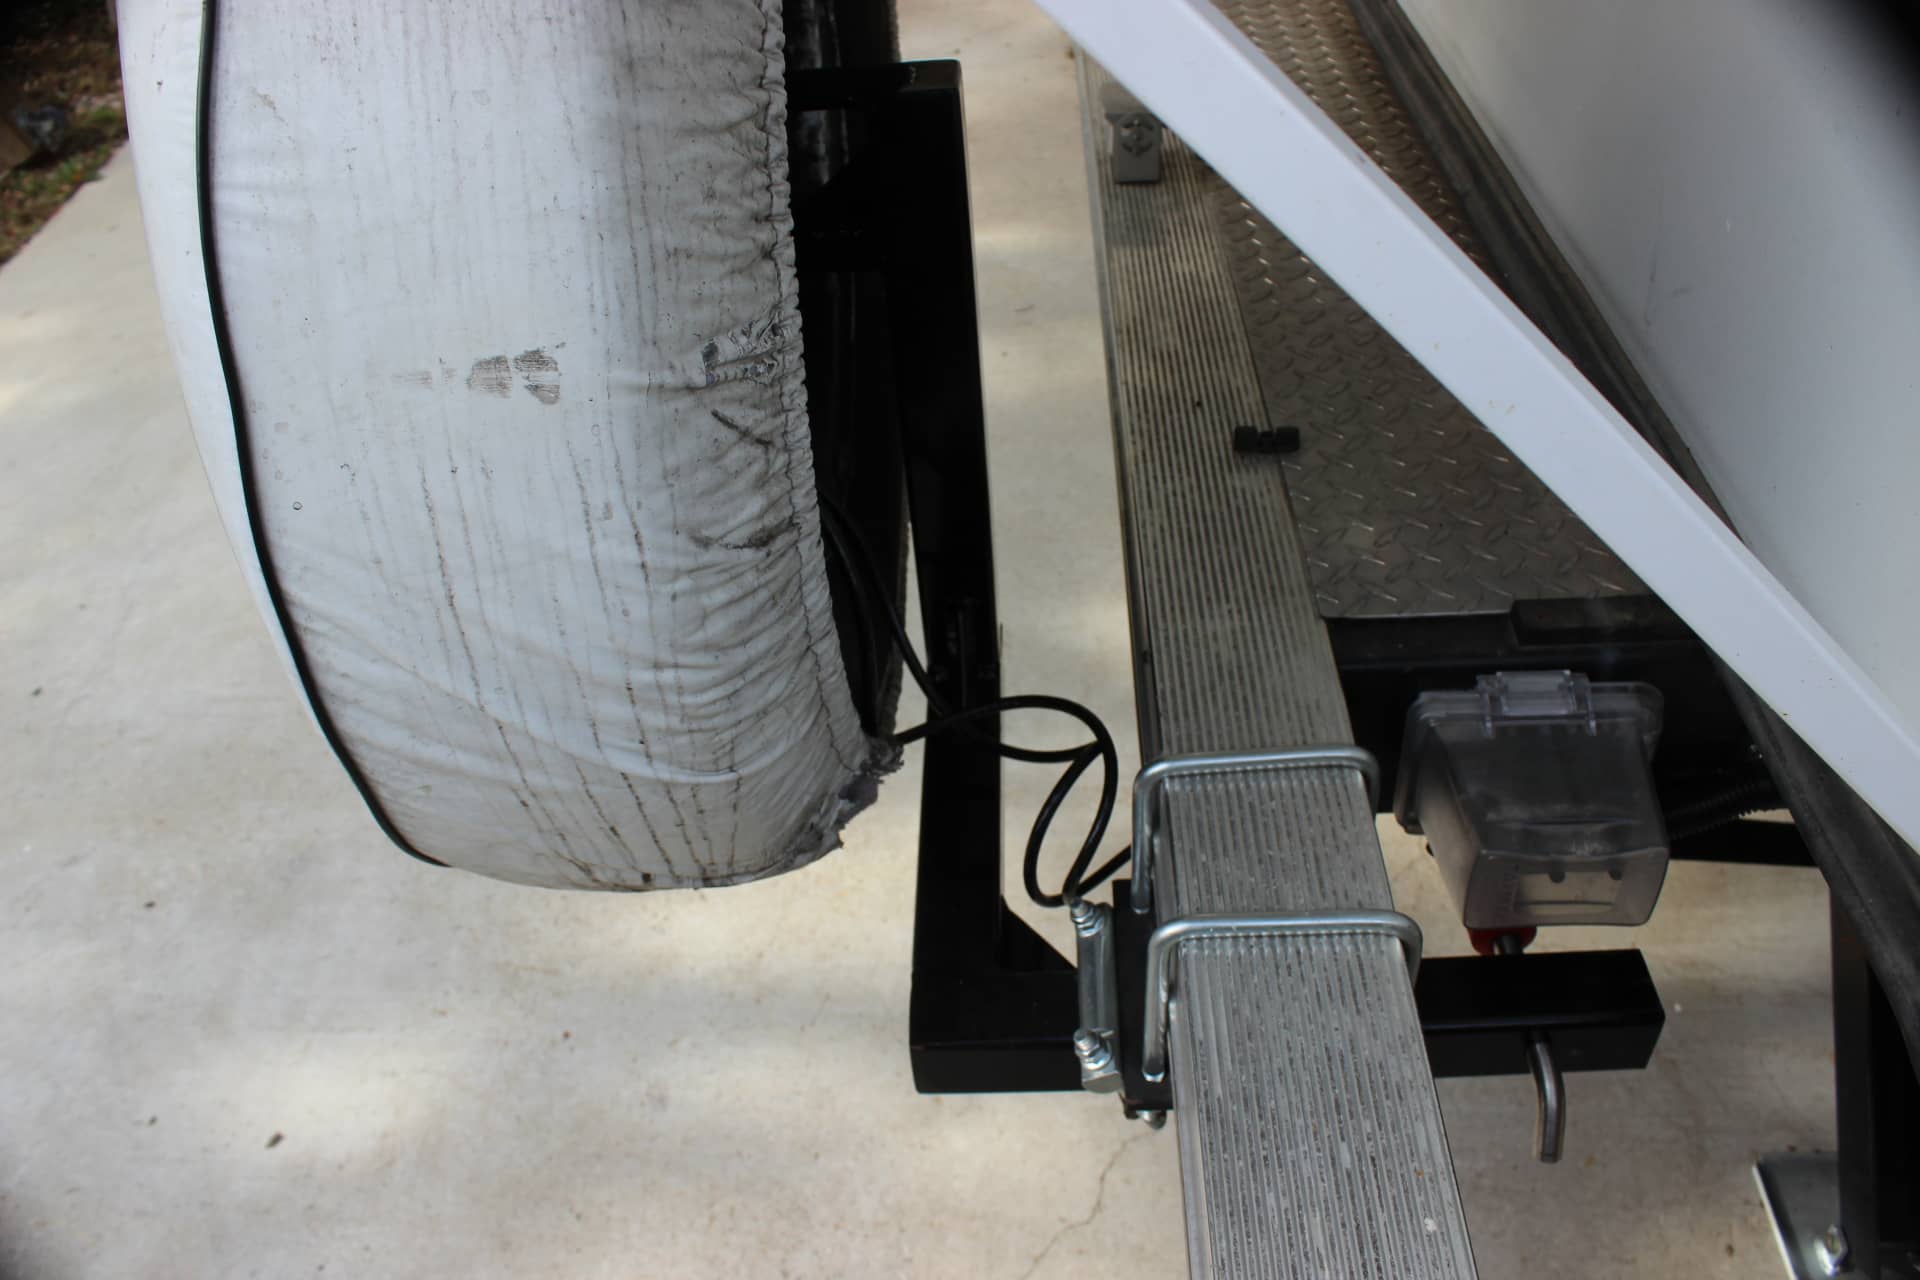
That’s when I decided to move the spare tire to the rear bumper (image 1715…you must have the old style bumper to do this). After much deliberating and searching for the best way to do it, I came up with a 2” receiver mounted to the rear bumper and a spare tire carrier that would plug into that receiver (image 1717). The problems with doing this is clearance for the rear shell to open (image 1714). But with a receiver carrier, it would be able to slide in and out of the receiver so clearance could be gained. I wasn’t too crazy about this, but had my hopes that it would clear and not have to be moved every time you wanted to open the trailer. But if it did, I could live with that. I ended up just drilling out a second hole in the receiver carrier tube so the tire would clear the bed supports and not have to be jacked with every setup.
I look all over the internet for a spare tire carrier that would slide into a receiver and could only find one from Lippert Industries. I was a happy camper….or so I thought. So I bought an Ultra-Fab bumper mount receiver and this carrier from Lippert. Much to my chagrin, when it all arrived the receiver was a 2” one, but the carrier was for a 1 ¼” receiver….OOOPS!
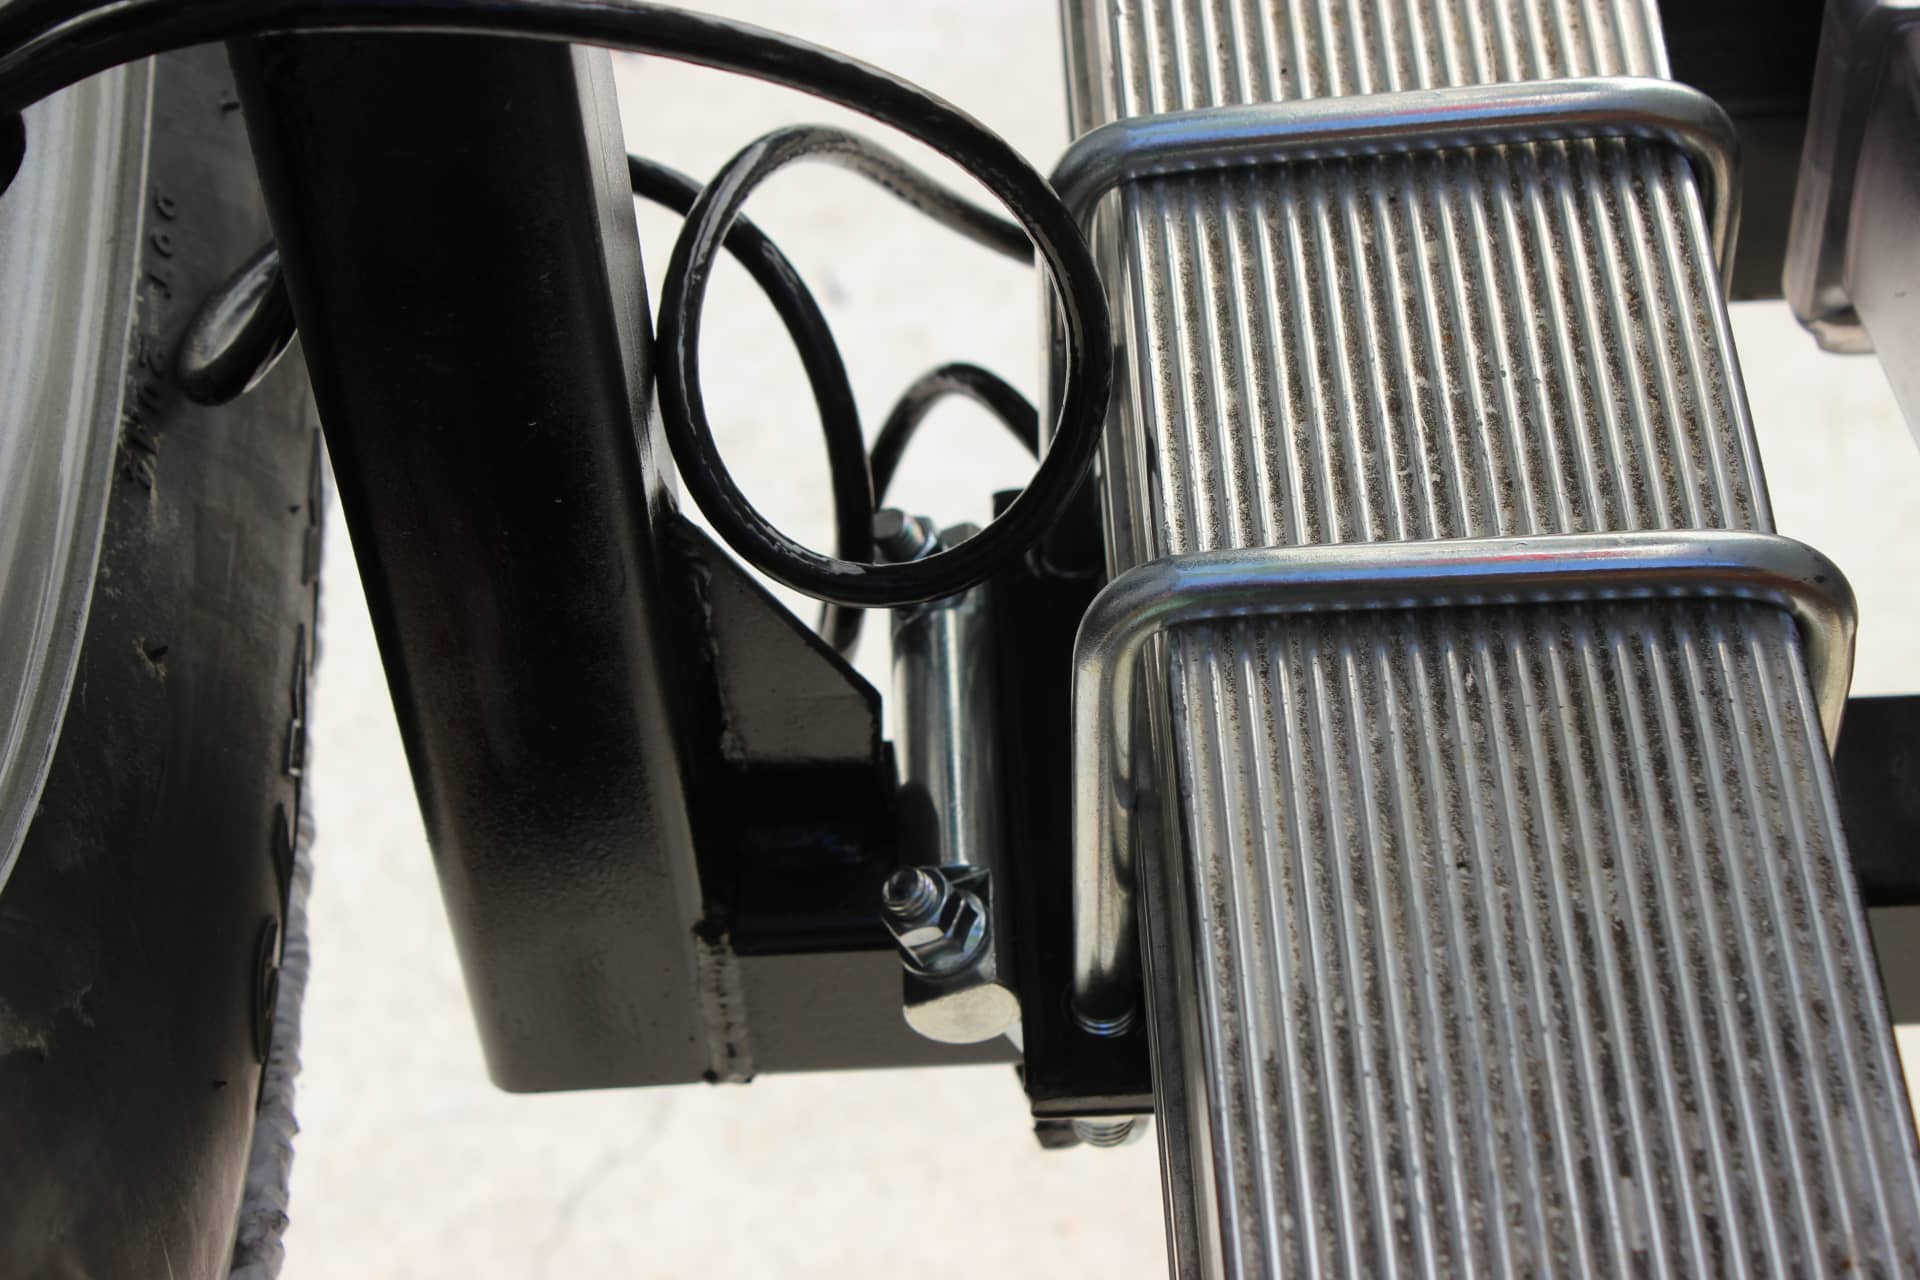
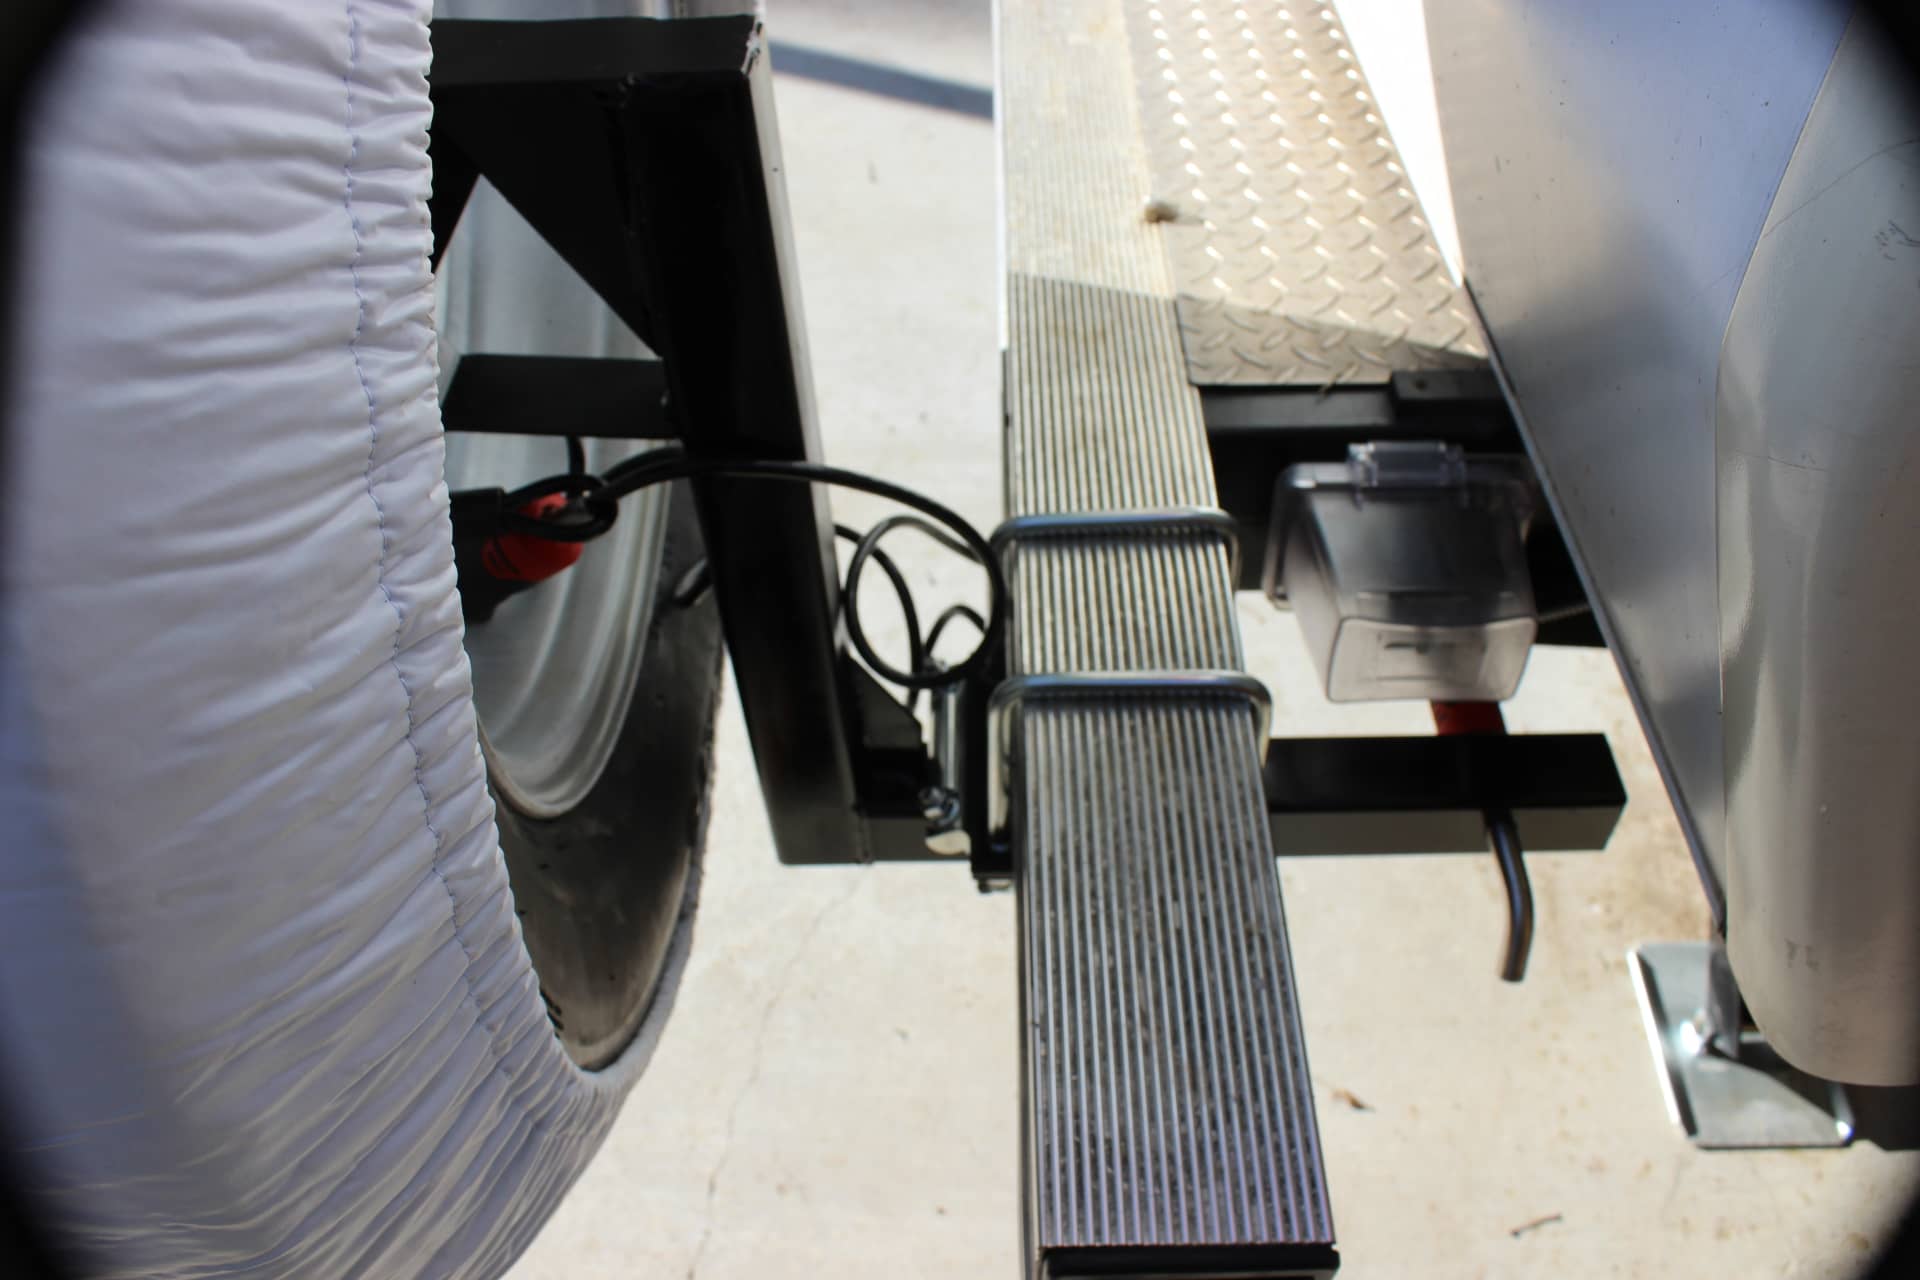
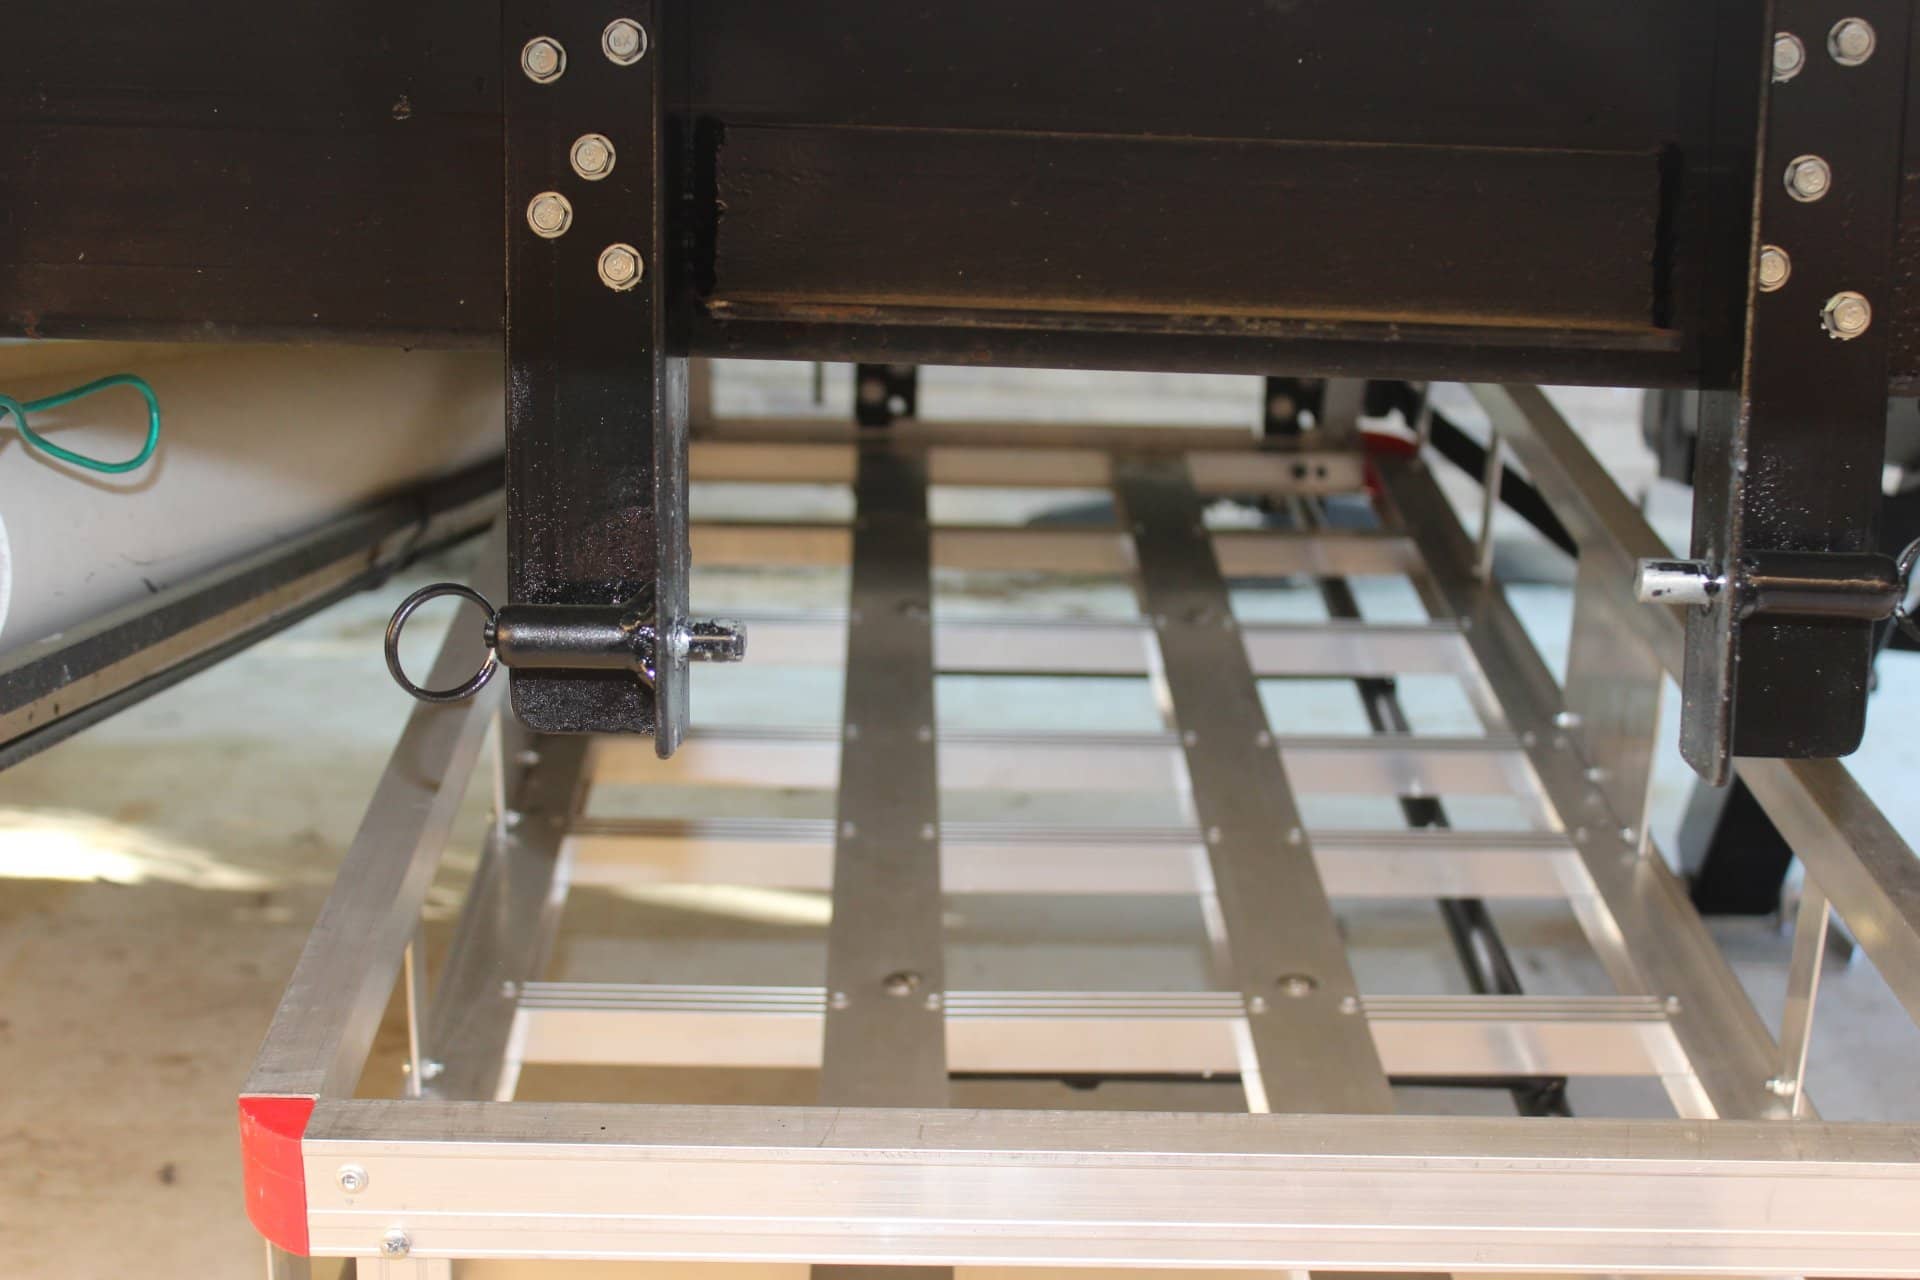
I hate to return stuff, so what I did was to have the folks who were mounting my Timbrens to my trailer fabricate a 2” square tube to the Lippert carrier. That way they could get to just the right position so the rear shell would clear, the spare would not be so low it might drag the ground, and that the tail light would not be totally blocked (I could always move it up some if it was too obstructed). This is what I had done, and so with an anti-rattle device (image 1716) to keep the spare tire carrier from moving around in the receiver, and a “Bolt” brand receiver lock, and a “Bolt” brand cable lock running thru the spare wheel spokes then thru the drag skid that’s welded to the bumper (to lock down the spare tire, image 1718) I was in business. It barely sticks out the side of the TM (1” or so…image 1744), so everything is a good solid fit. Since there were two holes in the receiver bar, I put the locking pin in the hole closest the front of the trailer (image 1717, under the switch box for my rear stabilizer jacks) and a regular pin in the hole closest the back of the trailer. That way if I do have to slide it out, I can pull the regular pin and it will slide out a good ways but it won’t come completely out of the receiver because of the locking pin.
Addendum:
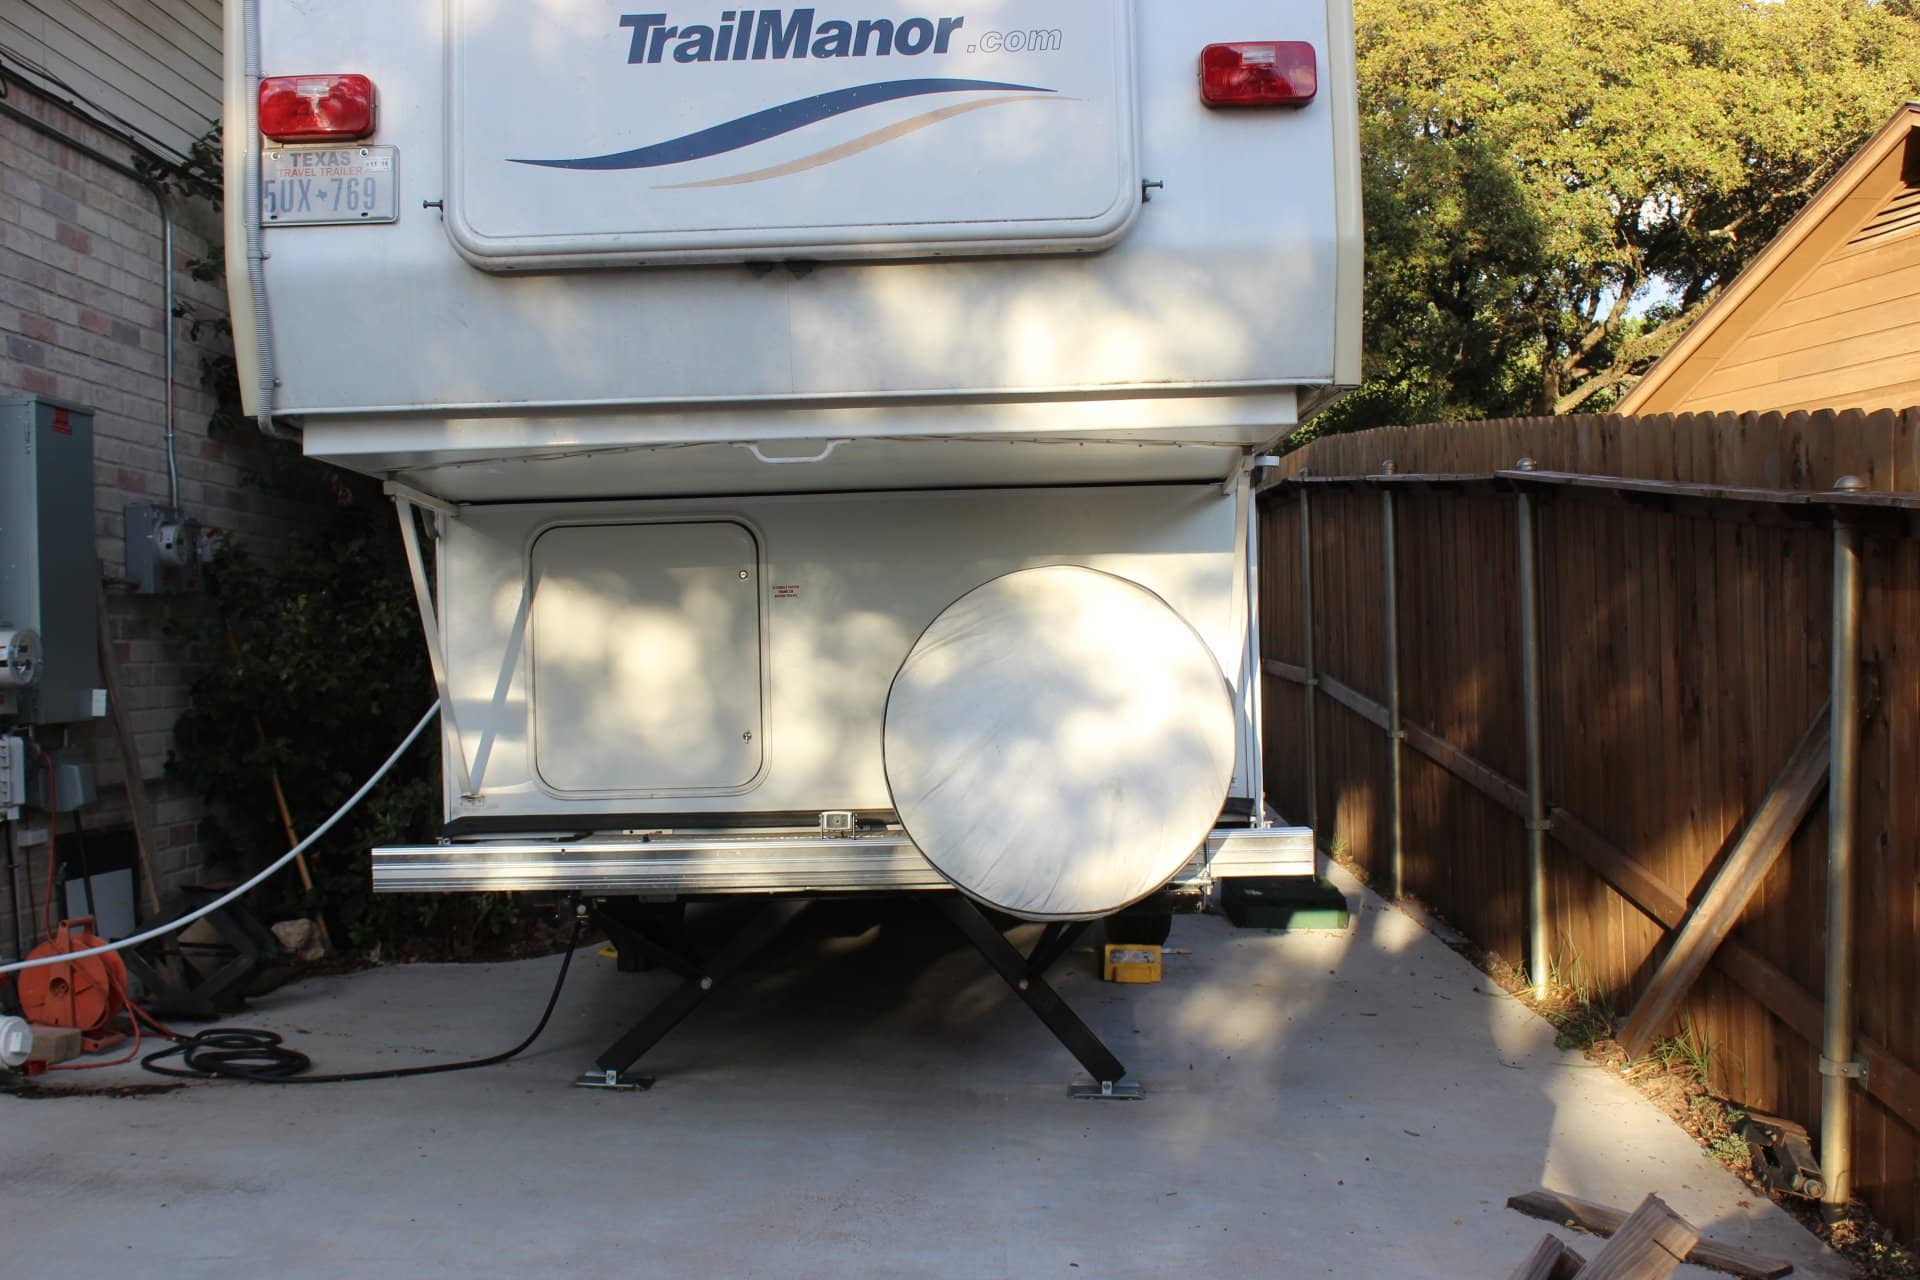
Since our last trip we hit a snag, or should I say we caught one of those poles that sticks up around the gas pumps to protect them from being hit by cars. It seems that the spare on the back bumper that sticks out just a few inches caught one of these poles and bent the spare tire holder about 30° towards the other side of the trailer. So once I got home I had the spare carrier removed and staightend and also had the welders offset it about a foot towards the middle of the trailer so it wouldn’t stick out from the side (images 2576, 2575, 2579). I would highly suggest this if you are going to put your spare on the back bumper.
Now I have the old spare tire carrier and the unused space under the trailer doing nothing. Well I can’t have that. Especially when cargo space is at a premium on the TM. So…..how to convert that open space to a cargo space? Hmmmmmm? Lippert makes these sliding box trays that go underneath trailers. I thought of these, but they are the wrong dimensions to fit right. Maybe have some boxes made…naaah…too expensive and how could I get into them if I did…or I could go with some saddle boxes between the outside frame and trailer edge…not much room and here again would cost too much. So while brainstorming on ebey I found the answer. There was this aluminum cargo tray that hooks into a 2” receiver…you know…like the kind you see on the back of suv’s and trucks etc…
or
It was almost the perfect size and a very close fit. I called the seller and they told me that the receiver could be unscrewed as well as the reflectors on the back. So I bought one.
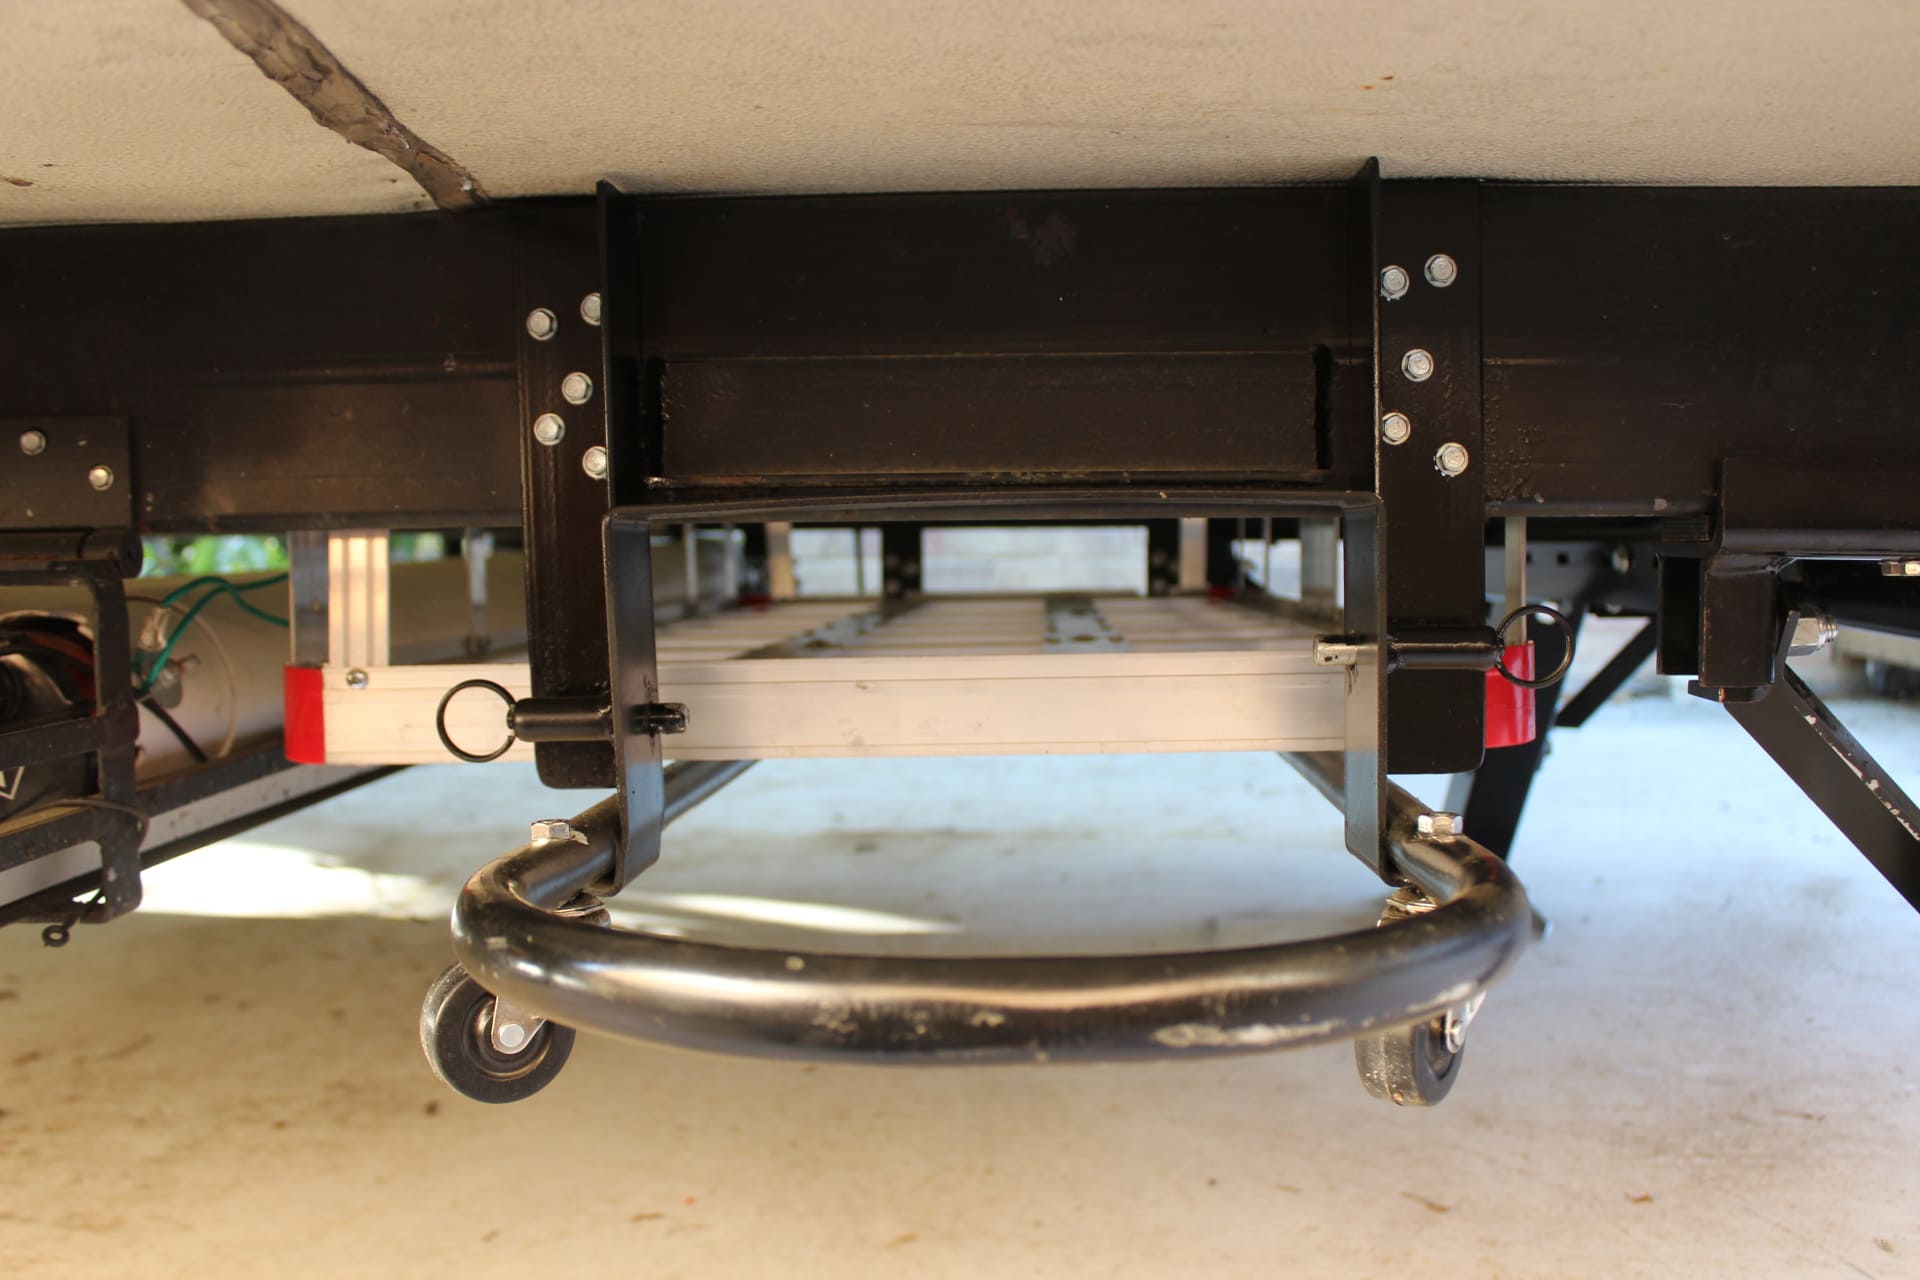
Now I had to figure out how to hook it to the old spare tire carrier….you know, the knuckle dragging sliding wonder! The first thing was to zip off the old spare wheel lug bolts. No problem with a cutoff tool and an angle grinder. OK…then next I had to weld another cross piece between the two outer tubes to give me another place to connect the basket to (be careful not to weld thru the tube!)….Bolted the basket (image 1737) with four bolts to the two cross braces on the outer tube. Then I went out and with the basket bolted to the carrier, I checked to see if it would go up between the two inside frame rails….almost, but needed more clearance to make this work. So I had to modify the basket a bit. I also had to drop the end on the road/driver’s side brackets where the sliding rod goes thru a 1” hole and is held into that with cotter pins on each side of the hanging bracket. I took a piece of ¼”thick flat steel stock 2”W x 5 ½”L and drilled another 1” hole, ¾” center from the end of that bracket extension, and several small holes for ¼” bolts, and bolted it to the old rod bracket on the trailer about 1 ½” lower from the existing 1”hole, center to center (images 1736, 1738). That way it dropped the sliding rods down another 1 ½” to give more clearance for the basket. This worked out well.
Now I remember the lady at the store where I bought the cargo carrier saying, “oh it is just bolted together, so you should have no problem”…WRONG-O….it was mainly put together with pop rivets. So out with the drill and off with the bottom aluminum channel that the receiver bar was held into. Then re-rivet that back together. OK…done…but I still needed some more clearance to make it fit right. I took the top end rail off of one end (the end facing the “road/driver’s side”) and shortened the both top side rails (that connects to the top end rail that I removed) by about 1”. I should have done a little more (another ½”) but as it turns out 1” was enough. Then I pop riveted it all back together and had to drill some new holes on the side to accommodate the braces on the sides of the shorter top end. Now it would fit but the bolts for the drop down brackets that hold the rods were in the way. So on that end, (image 1738) I drilled out some holes and made a couple of notches that the bolts could recess into and VOILAH! It fits YEAH!
To me those inside hollow tube rods seemed kinda flimsy. So I went and got some solid steel rod stock that would fit into those hollow tubes and put those inside to bolster them up. A very small pop rivet to hold them in place and now these hollow tubes are much stouter. Just be sure and use a small pop rivet or they won’t be able to slide into the outer tube. Some dry lubricate in those tubes helps also.
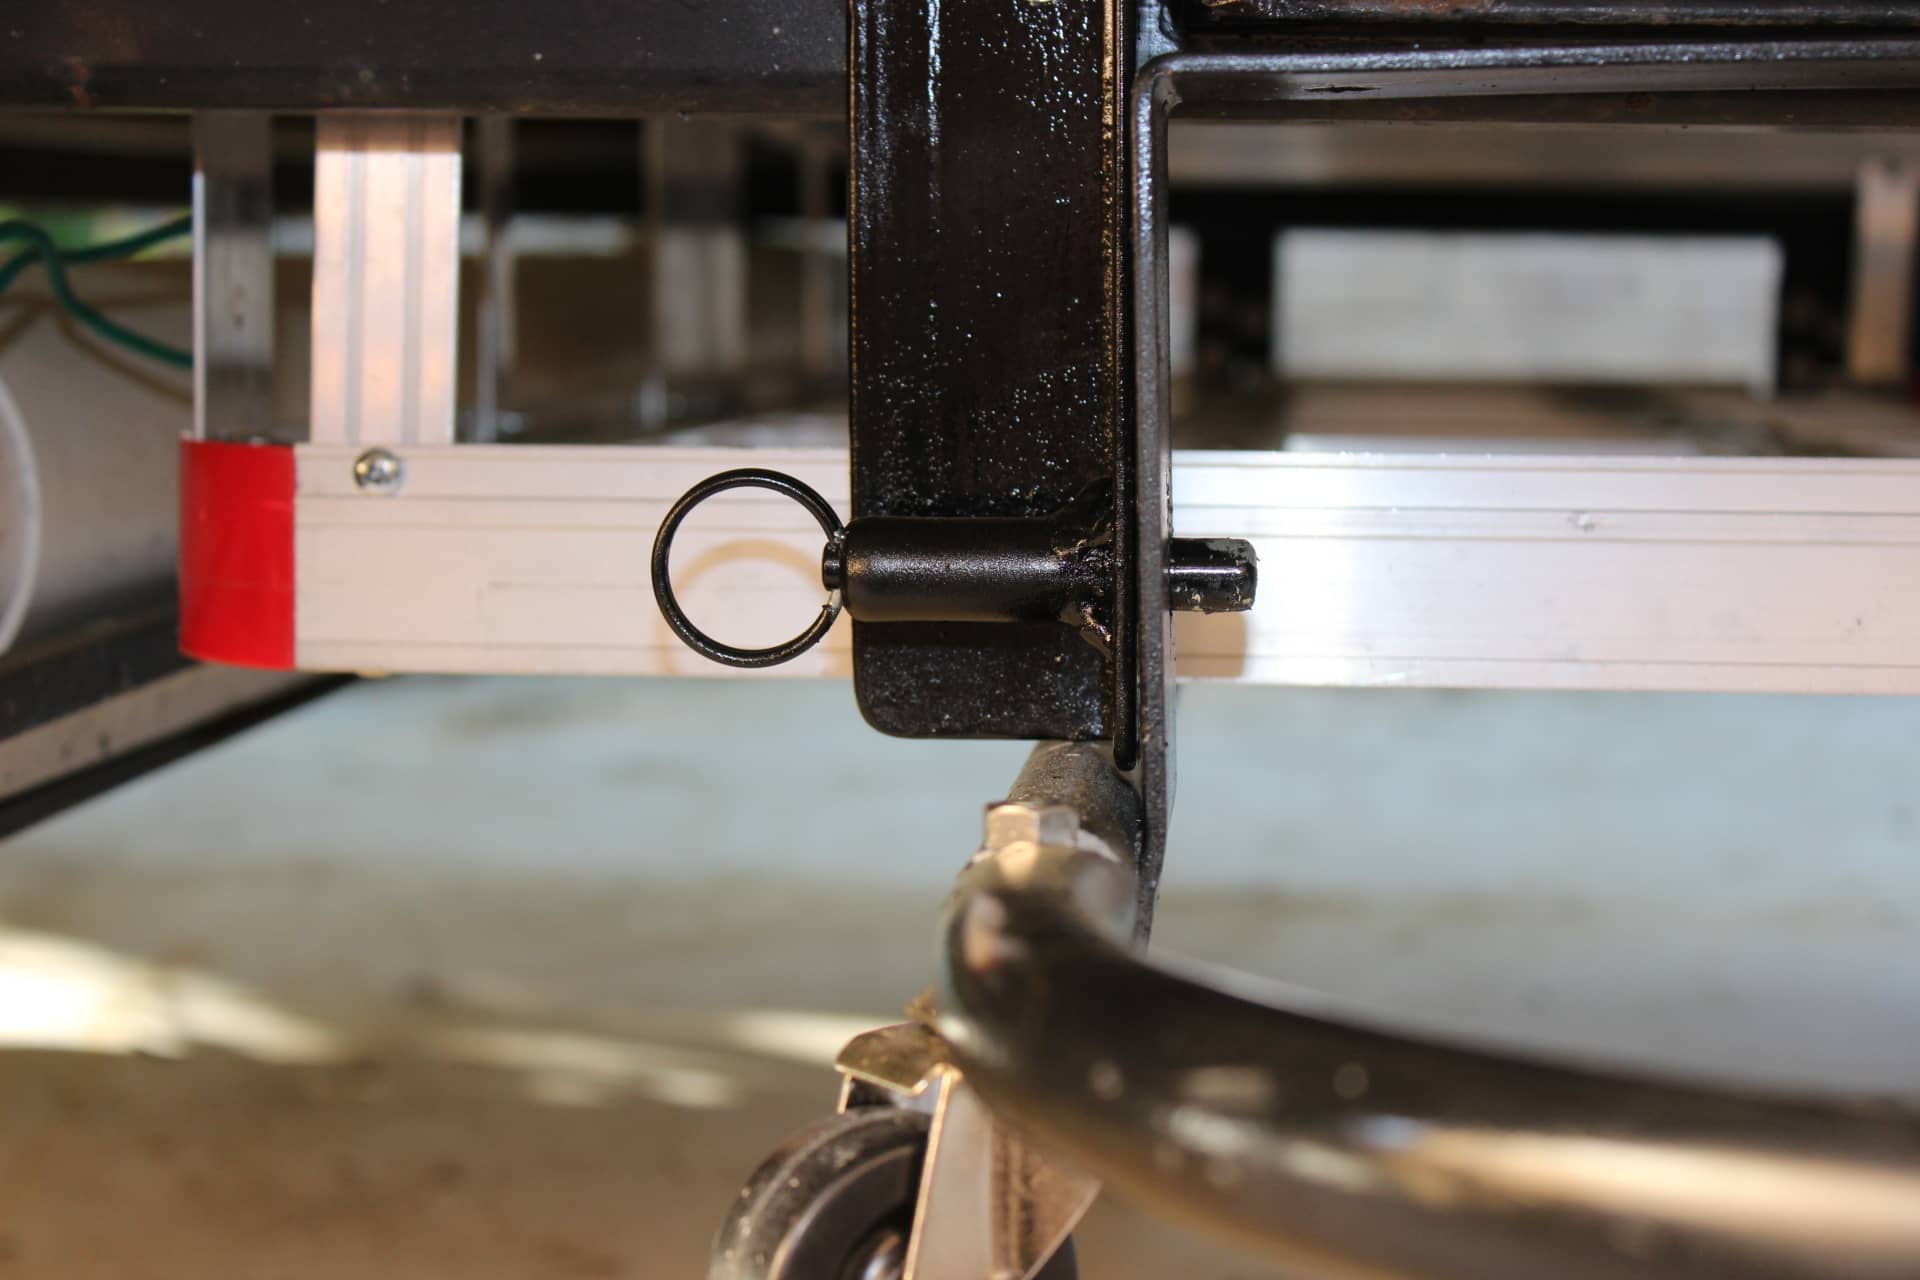
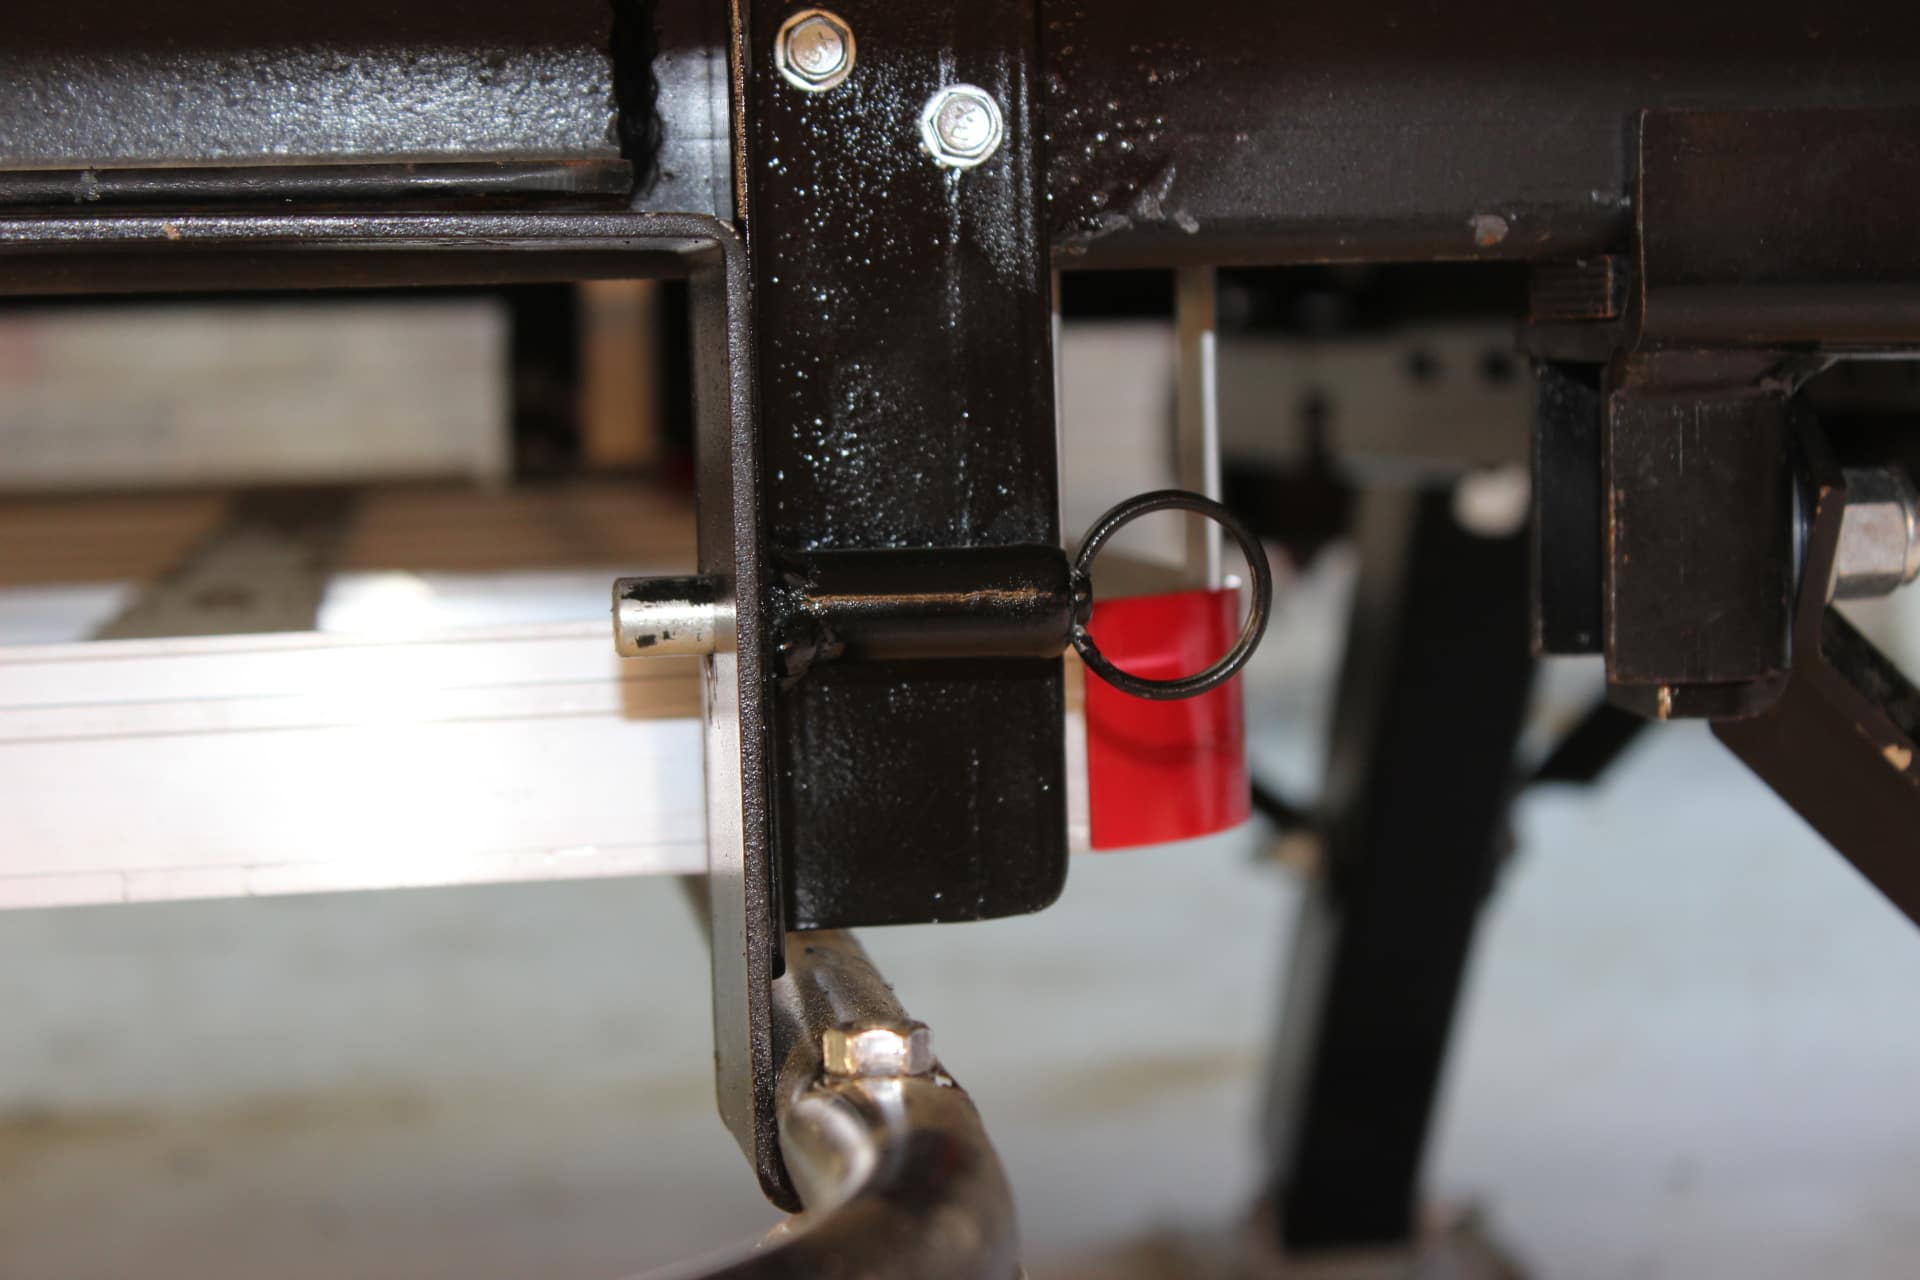
Now, how do I connect the carrier to the trailer? Well, since I was going to be getting in and out of this thing a lot, I didn’t want to have to pull those little clips from those little pins that hold the carrier up in place. I mean, in the dark they could be lost in the grass very easily. I needed something permanent and attached. So I used spring loaded locking pins (images 1724, 1723). I took a couple of pieces of angle iron and welded a locking pin on to each one. I placed them on either side of the existing bracket on the old tire carrier and drilled holes for the pins to lock into (image 1722). The only problem is you don’t have enough hands to operate both spring pins and hold the carrier up. So if you offset the locking pins (image 1728) so one is higher than the other, then you can unlock one side and it will drop down slightly (image 1727), which will allow you to pull the other pin out and drop the entire carrier (image 1729). Then you just slide it out (image 1730) to gain access to the contents.
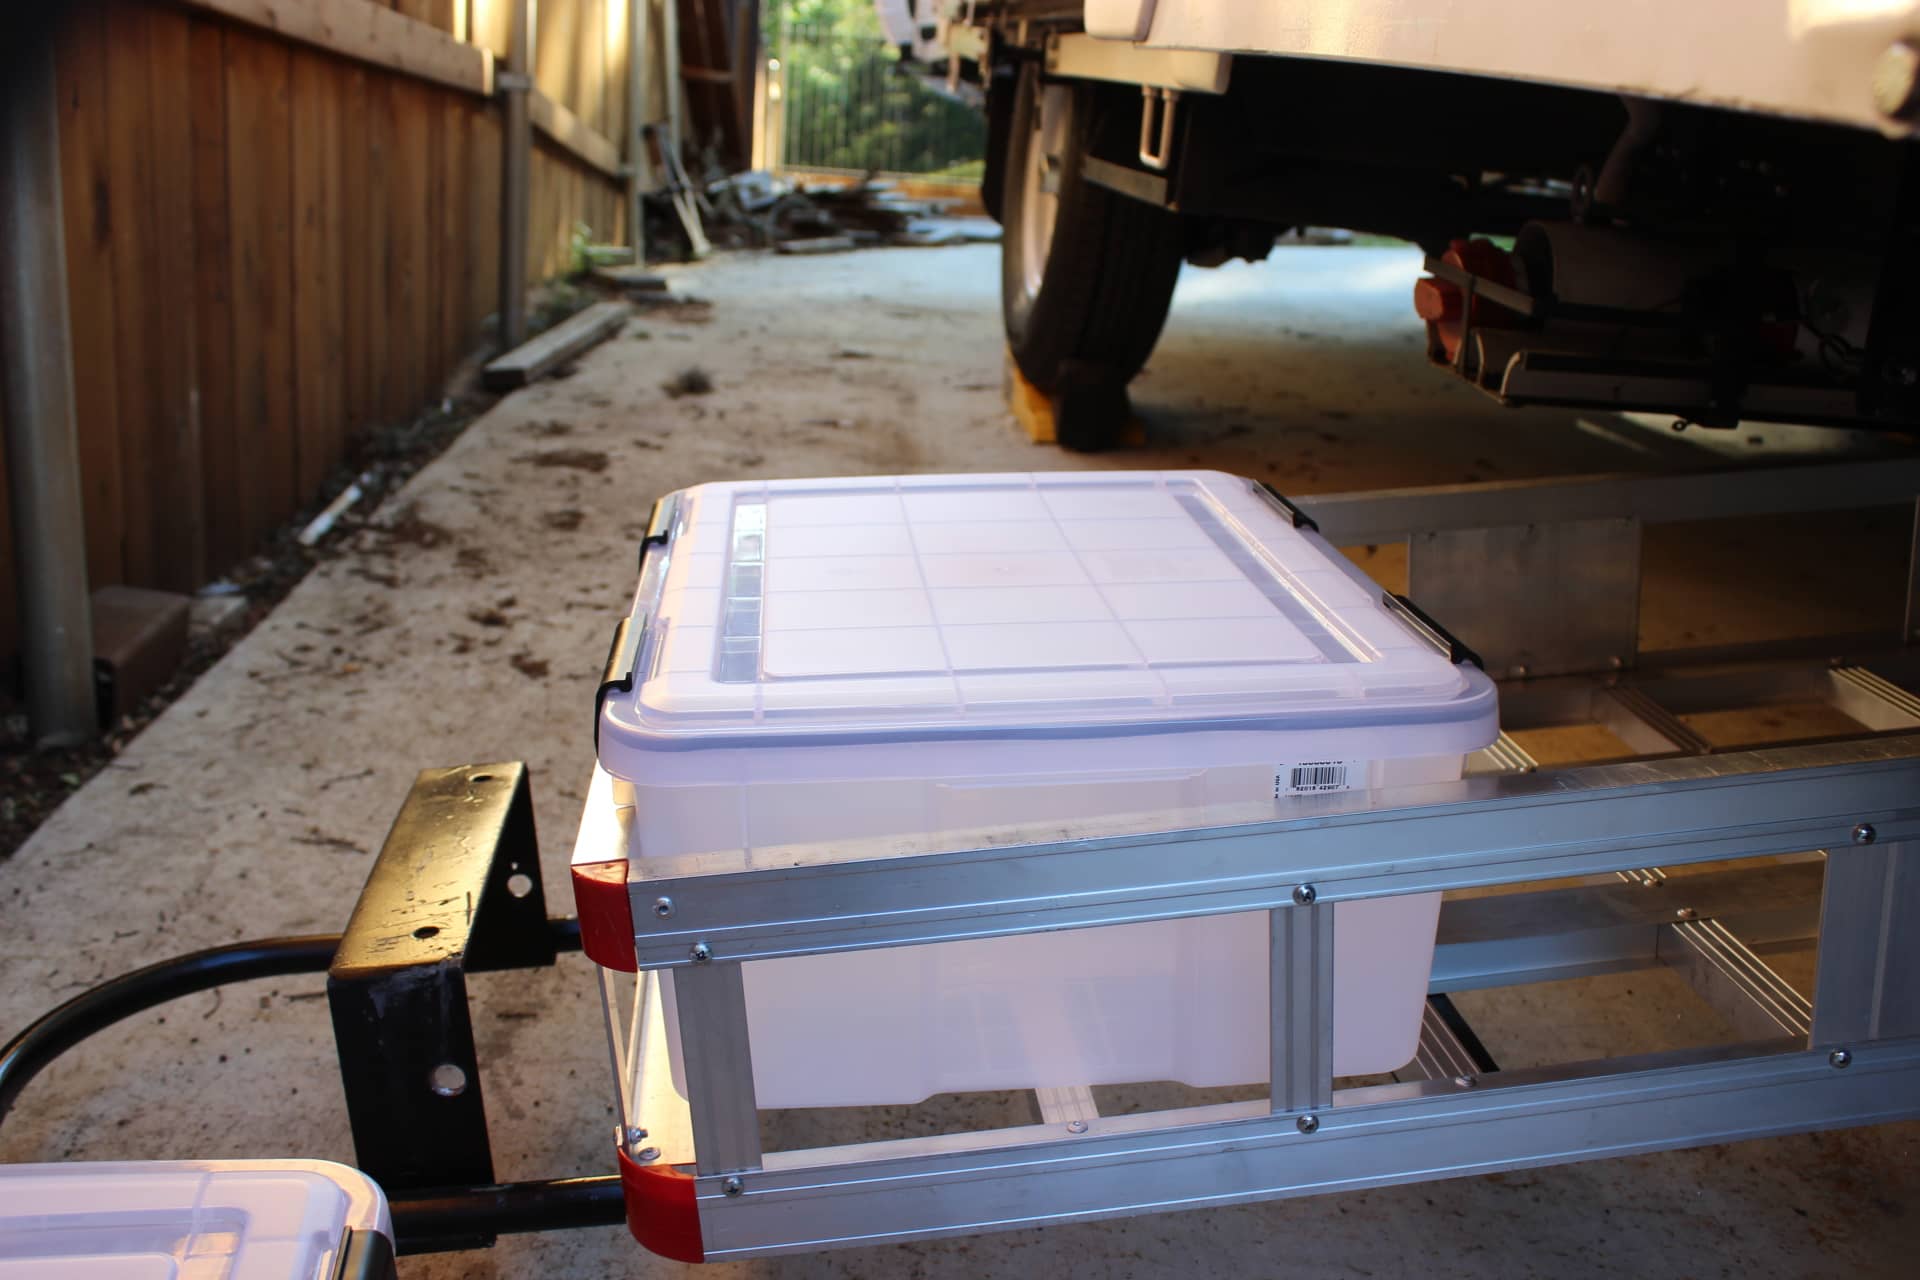
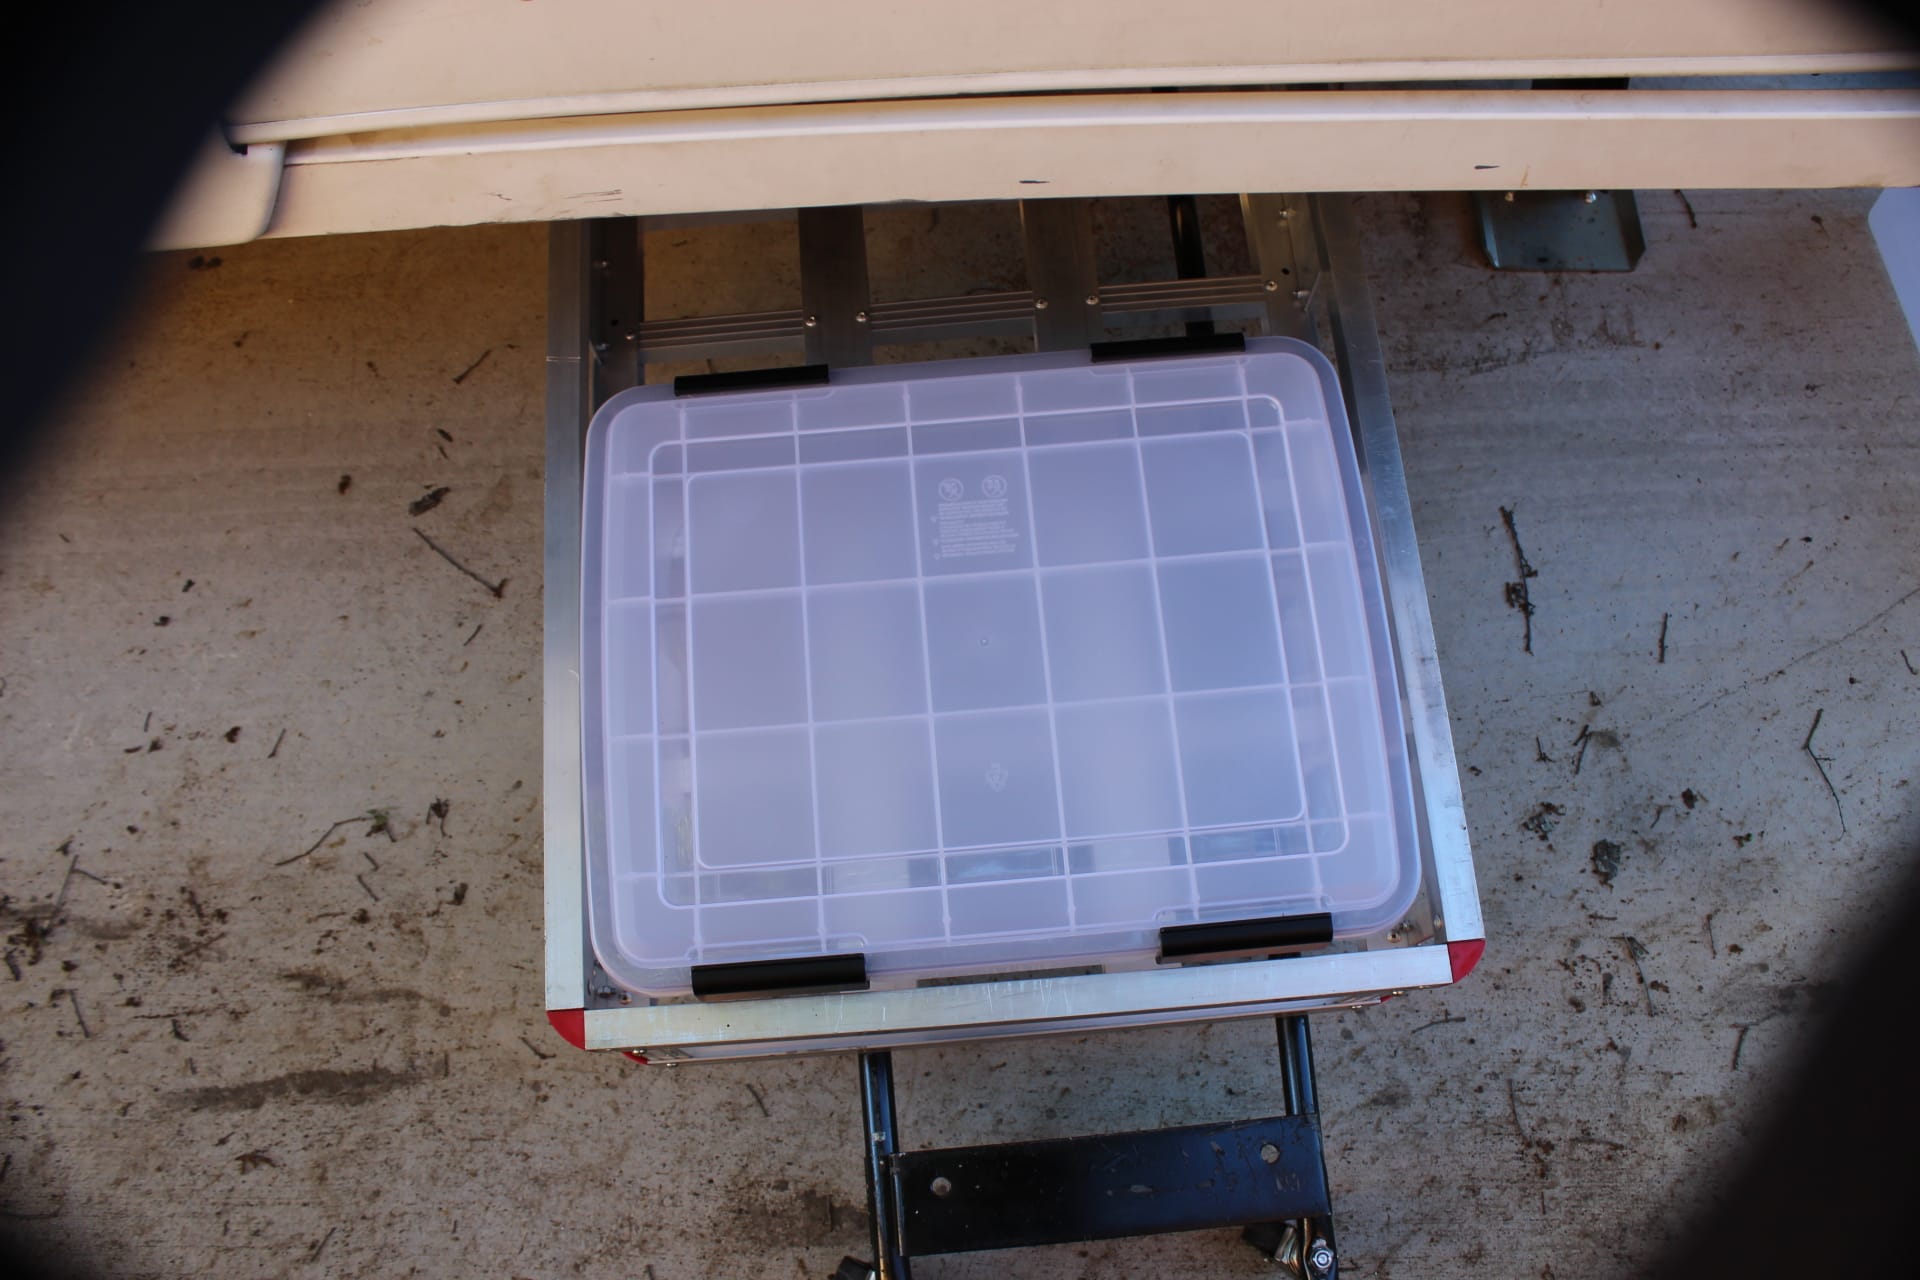
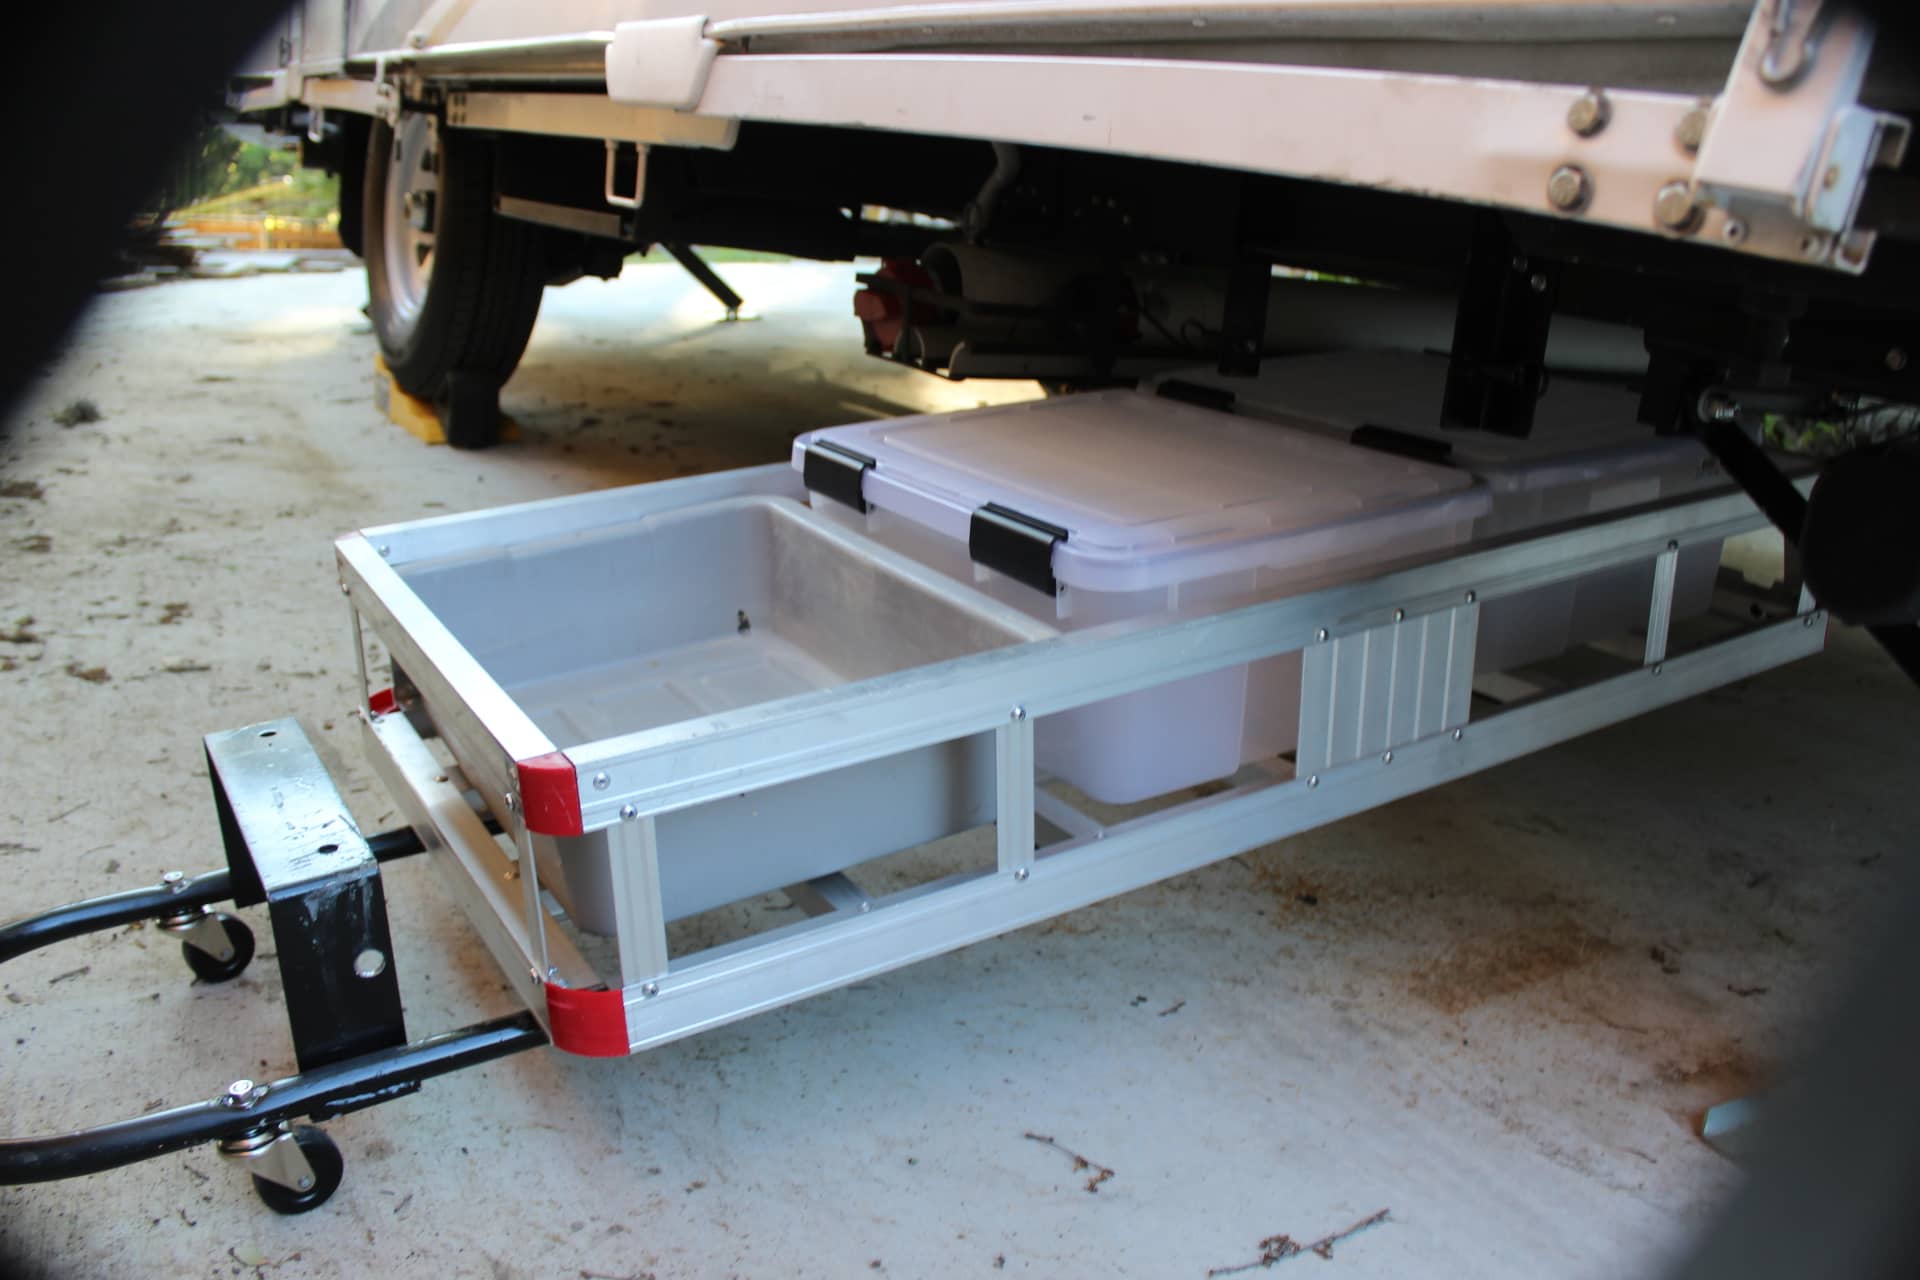
I found these weatherproof boxes at The Container Store (images 1731, 1732, 1733, 1734) that have locking lids to keep the elements out, that are just the perfect size. So I bought two of them and I had this old cat box or bus tray (image 1735) that was kicking around in my garage that when placed in the carrier took up the rest of the space. I’ll use this for wheel chocks and stuff that I don’t mind getting dirty and wet.
The last thing I did was to solve the knuckle scraping problem. I put a couple of casters on the carrier towards the curved handle part (images 1725, 1726). Only I miss calculated. You see those rods recess into the outer tubes all the way up to where the handle starts to curve. So if you decide to put on casters, make sure it is way past where the handle starts to curve so as not to restrict how deep the rods can go into the tubes. I ended up cutting off about 5” of the inside tube so they would fit into the outer tubes enough to slide the carrier all the way shut into the trailer. They were hitting the caster spindles and not letting the rods go all the way in (images 1719, 1730). Lesson learned.