Self-Supporting Sewer Hose? Now is that too much to ask for? Well this tends to be another time consuming problem.
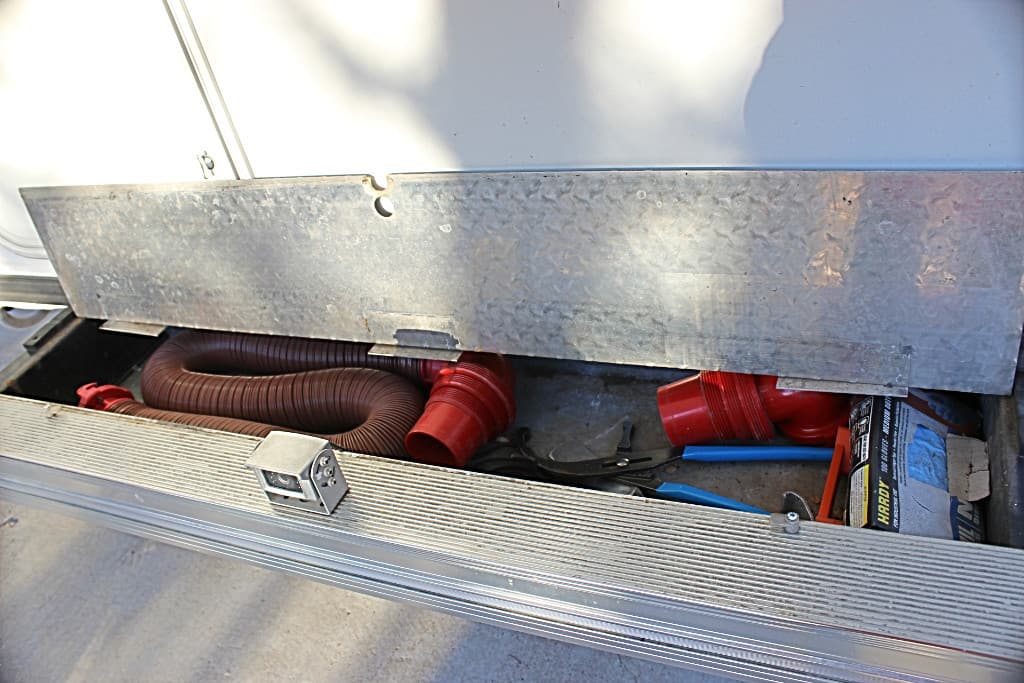
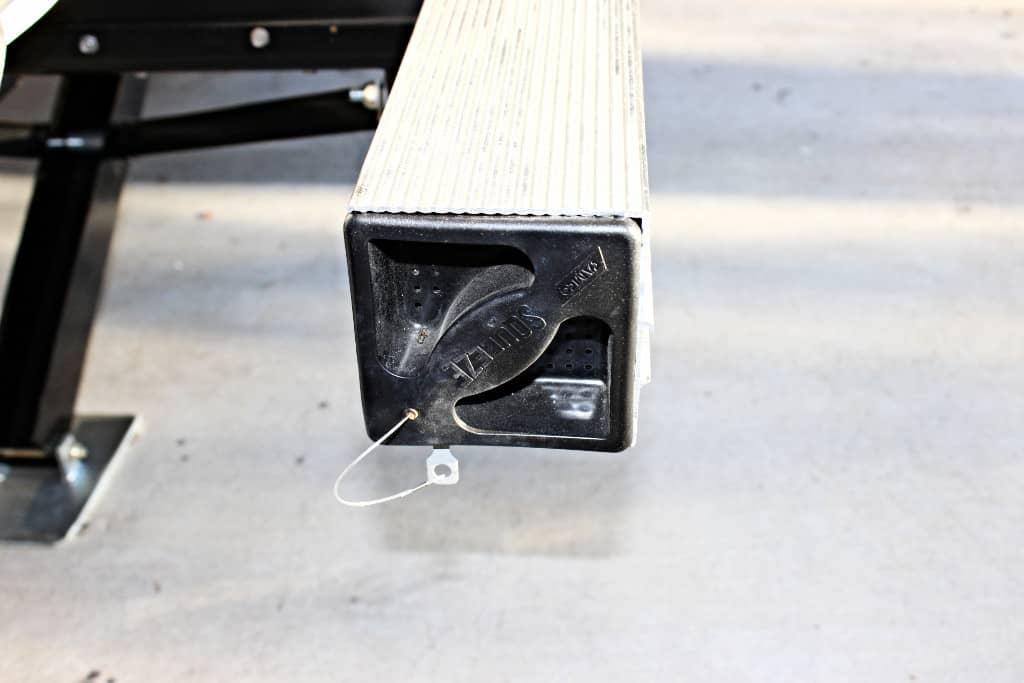
On the Trailmanors (mine included) there are compartments where you can store your sewer hose. I have a square hollow bumper tube made just for that purpose (image 1590) and if that’s not enough, there is a compartment in front of the rear bumper that I use to store sewer related hoses, fittings, tools and disposable latex gloves (image 1591) and etc. Now these square bumpers are made just for that 3” hose and the end fittings only (or should I say barely!). Anything bigger (like my new hose supports) will not fit in that bumper of mine (I don’t know how the newer models fair). The next problem is the support for that sewer hose. GRRRRR!
Ok….there are all sorts of aftermarket things made to support that sewer hose, but to tell the truth most are not worth the stuff they are made from. Stupid me, I bought the “Slunky”….well the “Slunky” was funky! It was very unstable and would flop and squirm all over the place like a slinky on steroids. But not just that, it was too short and not tall enough to do the job properly. A nightmare to get out and set up. Even worse, to try and put back and away. It’s definitely a team job, or even better, one that takes a union to complete (and I for one do not wish to pay any more dues!).
UNEXCEPTABLE!
So the sewer hose support safari begins, and the best place for that is the internet.
I found all the (un)usual suspects, as well as “The Last Sewer Hose You’ll Ever Buy”. Well you better cash in your Standard Oil Stock for that one. It was very impressive and had quadruple joints and could bend itself into the 709th dimension and would even make you breakfast in bed! WOW!…..oh I forgot…I don’t own, or could I afford a class A,B,C, anything mega bus motorhome gas guzzler so that’s that for me…..But wait….is it?….yes it is!….youtube to the rescue! YEAHHHHH!!!
And there it was. The DIYer’s dream in sewer hose supports. Eureka! So here I go again on my quest to save time and more importantly…$$$$$$!!!!
So here is what I did: I made my own self-supporting, telescoping, expandable sewer hose supports that are components, and best of all, they use regular existing sewer hoses (yeaaaaaa).
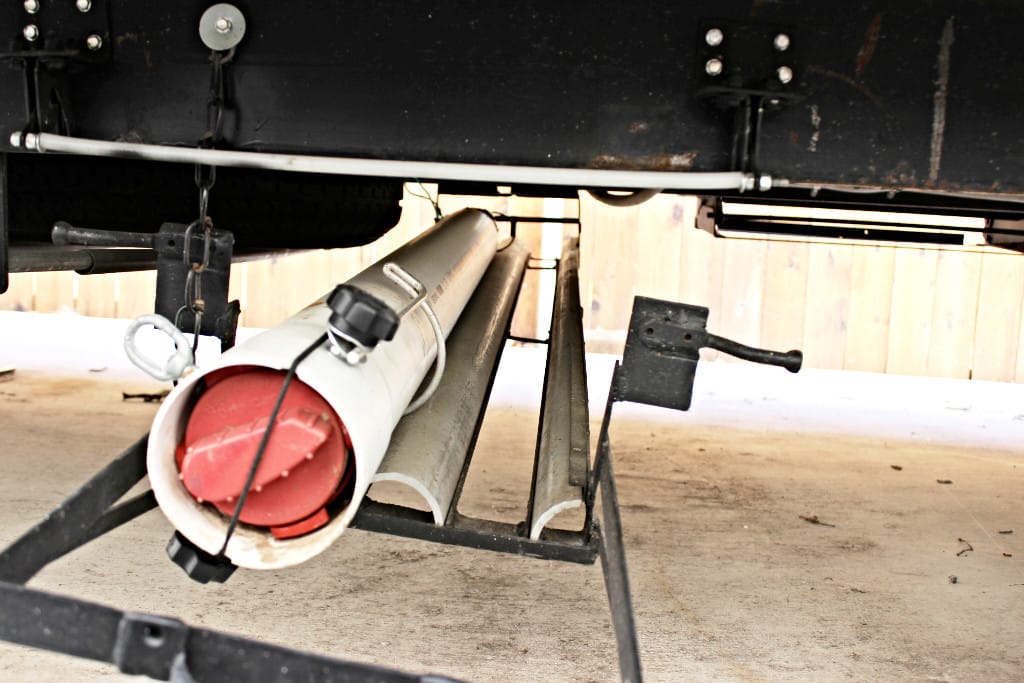
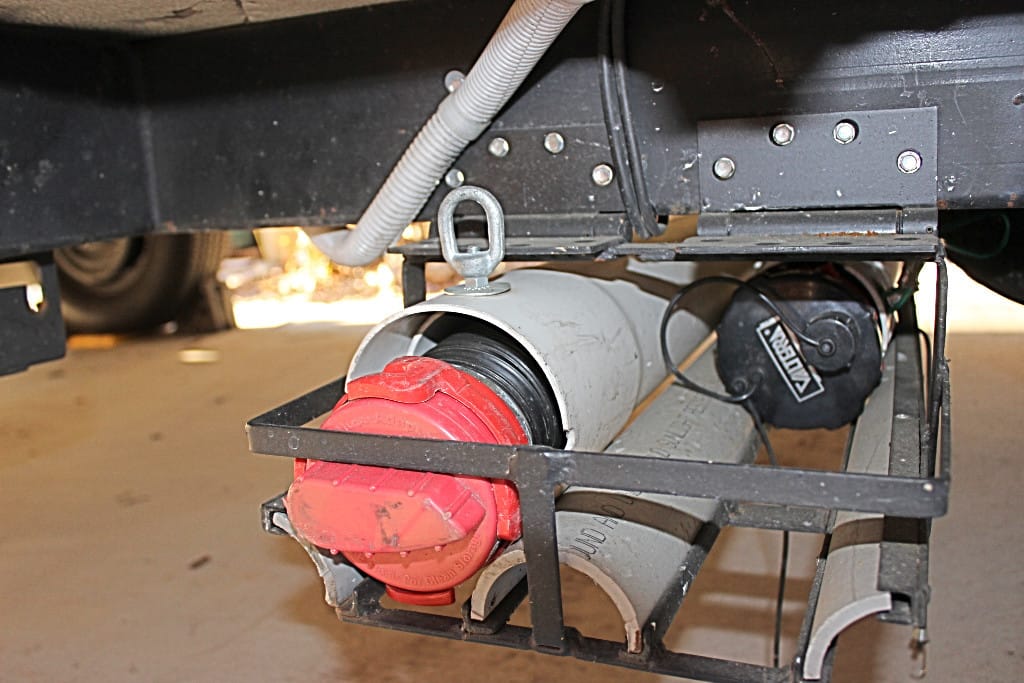
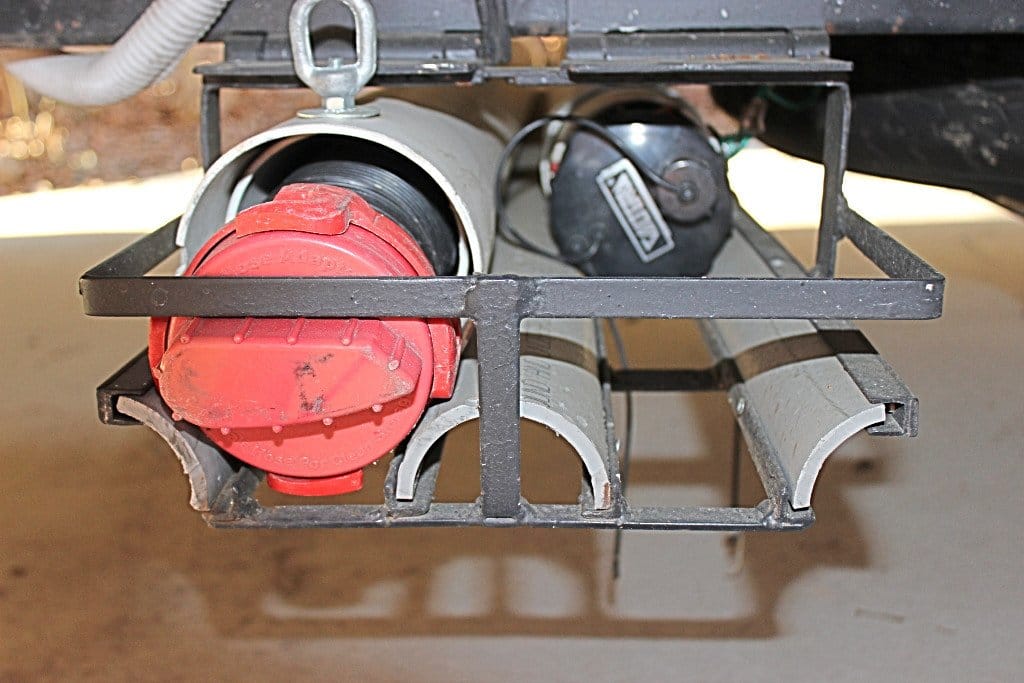
One expands to almost 10’ and the other to almost 8’. Plus I found just the right space under my trailer to mount a locking drop down rack to store them in (image 1448), behind the spare tire carrier.
Here is what I did to build the supports (thank you youtube and the guy on there whoever you are!). I started with two 20’ long 4” diameter PVC drain pipe. Anything smaller and your hose will NOT fit thru it. It has to be the “drain” pipe of the lowest schedule (the thin walled stuff…you can find it at Home Despots…I mean Depot).
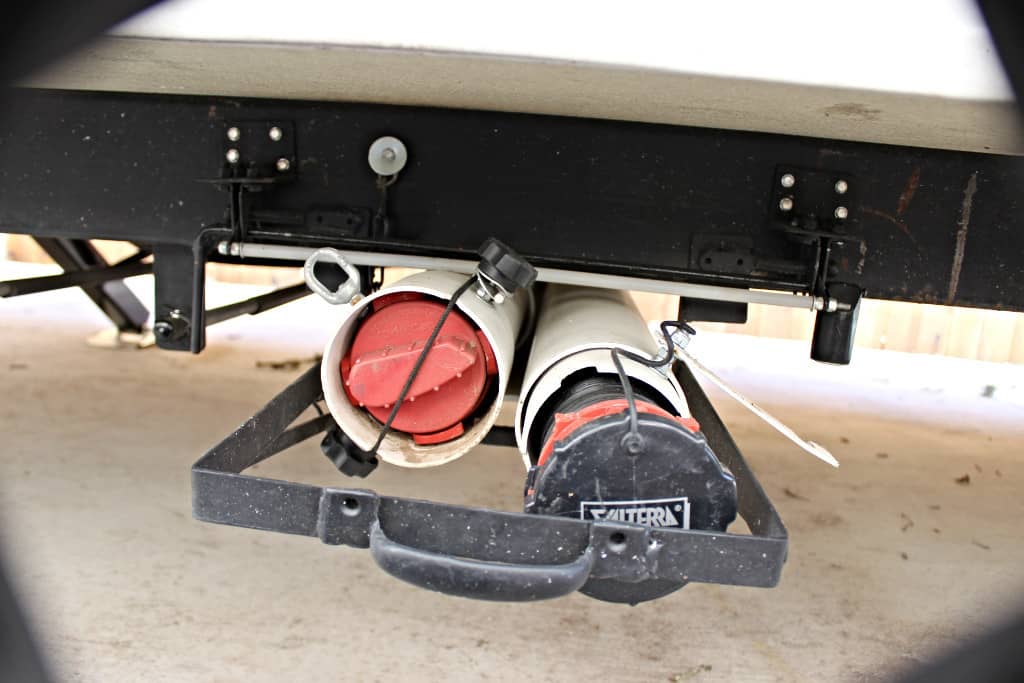
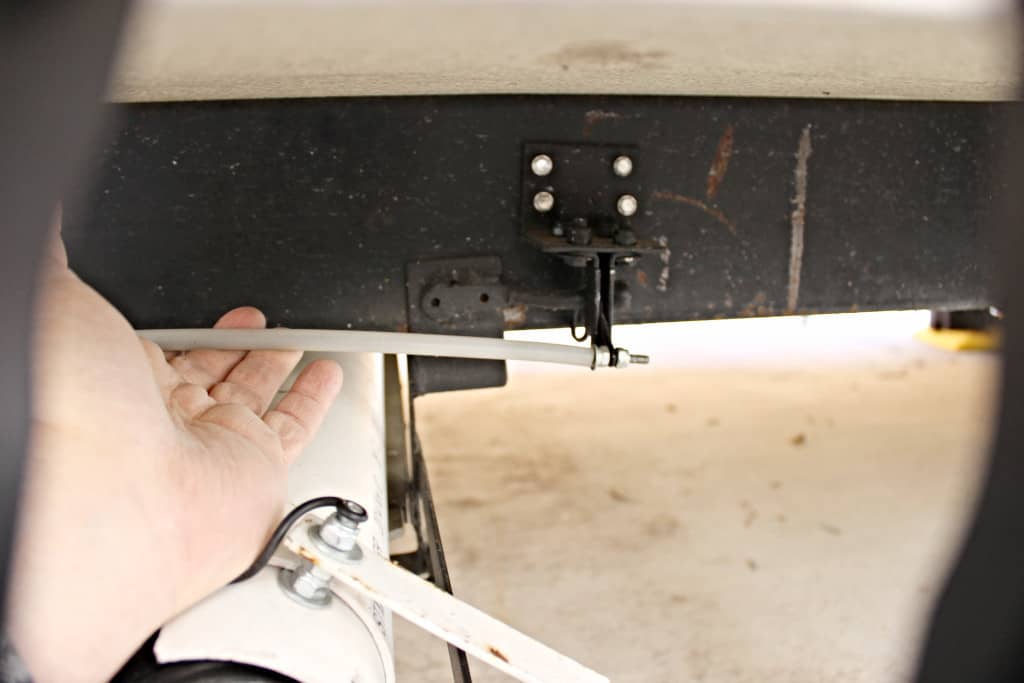
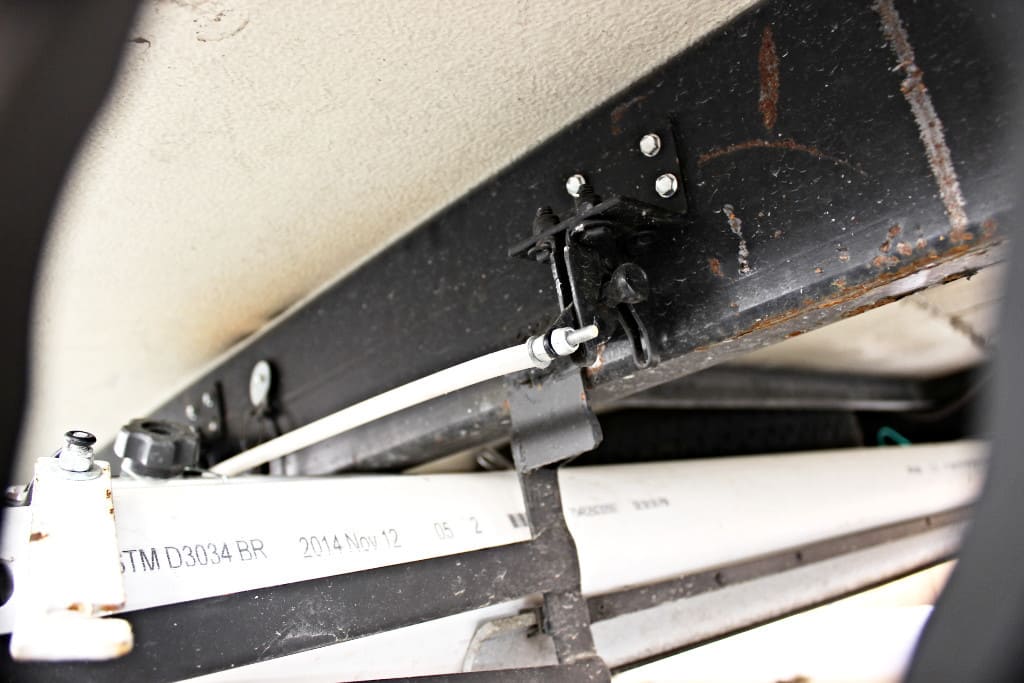
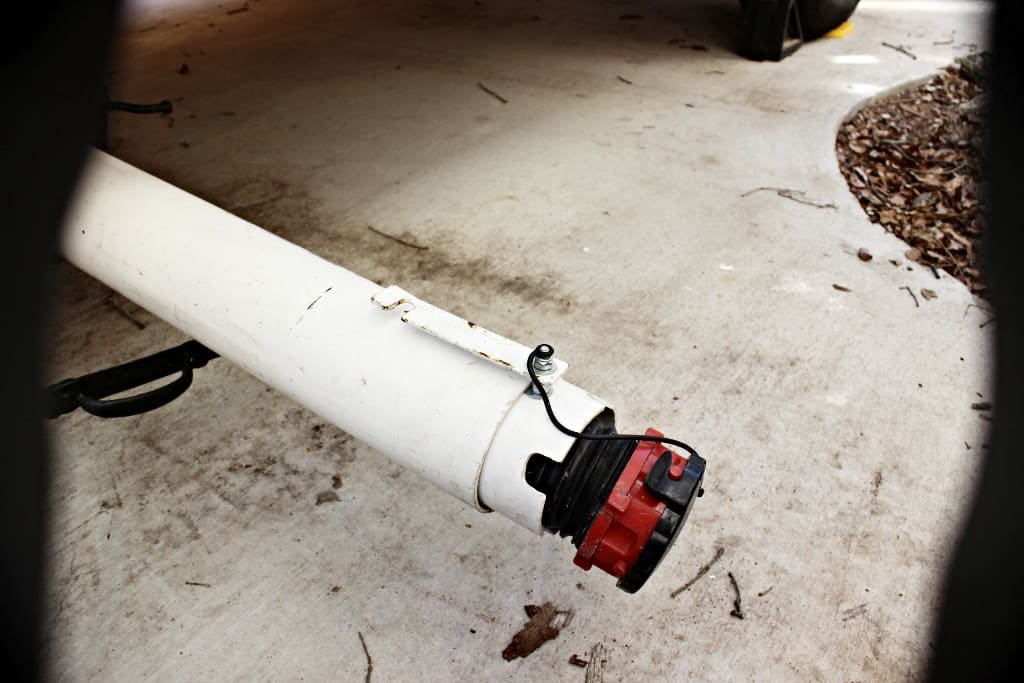
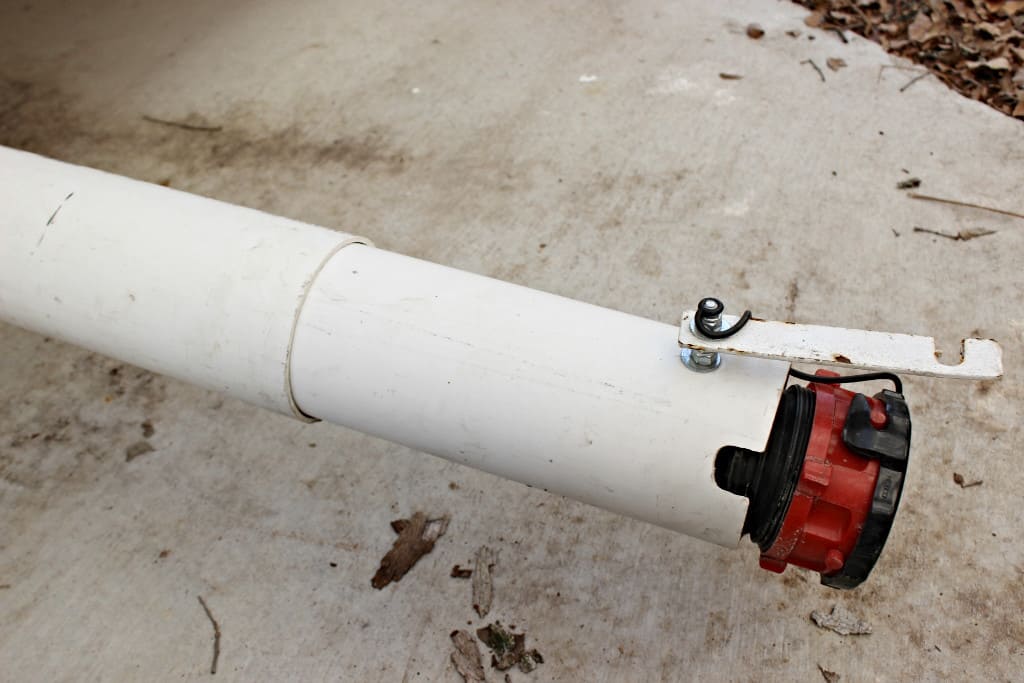
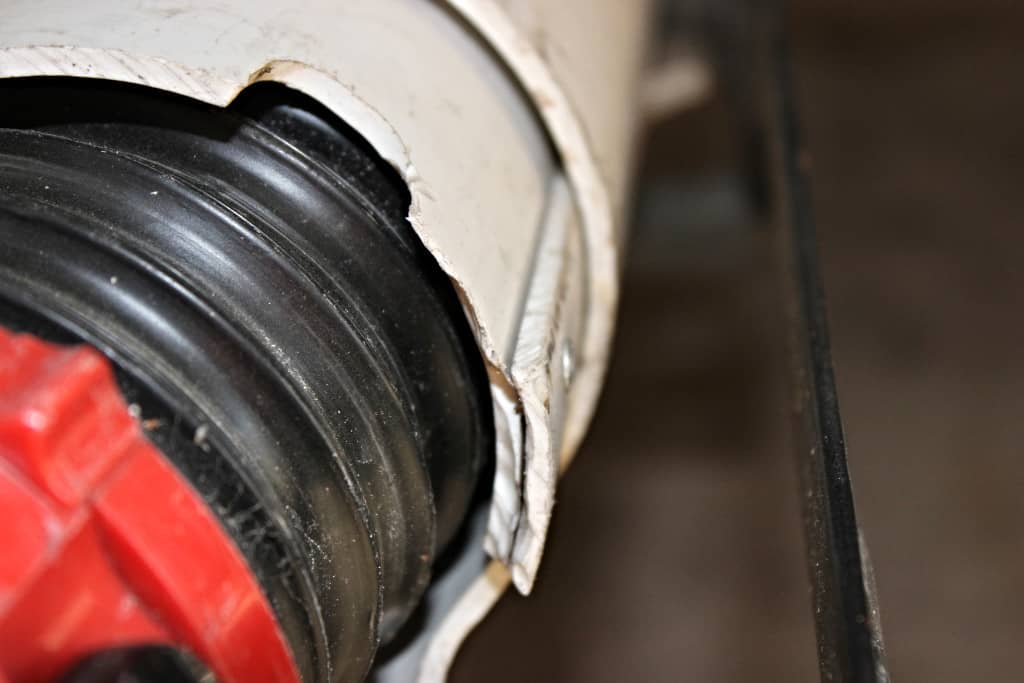
Take your sewer hose and remove one end from it. I chose the side that does not hook to the trailer, but to either a sewer head fitting or another hose. Take the PVC pipe and cut one 10’ long from the “flared” or belled side and cut the other 8’ long from the “flared” or belled side. You will now have 4 parts. Two will be 10’ long (one flared and one straight) and two will be 8’ long (one flared and one straight). Now take the one 10’ and the one 8’ straight sections of pipe without the flare (or bell on it), and using a skill saw or table saw with a fence, split/rip them both down the middle but just on one side. Do not cut all the way thru the pipe so as to split it into two halves! This allows you to fold the pipe over on top of itself, (image 1487) making it a smaller diameter so as to be able to fit inside the other pipe that you didn’t split down the middle. Don’t fold it too much, or you won’t be able to get your sewer hose thru and make sure you leave room so the end fittings will fit up inside the pipe as well ( image 1449). I also cut small slots with a sabre saw on the end that connects to the sewer access (or another hose…. not the flared part or pipe….the flared pipe side connects to the trailer holding tank) so the fitting would be able to fit in the pipe and give the fitting something to grip onto (image 1458, 1595).
Once you fold the pipe onto itself use pop rivets to hold it together (image 1588). Make sure the rivets do not stick out thru the pipe wall very much (use shorter rivets) because you have to be able to slip your sewer hose thru there (image 1449). Put your hose thru, the side without a fitting, and once it’s thru there you can put that fitting back on. I have the kind of hose that allows you to do that….I think it’s a Rino.
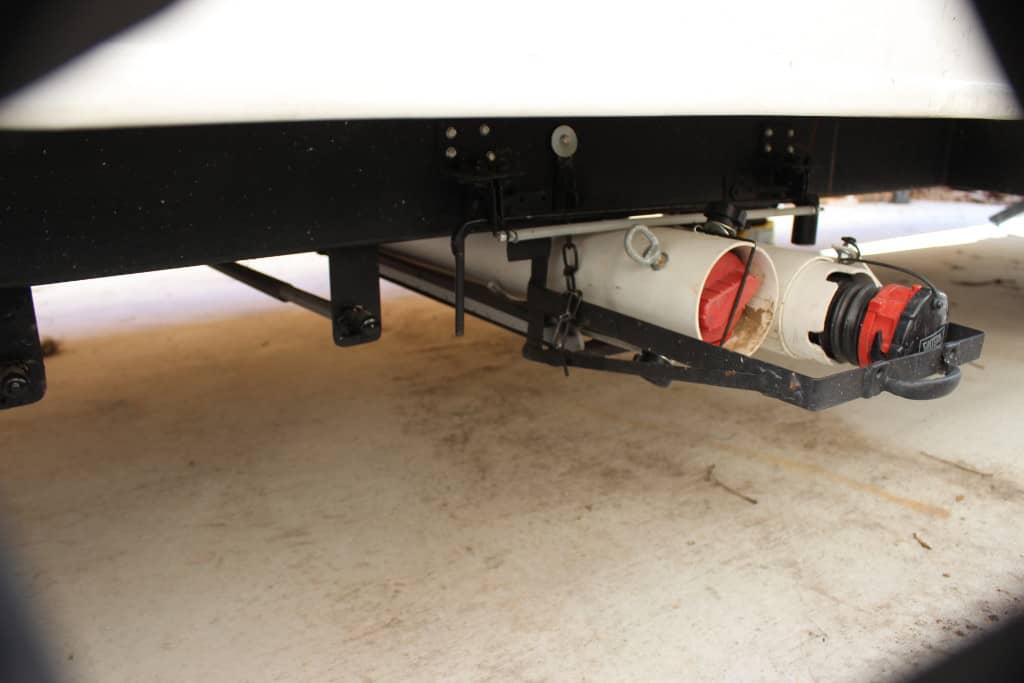
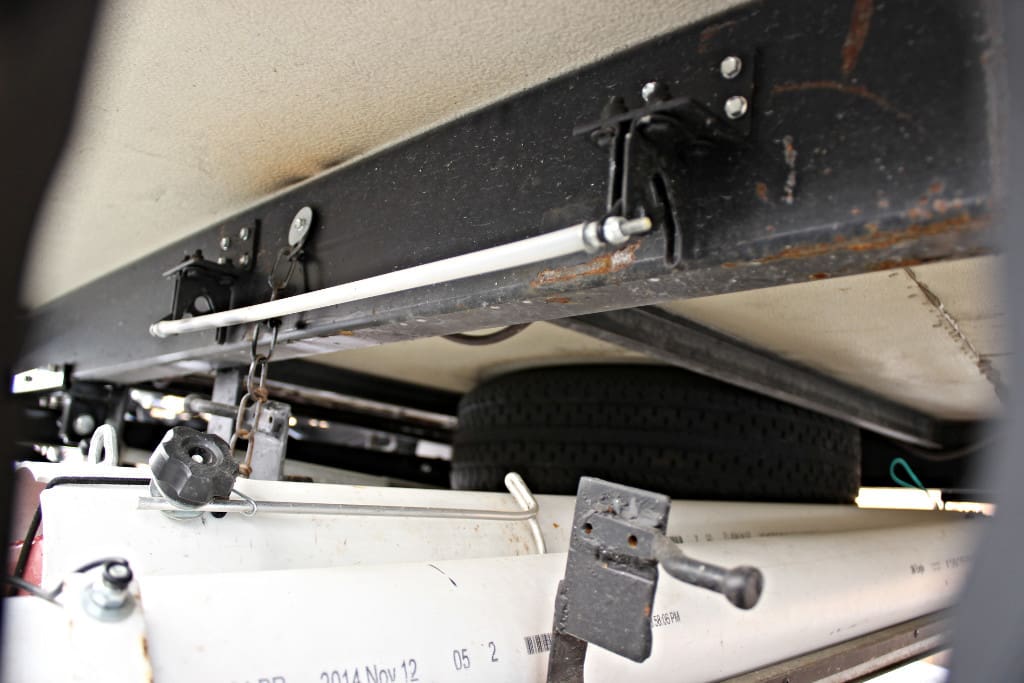
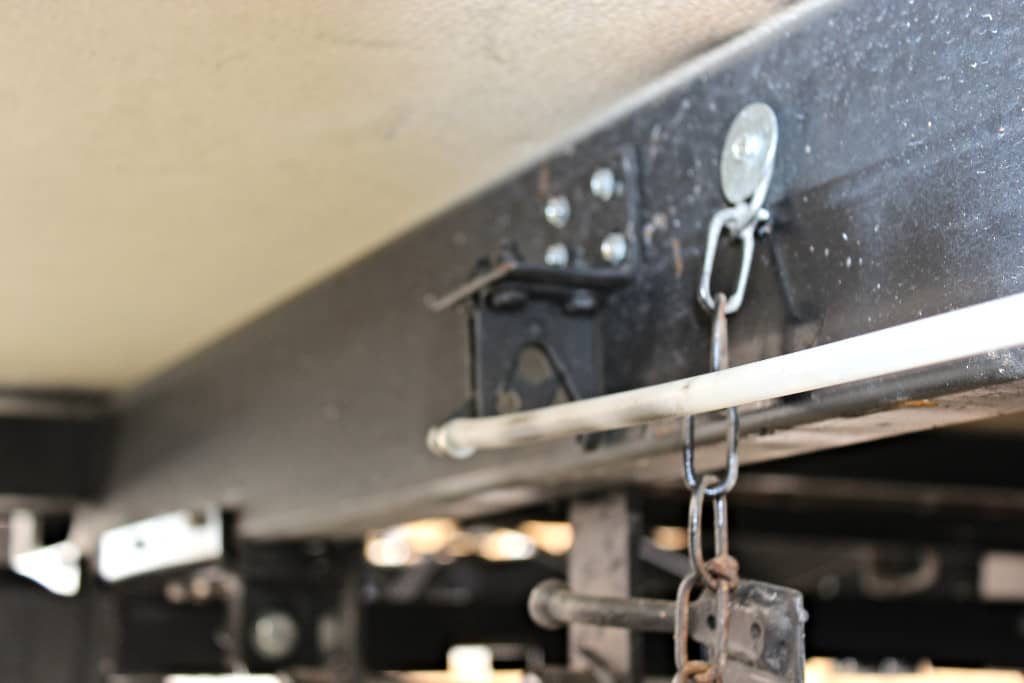
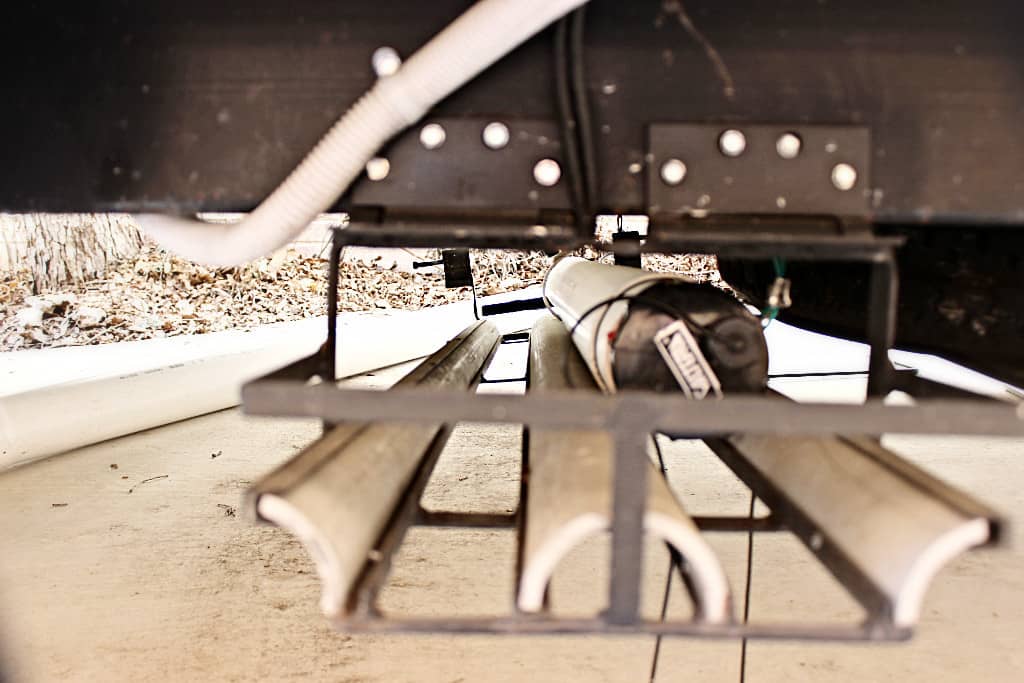
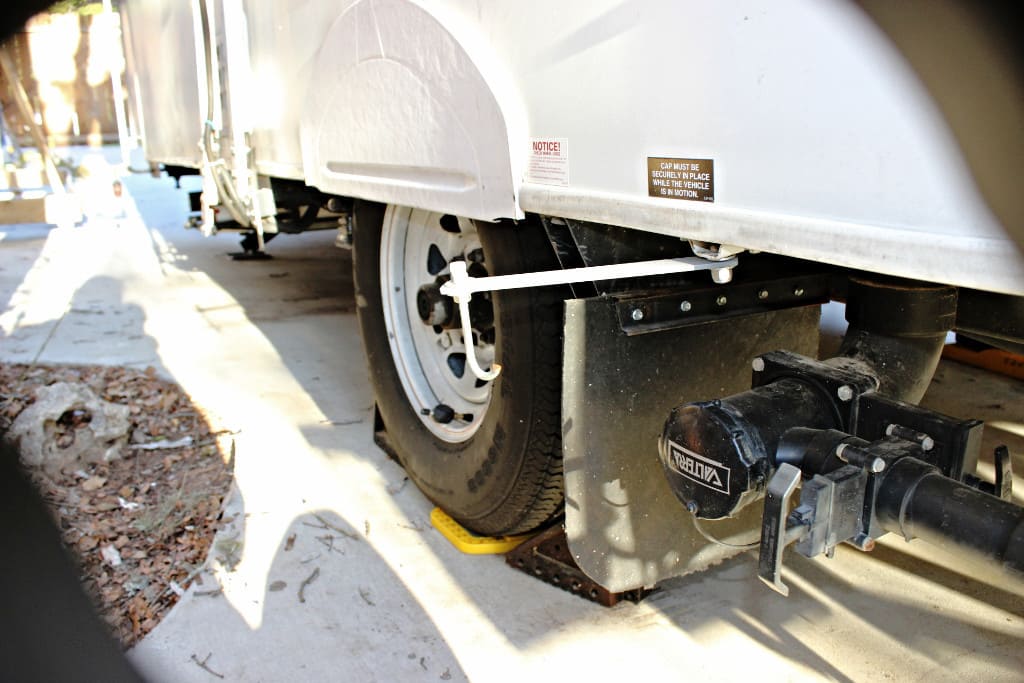
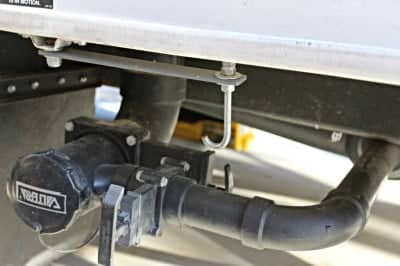
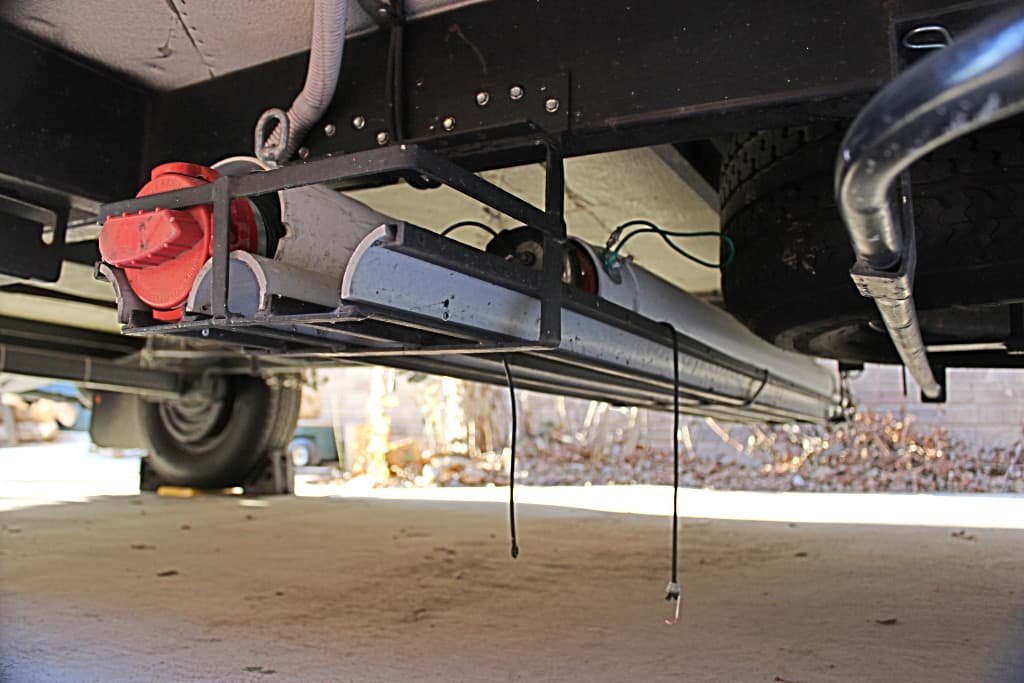
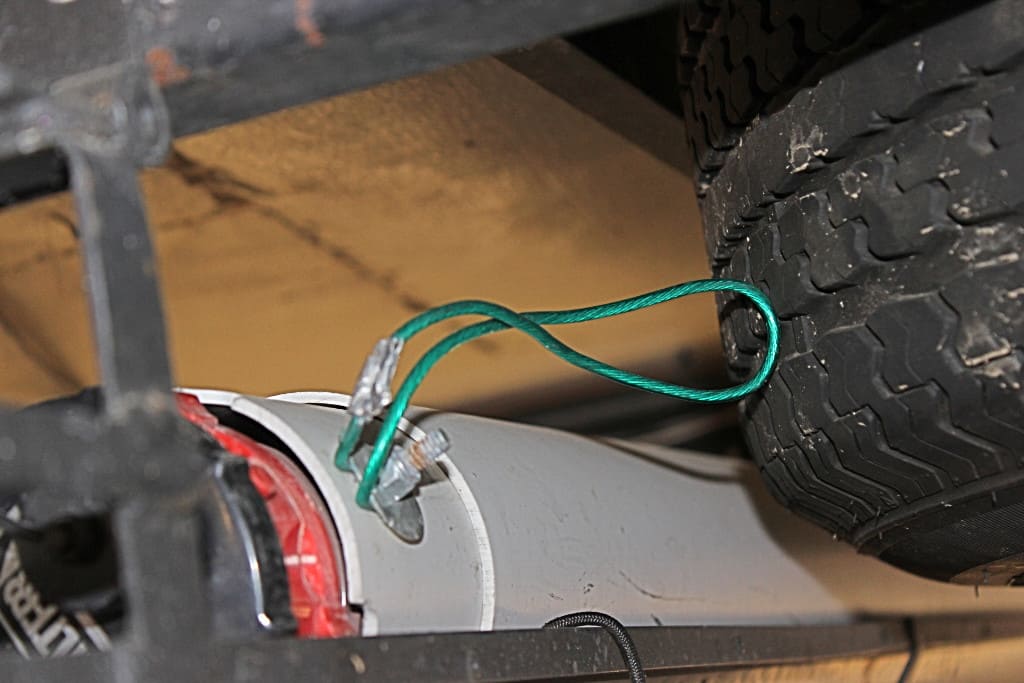
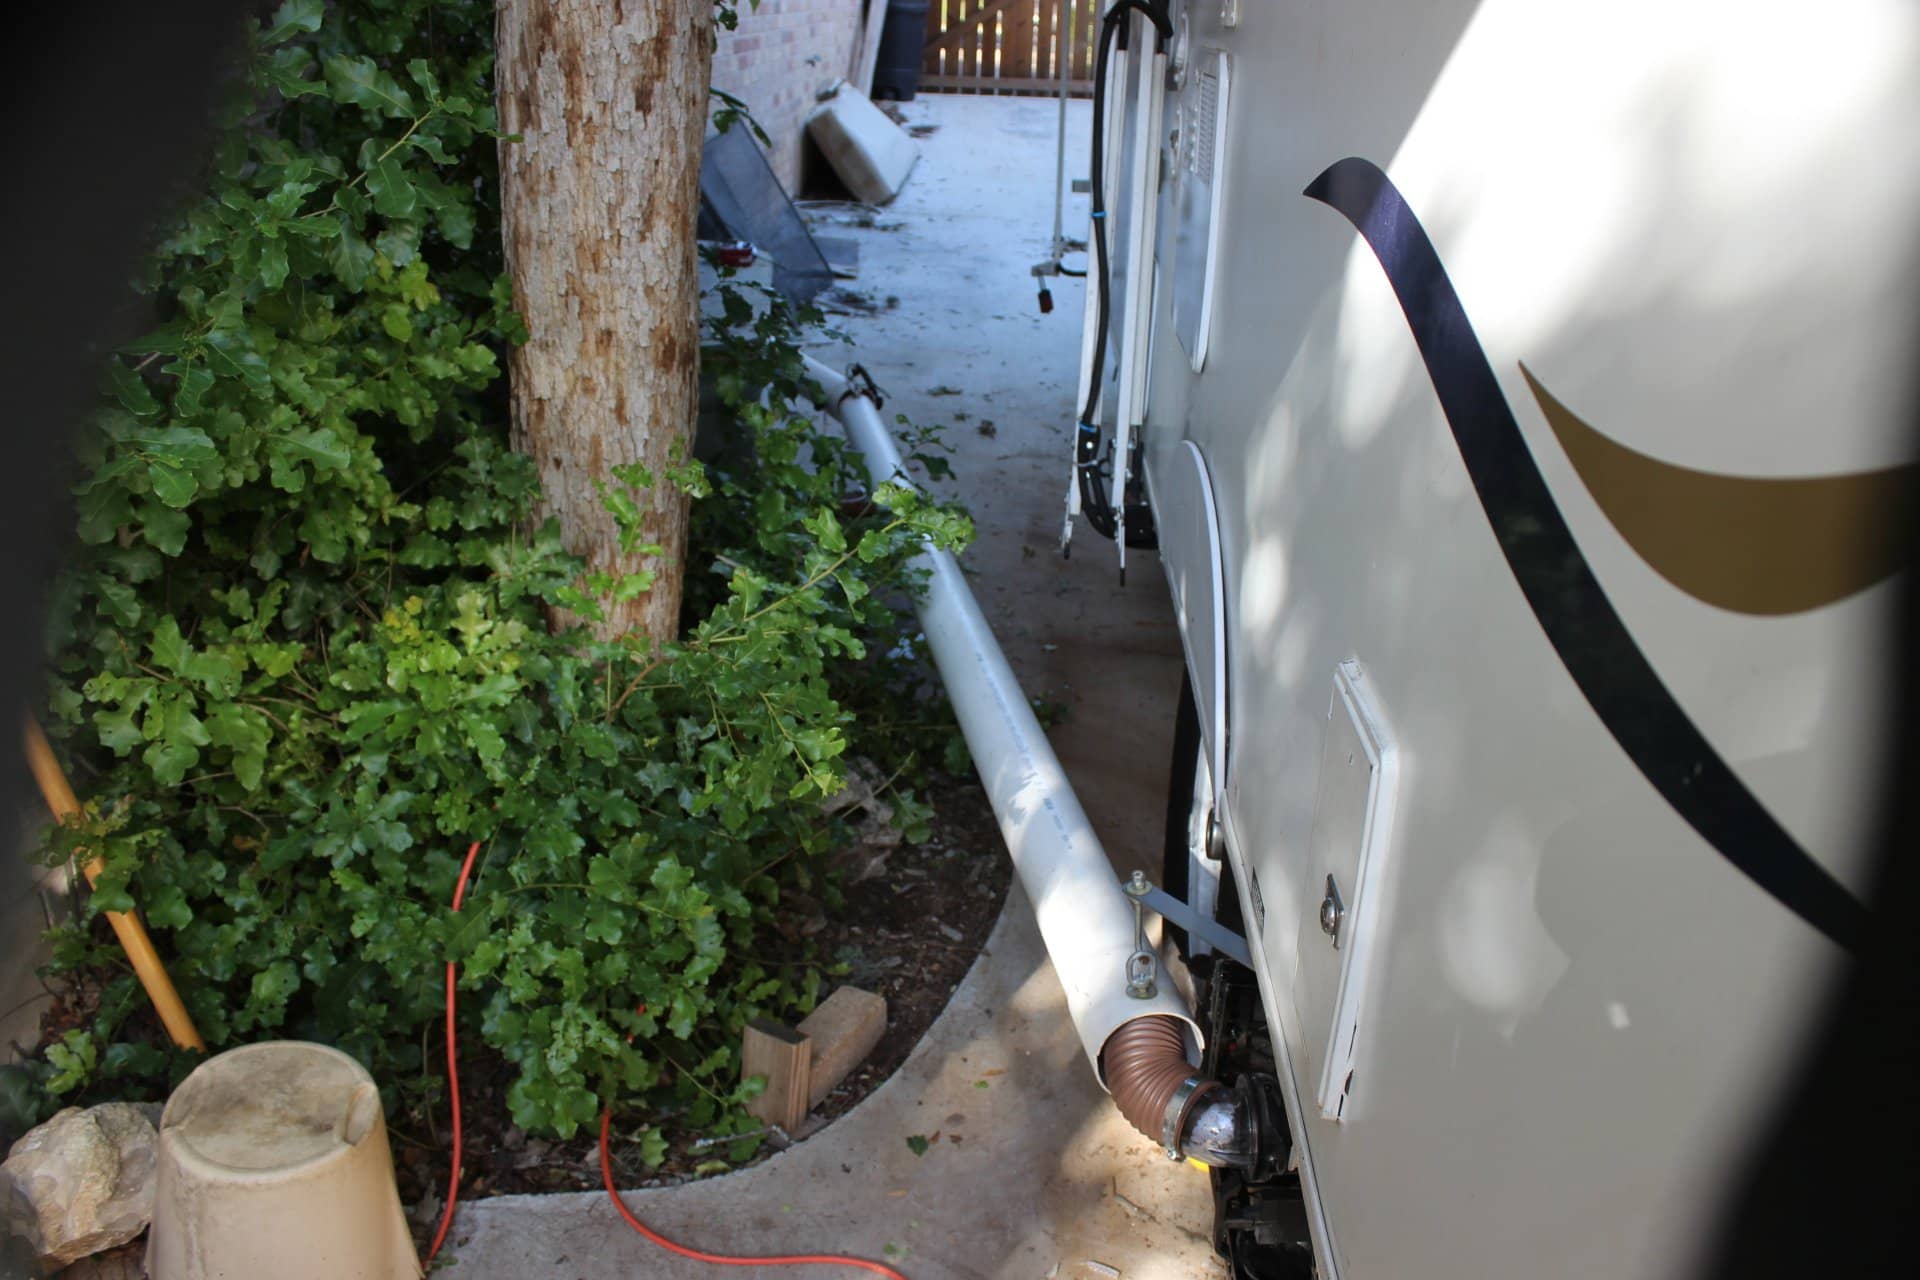
And there you have it….but I wanted much more….I wanted to be able to connect the two units together for times when a 10’ pipe wasn’t enough. I wanted to be able to have a longer reach because there is NO standard when it comes to the way campgrounds are laid out. That sewer head could be 15’ away from your trailer so I wanted flexibility here. That’s where the telescoping thing shines (image 1459)! So if you notice I have placed eyelets (with lanyards to make it easy to pull the support tubes apart….image1595) at the ends of each pipe (images 1449, 1596). These are for hanging on a swing out hook arm located right next to the holding tank drain spout (image 1585) that can swing out and then tuck back in under the trailer (image 1586). On the 10’ pipe I also put a flat swing bar hook on the straight pipe end(or side without the flare/bell) that will swing underneath the eyelet of the 8’ pipe there by connecting and holding the two together (images 1589, 1458) and keeping them in place. If you look at the 8’ pipe, it’s the one in the left side of the cradle/rack you will see a fold down support that is adjustable (made out of aluminum rod stock) so when the two are hooked together with the sewer hose fittings and the flat swing hook bar on the 10’ pipe, the support on the 8’ pipe can be folded down and then be raised or lowered on the 8’ pipe by loosening the nobs on the side and adjusting to the correct height you need and then tightening the nobs back again so as to keep the fold down support from slipping back up. This is to keep the gradient going down-hill (image 1460) at a constant rate to the sewer access head.
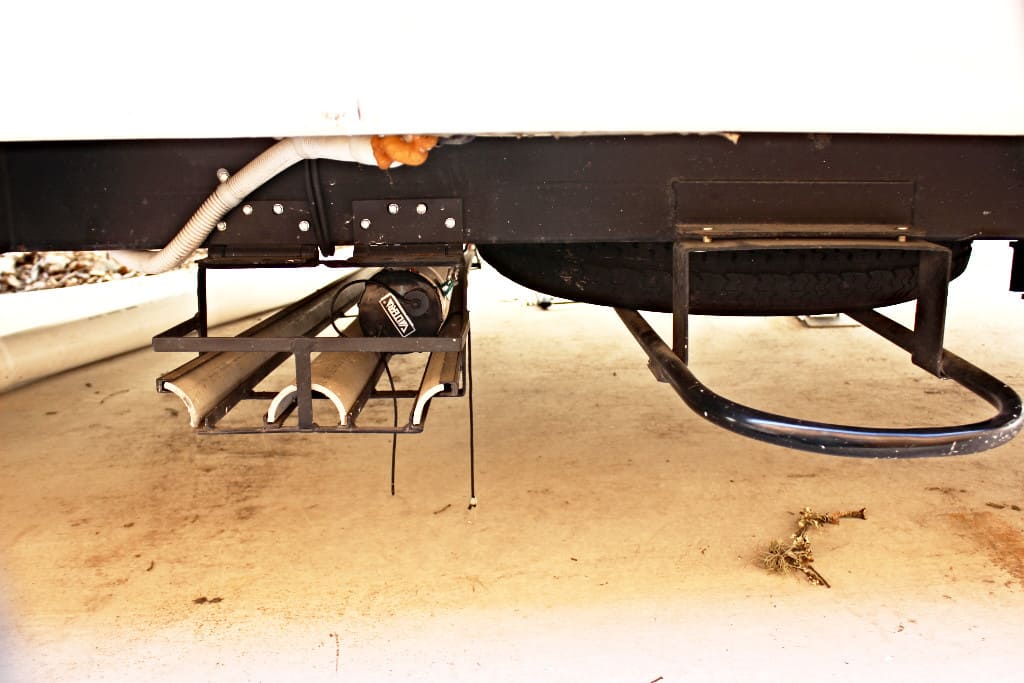
The Rack/Cradle.
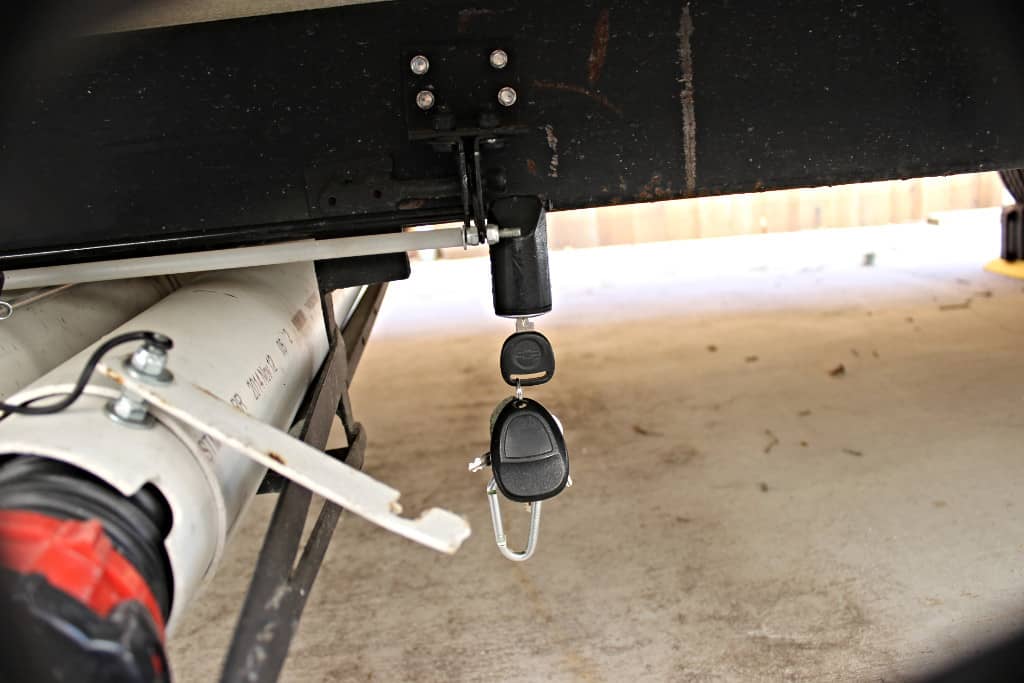
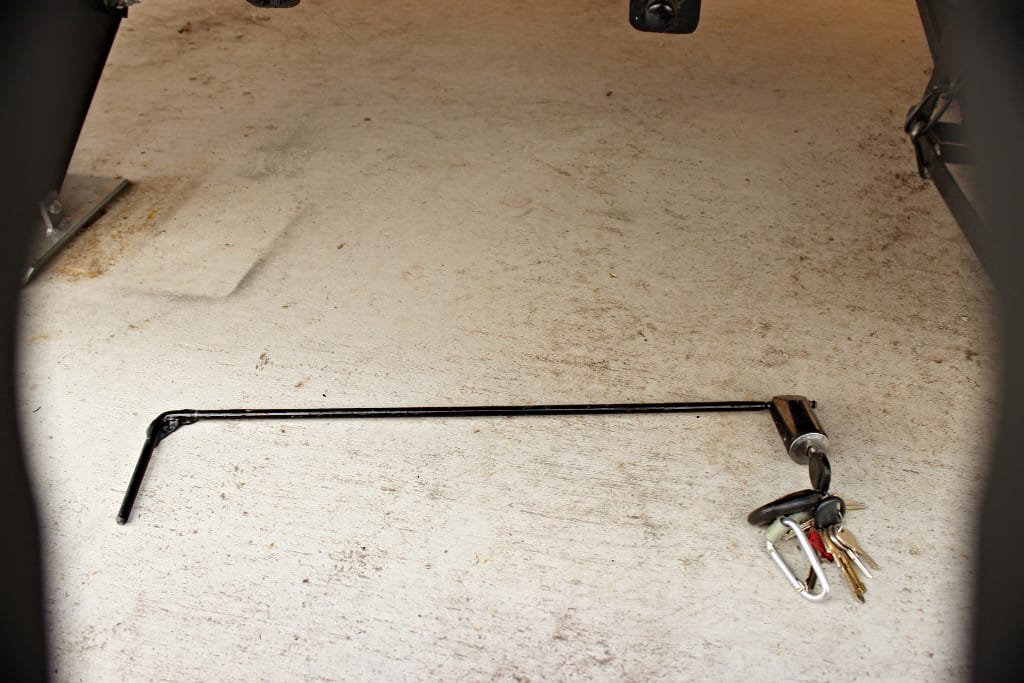
I used small angle iron here again and gray 3” PVC pipe and small channel aluminum. For the locking latches I used the ones made for outside gates (image 1454). I built a frame with the angle iron (images 1444, 1460, 1461, 1462) and small ½” flat strap (image 1496) and used small channel aluminum to hold the top edge of the left and right gray pvc runner slides in place (you can see the channel aluminum holding the top edge on the right side of image 1496…to hold the PVC in place I used pop rivets). I took a 10’ long piece of gray 3” pvc and ripped it completely in half (thru both sides) down the middle. Then I took one of those ripped half pieces and ripped it down the middle making two quarter round sections. These are the runners that the sewer hose supports will slide on (images 1460, 1462, 1496). I welded hinges on one side (Image 1462) so it would pivot up and down and lockable gate latch catches on the other end of the cradle (image 1455). The latches themselves are bolted to a piece of angle iron and then those are screwed with TEC screws to the frame of the trailer (image1454). I bought a “Bolt” brand trailer tongue lock (image 1451) and had a friend of mine (who is a machinist with a metal lathe) make me a locking rod to fit my Bolt lock to go all the way between the two gate latches (images 1452, 1450) so I could keep my sewer hoses from slinking away (me? I don’t trust any situation, especially when I leave for hours at a time from some trailer park!…this is why I lock everything down that I can…hey I’m just trying to protect my stuff….and yup, I know that if they REALLY want something off my trailer they will find a way around my puny security systems…I just don’t want to make it easy for the thieves out there!). If you look at images 1453 and 1455 you can see the rod I ran to the two gate latches to un-lock them both with the pull of one good jerk. Also in images 1454 and 1455 you can see the locking post for the gate latches and how they look when latched and un-latched. All it takes is one good slam and the whole cradle locks into the latches. Finally I thought it wise to add a safety chain (image 1457) just in case if for some reason I didn’t slam the cradle closed properly so as to keep the cradle/rack from dragging the ground while rolling down the road at 70 MPH (sparks=fire). I made it long enough to adequately open the cradle down for easy removal of the sewer hoses but not hit the ground/dirt/mud/etc…
Now since we are on the sewer hose subject I want to mention several more things.
On my bumper are these plugs that keep your sewer hose in place and on my last trip I lost them both (I guess they popped out…who knows…they were OEM) and we didn’t even know it until we were in downtown Dalhart TX and a woman flagged us down and told us we were dragging a hose out the back of our trailer. Duct tape to the rescue, but the hose had gotten trashed beyond repair. Camco, (who makes RV accessories) has some of these plugs that have fishing line lanyards attached to them (image 1597) so you won’t lose them if they pop loose. They also have vent holes in them to let your hose dry out while you go down the road but keep those pesky mud dobbers out.
Sometimes when you get to your campground, it’s late and you need to set up you sewer hose only to find that the cap on the access port in the ground is stuck. Well if the place is closed for the night there won’t be any maintenance personnel around to un-stick and screw off (which is usually what the maintenance personnel do anyway) that sticky sewer cap. You can buy an orange plastic wrench thingy that will fit a variety of cap sizes, but they don’t work very well. Every time I tried to use mine is seemed always on the verge of breaking. It was just too flimsy and flexible to work well. So save your money and get yourself a big crescent wrench. It’ll work much better and won’t break, plus with that long steel wrench and the leverage you’ll have, you’ll be able to apply much more force to unscrew that cap.
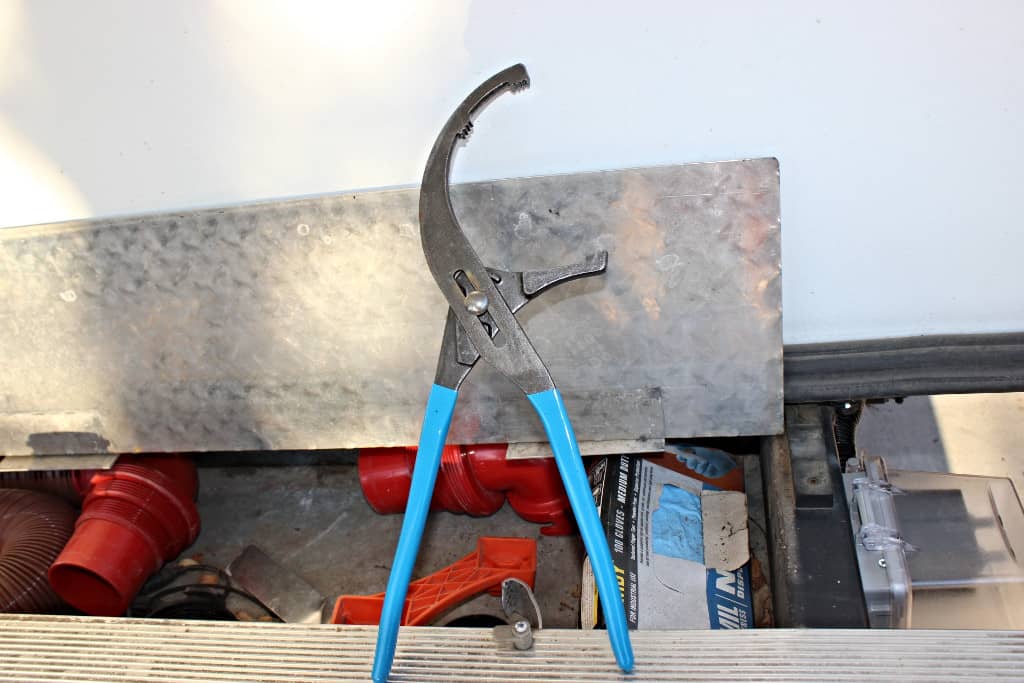
The last thing I want to address are those sewer hose twist on and off fittings. They can be kind of stubborn (if you know what I mean) when trying to make them mate up and lock tight against each other so they don’t leak. So I bought this plastic yellow spanner wrench made just for that application. It lasted about 10 times use before it broke in half (RATZ!… cheap commie crud). So I made my own (necessity is the mother of invention) out of some strap aluminum that worked pretty good but was sort of too flexible. Then, as luck would have it, I was at American Bolt getting some screws and saw the answer. It’s like a big pair of adjustable channel locks but made for oil filters and it work flawlessly (image 1592). I paid about $25 for these as they are a premium brand (Channel Lock), but I have seen them at communist Chinese Horrible Fraught Tools (Harbor Freight) for about eight bucks.
IN CONCLUSION…….
These hide away, telescoping, self-supporting sewer hoses work like a dream. They do NOT sag one iota and are so easy to operate my mother-in-law could do it (too bad she’s not around anymore or I would have her do it!). NO MORE FUNKY SLUKY TO MONKY with! Here again in just minutes I can be up and dumping instead of jumping up in down in frustration. These are quick out of the shoot, and fast to stick back away.
All I have to do is:
Unlock the cradle and drop it down
Pull out the hose (or two) that I need
Place the eyelet on the swing out hook by the holding tank
Hook the hose up to the holding tank valve
Give the lanyard on the other end of the hose support a tug to expand it to the right length (and hook up the second hose to the first one if needed and expand it to two hoses … image 1819)
Put a 90° sewer head fitting on the end and place it in the sewer access
Sounds like a lot, but it’s not. Just be sure and wear your communist Chinese Horrible Fraught disposable latex gloves….. and like all good boys…… don’t forget to wash your hands too.