The Roof
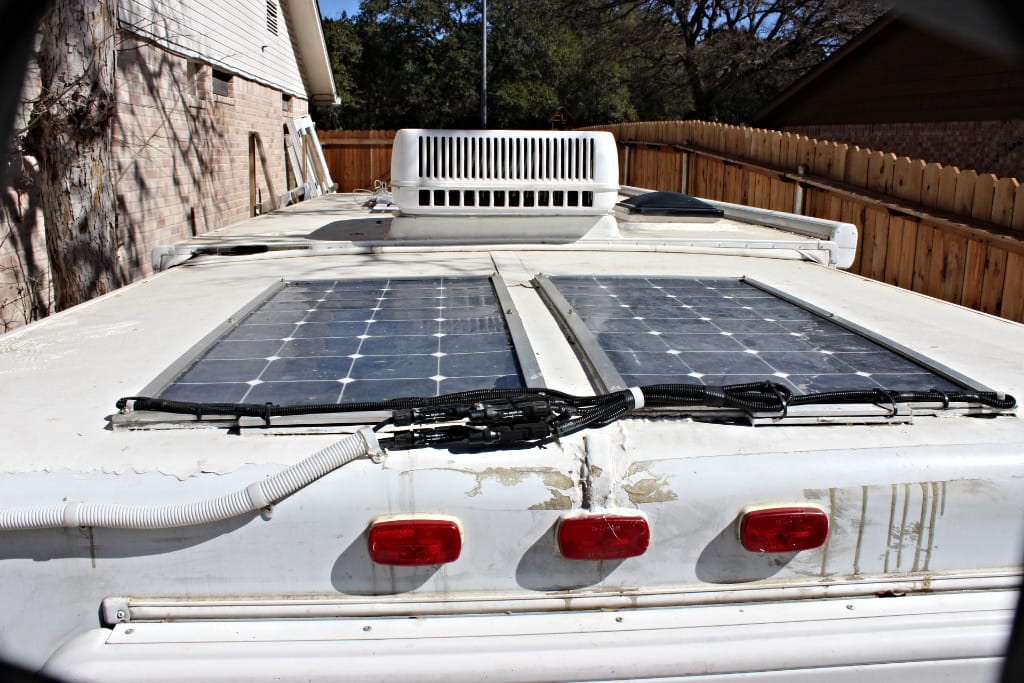

My roof was somewhat of a problem. I bought my Trailmanor from a salvage and parts yard in Bloomfield Iowa. Yes that’s right….all the way from Austin Texas to about 50 miles north of the Missouri border about half way across the state. Well anyway it was a GREAT deal. I paid $5500 for it because they had gotten it as a salvage deal from an insurance company who had totaled it because of hail damage. Well the damage was pretty minimal to say the least…accept for one big dent right on that seam that runs down the middle of the trailer. After I had had the thing for several months I noticed that one of the front light fixtures didn’t work and when I opened it up water came out and the workings were all rusted. I didn’t know where the water came from but I replaced that fixture and then later I was changing out all the bulbs to LED’s and found water there again. So then I went up on the roof with some Di-Core lap sealant and that worked for a short time but then the vents and the wiring channels on the inside were getting water in them as well and the battle raged on and on until I finally got fed up with the whole thing and took drastic measures.
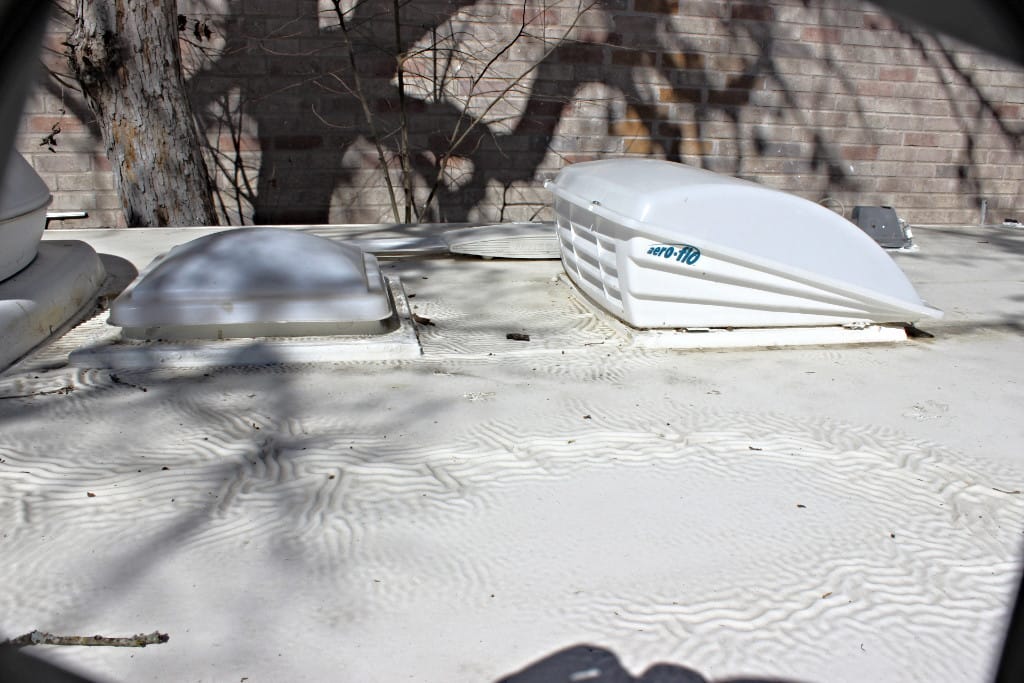
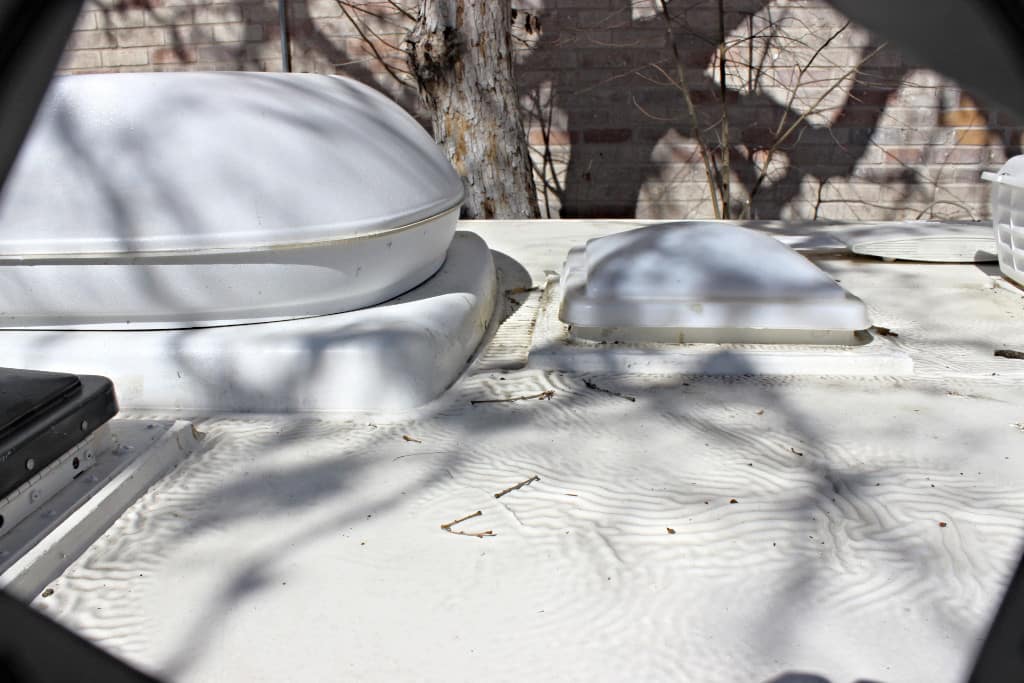
I took the (and don’t be offended please) puny little plastic strip that runs down the middle and set it aside. Then stripped all the sealant off and took the finish down to the metal. Made some measurements and had some aluminum flashings cut to size. Bought some epoxy stuff made to glue aluminum together and laid a 12” wide piece down the length of the front to the forward vent, and two pieces from the 12” wide strip to the edges of the trailer in the front (image 1412). I laid these two pieces on the leading edge of the trailer so as to form a wind break of sorts to help protect the roofing material from the wind.
I then laid aluminum flashing strips between the two vents (image 1413) as well as between the rear vent and the A/C (image 1414). Also did a strip between my solar panels in the back from the rear of the trailer all the way to the gasket on the front of the rear shell (image 1409).
I ran two stripes of the aluminum glue about 3” apart in the middle and also ran sealant as well between the glue and the outside edge of all the flashings.
Finally put EPDM Liquid Roof rubber roofing down on top of the whole shoot’in match (both shells) front to back and (knock on wood) haven’t had a leak yet. Not being a professional at this and it being my first attempt as well, my roof didn’t come out looking stellar, however, it did the job of sealing up my flashings and vents. It worked and that’s all I really wanted. Had I have had it done, it would have cost me thousands of $$$$s. Function over fashion is what matters.
If I were the Trailmanor folks, I’d be using aluminum flashing to cover the seam down the middle instead of that puny little stick-on plastic strip.
Not only did I encounter leaks on that seam (I suspect it was a hit from a big hail stone) but also around those pop-up vents where they sit on a…wood?…really!! wood?, frame…..why those vents can’t sit flat on the roof I can’t figure or at the very least on an aluminum frame. Maybe they do now, I don’t know how you build them these days.
Also, on my 3124KS, there was some sort of indention in the roof behind the back pop up vent between it and the AC about 4”’s from the middle seam. I mean it wasn’t a flat surface there, but a small dip or valley where water would pool and seep in. NOT GOOD!
One of the most frustrating things to date is to try and find out where a leak is or where water is coming in from. Especially when you can’t see it! GRRRRRRRRRRR!
Bottom line: Flashings covering the seams down the middle, GOOD! Puny plastic strips covering the seams down the middle, NOT SO GOOD! Vents lying flat on metal or even a metal frame GOOD! Vents on wood that will rot and leak, NOT GOOD!